Protect Cracked Nails During Cleaning: Easy Tips (47 characters)
Quick Answer
To protect cracked nails during cleaning, carefully shorten and smooth any loose nail edge, wear cleaning-product-compatible waterproof gloves, and avoid direct contact with detergents and chemicals. Keep your hands dry inside the gloves, remove them after the chore, and apply fragrance-free moisturizer. If the crack reaches the attached pink nail, bleeds, or hurts, avoid DIY glue repairs and seek medical advice.
A tiny crack in your nail can turn ordinary household cleaning into a stressful experience. One accidental snag on a sponge or cleaning cloth may make the split larger, especially when your nails are already brittle.
The good news? You don’t necessarily have to abandon your cleaning routine. You need to protect the damaged edge, reduce moisture exposure, and avoid putting pressure on the affected fingertip.
This guide explains how to protect cracked nails during cleaning, which supplies are worth using, and what to do if your nail becomes more damaged.
Preparation Time
5–10 minutes
Difficulty
Beginner
Items Needed
4–6 essentials
Protection Lasts
Each cleaning session


Why Are Cracked Nails More Vulnerable During Cleaning?
Your nails consist primarily of layers of keratin. Although they feel solid, they absorb some moisture and respond to repeated exposure to water, friction, and household products.
When a nail is already cracked, its damaged edge can catch on fabrics or cleaning tools. Repeated pressure may extend the split.
Water Can Make Fragile Nails More Vulnerable
Prolonged water exposure temporarily changes the nail plate’s moisture content. When your nails repeatedly become wet and dry, they may be more likely to peel or split, particularly if they’re already damaged.
Washing dishes without gloves can expose your fingertips to water for extended periods. Protecting the cracked nail from repeated soaking helps reduce this stress.
Cleaning Products Can Irritate Surrounding Skin
Dish detergents, degreasers, bleach-based products, and bathroom cleaners have different chemical properties. Some strip oils from the skin, while others can cause significant irritation or chemical injury.
The protective approach is to prevent unnecessary contact rather than assume that every cleaning product has the same effect.
Learn more about how cleaning products affect your nails and why repeated exposure matters.
Scrubbing Creates Mechanical Pressure
Even when you use a gentle cleaner, vigorous scrubbing can strain a cracked nail. Holding a brush tightly, scraping residue with your fingernails, or pulling at stuck debris may worsen an existing split.
That’s why protecting cracked nails requires both a barrier against cleaning products and gentler cleaning techniques.
When Is a Cracked Nail Unsafe to Manage at Home?
Before putting on gloves, check the location and severity of the crack.
A small, painless split confined to the white free edge can often be managed by shortening and smoothing the nail. A crack extending into the attached pink portion is different because it may involve sensitive tissue underneath.
Warning
Do not apply nail glue, gel, acrylic, or a cosmetic repair wrap over broken skin, bleeding tissue, or a painful split. Seek professional medical advice if you notice worsening pain, swelling, redness, pus, significant nail lifting, or a deep crack. If a cleaning chemical causes burning or a suspected chemical injury, stop exposure and follow the product’s first-aid instructions immediately.
If the nail has an open injury, household chemicals should not contact it. Avoid cleaning tasks that could expose the injured fingertip until it can be protected safely and assessed when necessary.
What Do You Need to Protect Cracked Nails While Cleaning?
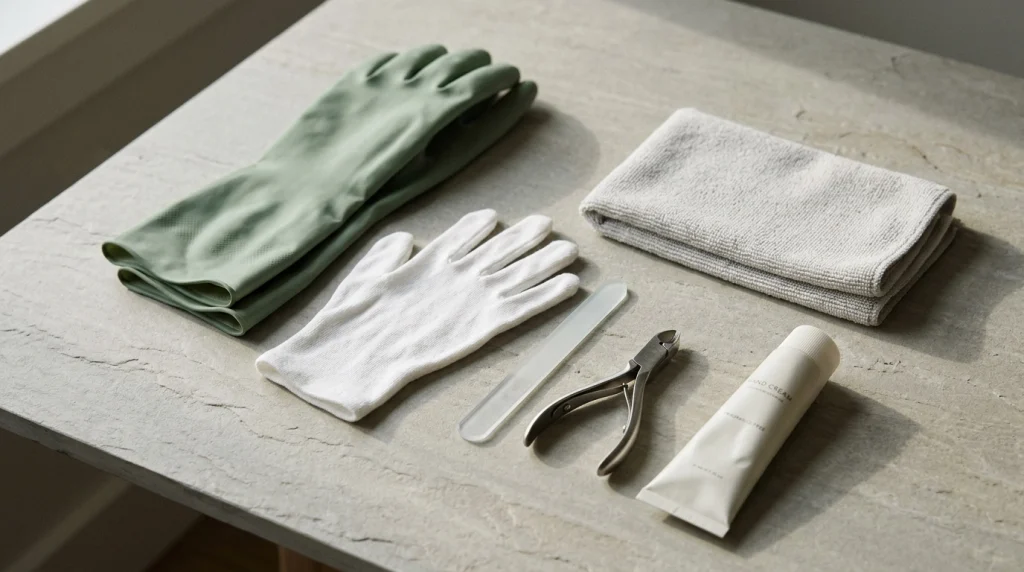
You don’t need an expensive nail-care collection. A few practical supplies can help minimize friction, moisture exposure, and additional cracking.
- Chemical-resistant cleaning gloves: Choose gloves suitable for the cleaning product you plan to use.
- Fine-grit or glass nail file: Smooths minor snags along the free edge.
- Clean nail clippers: Shorten excess length that could catch on objects.
- Fragrance-free hand cream: Moisturizes dry nail folds and surrounding skin.
- Optional cotton glove liners: May improve comfort during suitable prolonged tasks, provided they stay dry.
- Soft cleaning tools: Reduce the temptation to scrape surfaces with your nails.
Important: Disposable exam gloves, ordinary rubber gloves, and reusable household gloves are not interchangeable for every chemical. Check product labels and manufacturer compatibility guidance before use.
How Do You Protect Cracked Nails During Cleaning? 7 Steps
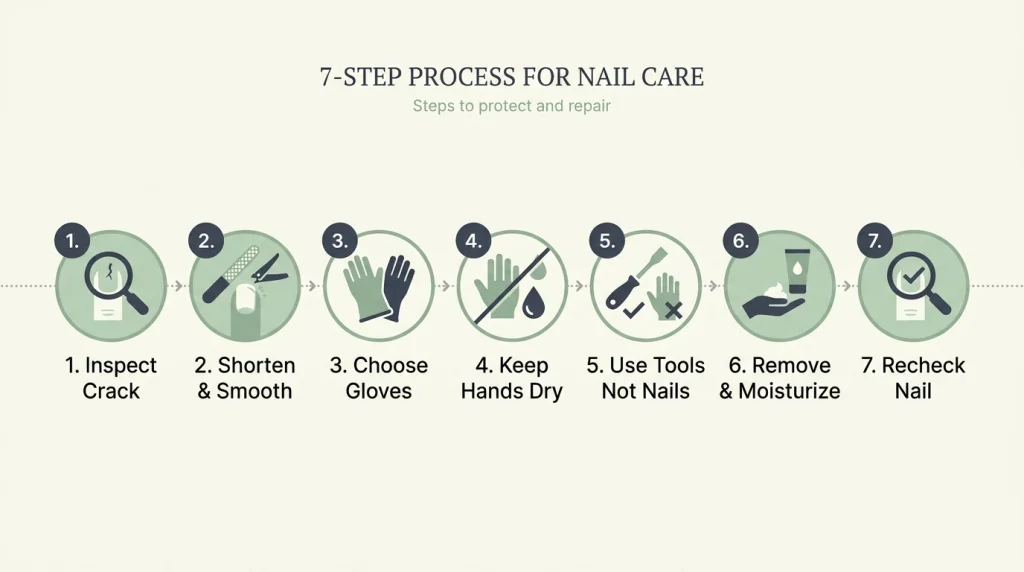
Follow this routine before, during, and after household chores to minimize additional damage.
1 Inspect the Crack Before Starting
Look closely at the damaged nail. Check whether the crack is limited to the free edge or extends into the attached portion.
If the nail hurts, bleeds, or is partially detached, avoid treating it as a simple cosmetic problem. Choose a safer task or arrange help rather than risking further injury.
Common mistake: Ignoring a painful split because it looks small. The location of the crack matters more than its visible length.
2 Gently Shorten and Smooth the Nail
If the crack is painless and confined to the free edge, carefully trim away excess length without cutting into attached tissue.
Use a fine-grit or glass file to smooth any rough corner. Keep pressure light, and stop if filing pulls on the crack or causes discomfort.
Common mistake: Trying to file deeply through a split instead of removing only the loose, safely accessible edge.
3 Choose the Right Protective Gloves
Read the cleaner’s label and choose gloves that provide appropriate protection for that product. Check for tears, holes, or deteriorated material before starting.
Make sure the gloves fit comfortably without squeezing or pulling on the cracked fingernail. For longer wet tasks, suitable dry cotton liners may help manage perspiration.
Common mistake: Assuming every waterproof glove protects against every household chemical.
4 Keep Your Hands Dry Inside the Gloves
Begin with clean, dry hands and dry gloves. During cleaning, avoid allowing water to run inside the glove opening.
If your gloves become wet internally, stop, remove them safely, dry your hands, and replace or thoroughly dry the gloves as appropriate.
Common mistake: Continuing to clean with damp glove interiors, leaving the nail exposed to prolonged moisture.
5 Use Cleaning Tools Instead of Your Fingernails
Use a sponge, soft brush, scraper, or other appropriate household tool instead of your fingernails to remove stubborn residue.
Hold cleaning equipment with a comfortable grip. Avoid pressing the cracked fingertip directly against hard surfaces, especially when scrubbing corners.
Common mistake: Using the nail tip to scrape away a stubborn stain or lift an adhesive label.
6 Remove Gloves Carefully and Moisturize
After cleaning, remove contaminated gloves according to their instructions without dragging the material across the damaged nail.
Wash away any residue as appropriate, dry your hands thoroughly, and massage fragrance-free cream over the nails and surrounding skin.
Common mistake: Pulling tight gloves off rapidly and catching a loose nail corner in the glove material.
7 Recheck the Nail After Cleaning
Inspect the nail for new snags, increased splitting, tenderness, or changes in the surrounding skin.
If the edge remains smooth and comfortable, continue gentle protection. If the crack has extended or started hurting, stop filing or covering it and consider medical evaluation.
Common mistake: Adding cosmetic glue immediately when a nail becomes painful instead of checking for an injury.
Pro Tip
Keep a dedicated pair of task-appropriate cleaning gloves beside your usual cleaning supplies. Having them accessible makes it easier to protect your nails consistently instead of skipping gloves for a quick chore.
Which Cleaning Tasks Need Extra Nail Protection?
Washing Dishes
Dishwashing exposes your nails to repeated moisture, detergent, and friction. Wear suitable waterproof gloves and use a sponge or dish brush rather than scraping food from plates with your fingertips.
If you have a dishwasher, use it for dishwasher-safe items when practical. This can reduce the amount of time your hands spend submerged in soapy water.
Cleaning the Bathroom
Bathroom cleaning may involve acidic products, disinfectants, bleach solutions, or other strong cleaners. Some require specific chemical-resistant gloves and ventilation.
Always follow product directions. Never mix bleach with ammonia, acids, or other cleaners, because dangerous gases can form.
Consider delegating intensive bathroom scrubbing if your nail is painful or the task risks aggravating the damage.
Doing Laundry
Laundry detergents and stain removers can irritate sensitive skin. Avoid unnecessarily handling concentrated products with bare hands.
Use the recommended protective equipment when pretreating stains or handling stronger cleaning formulations.
Cleaning Kitchen Counters
For everyday wiping, choose an appropriate cleaner and a soft microfiber cloth. Use cleaning tools rather than nail tips to remove stuck-on residue.
When using stronger degreasers, follow their glove and ventilation requirements.
Can Nail Glue or Clear Polish Protect a Cracked Nail?
It depends on the severity and location of the crack, but neither product replaces protective cleaning gloves.
For a tiny, painless split confined entirely to the free edge, some people use a temporary cosmetic nail-repair wrap. However, shortening and smoothing the affected edge is often simpler when it can be done safely.
Clear polish may make a nail surface look more even, but it does not create a reliable barrier against household cleaning chemicals.
Do not use nail glue on broken skin, an infected nail, a painful split, or a crack extending into attached tissue.
If you’re dealing with more extensive damage, see this guide to repairing a damaged nail at home safely for appropriate cosmetic-care limits.
What Products Are Worth Having for Cracked Nail Protection?
The most useful supplies are the ones that address the actual problem: chemical exposure, rough edges, and dry skin.
Recommended Supply
Reusable Chemical-Resistant Cleaning Gloves
Suitable gloves help keep cleaning solutions away from your nails and skin. Choose according to the specific chemical and manufacturer guidance, not appearance alone.
Check chemical compatibility and sizing before purchasing.
Recommended Supply
Fine-Grit Glass Nail File
A fine glass file can smooth minor nail-tip snags with controlled pressure. Use it only on an accessible, painless free edge.
Recommended Supply
Fragrance-Free Hand Cream
A moisturizing cream helps support dry, uncomfortable skin around your nails after frequent washing. It conditions the area but cannot fuse an existing nail crack.
As an Amazon Associate, we earn from qualifying purchases.
What Should You Do and Avoid When Cleaning With Cracked Nails?
DO
- Wear task-appropriate protective gloves.
- Keep nails comfortably short.
- Use soft cleaning tools.
- Dry hands after wet chores.
- Moisturize after washing.
- Check damaged nails regularly.
DON’T
- Clean with damaged or leaking gloves.
- Use fingernails as scrapers.
- Pull on split nail edges.
- Keep wet gloves on for long periods.
- Glue painful or bleeding cracks.
- Mix incompatible cleaning products.
What If Your Nail Crack Gets Worse While Cleaning?
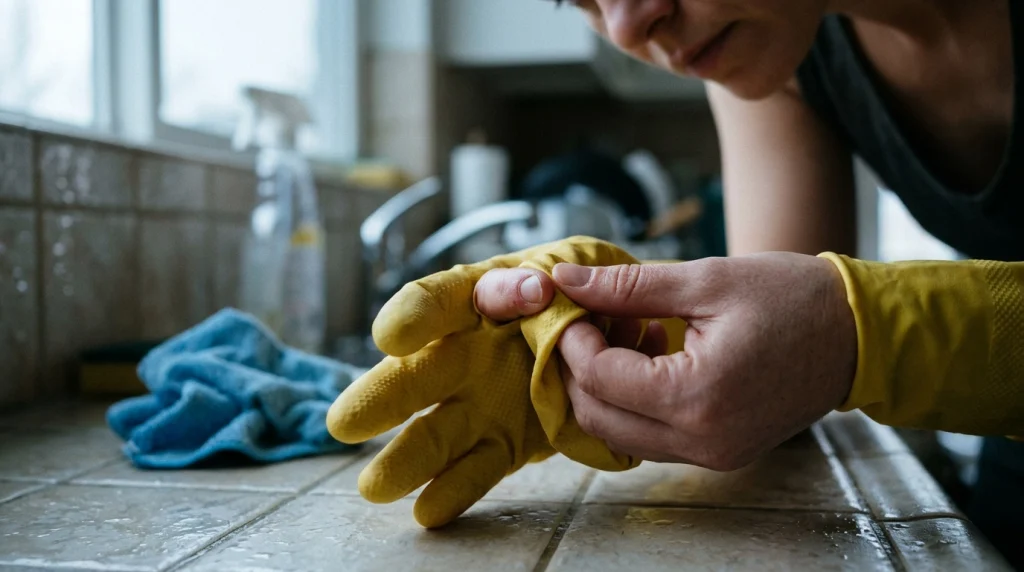
Problem: The Nail Catches on Your Cleaning Glove
Immediate action: Stop cleaning and remove the glove carefully. Inspect the nail for pain or a larger split.
Prevention: Smooth a painless loose free edge before future chores and choose gloves with sufficient fingertip room.
Problem: Your Fingertips Feel Damp Inside Gloves
Immediate action: Stop, remove the gloves safely, and dry your hands. Replace wet liners or gloves as needed.
Prevention: Use correctly sized gloves, prevent water entering the cuffs, and take suitable breaks during extended cleaning.
Problem: The Nail Starts Splitting Further
Immediate action: Stop putting pressure on the fingertip. Avoid pulling or gluing the new split.
Prevention: Keep the nail short when safe, use cleaning tools, and reduce direct mechanical pressure. Seek medical advice if the split reaches attached tissue or becomes painful.
Problem: Skin Around the Nail Becomes Red or Itchy
Immediate action: Stop exposure and follow the cleaning product’s first-aid instructions. Wash off contamination as directed.
Prevention: Reassess glove suitability and cleaner exposure. Persistent or worsening irritation should be evaluated by a healthcare professional.
How Long Does a Cracked Nail Take to Recover?
A cracked nail plate doesn’t heal by rejoining its damaged keratin layers. Instead, new nail grows from the base, and the damaged section gradually moves toward the tip.
Fingernails generally grow around 3 millimeters per month, although growth varies between people and fingers.
A small crack close to the free edge may become easier to trim away within days or weeks. Damage closer to the base can require several months to grow out completely. Full fingernail replacement commonly takes approximately four to six months.
Moisturizer and protective gloves cannot speed up nail growth dramatically. Their value is helping you avoid further damage during the growth process.
How Can You Prevent More Nail Cracks in the Future?
The best long-term prevention plan combines protective cleaning habits with a gentle, realistic nail-care routine.
Keep Nails at a Practical Length
Long nails experience more leverage when they strike or press against objects. If your nails split frequently, temporarily wearing a shorter rounded or squoval shape may reduce snagging.
Moisturize Regularly
Apply hand cream after washing and before bed. Pay attention to dry nail folds and cuticles, particularly during colder weather or periods of frequent handwashing.
Avoid Aggressive Manicure Removal
Peeling gel polish, scraping coatings, and over-buffing can damage nail layers. Remove products according to their instructions, and don’t force off firmly attached enhancements.
Protect Your Nails Beyond Cleaning
Gloves are useful for appropriate wet chores, but prevention also means avoiding repeated trauma from opening packages, scraping surfaces, or using nail tips as tools.
For a broader routine, explore how to stop nails from breaking and build consistent habits that reduce everyday stress.
Review Persistent Nail Changes
If several nails repeatedly split despite gentle care, don’t assume cleaning is the only cause. Nail conditions, skin problems, and other health factors may contribute.
You can compare your symptoms with common causes of brittle nails. Persistent, sudden, or unusual changes are worth discussing with a healthcare professional.
Frequently Asked Questions About Protecting Cracked Nails During Cleaning
Q: Can I wash dishes with a cracked fingernail?
A: If the crack is small, painless, and limited to the free edge, you can generally continue with careful protection. Wear suitable waterproof gloves and avoid scraping dishes with your nails. Deep, painful, or bleeding cracks need a different approach and may require medical care.
Q: Are nitrile gloves better than rubber gloves for cracked nails?
A: Neither material is universally better. Protection depends on the chemical, glove thickness, formulation, and contact time. Check both the cleaning product’s label and the glove manufacturer’s resistance information.
Q: Should I cover a cracked nail with a bandage before cleaning?
A: A bandage is not a substitute for chemical-resistant gloves. It can become wet, trap moisture, or stick to damaged tissue. If your nail has an open wound, use appropriate first aid and avoid chemical exposure rather than relying on a cosmetic covering.
Q: Can household bleach make an existing nail crack worse?
A: Bleach-based cleaners can irritate or injure exposed skin, depending on concentration and contact. Protect cracked nails with gloves appropriate for the product, follow label directions, and avoid direct contact.
Q: Should I apply cuticle oil before or after cleaning?
A: Applying a moisturizer or cuticle oil after cleaning is practical because you can first wash and thoroughly dry your hands. Oil may condition dry skin, but it doesn’t replace gloves or repair a split nail plate.
Final Thoughts: Keep Cracked Nails Protected During Every Cleaning Session
Protecting cracked nails during cleaning doesn’t require complicated treatments. The most important steps are to smooth minor free-edge snags safely, wear task-appropriate gloves, avoid unnecessary water exposure, and keep pressure off the damaged fingertip.
Remember that an existing nail crack must grow out. Consistent protection helps prevent additional damage while that happens.
Save this guide to your Pinterest nail-care board so you can revisit these practical protection tips before your next cleaning day.

Hi, I’m Jessica, the creator behind Unique Lash & Nails Katy.
I created this website for anyone who loves beautiful nails as much as I do. Here, I share trendy nail designs, seasonal manicure ideas, easy nail care tips, honest product recommendations, and step-by-step guides to help you create salon-worthy nails at home. Whether you’re looking for everyday inspiration or your next favorite nail trend, I hope you’ll find something you love.