How to Heal & Repair a Damaged Nail at Home: Easy Recovery Guide
Quick Answer
You can help a mildly damaged nail at home by trimming away loose edges, filing snags gently, moisturizing the nail and cuticle, protecting it from water and chemicals, and stopping whatever caused the damage. The damaged nail plate itself doesn’t literally heal back together, so your goal is to protect it while healthier nail grows forward from the base. Pain, pus, significant lifting, bleeding, severe discoloration, or worsening swelling needs professional medical evaluation.
Time needed
15–25 minutes
Difficulty
Beginner
Items needed
5–7 basic items
Result lasts
Until damaged area grows out
Seeing a nail become thin, rough, split, or flaky after gel removal, acrylics, cleaning, biting, or an accidental snag can be alarming. The good news is that many minor cosmetic problems can be managed with gentle home care.
The important part is understanding what “repair” really means. You can’t permanently glue damaged nail layers back into their original condition. Instead, you protect the weak area, prevent additional trauma, and create better conditions for new nail to grow.


How Do You Know If a Damaged Nail Is Safe to Treat at Home?
Home care makes the most sense when the problem is minor and mainly affects the appearance or strength of the nail.
You may be able to manage the damage yourself if you notice:
- Peeling layers near the nail tip.
- A rough surface after removing gel, dip, or acrylic.
- A small split limited to the free edge.
- Dry, brittle nails that break easily.
- Minor white patches after picking or scraping product.
- Thin nails after aggressive filing or buffing.
- Dry cuticles and frequent hangnails.
If several nails seem weak at once, you may also want to follow this simple nail recovery routine for making your nails healthy again.
Warning
Don’t try to disguise a nail that is painful, swollen, bleeding, producing pus, significantly lifted from the nail bed, becoming thick and crumbly, or developing unexplained dark discoloration. Those changes may need medical evaluation rather than a cosmetic repair.
If you’re unsure whether what you’re seeing is ordinary manicure damage, compare your nail with these common signs of unhealthy nails before applying another enhancement.
What Do You Need to Repair a Damaged Nail at Home?
You don’t need an expensive nail-repair kit. Keep the routine simple so you don’t accidentally create more damage while trying to fix the first problem.
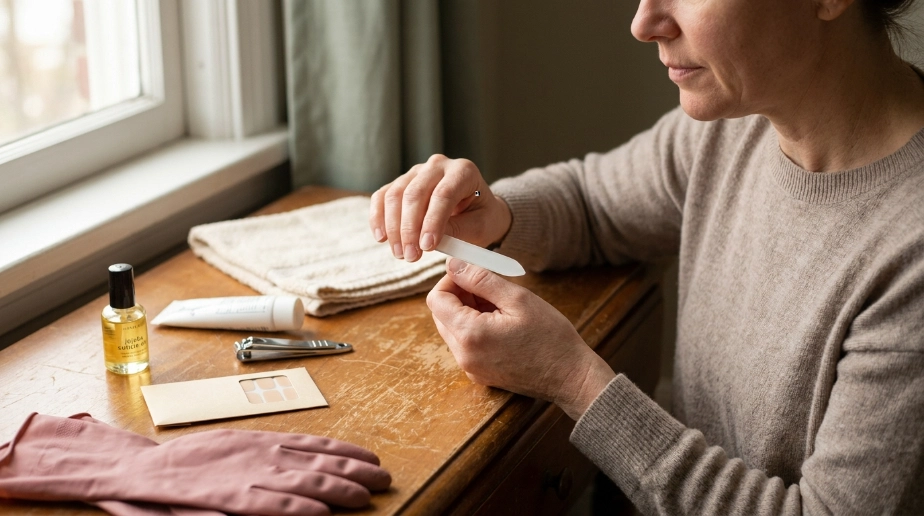
- Clean nail clippers.
- Glass or fine-grit nail file.
- Mild soap and clean towel.
- Jojoba-based cuticle oil or hand cream.
- Petroleum jelly for very dry skin around the nail.
- Protective household gloves.
- Optional nail-repair wrap for a tiny split at the free edge.
How Can You Repair a Damaged Nail Step by Step?
 Save
Save
1
Remove Anything That Is Making the Damage Worse
Start by removing ordinary polish gently so you can see the entire nail. If you’re wearing gel, dip, press-ons, or acrylic, don’t pry or peel the product away just because one corner has lifted.
Once the nail is visible, identify whether you’re dealing with peeling, thinning, a free-edge crack, or general dryness.
Common mistake: Pulling off loose gel or acrylic. The coating may take superficial nail layers with it, leaving the natural nail thinner than it was before.
2
Trim the Nail to a Safer Length
Shorten the nail enough that the weak area isn’t constantly catching on hair, clothing, bags, or bedding. Less length means less leverage on an already fragile nail.
Only remove nail that can be trimmed comfortably. Don’t cut into attached, painful, or living tissue.
Common mistake: Cutting the nail extremely short because you want all visible damage gone immediately. That can make the fingertip tender and won’t make new nail grow faster.
3
Smooth Every Rough or Peeling Edge
Use a fine file to remove snags that could turn into larger splits. File with light, controlled movements and stop as soon as the edge feels smooth.
If a thin layer is peeling, don’t grab the loose section and pull it toward the nail base.
Common mistake: Trying to buff away every ridge or rough patch. A nail that’s already thin doesn’t need more material removed from its surface.
4
Moisturize the Nail and Cuticle
Apply a small amount of cuticle oil around the nail and massage it into the surrounding skin. Follow with hand cream after washing your hands and before bed.
For very dry cuticles, you can seal in moisture with a thin layer of petroleum jelly. This won’t rebuild missing nail layers, but it helps prevent the area from becoming excessively dry.
Common mistake: Applying oil once and expecting the damaged nail to look normal the next morning. Recovery depends on consistency and new nail growth.
If petroleum jelly is part of your routine, this guide explains how Vaseline can be used for dry nails and cuticles.
5
Protect the Nail From Water and Chemicals
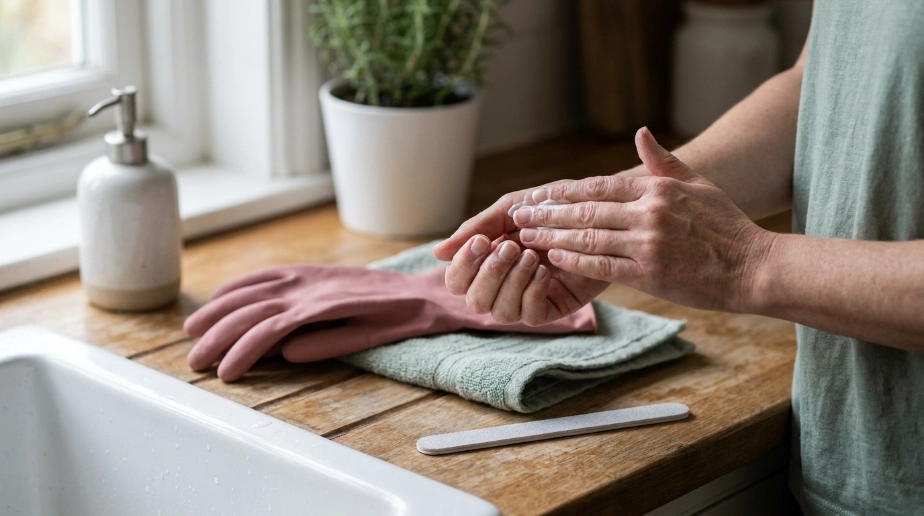
Wear gloves when washing dishes, cleaning bathrooms, gardening, or handling household cleaners. Repeated wetting, drying, scrubbing, and chemical exposure can make fragile nails harder to manage.
After wet work, dry your hands thoroughly and reapply hand cream.
Common mistake: Protecting the nail from polish but continuing to use it for scraping labels, opening cans, or prying objects apart.
6
Reinforce Only a Tiny Free-Edge Split if Needed
If the crack is tiny, painless, and entirely within the white free edge, a temporary nail-repair wrap can stop it catching while you wait to trim the damaged section away.
Don’t place nail glue or a wrap over broken skin, bleeding tissue, a painful crack extending into the attached nail, or a nail that appears infected.
Common mistake: Treating a deep nail-bed injury like a cosmetic split. If the crack extends into living tissue or causes significant pain, skip the DIY patch.
7
Give the Nail a Low-Trauma Recovery Period
For the next few weeks, minimize aggressive buffing, drilling, scraping, picking, and frequent enhancement removal. You can use a gentle clear or sheer polish if the nail isn’t painful or showing concerning changes.
The point isn’t that nails need to “breathe.” A temporary break simply removes repeated manicure trauma while you monitor the damaged area.
Common mistake: Covering damage with another thick enhancement immediately, then repeating the same removal method that caused the problem.
If you’re deciding whether to stop manicures temporarily, see when a polish break can actually help damaged nails.
How Long Does a Damaged Nail Take to Repair?
You may notice less snagging and dryness within days once you shorten, smooth, moisturize, and protect the nail. Full recovery is slower because the visibly damaged part generally needs to grow toward the tip before you can trim it away.
Fingernails grow gradually, so completely replacing a damaged visible nail plate can take several months. A small area near the tip will disappear much sooner than damage that begins close to the cuticle.
Instead of judging progress by the oldest part at the tip, look at the new growth near the base. A smoother-looking band appearing there is more useful than expecting an old peeling section to suddenly become perfect.
Pro Tip
Take a clear photo of your bare nail every two weeks from the same angle. Comparing the new growth near the cuticle makes slow improvement easier to see and discourages you from constantly changing treatments.
What Should You Do and Avoid While Your Nail Recovers?
 Save
SaveDo
- +Keep weak nails comfortably short.
- +Moisturize after handwashing and before bed.
- +Wear gloves for wet and chemical-heavy chores.
Don’t
- −Peel off gel, dip, press-ons, or acrylic.
- −Buff a thin nail to make it look smoother.
- −Cut living cuticle tissue or pull hangnails.
For a simple maintenance system after the damaged portion grows out, follow this healthy nail care routine.
Which Products Actually Help a Damaged Nail?
You don’t need multiple strengthening serums, supplements, masks, and hardeners at once. Start with products that solve practical problems: snagging, dryness, and exposure.
Recommended Product
Glass Nail File for Natural Nails
A fine glass file helps you smooth tiny snags before they turn into larger tears, which is especially useful while you’re keeping damaged nails short.
As an Amazon Associate, we earn from qualifying purchases.
Recommended Product
Jojoba-Based Cuticle Oil
A brush-on cuticle oil makes frequent moisturizing convenient when your nail plate and surrounding skin feel dry after polish removal or repeated handwashing.
As an Amazon Associate, we earn from qualifying purchases.
Recommended Product
Reusable Household Cleaning Gloves
Protective gloves reduce repeated exposure to dishwater and cleaning products, making them one of the simplest tools for preventing new damage while your nail grows.
As an Amazon Associate, we earn from qualifying purchases.
What If Your Damaged Nail Isn’t Getting Better?
The nail keeps peeling at the tip
Shorten the peeling section, smooth the edge, moisturize consistently, and protect your hands from repeated water exposure. Prevent the next split by filing snags as soon as you notice them instead of pulling the loose layer.
The surface still looks rough after several weeks
Don’t keep buffing the roughness away. Watch the new nail growing from the base. Older over-filed material may remain visibly rough until it reaches the tip and can be trimmed.
A crack keeps catching on everything
If it’s completely in the painless free edge, shorten and smooth it or temporarily reinforce it. If the crack enters attached tissue, bleeds, or hurts, don’t glue it shut—get appropriate professional care.
The nail becomes more painful, swollen, or discolored
Stop treating it as ordinary cosmetic damage. Remove unnecessary pressure from the area and seek professional medical advice, especially when swelling, drainage, significant lifting, or worsening pain develops.
What Can Help Your Nails Recover More Smoothly?
 Save
SavePro Tip
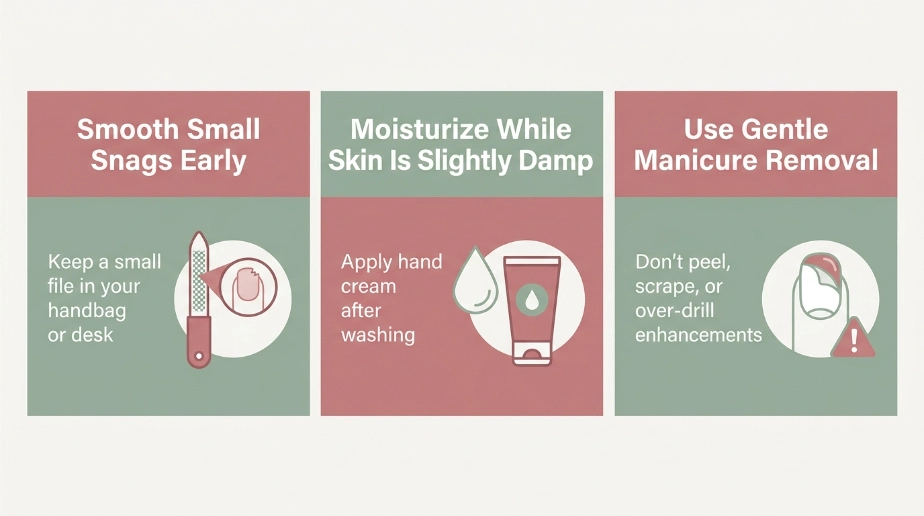
Keep a small file in your handbag or desk. Smoothing a one-millimeter snag immediately is easier than repairing the larger tear it can become after catching on clothing all day.
Pro Tip
Apply hand cream while your skin is still slightly damp after washing. That turns frequent handwashing into a reminder to moisturize instead of waiting until the skin around your nails feels tight and flaky.
Pro Tip
When you return to gel, dip, or acrylic, pay as much attention to removal as application. A beautiful manicure isn’t worth repeatedly scraping, peeling, or drilling away layers of your natural nail.
Frequently Asked Questions About Damaged Nails
Q: Can a damaged nail heal itself?
A: The existing damaged nail plate doesn’t truly heal the way skin does. Minor damage improves visually as you prevent additional trauma and healthier nail gradually grows from the base, allowing you to trim the damaged portion away.
Q: What is the fastest way to repair damaged nails after acrylics?
A: Keep the nails short, smooth rough edges gently, moisturize daily, protect them from water and chemicals, and stop peeling or aggressively buffing remaining product. There isn’t a safe overnight method that instantly replaces nail layers that have already been removed.
Q: Should you put nail strengthener on damaged nails?
A: A protective coating may help some painless, superficially damaged nails, but harder isn’t always better. If your nail is extremely thin, sore, separating, or discolored, focus on identifying the problem rather than repeatedly covering it with stronger products.
Q: Can Vaseline repair damaged nails?
A: Vaseline can’t rebuild damaged nail material, but it can help reduce moisture loss from dry skin around your nails. Use it after moisturizing, particularly at night, if dryness and rough cuticles are part of the problem.
Q: When should you see a doctor for a damaged nail?
A: Seek professional medical advice when the nail injury involves significant pain, bleeding, pus, increasing redness or swelling, major separation from the nail bed, severe trauma, or unexplained persistent discoloration instead of treating it only as a manicure problem.
Can Your Damaged Nail Become Healthy Again?
Minor manicure damage, peeling, dryness, and small free-edge splits can often look much better when you stop the source of damage and protect the nail consistently. Keep it short, smooth snags instead of pulling them, moisturize daily, wear gloves for wet work, and let healthier nail replace the damaged area naturally.
Your best repair tool is patience paired with gentle care. Save this guide on Pinterest so you have the recovery steps ready the next time a manicure, snag, or removal session leaves one of your nails looking worse for wear.

Hi, I’m Jessica, the creator behind Unique Lash & Nails Katy.
I created this website for anyone who loves beautiful nails as much as I do. Here, I share trendy nail designs, seasonal manicure ideas, easy nail care tips, honest product recommendations, and step-by-step guides to help you create salon-worthy nails at home. Whether you’re looking for everyday inspiration or your next favorite nail trend, I hope you’ll find something you love.