How to Keep a Manicure Kit Clean: Easy 10-Minute Routine
Quick Answer
Wash your metal tools in warm soapy water, scrub the hinges and edges with a small brush, then soak them in a salon-grade disinfectant for 10 minutes. Wipe porous tools like files and buffers with 70% rubbing alcohol instead of soaking them. Air-dry everything completely, then store your kit in a dry pouch. Repeat this full routine every two to three weeks, and give tools a quick wipe after every single use.
Time needed
10 minutes
Difficulty
Beginner
Items needed
5 basic tools
Result lasts
2-3 weeks
Your nail clippers touch your skin every single time you use them, and the tiny grooves in your files trap nail dust, skin cells, and moisture. Left alone, that residue turns your kit into a cozy home for bacteria and fungus, which is exactly how nail infections start. You’ll learn a simple 10-minute system below that keeps every tool in your kit sanitary, rust-free, and working like new — the same basic routine salons follow, scaled down for your bathroom counter.


What You’ll Need
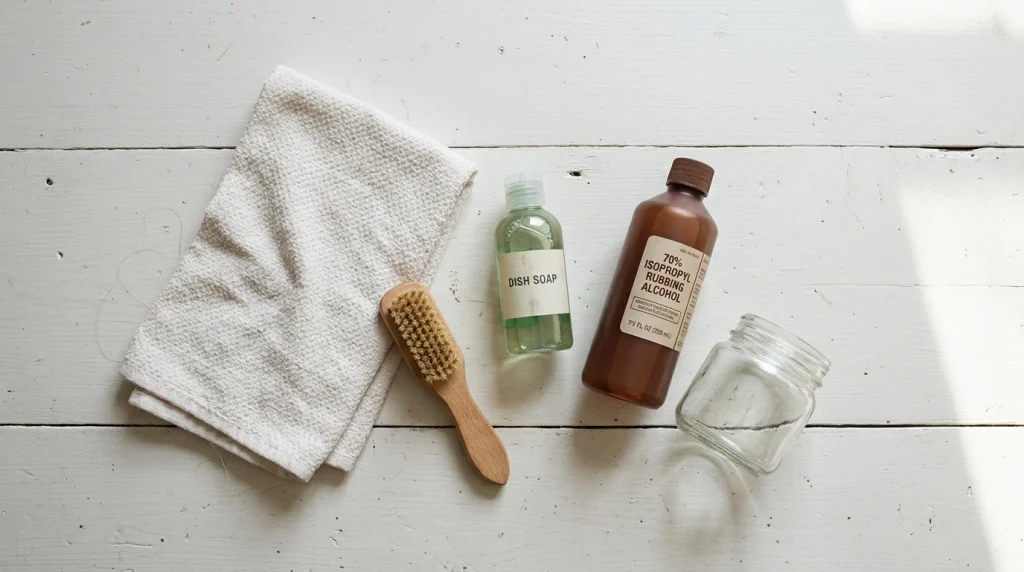
Gather these before you start so you don’t leave wet tools sitting around. Everything here is cheap and easy to find:
- A small stiff brush — an old toothbrush or a dedicated nail brush works perfectly
- Dish soap or a gentle antibacterial hand soap
- 70% isopropyl rubbing alcohol — for wiping non-metal tools
- Barbicide disinfectant concentrate — the blue salon disinfectant, mixed per the label
- A small glass jar deep enough to submerge your tools
- A clean lint-free towel or a stack of paper towels
If you’ve been wondering how to clean your nails at home, keeping the tools clean is the other half of that equation — spotless nails and dirty clippers cancel each other out.
The 6-Step Cleaning Routine for Your Manicure Kit
Work through these steps in order. Cleaning always comes before disinfecting, because no disinfectant can reach germs hiding under dried skin and nail dust.
1
Sort Your Tools by Material
Spread everything on a clean towel and split your kit into two groups: metal tools (clippers, scissors, cuticle nippers, metal pushers, tweezers) and porous tools (emery boards, buffers, wooden or rubber cuticle sticks, foam files). This split decides how each tool gets cleaned, so getting it right now saves you from ruining good tools later.
Common mistake: Tossing everything into one soak. Wooden sticks and emery boards absorb liquid and can never be truly disinfected, so soaking them just creates a damp breeding ground for bacteria.
2
Scrub Every Metal Tool With Soap and Warm Water
Run warm water over each metal tool, add a drop of dish soap, and scrub with your brush — pay special attention to the hinge of your clippers, the spring of your nippers, and the textured grip of your pusher, because debris hides in those crevices. Rinse everything under clean running water afterward. Soap and friction physically remove the skin cells and nail dust that shield germs from disinfectant, which is why this step can never be skipped.
Common mistake: Going straight to disinfectant on dirty tools. The soak can’t penetrate a crust of old skin and oil, so you’re disinfecting the dirt, not the tool.
3
Soak the Metal Tools in Disinfectant for 10 Minutes
Mix your disinfectant exactly as the label directs, pour it into your glass jar, and fully submerge the scrubbed metal tools for the full 10-minute contact time. Salon-grade disinfectants are formulated to kill bacteria, fungi, and viruses on hard surfaces, but they only do that job when the tools stay wet with the solution for the labeled time. If you’re curious about the best liquids for cleaning nails and tools, a registered disinfectant beats plain soap or alcohol every time — and the chemicals nail professionals use are the same ones you can buy for home use.
Common mistake: Pulling the tools out after two or three minutes. Contact time is what actually kills the germs, so a rushed soak gives you blue water and a false sense of security.
Warning
Never soak your tools in bleach or undiluted household cleaners. Bleach corrodes metal in minutes, dulls cutting edges, and leaves a residue that irritates the skin around your nails. Stick to disinfectants made for salon tools — they’re strong enough to kill germs without destroying your kit.
4
Wipe Porous Tools With Rubbing Alcohol
Dampen a cotton pad or paper towel with 70% isopropyl alcohol and wipe down your emery boards, buffers, and plastic or rubber pushers on both sides. Soaking would ruin these tools — the grit on a file lifts off, buffers swell, and wooden sticks splinter — so a thorough wipe is the right level of cleaning. Seventy percent alcohol (not 90%+) is the sweet spot because the added water slows evaporation, giving the alcohol time to break down germs instead of flashing off the surface.
Common mistake: Dunking emery boards in the disinfectant jar “just to be safe.” You’ll pull out a warped, useless board — and the damp grit becomes a perfect home for the bacteria you were trying to kill.
5
Dry Everything Completely Before You Put It Away
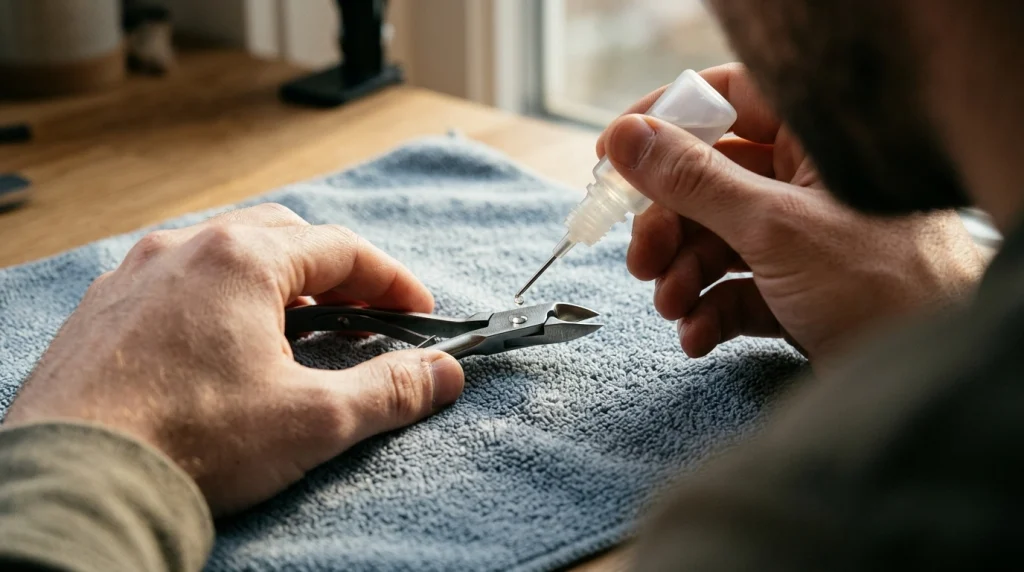
Lay every tool on your clean towel and let them air-dry fully — give it at least 20 minutes, because moisture hiding in a clipper hinge is invisible but very real. Once dry, add one drop of clipper oil to the hinge of your clippers and nippers and work it open and closed a few times. Steel rusts fastest in dark, damp, enclosed spaces, so a tool that goes into its case even slightly wet will spot with rust within days.
Common mistake: Zipping the case shut while tools are still damp. Even a little trapped moisture causes rust spots and a musty smell that transfers straight back to your nails.
6
Store Your Kit Dry, Separated, and Labeled
Place the dry tools back in a clean, dry pouch or roll case with sharp edges facing away from each other so blades don’t knock and dull. Keep the case somewhere dry — not the shower shelf, where steam hits it daily. When you want to deep-clean your nails before a special occasion, starting with a clean, organized kit makes the whole manicure faster and safer.
Common mistake: Tossing clippers loose in a drawer or makeup bag. The blades bang against other items, dull faster, and collect lint and moisture from everything around them.
Manicure Kit Do’s and Don’ts
Do
- +Wipe tools with alcohol after every use — it takes 30 seconds and stops buildup
- +Do the full disinfecting routine every 2 to 3 weeks, or weekly if you do nails often
- +Replace emery boards and buffers monthly, since porous tools can’t be fully disinfected
- +Oil clipper hinges after disinfecting so the spring stays smooth and pinch-free
Don’t
- −Soak wooden sticks, emery boards, or buffers — they’ll warp and harbor bacteria
- −Share tools without disinfecting between people — fungus spreads easily this way
- −Store tools while damp, even slightly — trapped moisture means rust and mildew
- −Use a rusty or pitted tool on your skin — rough spots trap debris and can scratch you
Pro Tips That Keep Your Kit Cleaner for Longer
Pro Tip
Keep a small pack of alcohol wipes inside your kit for travel and quick touch-ups. One wipe before and after you use your clippers away from home gives you salon-level hygiene without carrying the whole cleaning setup.
Pro Tip
Label your tools if you share a bathroom with family or roommates. Nail fungus spreads through shared files and clippers, and a tiny initial sticker on your case prevents the mix-ups that cause it.
Pro Tip
Change your disinfectant solution every time you use it, never top it up. A reused jar loses strength with every soak, so “topping off” leaves you soaking tools in weakened solution that doesn’t disinfect properly.
Pro Tip
Use separate files for natural nails and enhancements. Filing acrylic or gel leaves fine dust embedded in the grit that you can’t fully remove — dedicating one file to enhancements keeps your natural-nail file cleaner and gentler.
Troubleshooting: Common Kit Problems and Fixes
Rust spots appeared on your clippers
Scrub the spots with a paste of baking soda and a few drops of water, rinse, dry fully, then oil the hinge. To prevent it next time, never put tools away damp — even the moisture from a bathroom’s steam is enough to start rust inside a closed case.
Tools feel sticky or look cloudy after disinfecting
Rinse the tools under clean water and dry them completely — the film is usually disinfectant residue from a mix that was too strong. Next time, measure the concentrate exactly as the label says instead of eyeballing it.
The disinfectant smell lingers on your tools
Give the tools a quick rinse after their soak and let them air-dry in a ventilated spot — the smell fades completely once they’re dry. If it bothers you during the soak, crack a window or move the jar away from your face while the tools sit.
Your emery board smells musty or looks dark
Throw it out — a musty smell means bacteria have settled into the porous grit, and no wipe can reach them. Prevent it by replacing files monthly and never letting them sit damp in your case.
Products That Make Kit Cleaning Easier
These aren’t required — soap and alcohol handle the basics — but each one makes the routine faster or more thorough:
Recommended Product
Barbicide Disinfectant Concentrate
★★★★☆ Highly rated on Amazon
This is the blue liquid in the jar at every salon — one bottle makes gallons of disinfectant, so it lasts ages for home use.
As an Amazon Associate, we earn from qualifying purchases.
Recommended Product
UV Sanitizer Box for Nail Tools
★★★★☆ Highly rated on Amazon
A five-minute UV cycle between deep cleans keeps your tools fresh daily — perfect if you do your nails every week.
As an Amazon Associate, we earn from qualifying purchases.
Recommended Product
Manicure Tool Storage Roll Case
★★★★☆ Highly rated on Amazon
Separate slots keep blades from knocking together and let air circulate, so your clean tools stay clean and sharp.
As an Amazon Associate, we earn from qualifying purchases.
Frequently Asked Questions
Q: How often should you clean your manicure kit?
A: Wipe your tools with alcohol after every use, and do the full wash-and-disinfect routine every two to three weeks. If you share your kit or do nails weekly, disinfect the metal tools before each session instead.
Q: Can you boil metal nail tools to disinfect them?
A: Boiling kills many germs but not all spores, and the heat dulls cutting edges and loosens glued handles over time. A salon-grade disinfectant soak is both gentler on your tools and more effective against germs.
Q: Is rubbing alcohol enough to disinfect nail tools?
A: Seventy percent isopropyl alcohol is excellent for quick wipe-downs and kills many germs, but it isn’t a registered tool disinfectant. Use it for daily maintenance and porous tools, and give metal tools a proper disinfectant soak regularly.
Q: Can you share a manicure kit with someone else?
A: Only if every metal tool is cleaned and disinfected before each person uses it. Never share porous items like emery boards or buffers — they’re single-person tools because they can’t be fully disinfected.
Q: When should you throw away a nail tool?
A: Toss clippers or nippers with rust that won’t scrub off, loose springs, or chipped blades — and any file or buffer that smells musty or looks dark. Pitted or cracked surfaces trap debris no cleaning can reach, so replacement is the safe move.
Clean tools are the quiet foundation of every good manicure — they protect your nails from infection, keep your edges sharp, and make your kit last for years instead of months. Run the 10-minute routine this weekend and your nails will thank you. Learn how often to care for your nails to build the rest of your routine around it, and save this guide to your nail-care board on Pinterest so it’s there for your next nail day.

Hi, I’m Jessica, the creator behind Unique Lash & Nails Katy.
I created this website for anyone who loves beautiful nails as much as I do. Here, I share trendy nail designs, seasonal manicure ideas, easy nail care tips, honest product recommendations, and step-by-step guides to help you create salon-worthy nails at home. Whether you’re looking for everyday inspiration or your next favorite nail trend, I hope you’ll find something you love.