How to Stop Nails From Yellowing: Easy Prevention Tips
Quick Answer
To stop nails from yellowing, apply a clear stain-blocking base coat before every colored polish, avoid leaving dark shades on for weeks, remove polish gently, and moisturize after acetone. Let discoloration grow out instead of aggressively buffing it. If a nail becomes thick, crumbly, painful, lifts from the nail bed, or stays yellow without polish, ask a dermatologist or healthcare professional to check it.
Time needed
10–15 minutes
Difficulty
Beginner
Items needed
4 basic products
Result lasts
With every manicure
Seeing a yellow cast after removing burgundy, navy, or black polish can be alarming. Most surface staining is cosmetic and moves toward the tip as your nail grows. The useful goal isn’t to bleach your nail overnight; it’s to prevent more pigment from entering the nail plate while keeping your manicure routine gentle.


When Is a Yellow Nail More Than a Polish Stain?
Polish staining usually affects several painted nails, appears after color removal, and leaves the nail’s thickness and texture unchanged. It should gradually grow out. A fungal infection is more likely when one or a few nails also become thick, brittle, crumbly, distorted, lifted, or surrounded by debris. Greenish discoloration, swelling, pain, drainage, a dark streak, or a sudden unexplained color change also deserves professional assessment.
Warning
Don’t cover a persistently yellow, thickened, painful, or lifting nail with another opaque manicure. Polish can hide changes while the underlying problem continues. Get an accurate diagnosis before using an antifungal product because nail psoriasis, trauma, and other conditions can resemble fungus.
If you’re unsure what normal nails should look like, compare the change with these signs of healthy nail color. You can also review the broader signs of unhealthy nails before deciding whether home care is appropriate.
Why Do Nails Turn Yellow After Polish?
Dark and highly pigmented lacquers can leave dye in the upper layers of the porous nail plate, especially when you skip base coat. Reds, oranges, purples, blues, and deep browns are common offenders. The pigment is more noticeable on naturally light nails and after a color has been worn continuously.
Frequent manicures can add to the problem indirectly. Long acetone exposure, scraping, peeling gel, and heavy buffing dehydrate or thin the nail surface. A rough, damaged surface can look dull and hold color unevenly. Smoking can also stain the fingertips and nails. Less commonly, persistent yellowing can be related to infection or a health condition, which is why texture and other symptoms matter.
Your nails don’t need to “breathe,” because the visible plate is made of dead keratin. A polish-free interval can still be useful: it lets you inspect the true color, moisturize the surrounding skin, and allow a stained portion to grow forward.
What Do You Need to Prevent Yellow Nail Stains?
- A clear base coat labeled stain-blocking or ridge-filling
- Your chosen color polish and a clear top coat
- Polish remover and lint-free pads or cotton rounds
- Cuticle oil or a fragrance-free hand cream
A separate whitening kit isn’t essential. Prevention works better than repeated bleaching, and the routine uses products you probably already keep near your manicure tools.
How Do You Stop Nails From Yellowing Step by Step?
 Save
Save1 Inspect Your Bare Nails
Remove old color and check each nail in bright, natural light. Look for uniform surface staining versus thickening, lifting, crumbling, tenderness, or a change limited to one nail. Take a dated photo if you want to track whether the color is moving outward with growth.
Common mistake: Repainting immediately can hide a change that should be monitored.
2 Clean and Dry the Nail Plate
Wash your hands, rinse away soap, and dry thoroughly. Before polishing, make one quick pass over each nail with remover or alcohol to lift surface oil. Keep the surrounding skin protected and avoid prolonged soaking.
Common mistake: Soaking nails before polish makes the nail plate temporarily swell, which can encourage early chipping as it dries.
3 Apply a Complete Base-Coat Layer
Brush one thin, even layer from near the cuticle to the free edge, covering the sidewalls without flooding the skin. Let it dry according to the bottle directions. This transparent barrier limits direct contact between strong pigments and the nail plate.
Common mistake: Using clear top coat as base coat may reduce adhesion because top coats are formulated mainly for shine and surface protection.
4 Paint Thin Color Layers
Use two thin coats rather than one heavy coat, allowing the first to set before the second. Thin layers dry more evenly and are easier to remove without long solvent exposure. Seal with top coat to slow chipping, which reduces the urge to pick.
Common mistake: Letting pigment touch an uncovered strip near the sidewall can leave a yellow outline after removal.
5 Remove Color Without Scraping
Saturate a pad, press it on the nail for several seconds, then wipe from cuticle toward tip. Repeat with a clean section instead of rubbing dissolved dark pigment across your fingers. Follow the removal directions for gel or dip systems; never peel them off.
Common mistake: Scraping stubborn color removes superficial nail layers along with the polish and makes the plate rougher.
6 Rehydrate After Removal
Wash away remover residue, dry your hands, and massage oil or cream into the nail folds and cuticles. Moisturizer won’t erase pigment, but it helps counter dryness and reduces splitting. This simple nail-care routine makes the habit easier to maintain.
Common mistake: Applying oil immediately before your next manicure can interfere with polish adhesion; remove surface oil first.
Can Everyday Products Make Your Nails Look Yellow?
Polish isn’t the only source of surface color. Hair dye, turmeric, self-tanner, tobacco, strong household dyes, and even garden soil can tint the nail or the dry skin around it. Wear fitted nitrile or household gloves when you handle staining products. If your hands get wet inside the gloves, take them off, dry your skin, and use a fresh pair. Trapped moisture can soften the nail and surrounding skin.
When an external stain is fresh, wash with mild soap and use a soft nail brush briefly. Brush the visible plate and beneath the free edge without digging into the nail bed. Skip metal tools, forceful scrubbing, and repeated solvent use. A mark that doesn’t lift with gentle cleaning should be watched as it grows rather than attacked with stronger chemicals.
Product age matters too. Some clear coats can yellow in sunlight or change color as the formula ages, making the manicure look stained even when the natural nail underneath is not. If only the coating looks yellow, remove it gently and inspect the bare plate. Store polish tightly closed, away from heat and direct sun, and replace a formula that has changed color, smell, or texture.
Pro Tip
Photograph a suspected stain in the same window light once a week. If a clear, healthy-looking band appears at the cuticle and the yellow area moves toward the tip, that pattern supports old surface staining. A change that spreads backward, alters texture, or causes discomfort needs professional assessment.
How Long Does Yellow Nail Staining Take to Grow Out?
 Save
SaveFingernails grow roughly a few millimeters per month, so a stain near the cuticle can take several months to reach the tip. Toenails grow more slowly and may take a year or longer to replace fully. Timing varies with age, health, season, and which nail is affected.
A light surface stain may look less obvious sooner, but there’s no safe way to force stained keratin to renew overnight. Keep the nail short, file the free edge gently, and watch for a clear band of new growth at the base. That clean band is more useful evidence than a whitening hack.
What Should You Do—and Avoid—Between Manicures?
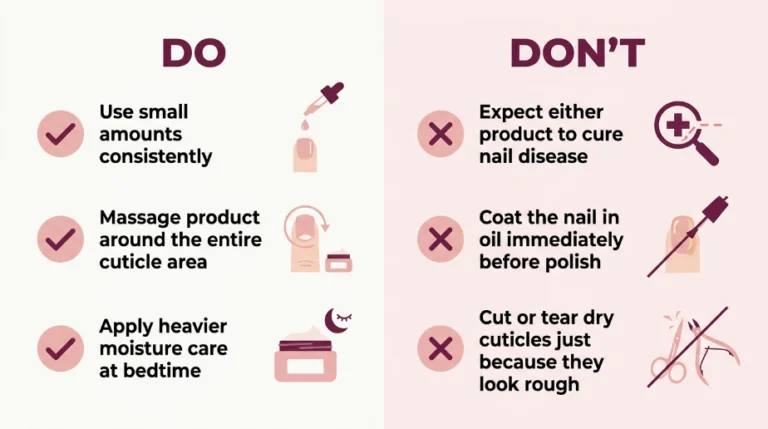
Do
- + Use base coat under every pigmented shade
- + Wear gloves for dyes, cleaners, and gardening
- + Check bare nails regularly
Don’t
- − Peel gel or scrape polish
- − Buff repeatedly to chase color
- − Use undiluted bleach or harsh DIY acids
For a broader maintenance plan, use this guide to keep your nails healthy. Consistent gentle care protects the surface better than occasional intensive treatments.
What If Your Nails Still Look Yellow?
The stain returned after dark polish
Switch to a dedicated stain-blocking base coat and test the shade on one nail. Next time, apply complete edge-to-edge coverage before color and remove the manicure when it begins wearing unevenly.
The surface looks chalky after gel removal
Pause abrasive prep, moisturize daily, and let the damaged area grow forward. Arrange professional removal next time and don’t peel lifted gel.
Only one nail stays yellow or becomes thicker
Stop covering it and book a medical evaluation. A clinician may examine or test a clipping before recommending treatment, which prevents you from treating the wrong condition.
Which Products Actually Help Prevent Yellowing?
Recommended Product
Stain-Blocking Nail Base Coat
A dedicated base coat creates the most useful barrier between dark lacquer pigments and your natural nail.
As an Amazon Associate, we earn from qualifying purchases.
Recommended Product
Acetone-Resistant Nail Clips and Pads
Clips keep a remover pad in place for soak-off products, helping you avoid scraping and picking when used according to the product directions.
As an Amazon Associate, we earn from qualifying purchases.
Recommended Product
Jojoba Cuticle Oil Pen
A brush pen makes post-removal moisturizing tidy and easy, although it won’t bleach an existing stain.
As an Amazon Associate, we earn from qualifying purchases.
What Extra Tricks Make the Biggest Difference?
Pro Tip
Keep a photo of your bare nails before a dark manicure. When you remove the color, you’ll have a real comparison instead of relying on memory or different bathroom lighting.
Pro Tip
For a new deep shade, paint one test nail over your usual base coat and remove it after several days. If it stains, double up with a second thin base layer for the full manicure or choose a lighter color.
Pro Tip
Write the opening date on your base coat. A thick, stringy formula can leave gaps and uneven protection; replace it when thinning no longer restores smooth application.
Frequently Asked Questions About Yellow Nails
Q: Does clear nail polish prevent yellow nails?
A: A true base coat can reduce pigment transfer by placing a barrier under colored polish. Ordinary clear top coat isn’t always formulated for adhesion or stain protection, so choose a product labeled as base coat.
Q: Can you whiten yellow nails with lemon or baking soda?
A: Abrasive or acidic DIY treatments may irritate skin and roughen the nail without removing deeper pigment. It’s safer to prevent new staining and allow the discolored nail to grow out.
Q: Are yellow nails always caused by fungus?
A: No. Nail polish pigment, smoking, trauma, and other conditions can change nail color. Fungus is more suspicious when yellowing comes with thickening, crumbling, distortion, debris, or separation from the nail bed.
Q: Should you take a break from nail polish?
A: Nails don’t breathe, but a polish-free interval lets you inspect them and track whether staining is growing out. Take a break if the plate is peeling, sore, unusually dry, or changing color without an obvious polish cause.
Q: When should you see a doctor about yellow nails?
A: Seek professional advice when yellowing persists without polish, affects one nail unexpectedly, or appears with pain, swelling, thickening, crumbling, lifting, odor, drainage, or another unexplained health change.
How Do You Keep Nails Clear Going Forward?
Your best defense is simple: inspect bare nails, use a complete base-coat layer, remove polish without scraping, and moisturize afterward. Let old stains grow out rather than sanding or bleaching them away. Save this prevention routine on Pinterest so it’s beside you before your next dark manicure.

Hi, I’m Jessica, the creator behind Unique Lash & Nails Katy.
I created this website for anyone who loves beautiful nails as much as I do. Here, I share trendy nail designs, seasonal manicure ideas, easy nail care tips, honest product recommendations, and step-by-step guides to help you create salon-worthy nails at home. Whether you’re looking for everyday inspiration or your next favorite nail trend, I hope you’ll find something you love.