How to Get Shiny Natural Nails at Home (No Gel Needed!)
Quick Answer
To shine natural nails, buff them with a four-sided nail buffer, moving from the roughest side to the smoothest, then seal in the shine with a drop of cuticle oil massaged into the nail plate. Skip the file’s coarse side once you’re smoothing — over-buffing thins your nails and kills the shine you’re chasing. Do this once every two to three weeks for a glossy, polish-free glow.
Time needed
10-15 minutes
Difficulty
Beginner
Items needed
3 basic tools
Result lasts
2-3 weeks
You don’t need gel, acrylic, or a trip to the salon to get nails that catch the light. Your natural nail already has the shine in it — you just have to buff away the ridges and dullness sitting on top of it. Here’s the exact at-home method that gets you there, plus the one mistake that ruins it for most people.


What You’ll Need
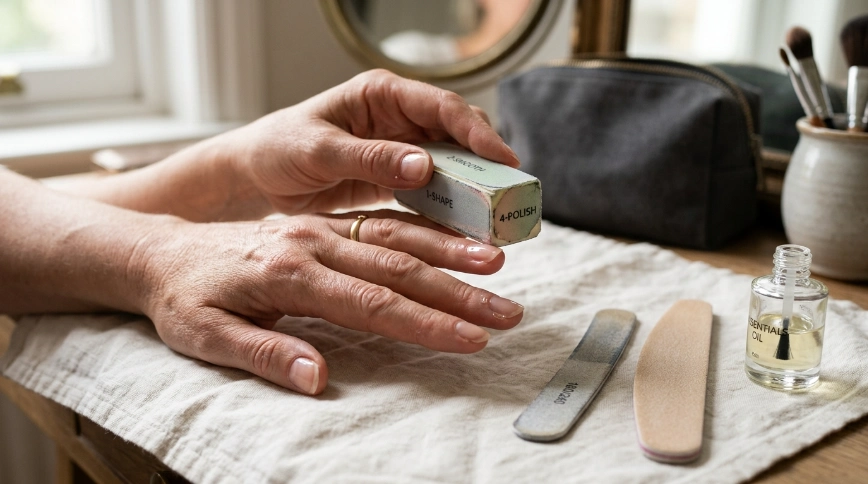
- A four-sided (or four-step) nail buffer block
- Cuticle oil or a light carrier oil like jojoba oil
- A soft nail file (180/240 grit, not a metal file)
Recommended Product
4-Way Nail Buffer Block
★★★★☆ Highly rated on Amazon
This is the exact tool the whole method below relies on — each side does a different job, so you’re not stuck guessing which grit to use.
As an Amazon Associate, we earn from qualifying purchases.
The Step-by-Step Buffing Method
 Save
Save
1
Shape and smooth the edges first
Before you touch the buffer, file your nail edges into your preferred shape using a soft file. Always file in one direction — back and forth tears the nail’s layers and creates the exact roughness you’re trying to shine away.
Common mistake: Sawing back and forth. It heats the nail plate and causes splitting, which shows up as a dull, feathered edge no amount of buffing fixes.
2
Use the coarsest side to smooth ridges
Take side one of your buffer (usually the roughest) and gently sweep it across the nail surface in light, even strokes for about 10 seconds per nail. This knocks down the vertical ridges that catch light unevenly and make nails look dull instead of glossy.
Common mistake: Pressing hard or buffing longer than 10 seconds per nail. Natural nails are only about 0.5mm thick, and heavy buffing on side one alone can thin them enough to cause sensitivity.
3
Refine with sides two and three
Move to the next two sides in order, using the same light pressure. Each pass removes the fine scratches the previous side left behind. You’re building shine in layers here, not creating it in one step.
Common mistake: Skipping straight from side one to the shine side. Without the middle steps, you’ll polish over scratches instead of removing them, and the shine looks patchy instead of even.
4
Finish with the polishing side
The final, smoothest side of the buffer is what actually creates the mirror-like shine. Glide it across each nail with almost no pressure for 15-20 seconds. You should start seeing your natural shine come through immediately.
Common mistake: Using this side more than once a week. It’s the gentlest step, but repeated buffing still removes microscopic layers of keratin over time, which is why this whole routine is a two-to-three-week ritual, not a daily one.
5
Lock in the shine with oil
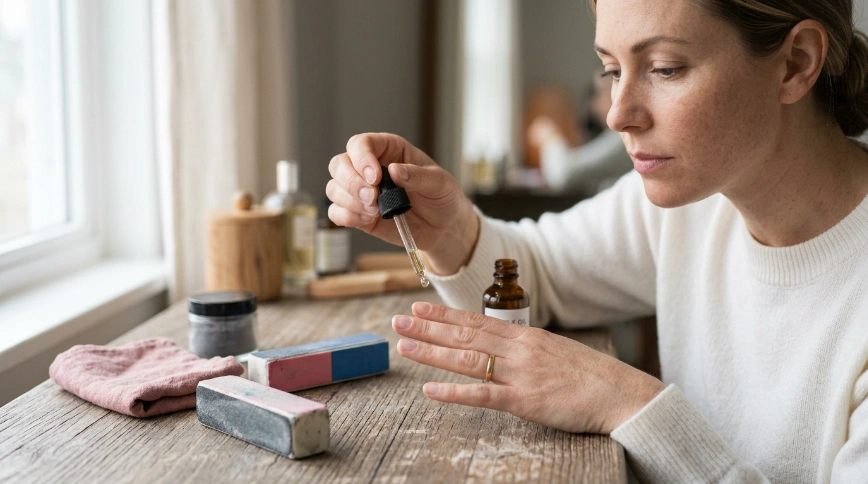
Warm a drop of cuticle oil between your fingers and massage it into each nail plate and cuticle for about 30 seconds. This isn’t optional — a freshly buffed nail without oil dries out fast and loses its shine within a day or two.
Common mistake: Only applying oil to the cuticle, not the nail plate itself. The plate is what needs the moisture to keep reflecting light evenly.
How Long Does the Shine Last?
Buffed, polish-free shine typically holds for one to two weeks before it starts to dull, longer if you’re applying cuticle oil daily in between buffing sessions. That’s shorter than a gel manicure, but it’s also gentler — you’re not sealing the nail under a layer of product, you’re working with the keratin you’ve already got. If you want to know how the rest of your at-home routine affects nail strength over time, this step-by-step nail care guide covers the full picture.
Pro Tip
Buff right after a warm shower, not before. Warm water softens the nail plate slightly, so your buffer smooths ridges more evenly instead of catching on dry, brittle keratin.
Pro Tip
Store your buffer in a small pouch instead of tossing it loose in a drawer. Dust and grit from other items dull the fine grit side, and once that side is worn down, it stops producing the mirror shine.
Pro Tip
If your nails are already thin or peeling, buff only the smoothest final side and skip the rougher steps entirely. You’re polishing what’s there rather than removing more layers. For nails in this state, this guide on repairing damaged nails is worth reading first.
Do’s and Don’ts for a Natural Nail Shine
Do
- +Buff in one direction, never back and forth
- +Follow the buffer’s sides in order, coarse to fine
- +Oil the nail plate immediately after buffing
Don’t
- −Buff more than once every two to three weeks
- −Press hard trying to speed up the shine
- −Skip oil and expect the shine to hold
Troubleshooting Common Shine Problems
 Save
SaveNails look dull again within a day or two
Reapply cuticle oil to the nail plate, not just the cuticle. Prevention: rub in oil every night before bed, even on days you’re not buffing — dehydrated keratin loses shine fastest.
Shine looks patchy or uneven
Go back over the missed spot with the buffer’s middle sides before finishing with the polishing side. Prevention: work each nail fully through all sides before moving to the next one instead of buffing all ten nails on one side first.
Nails feel thin or sensitive after buffing
Stop buffing for at least three weeks and focus on oiling daily to let the nail plate rebuild thickness. Prevention: use lighter pressure and stick to the two-to-three-week schedule going forward. This article on nail oiling frequency can help you dial in the right amount.
Recommended Product
Cuticle Oil for Nail Hydration
★★★★☆ Highly rated on Amazon
This is the step most people skip, and it’s the one that decides whether your buffed shine lasts two days or two weeks.
As an Amazon Associate, we earn from qualifying purchases.
If your goal is long-term nail health and not just a one-time shine, it helps to look at what you’re putting on your nails between buffing sessions. This breakdown of the healthiest nail ingredients pairs well with this routine, and if you want a broader daily habit list, this daily nail care guide walks through it.
FAQ
Q: Does buffing damage your nails?
A: Buffing only damages nails when it’s done too often or with too much pressure. Sticking to once every two to three weeks with light strokes keeps it safe.
Q: Can you use a regular nail file instead of a buffer block?
A: A regular file shapes nails but doesn’t have the graduated grits needed to build shine. You need the multi-sided buffer for the polishing effect specifically.
Q: Is Vaseline good for shining nails too?
A: Vaseline can add temporary sheen and lock in moisture, but it sits on top of the nail rather than absorbing in the way cuticle oil does. See this comparison for more detail.
Q: Why do my nails look shiny right after buffing but dull by the next day?
A: This almost always comes down to skipping oil. The buffing creates the shine; the oil is what keeps the nail plate hydrated enough to hold it.
Q: Can I buff nails with polish still on?
A: No, buffing is for bare, natural nails. Buffing over polish just scratches and ruins the topcoat instead of shining anything underneath.
The Takeaway
Shiny natural nails come down to two things: buffing correctly through every grit, and following it up with oil every single time. Skip either step and the shine fades fast. Save this guide so it’s ready the next time your nails need a refresh.

Hi, I’m Jessica, the creator behind Unique Lash & Nails Katy.
I created this website for anyone who loves beautiful nails as much as I do. Here, I share trendy nail designs, seasonal manicure ideas, easy nail care tips, honest product recommendations, and step-by-step guides to help you create salon-worthy nails at home. Whether you’re looking for everyday inspiration or your next favorite nail trend, I hope you’ll find something you love.