How to Care for Weak Nails After Gel or Acrylic Removal
Quick Answer
To care for weak nails after gel or acrylic removal, keep your nails short, moisturize your nails and cuticles several times daily, and avoid buffing, peeling, or applying new enhancements. Wear gloves during wet chores and give your nails at least one to two weeks without polish, or longer if they’re still damaged. Existing nail damage must grow out, so consistent protection is the key to recovery.
Your gel or acrylic manicure looked beautiful, but now your natural nails feel thin, bendy, or painfully fragile. Perhaps the tips keep peeling, or you can’t grow them without another break.
Fortunately, you can take practical steps to prevent additional damage while healthier nail grows in. You don’t need an expensive salon treatment or a complicated collection of nail products.
This guide explains why your nails feel weak, how to care for them safely, which treatments may help, and what recovery actually looks like.


Why Do Nails Become Weak After Gel or Acrylic Removal?
Your nails consist primarily of compacted keratin layers. These layers create a flexible but protective nail plate.
Gel and acrylic products don’t automatically destroy natural nails. However, repeated preparation, aggressive filing, product removal, and physical stress can damage the nail surface.
1. Excessive Filing Thins the Nail Plate
Before applying acrylic or certain gel enhancements, a technician may lightly prepare your natural nail. Overfiling removes too many protective layers, leaving the plate noticeably thinner.
A thin nail bends more easily under pressure. This makes everyday activities, including opening containers or washing dishes, more likely to cause splitting.
2. Peeling Products Removes Nail Layers
Pulling off gel polish or acrylic that is still firmly attached can lift pieces of your natural nail along with the product.
That damage often appears as rough white patches, uneven surfaces, or peeling tips. Unfortunately, a moisturizer cannot permanently replace missing keratin layers.
3. Acetone Can Increase Dryness
Acetone is commonly used to remove soak-off gel and certain acrylic products. Although effective when used correctly, it can temporarily dry your nails and surrounding skin.
Dry, brittle nails are more likely to chip, particularly when combined with repeated handwashing or exposure to cleaning products.
4. Repeated Manicures Limit Recovery Time
Applying new enhancements over already weakened nails may increase mechanical stress and conceal problems that deserve attention.
If your nails are breaking frequently, take a break from enhancements rather than using another set to hide the damage.
For a broader explanation of how nail products affect the natural nail, explore our guide to how chemicals affect nail strength.
How Can You Tell If Your Nails Are Damaged?
Not every change after a manicure means serious injury. Mild dryness can improve relatively quickly, while damaged nail layers need time to grow out.
Common signs of weakened nails include:
- Peeling tips: Thin layers separate near the free edge.
- Excessive flexibility: Nails bend with minimal pressure.
- White surface patches: Rough or chalky areas appear after removal.
- Frequent breakage: Nails crack during ordinary activities.
- Rough texture: The surface feels uneven or scratched.
- Dry cuticles: Skin around the nails looks flaky or irritated.
If you’re unsure whether you’re experiencing dryness or structural weakness, see our comparison of dry nails versus brittle nails.
Warning
Significant pain, redness, swelling, drainage, green or dark discoloration, or separation from the nail bed is not ordinary cosmetic weakness. Stop using nail enhancements and seek medical evaluation. Don’t cover a potentially infected nail with polish or acrylic.
What Should You Do Immediately After Removing Gel or Acrylic Nails?
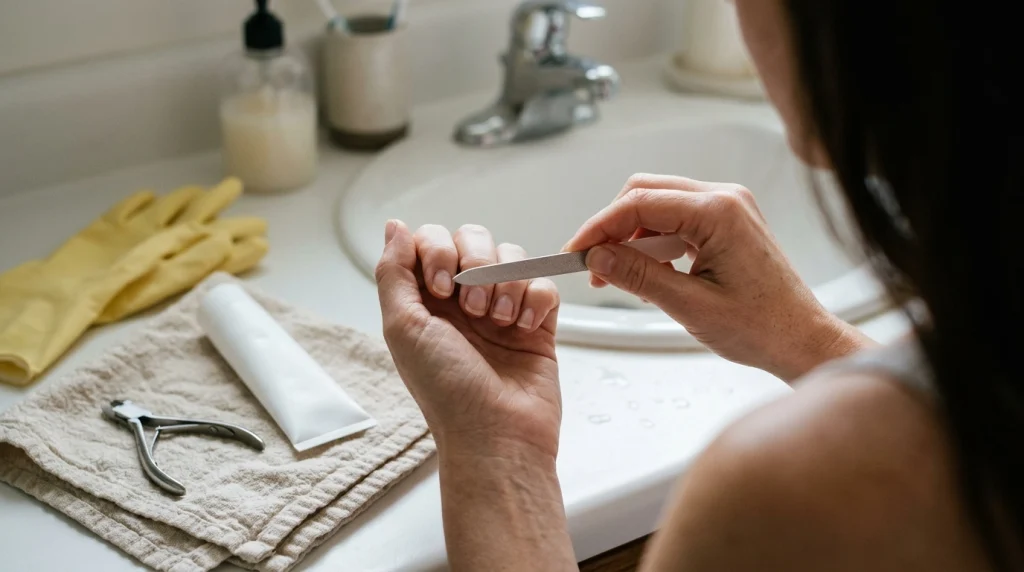
Your first goal is to prevent further damage. Start with a gentle routine rather than trying to make your nails hard overnight.
1. Trim Your Nails Short
Carefully trim excessive length using clean nail clippers. Leave a small, comfortable free edge rather than cutting close to the skin.
Shorter nails experience less leverage during daily activities, making accidental bending and tearing less likely.
Common mistake: Keeping damaged nails long because you want them to recover their length immediately.
2. Smooth Rough Edges Gently
Use a fine-grit nail file to smooth snagging edges. Apply light pressure and stop once the edges feel comfortable.
Avoid filing across the top of the nail plate or attempting to erase every visible ridge.
Common mistake: Aggressively buffing thin nails to make their surfaces look perfectly smooth.
3. Apply a Moisturizing Product
Massage fragrance-free hand cream or a small amount of petroleum jelly over your nails and cuticles.
Repeat throughout the day, particularly after washing your hands. Moisturizing can reduce dryness and help minimize brittleness.
Common mistake: Applying oil once and expecting missing nail layers to regenerate immediately.
4. Avoid New Nail Enhancements
Leave your nails free from gel, acrylic, dip powder, and press-on adhesives while they’re fragile.
Dermatologists recommend trying a polish break of one to two weeks or longer between gel manicures. More significant damage may require additional time.
Common mistake: Covering weakened nails with another hard enhancement before checking their condition.
5. Protect Your Hands From Water and Chemicals
Wear comfortable household gloves when washing dishes, cleaning bathrooms, or handling detergents.
Frequent wetting and drying can contribute to brittleness. Gloves reduce unnecessary chemical exposure while your nails grow.
Common mistake: Assuming a short cleaning task isn’t enough to expose already fragile nails to irritants.
What Are the Best Ways to Strengthen Weak Nails?
Different nail problems benefit from different forms of care. Choose treatments based on whether your nails feel dry, thin, peeling, or irritated.
Method 1: Moisturize With Cuticle Oil
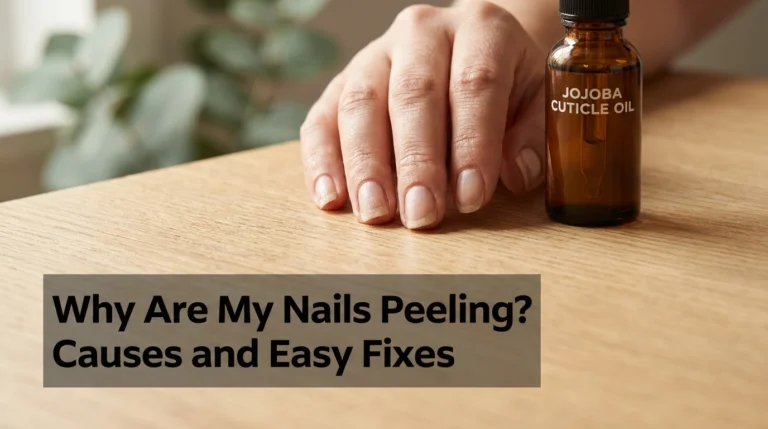
Cuticle oil can condition the surface of your nails and soften the surrounding skin. Jojoba-based oils are a convenient option because they spread easily without requiring much product.
Apply a small amount to each nail and massage gently around the cuticle and sidewalls. Use it daily, especially after handwashing.
Best for: Dry nails, flaky cuticles, and rough-feeling nail surfaces.
Limitation: Oil won’t reconnect layers that have already split.
Method 2: Use Petroleum Jelly Overnight
Petroleum jelly helps reduce moisture loss. It’s particularly useful when your nails and surrounding skin feel dry after acetone exposure.
Apply a thin layer before bed. You can wear clean cotton gloves if you want to keep the product from transferring onto your bedding.
Best for: Persistent dryness and uncomfortable cuticles.
Limitation: It improves conditioning but cannot instantly restore nail thickness.
Method 3: Try a Gentle Protective Base Coat Later
Once your nails are comfortable and no longer visibly irritated, a conventional base coat may help protect the surface from minor staining and everyday wear.
However, avoid very rigid nail hardeners on excessively brittle nails. Some strengthening formulas can make nails stiff enough to crack under pressure.
Choose a removable product without harsh formaldehyde-based hardening ingredients, and follow the manufacturer’s directions.
Best for: Nails that have improved enough to tolerate ordinary polish.
Limitation: A coating offers temporary protection rather than repairing structural damage.
Method 4: Improve Everyday Nail Protection
Protecting your nails is often more important than buying another treatment. Avoid using your nails to open cans, remove stickers, or scrape surfaces.
Use the pads of your fingers instead of the nail tips when typing, handling packages, or picking up small objects.
For additional ideas, see our four-week routine for weak, thin, and brittle nails.
What Is a Simple Daily Nail Recovery Routine?
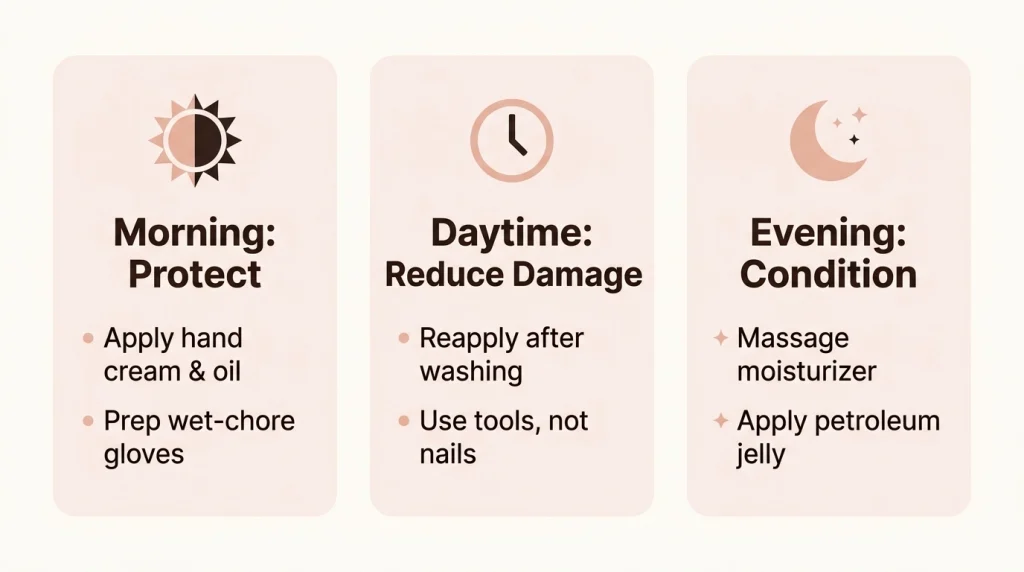
You don’t need to spend an hour caring for your nails. A few short habits repeated consistently can make a meaningful difference.
Morning: Protect and Moisturize
- Check nails for fresh cracks or loose edges.
- Apply fragrance-free hand cream to nails and surrounding skin.
- Massage in a small amount of cuticle oil if your nails feel dry.
- Keep gloves available for wet household chores.
During the Day: Reduce Damage
- Reapply moisturizer after washing your hands.
- Dry your fingertips thoroughly without aggressive rubbing.
- Avoid picking at peeling nail layers.
- Use tools instead of your nails to open or scrape objects.
Evening: Condition Overnight
- Wash your hands gently and pat dry.
- Massage moisturizing cream over the nails and cuticles.
- Apply a thin layer of petroleum jelly if needed.
- Check for any splits that need gentle filing.
Pro Tip
Keep a small moisturizer beside your hand soap and another near your bed. Connecting nail care with habits you already have makes consistent moisturizing easier than relying on reminders.
If you prefer a more complete maintenance system, explore our guide to building the best everyday nail care routine.
How Long Does It Take for Nails to Recover?
Recovery depends on how much of your nail plate was damaged. Superficial dryness can feel better relatively quickly, while deep thinning takes much longer to disappear.
First 1–2 Weeks: Focus on Comfort
With gentle care, your cuticles may become less dry and your nail surfaces may feel more comfortable. Reduce exposure to acetone, avoid enhancements, and keep your nails short.
Don’t mistake a smoother appearance for complete structural recovery.
Weeks 3–6: Watch for Healthier New Growth
You may begin noticing a healthier-looking area emerging near the cuticle. The previously damaged section will still be present farther toward the tip.
Continue protecting the nail rather than trying to buff the old damage away.
Several Months: Damaged Nail Gradually Grows Out
Fingernails typically take approximately four to six months to grow from base to tip, although individual growth rates vary.
Damage near the free edge may disappear sooner because you can trim it away. Damage closer to the base takes longer to reach the tip.
If your nails aren’t improving, or you develop unexplained changes, consult a dermatologist instead of assuming every problem comes from your manicure.
What Should You Do and Avoid During Recovery?
Do
- Keep nails comfortably short.
- Moisturize several times daily.
- File snagging edges gently.
- Wear gloves for wet chores.
- Allow damaged areas to grow out.
- Seek care for persistent problems.
Don’t
- Peel off remaining product.
- Buff thin nail surfaces.
- Cut or aggressively push cuticles.
- Apply acrylic over damaged nails.
- Use harsh DIY acid treatments.
- Ignore pain or unusual discoloration.
Which Nail Care Products Are Actually Worth Buying?
You can build an effective recovery routine with a few inexpensive products. You don’t need every strengthener, serum, or treatment advertised on social media.
Affiliate disclosure: As an Amazon Associate, we earn from qualifying purchases.
Recommended Product
Vaseline Original Petroleum Jelly
This simple occlusive product helps reduce moisture loss from dry nails and cuticles. Apply a small amount after moisturizing, particularly before bed.
Best for: Dry cuticles and post-removal conditioning.
Recommended Product
Bliss Kiss Simply Pure Nail Oil
A jojoba-based nail oil can make regular cuticle care convenient. Massage a small amount around each nail without rubbing aggressively.
Best for: Daily nail and cuticle conditioning.
Recommended Product
OPI Crystal Nail File
A smooth glass-style nail file offers precise control when you’re tidying small snags. Use minimal pressure and avoid filing the top surface.
Best for: Gentle maintenance of short natural nails.
These are product options, not personally tested recovery treatments. Their cosmetic benefits should not be confused with medical treatment or guaranteed nail repair.
What If Your Nails Keep Peeling or Breaking?
Your Nail Tips Keep Peeling
Immediate fix: Shorten the affected nails and gently smooth loose, snagging edges without pulling on attached layers.
Prevention: Reduce prolonged water exposure, moisturize regularly, and avoid peeling off future manicures.
Your Nails Feel Extremely Thin
Immediate fix: Stop buffing and avoid adhesive enhancements. Keep nails short to reduce bending.
Prevention: Request gentler nail preparation and professional removal in the future.
Your Cuticles Are Dry and Cracked
Immediate fix: Apply fragrance-free moisturizer followed by a thin layer of petroleum jelly to intact skin.
Prevention: Moisturize after handwashing and avoid cutting protective cuticle tissue.
Your Nails Hurt After Removal
Immediate fix: Stop using cosmetics, adhesives, and filing tools on the painful nails. Seek medical evaluation if pain is significant, worsening, or persistent.
Prevention: Never force off attached enhancements, and stop any removal procedure that causes pain.
How Can You Prevent Damage During Your Next Manicure?
Once your nails have recovered, changing a few salon habits may help prevent another cycle of weakness.
- Choose an experienced technician: Ask how they protect the natural nail during preparation.
- Avoid excessive buffing: Your nail plate doesn’t need aggressive thinning to look attractive.
- Never peel off gel: Use a suitable professional removal method for the exact product.
- Protect your cuticles: Avoid cutting living skin or forceful cuticle manipulation.
- Schedule breaks when needed: Allow fragile nails to recover before applying new enhancements.
If you normally remove gel at home, learn why some popular methods are ineffective in our guide to removing gel nails with vinegar or coconut oil.
Frequently Asked Questions
Q: Can weak nails become strong again after acrylic removal?
A: Yes, many nails improve as healthier nail grows and damaged sections are trimmed away. Moisturizing, reducing mechanical stress, and avoiding aggressive filing help prevent additional breakage during that process.
Q: Should you use nail hardener after gel removal?
A: Not automatically. Very rigid hardeners can make brittle nails more prone to cracking. Start with moisturizing and protection, and avoid hardening treatments on painful or visibly damaged nails.
Q: How long should you leave your nails bare after acrylic removal?
A: A break of one to two weeks can be a starting point, but significantly weakened nails may need much longer without enhancements. Wait until tenderness and visible damage improve rather than following a fixed calendar deadline.
Q: Does cuticle oil repair damaged nails?
A: Cuticle oil helps condition dry nail surfaces and surrounding skin, but it cannot rebuild keratin layers that were filed or peeled away. Existing structural damage must gradually grow out.
Q: Do nails need to breathe between gel manicures?
A: Nails don’t need air exposure to breathe. However, a break from polish and enhancements makes moisturizing easier and gives you time to inspect the natural nail and avoid further damage.
Give Your Natural Nails Time to Recover
Learning how to care for weak nails after gel or acrylic removal starts with gentle habits: keep them short, moisturize consistently, protect them from chemicals, and avoid unnecessary filing.
You can’t instantly reverse structural nail damage, but you can prevent additional breakage while healthier nail grows forward.
Save this nail recovery guide on Pinterest so you can follow the routine whenever your nails need extra care after a manicure.

Hi, I’m Jessica, the creator behind Unique Lash & Nails Katy.
I created this website for anyone who loves beautiful nails as much as I do. Here, I share trendy nail designs, seasonal manicure ideas, easy nail care tips, honest product recommendations, and step-by-step guides to help you create salon-worthy nails at home. Whether you’re looking for everyday inspiration or your next favorite nail trend, I hope you’ll find something you love.