How to Sanitize Nail Tools: Easy 5-Step Guide at Home
Quick Answer
Scrub your nail tools with soap and warm water, then soak metal tools in a disinfectant like Barbicide for 10 minutes. Rinse them well, dry every surface completely, and store them in a clean, dry case. Toss porous items like emery boards and buffers instead of trying to sanitize them, and repeat the routine after every use if you share your tools.
Time needed
20 minutes (5 active)
Difficulty
Beginner
Items needed
5 basic supplies
Result lasts
Until your next manicure
Your nail tools might look spotless, but bacteria and fungi are invisible — and they love the warm, damp crevices of clippers and cuticle pushers. Skipping sanitation is how tiny nicks turn into painful infections. This guide gives you a simple five-step routine that takes about twenty minutes and works for every tool in your kit.


Can Dirty Nail Tools Actually Harm Your Nails?
Yes — and more often than you’d think. Every manicure creates micro-tears around your cuticles, and those tiny openings give bacteria and fungi a direct path under your skin. Dirty tools can carry staph bacteria, yeast, and the fungi behind nail infections, which is exactly why licensed salons must disinfect tools between clients.
At home the risk is lower but very real, especially when you share tools with family or friends. One person’s harmless skin bacteria can become another person’s infection. Watch for redness, swelling, or throbbing around your nails — these signs of unhealthy nails mean you should pause your nail routine and get professional advice.
What Do You Need to Sanitize Nail Tools at Home?
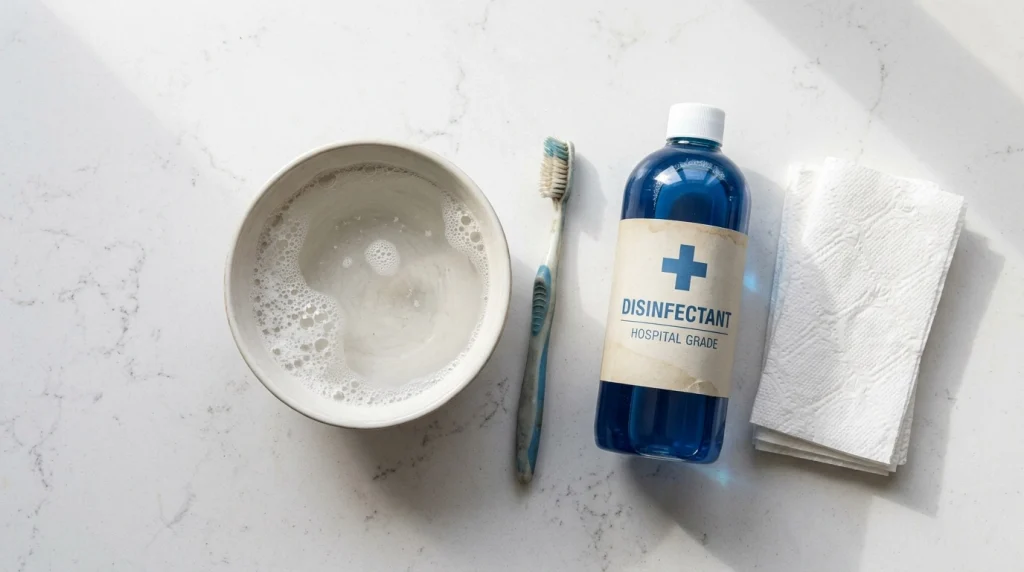
You don’t need salon equipment. Gather these five supplies before you start — having everything ready keeps the routine quick and mess-free.
- Warm water and antibacterial dish soap — soap lifts the oils, dead skin, and polish residue that disinfectant alone can’t cut through.
- An old toothbrush or nail brush — bristles reach the hinges and grooves where gunk hides from a quick rinse.
- Hospital-grade disinfectant — Barbicide is the blue liquid salons use; it kills bacteria, fungi, and viruses on hard, non-porous surfaces.
- A clean towel or paper towels — tools must dry fully, because lingering moisture breeds the very germs you’re trying to remove.
- Grab a small glass jar or plastic tray for the soak — it holds enough liquid to submerge your tools without wasting disinfectant.
Which Sanitizing Method Fits Your Tools?
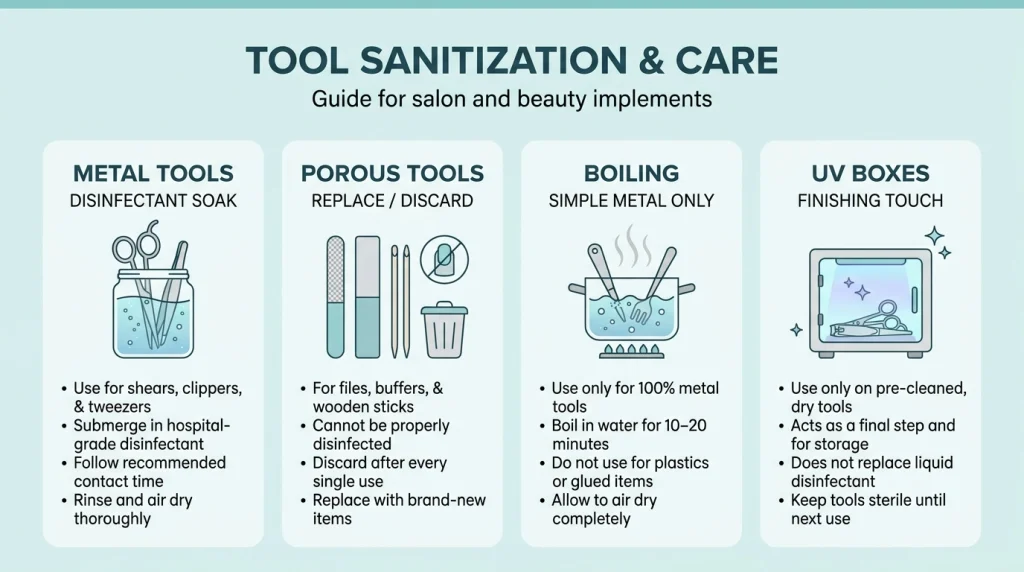
Not every tool can be sanitized the same way. Match the method to the material — the wrong approach can rust metal or leave porous tools still contaminated.
Metal tools: disinfectant soak (best for most people)
Clippers, nippers, metal pushers, and tweezers handle liquid disinfectant perfectly. Submerge them fully in properly diluted disinfectant for the contact time on the label — usually ten minutes. This method suits anyone with standard metal tools, and it’s the same standard salons follow. The upside: it kills a broad range of germs and costs very little per use. One caveat: you must measure the dilution correctly, and every tool needs a full rinse afterward.
Porous tools: replace, don’t sanitize
Emery boards, foam buffers, and wooden orange sticks soak germs deep into their fibers, where no disinfectant can reliably reach. Treat them as single-use or personal-use items and swap in fresh ones on a regular schedule. This rule applies to everyone — even salon professionals toss these between clients.
Boiling: only for simple all-metal tools
A ten-minute rolling boil kills most germs on plain stainless steel tools with no plastic or rubber parts. It suits minimalists who’d rather skip chemicals. The downside: boiling dulls sharp edges faster and can loosen glued joints, so reserve it for sturdy basics like plain clippers.
UV sterilizer boxes: a nice extra, not a replacement
UV-C boxes look impressive, but light can’t reach the shadowed crevices inside hinged tools. Use one as a finishing touch after a proper soak — never as your only method. If you’re assembling your kit from scratch, our beginner nail care tools guide shows what to buy first.
Warning
Never use household bleach on nail tools — it corrodes metal, pits the surface so germs hide even better, and leaves residue that irritates your skin. Skip the microwave too: metal tools spark, and uneven heating leaves cold spots where germs survive. When in doubt, stick to a disinfectant made for salon tools.
How Do You Sanitize Nail Tools? The Five-Step Routine
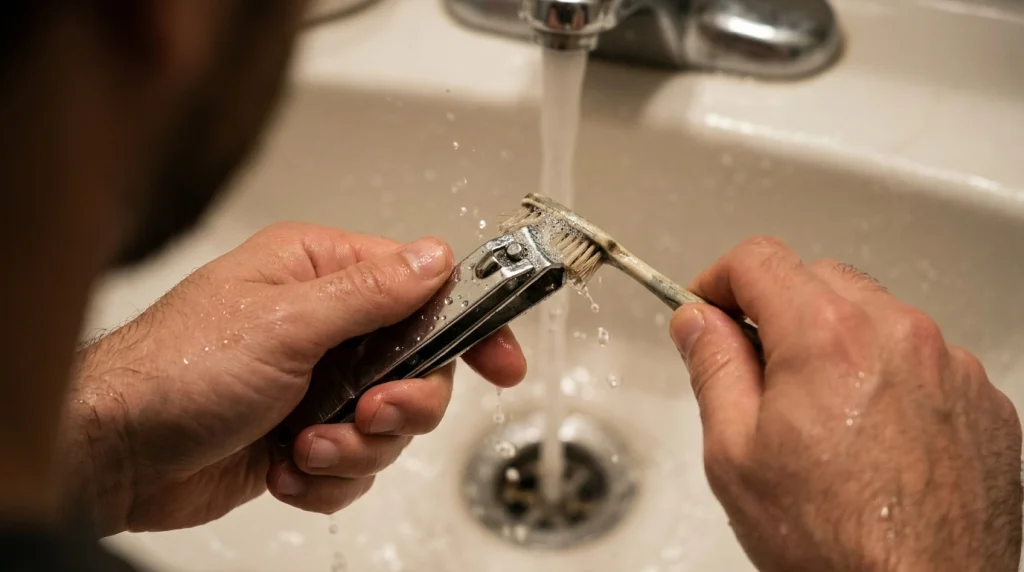
Follow these steps in order — each one sets up the next, and skipping the wash before the soak is the most common reason sanitizing fails.
1
Wash the tools with soap and warm water
Fill a bowl with warm water, add a squirt of antibacterial dish soap, and swish your metal tools for a full minute. This step removes the oils, skin cells, and polish residue that shield germs from disinfectant. Give your nails the same fresh start — learn how to clean nails at home while your tools soak.
Common mistake: Dunking tools straight into disinfectant without washing first. Organic debris neutralizes the active ingredients, so the soak barely works.
2
Scrub every hinge and groove
Take your old toothbrush and scrub the cutting edges, hinges, and textured grips under running water. These crevices trap debris that a simple rinse leaves behind. Spend an extra few seconds on spring mechanisms and the underside of clipper blades.
Common mistake: Scrubbing only the blades. The hinge of a clipper holds more grime than its cutting edge.
3
Soak in disinfectant for the full contact time
Mix your disinfectant exactly as the label directs, submerge the tools completely, and set a timer for the full contact time — ten minutes for most concentrates. Pulling tools out early or leaving parts above the liquid line leaves live germs on the surface. Never toss porous files or wooden sticks into the jar.
Common mistake: Guessing the dilution instead of measuring. Too weak and it won’t disinfect; too strong and it can damage tools and irritate your skin.
4
Rinse and dry every surface completely
Rinse each tool under clean running water to remove all disinfectant residue, then lay them on a fresh towel. Let them air-dry fully before you touch them again — even a little trapped moisture lets bacteria regrow within hours. Open hinged tools halfway so air reaches the inner surfaces.
Common mistake: Towel-drying the outside and packing tools away while the hinges are still damp inside.
5
Store them clean, dry, and separate
Place your dry tools in a clean pouch, case, or lidded container — not loose in a drawer with makeup and hair ties. Keep personal tools separate from shared ones so you always know which set is sanitized. A dedicated spot also reminds you to repeat the routine instead of letting months slide by.
Common mistake: Storing everything jumbled in one drawer, where clean tools pick up germs from the dirty ones.
How Long Does It Take, and How Often Should You Repeat It?
The whole routine takes about twenty minutes, and only five of those need your hands — the rest is soak time. Sanitize after every single use if you share tools with anyone. For tools only you touch, run the routine at least once a month, and always right after working around a hangnail or broken skin, when germs had an open door. To keep the rest of your routine on track, check how often to care for your nails overall.
Pro Tips That Make Sanitizing Easier
Pro Tip
Sanitize right after your manicure, not before it. Fresh residue washes off in seconds, while dried-on debris needs real scrubbing.
Pro Tip
Mix a fresh batch of disinfectant every session. Diluted solution loses strength as it sits, and a cloudy jar means the active ingredients are already spent.
Pro Tip
Buy your most-used tools in pairs. While one set soaks, the other is ready to use — you’ll never skip sanitizing just because you’re in a hurry.
Pro Tip
Write the date on new emery boards and buffers with a marker. You’ll replace them on schedule instead of guessing how old they are.
Sanitizing Do’s and Don’ts
Do
- +Wash with soap before you disinfect
- +Follow the dilution printed on the label
- +Dry every hinge and groove completely
- +Replace emery boards and buffers on schedule
- +Keep personal and shared tools in separate cases
Don’t
- −Use bleach or harsh household cleaners
- −Try to sanitize wooden or foam tools — toss them
- −Store tools while they’re still damp
- −Share tools without sanitizing between people
- −Skip the timer — soak for the full contact time
What If Something Goes Wrong?
Your tools smell like chemicals after soaking
Wash them again in warm soapy water, rinse thoroughly, and dry. Next time, rinse within a minute of the soak ending — residue gets much harder to remove once it dries onto the metal.
Rust spots appeared on your clippers
Moisture sat on the metal too long. Scrub the spots with a paste of baking soda and water, dry immediately, and store the tools with a silica gel packet. Stainless steel resists rust only when it dries fully between uses.
Your skin stung after using a freshly sanitized tool
Disinfectant residue was still on the tool. Rinse longer next time, and wait until tools are bone-dry before use — wet disinfectant transfers to skin far more easily than dry residue.
The disinfectant turned cloudy
It’s exhausted and won’t kill germs anymore. Pour it out, wash the jar, and mix a fresh batch — cloudiness means the active ingredients are used up. To avoid this, mix only what you need for one session.
Our Recommended Sanitizing Products
Recommended Product
Barbicide Disinfectant Concentrate
★★★★☆ Highly rated on Amazon
The blue disinfectant trusted in salons for decades — one small bottle mixes into gallons of soaking solution, so it lasts ages at home.
As an Amazon Associate, we earn from qualifying purchases.
Recommended Product
Ultrasonic Cleaner for Small Tools
★★★★☆ Highly rated on Amazon
Tiny vibrations shake debris out of hinges and grooves before your disinfectant soak — perfect for tools with fiddly moving parts.
As an Amazon Associate, we earn from qualifying purchases.
Recommended Product
70% Isopropyl Alcohol Spray
★★★★☆ Highly rated on Amazon
Handy for quick wipe-downs between full sanitizing sessions — just don’t rely on it as your only method.
As an Amazon Associate, we earn from qualifying purchases.
Recommended Product
Disposable Nail Files, Bulk Pack
★★★★☆ Highly rated on Amazon
Since porous files can’t be sanitized, a bulk pack of fresh ones keeps every manicure hygienic without the guilt of tossing pricey files.
As an Amazon Associate, we earn from qualifying purchases.
Frequently Asked Questions
Q: Can I sanitize nail tools with rubbing alcohol alone?
A: Alcohol works for a quick wipe-down, but it evaporates too fast to guarantee full disinfection, and it can’t remove caked-on debris. Use soap, water, and a proper disinfectant soak for real sanitizing — save alcohol for touch-ups between sessions.
Q: Can I boil my nail tools to sanitize them?
A: Yes, if they’re plain stainless steel with no plastic, rubber, or glued parts. Boil for ten minutes, then dry them immediately. Boiling dulls sharp edges over time, though, so a disinfectant soak is gentler for tools you want to last.
Q: How often should I replace nail files and buffers?
A: Swap emery boards every three to four uses, and foam buffers after one or two. Once the grit wears smooth they’re useless anyway — and since porous surfaces can’t be sanitized, fresh ones are the only hygienic option.
Q: Is Barbicide safe to use at home?
A: Yes, when you follow the dilution on the label. It’s made for salon tools, not skin — always rinse tools after soaking, keep the concentrate away from kids and pets, and store it out of reach.
Q: Can I put nail tools in the dishwasher?
A: Skip it. Dishwasher detergent is too harsh for fine edges, the heat warps plastic handles, and tools rattle against dishes and dull. A hand wash plus a disinfectant soak treats your tools far better in the same amount of time.
The Bottom Line
Here’s the one rule to remember: clean every tool after you use it, and never store them damp. That single habit prevents nearly every tool-related nail infection. Pair it with healthy nail habits and your nails will thank you.
Found this routine helpful? Save it to your nail care board on Pinterest so it’s there the next time your kit needs a refresh.

Hi, I’m Jessica, the creator behind Unique Lash & Nails Katy.
I created this website for anyone who loves beautiful nails as much as I do. Here, I share trendy nail designs, seasonal manicure ideas, easy nail care tips, honest product recommendations, and step-by-step guides to help you create salon-worthy nails at home. Whether you’re looking for everyday inspiration or your next favorite nail trend, I hope you’ll find something you love.