How Do I Make My Nails Glow? Easy Glow-in-the-Dark Nail Tutorial
Quick Answer
To make your nails glow in complete darkness, apply a white or pale base color, add two or three thin coats of phosphorescent glow-in-the-dark nail polish, and seal it with a clear top coat. Hold your finished nails under bright sunlight or a strong lamp for 30–60 seconds to “charge” the glow before you turn off the lights. Neon polish alone usually needs a UV black light and won’t glow by itself in a dark room.
Time needed
25–40 minutes
Difficulty
Beginner
Items needed
5 basic tools
Result lasts
4–7 days
Glow nails look like an ordinary bright manicure in daylight, then reveal a vivid effect when the room goes dark. The trick isn’t a special lamp or a complicated salon technique. You need the right type of pigment, an opaque base beneath it, and enough light exposure to activate it.
This guide shows you the easiest regular-polish method first. You’ll also learn why some “glow” colors only react under a black light, how to make the effect brighter, and what to fix when your manicure barely glows.


What do you need to make nails glow in the dark?
- Nail polish remover or rubbing alcohol: It clears away oil that can cause early peeling.
- Clear base coat: It helps the color grip and protects your natural nail from staining.
- White or very pale nail polish: An opaque background reflects more visible light through the glow layer, so the color appears brighter.
- Glow-in-the-dark nail polish: Choose a product labeled phosphorescent or glow in the dark—not merely neon, fluorescent, or UV reactive.
- Clear top coat: A thin glossy layer smooths the slightly gritty glow pigment and reduces chipping.
Recommended Product
Phosphorescent Glow-in-the-Dark Nail Polish
★★★★☆ Popular style on Amazon
A polish specifically labeled “glow in the dark” gives you a visible effect without keeping a black light switched on.
As an Amazon Associate, we earn from qualifying purchases.
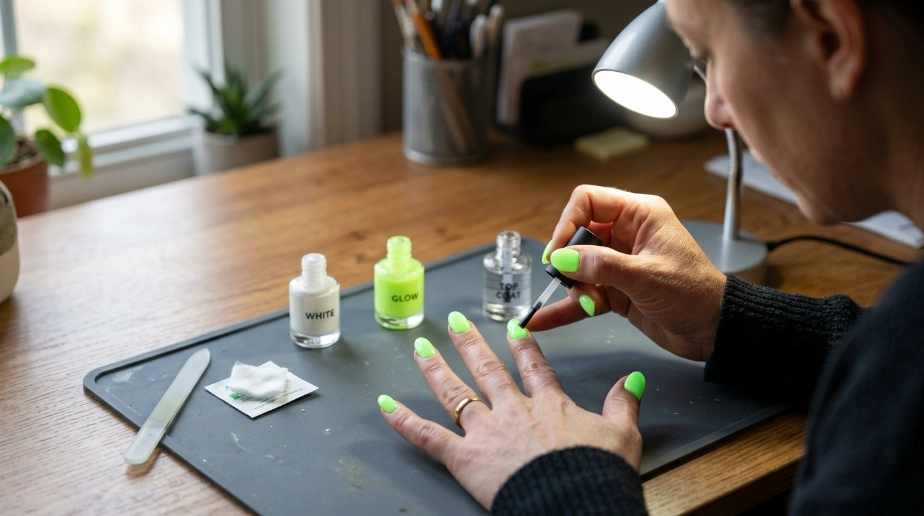
How do you apply glow-in-the-dark nail polish step by step?
 Save
Save1Clean and shape your nails
Remove old polish, file the free edge, and gently push back your cuticles. Wipe each nail with rubbing alcohol or polish remover, then let it dry completely so no oil or hand cream remains on the nail plate.
Common mistake: Applying polish after cuticle oil or lotion. That slippery film stops the base coat from bonding and can make the whole manicure lift in a sheet.
2Apply a thin base coat
Brush on one thin layer from just above the cuticle to the tip. Cap the free edge with a light swipe, then wait about two minutes or until the base feels dry rather than wet.
Common mistake: Flooding the cuticle. Polish touching your skin creates a lifted edge where water can get underneath.
3Paint an opaque white base
Add one or two thin coats of white polish, allowing each layer to become touch-dry. The white base keeps your natural nail color from muting the pigment and makes sheer glow polish look even.
Common mistake: Using one thick white coat to save time. Thick polish traps solvent, stays soft underneath, and dents when you add the glow layer.
4Layer the glow polish
Roll the closed bottle between your palms for 20 seconds to redistribute settled pigment. Apply two thin coats, or a third if the finish still looks patchy, and wait two to three minutes between layers.
Common mistake: Shaking the bottle hard. That mixes air bubbles into the polish and can leave tiny pits across the surface.
5Seal and charge the glow
Finish with one thin clear top coat and let the manicure dry fully. Expose your nails to direct sunlight or a bright lamp for 30–60 seconds, then move into a dark room to see the effect.
Common mistake: Testing the nails before charging them. Phosphorescent pigment stores light energy, so an uncharged manicure can look disappointingly dim even when you applied it correctly.
Pro Tip
Paint a test swatch on a plastic nail tip or a strip of clear tape first. Charge it, check it in a truly dark space, and count how long the glow remains useful. You’ll know how many coats you need before committing to all ten nails.
Which glow effect should you choose?
True glow-in-the-dark polish
Phosphorescent polish absorbs light and slowly releases it after the lights go out. It suits parties, concerts, Halloween looks, or any time you want your nails visible in complete darkness. The first few minutes are usually the brightest, then the glow gradually fades and needs another light charge.
You can wear it as a full manicure or paint moons, stars, drips, French tips, and tiny ghost details over a dark background. For more seasonal inspiration, pair the technique with these simple Halloween nail ideas or create luminous accents on ghost Halloween nails.
UV-reactive or neon polish
Fluorescent color appears intensely bright under a UV black light but usually becomes ordinary—or invisible—when the light is switched off. Choose this effect for clubs, bowling alleys, festivals, or black-light events where UV lighting remains on. It often gives you stronger hot-pink, orange, and blue shades than true glow pigment.
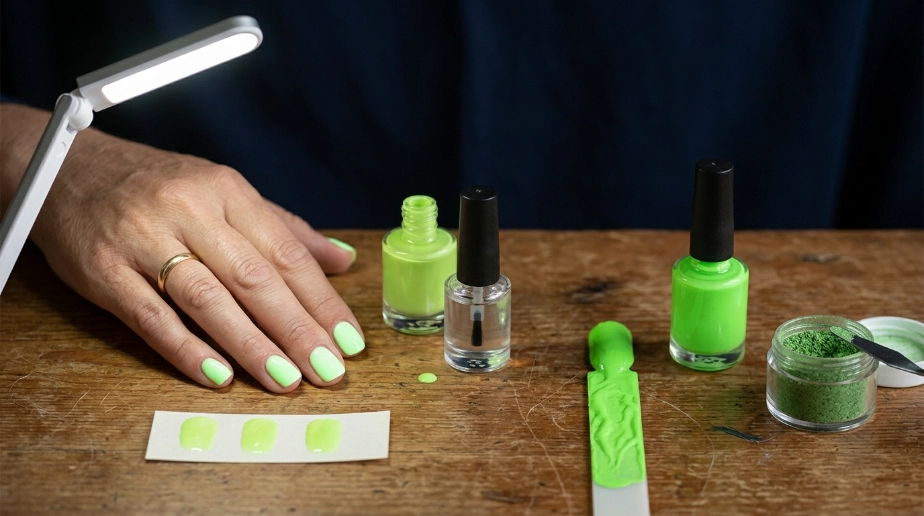
Glow powder mixed with clear polish
Loose cosmetic-grade glow pigment lets you control the strength, but it takes more care. Mix a small amount into a separate puddle of clear polish rather than pouring powder into your whole bottle. Add pigment gradually until the blend brushes smoothly; too much produces a lumpy layer that chips easily.
Warning
Use only cosmetic-grade pigment intended for nails or skin. Craft powder may contain particles, colorants, or contaminants that were never assessed for cosmetic contact. Keep loose powder away from your eyes and avoid breathing the dust.
How long will glowing nails last?
A regular-polish glow manicure generally stays presentable for four to seven days. The glow pigment doesn’t “run out” after one night; you can recharge it repeatedly whenever it becomes dim. Wear at the tips, peeling around the cuticles, and scratches in the top coat usually end the manicure before the pigment stops responding.
The visible glow after each charge varies by formula, layer thickness, charging light, and darkness. Expect the strongest effect during the first 5–15 minutes. A softer glow may linger much longer, but your eyes often need a minute to adjust before you can see it.
Protect the manicure by wearing gloves for dishes and cleaning, because long water exposure can soften the layers and encourage lifting. If you use gel instead of regular polish, follow the exact lamp and curing directions supplied with that gel system; “charging” glow pigment is different from curing uncured gel.
What should you do—and avoid—for a brighter glow?
 Save
SaveDo
- +Use a smooth white base under sheer glow polish.
- +Apply several thin coats and dry between them.
- +Recharge your nails immediately before the dark-room moment.
Don’t
- −Assume every neon bottle glows without UV light.
- −Apply one heavy coat that stays soft underneath.
- −Use industrial or craft pigment on your nails.
How can you make glow nail art look more professional?
Keep luminous details slightly larger. Tiny dots contain very little pigment and fade from view first. Make stars, moons, flames, or French tips wide enough to hold two opaque glow layers.
Charge every nail evenly. If one hand sits closer to the lamp, it may look brighter even though both hands have the same polish. Turn your hands once and expose the thumbs separately because they often hide at the side.
Test the design in darkness between coats. A daylight pattern may have thin spots you can’t see until the room goes dark. One quick charge reveals exactly where a second detail coat is needed.
Choose contrast for daytime too. Pale green glow stars over navy or black polish create a clear pattern before and after dark. You can adapt the contrast to spooky Halloween nail designs or add a luminous web accent to these spider Halloween nail ideas.
Why aren’t your nails glowing brightly?
The polish glows only under a black light
You probably bought fluorescent or UV-reactive polish. Use it with a black light, or replace it with a bottle clearly labeled phosphorescent or glow in the dark for an afterglow when the room is completely dark.
The glow looks patchy
Pigment may have settled in the bottle or the coats may be too sparse. Roll the bottle between your palms, add another thin coat over the weak areas, and charge the finished nail evenly.
The glow disappears quickly
A short bright burst followed by gradual fading is normal. Charge the manicure immediately before you need it, use a strong light source, and add a second or third glow coat next time so more pigment can store light.
The surface feels rough or gritty
Glow particles can create texture, especially after several coats. Let the color dry, then float a slightly fuller—but not thick—layer of clear top coat over the nail without pressing the brush into the pigment.
Recommended Product
Opaque White Nail Polish
★★★★☆ Popular style on Amazon
An even white background is the simplest way to improve a sheer glow polish without piling on too many textured coats.
As an Amazon Associate, we earn from qualifying purchases.
Which products help a glow manicure last longer?
You don’t need a large kit, but each layer should have one clear job. A long-wear nail base coat is useful if polish tends to peel from your nails within a day or two. Choose a regular air-dry formula when you’re using regular glow polish; mixing an uncured gel base with ordinary polish can leave the manicure soft or wrinkled.
For the color layer, select a glow polish whose listing clearly distinguishes an afterglow from a black-light reaction. Pale green is a forgiving first choice because it tends to look brighter than deeper colors. If you prefer detailed art instead of a full luminous nail, use a small nail-art liner brush set. A dotting tool makes moons and dots consistent, while a fine liner gives you cleaner stars, webs, and French tips.
Finish with a fast-dry clear nail top coat that doesn’t have a strong tint. Brush it on after the glow color feels dry to a light touch. Dragging top coat across wet pigment can create bald patches, while repeated heavy layers may make the manicure bulky and slow to harden.
Keep your expectations practical when comparing products online. A camera can exaggerate glow through long exposure, and a seller’s photo may show the polish immediately after an intense charge. Look for customer photos taken in ordinary darkness, check whether the formula needs UV light, and read recent comments about drying time and texture. Those details tell you more than the brightest promotional image.
Frequently asked questions about glowing nails
Q: Can you make normal nail polish glow in the dark?
A: Normal polish won’t store and release light by itself. You can add a cosmetic-grade glow pigment to clear polish or apply a transparent glow top coat over your favorite color.
Q: Do glow-in-the-dark nails need a UV lamp?
A: Regular phosphorescent nail polish doesn’t need a curing lamp; it air-dries like ordinary polish and charges under bright light. Gel glow polish still needs the correct curing lamp because the gel base must cure safely.
Q: What color glows brightest in the dark?
A: Green and yellow-green phosphorescent pigments commonly appear brightest to your eyes. Blue can also look strong, while pink, red, and purple formulas may need more coats or a longer charge.
Q: Is glow-in-the-dark nail polish safe?
A: Use a nail product from a reputable cosmetic seller and follow its label. Don’t substitute craft pigment, avoid applying polish to broken or irritated skin, and stop using it if you notice burning, swelling, or a rash.
Q: Can you put a top coat over glow polish?
A: Yes. One clear top coat protects the color and smooths textured pigment. Test unusual tinted or matte top coats first, because a cloudy finish can reduce the amount of light reaching the glow layer.
Ready to make your nails glow?
Your brightest result comes from a simple combination: clean nails, a white base, two or three thin glow-polish layers, and a fresh charge under strong light. Save this tutorial to your Pinterest nail board so you can follow the steps before your next party, concert, or Halloween manicure.

Hi, I’m Jessica, the creator behind Unique Lash & Nails Katy.
I created this website for anyone who loves beautiful nails as much as I do. Here, I share trendy nail designs, seasonal manicure ideas, easy nail care tips, honest product recommendations, and step-by-step guides to help you create salon-worthy nails at home. Whether you’re looking for everyday inspiration or your next favorite nail trend, I hope you’ll find something you love.