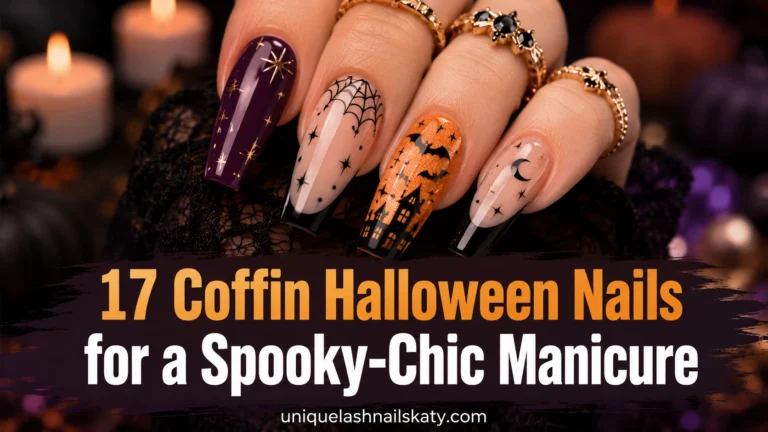
17 Spider Halloween Nails to Save for This Season
If you love Halloween but you’re a little tired of the same three pumpkin designs, spider nails are your answer. They’re spooky without being over the top, and they work on absolutely any nail shape or skill level.
Below you’ll find 17 spider and spiderweb designs to save, screenshot, and bring straight to your nail tech (or DIY yourself). Let’s get into it.
✦ Our Top Picks at a Glance
Best Overall — Lavender Ombre Ghost & Web French
Best for Beginners — Sheer Nude Fine-Line Webs
Most Trendy — Chrome Silver Web Swirl
Best for Special Occasions — Rainbow Ombre Web Stiletto
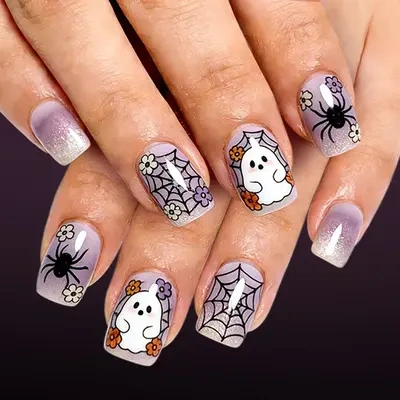


#1. Lavender Ombre Ghost & Web French
Picture a soft lavender ombre base that fades into shimmery white tips, then gets layered with hand-painted webs, tiny orange flowers, and a friendly cartoon ghost. It’s the kind of set that reads “cute Halloween,” not “haunted house.”
Best For — the girl who wants Halloween without the horror
Pro Tip — Use a size 000 detail brush and dilute your white polish with one drop of thinner so the web lines stay crisp instead of blobbing.
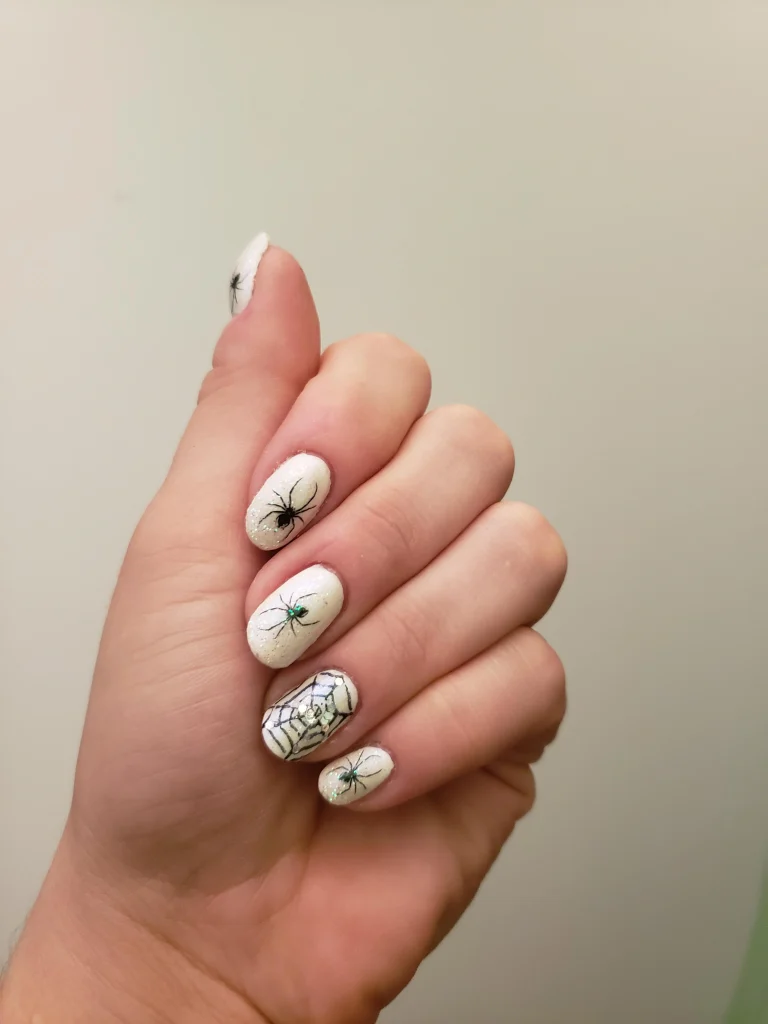
#2. Glitter White Spider Accent
This one’s for anyone who wants sparkle to do most of the talking. A fine iridescent glitter base carries hand-drawn black spiders on most nails, while a single ring finger gets a delicate silver spiderweb with a tiny rhinestone at its center.
Best For — brides-to-be who still want a Halloween moment
Pro Tip — Apply your glitter glitter top coat in two thin layers rather than one thick one, so it stays smooth instead of gritty under your top coat.
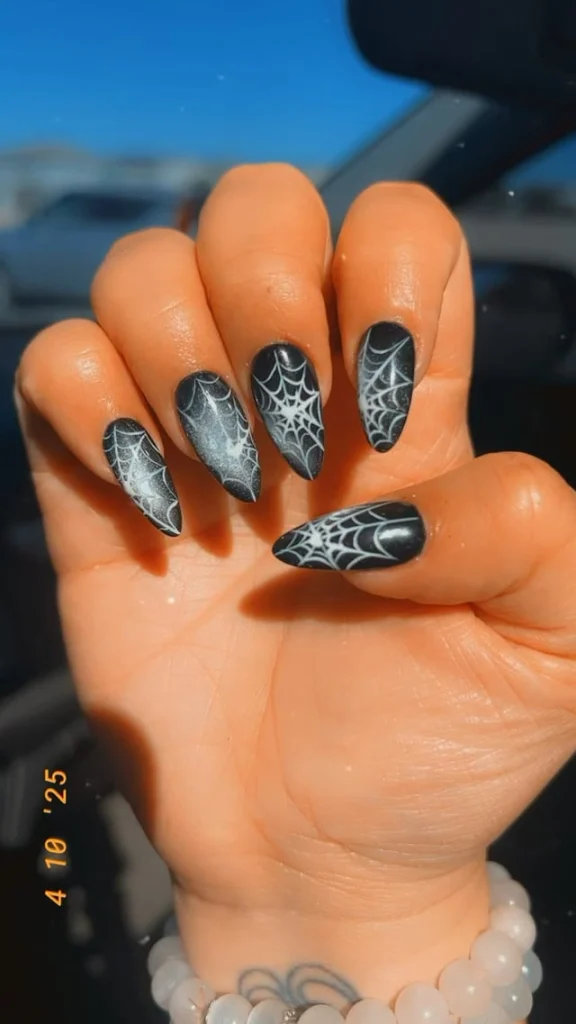
#3. Galaxy Black Stiletto Webs
Unlike the softer looks on this list, this one goes bold with a deep, shimmery charcoal base and full-nail white spiderwebs that stretch from cuticle to tip. The sharp stiletto shape makes every web look like it’s about to catch something.
Best For — a night-out look with real drama and edge
Pro Tip — Start each web with one straight center line, then add 4-5 connecting arcs working outward, curing each layer for a full 30 seconds before adding the next.
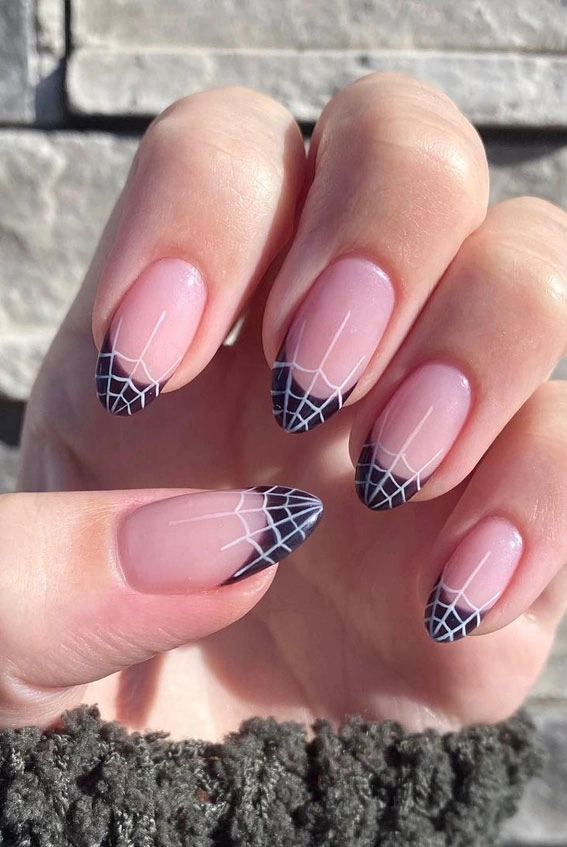
#4. Almond Web French Tips
This spin on a classic french tip swaps the plain white line for a black spiderweb tip over a sheer pink base. It’s glossy, it’s wearable past October 31st, and it still gets the message across.
Best For — office-appropriate Halloween nails
Pro Tip — Use a striping brush held at a 45° angle to pull the web threads from the tip line down, so each thread tapers naturally instead of ending blunt.
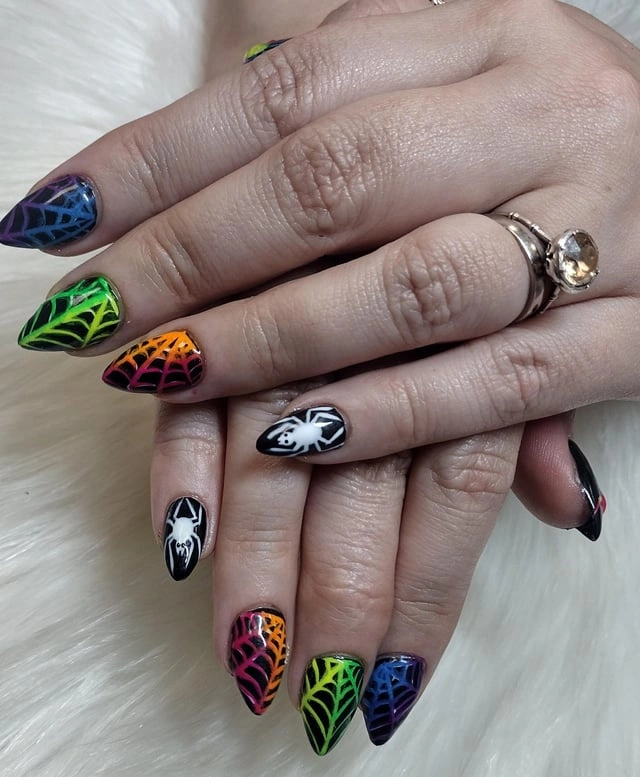
#5. Rainbow Ombre Web Stiletto
Each stiletto nail here airbrushes into a different jewel tone — purple, blue, green, orange, red — then gets a black spiderweb layered on top, with one accent nail flipping the formula to a white spider on solid black. The ring on this hand isn’t part of the manicure, but it fits the mood perfectly.
Best For — costume parties and photo-ready Halloween nights
Pro Tip — Blend your ombre colors while the base coat is still slightly tacky, using a makeup sponge in a dabbing motion rather than swiping, so the colors gradient instead of streak.
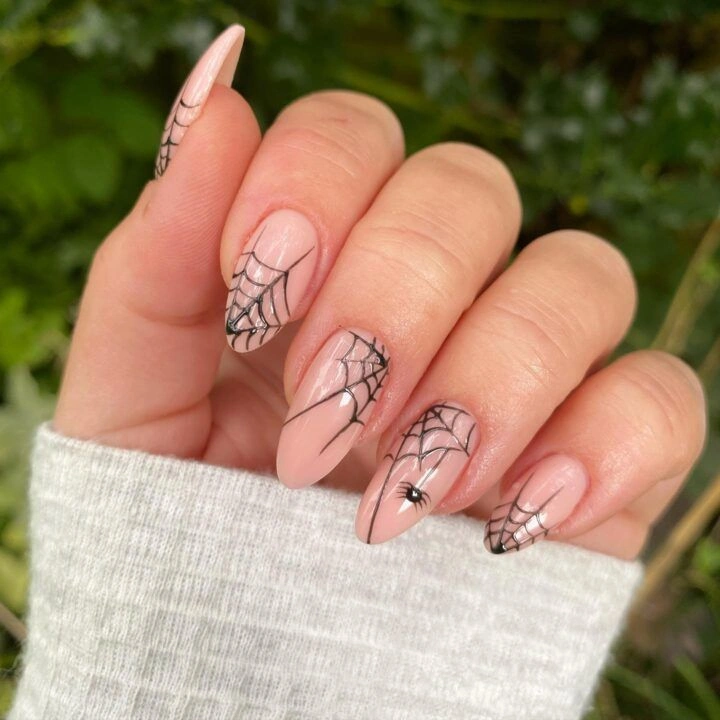
#6. Sheer Nude Fine-Line Webs
Feeling like you want spider nails but nothing loud? This is the set for you. A glossy, almost bare nude base carries just a few fine black web lines per nail, with one tiny spider tucked near the cuticle of a single finger.
Best For — first-timers trying nail art for the first time
Pro Tip — Use a detail liner brush with only 2-3 bristles loaded so each line stays under 1mm wide.
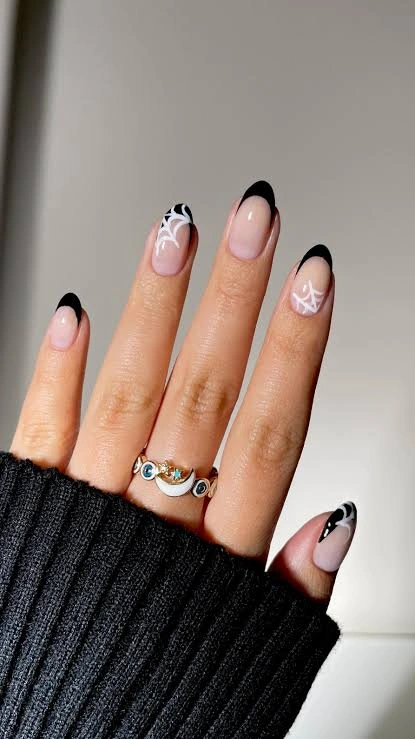
#7. Black Tip Web Moon French
Short and round nails get a moody upgrade here with solid black french tips, a single web accent nail, and a crescent-moon nail left bare for contrast. The stacked moon and star rings on this hand tie the whole witchy vibe together.
Best For — anyone with short nails who still wants an edgy look
Pro Tip — Use tape guides positioned at a 60° angle from the cuticle to get a symmetrical french tip on both hands before freehanding the web.
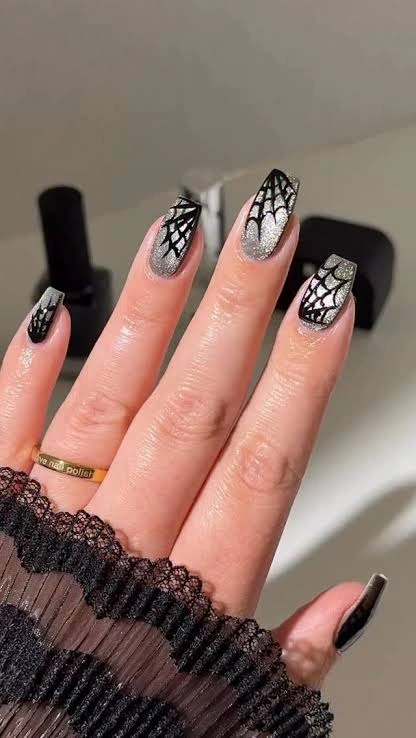
#8. Silver Glitter Ombre Web
Here’s why this one’s a scene-stealer: coffin-shaped nails fade from black at the base into a shimmering silver glitter tip, and a black spiderweb is layered right over the sparkle. It photographs beautifully under any kind of light.
Best For — a Halloween party where you want to catch the light
Pro Tip — Seal your glitter gradient with two coats of high-shine top coat, curing 45 seconds each, so the glitter edges don’t snag on fabric.
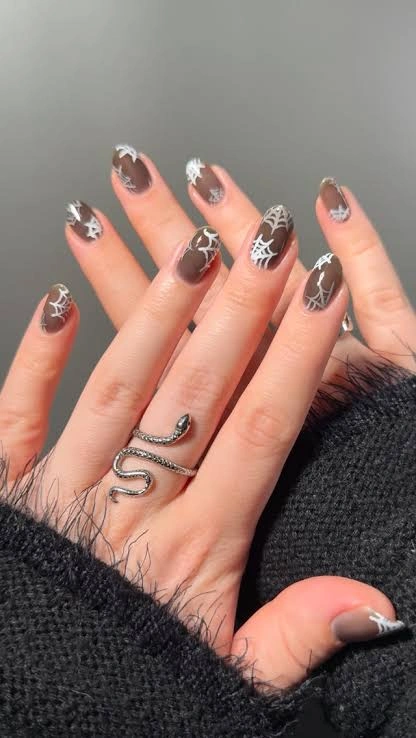
#9. Mocha Brown White Web Lines
This one swaps black for brown, giving it a warmer, more autumn-leaning feel than most spider nails. White web lines sit crisp against the milky mocha base, and a silver snake ring adds just the right amount of extra bite.
Best For — fans of fall color palettes over traditional black
Pro Tip — Mix your own mocha shade with a 3:1 ratio of warm beige to chocolate brown polish so it doesn’t read too orange or too gray.
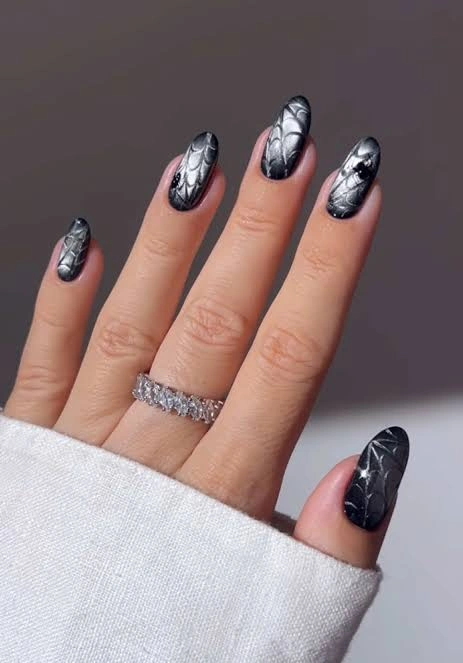
#10. Chrome Silver Web Swirl
Mirror-finish chrome nails already look expensive on their own, but adding a black spiderweb pattern over the reflective silver takes it somewhere completely different. It’s giving spooky-meets-sci-fi, and it works.
Best For — trend-followers who want the newest thing on Pinterest
Pro Tip — Apply your chrome powder with a silicone applicator in small circular motions for 15-20 seconds per nail to avoid streaking.
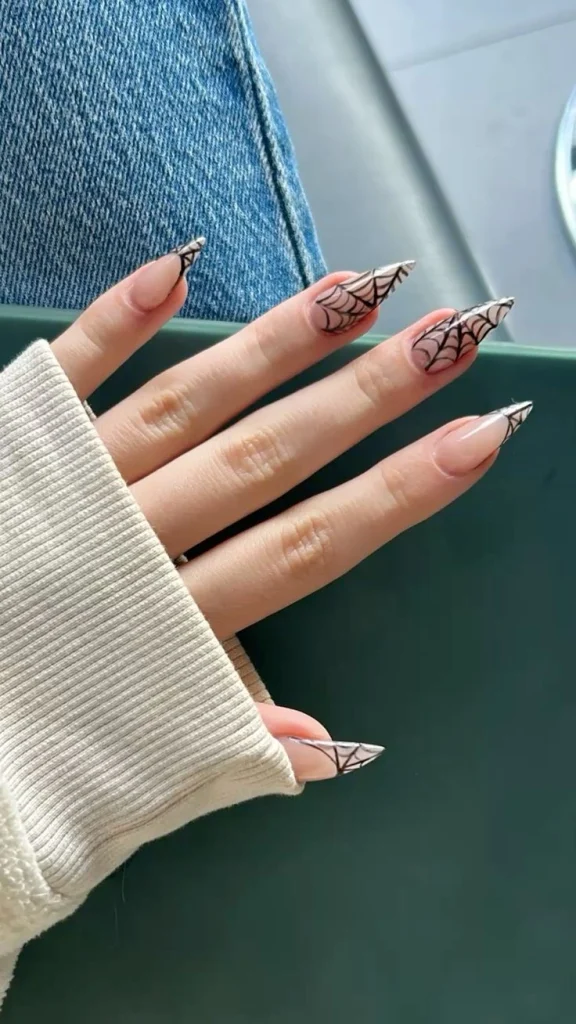
#11. Long Clear Web Stiletto Tips
So what does this mean for you if you love length? This set keeps the nail almost bare and clear all the way down, saving the black spiderweb detail for the very tip of each dramatic stiletto point.
Best For — anyone who wants length to be the main statement
Pro Tip — File your stiletto shape first using a 180-grit file, then add the web design last, since sharp tips flex less and hold fine linework better once fully shaped.
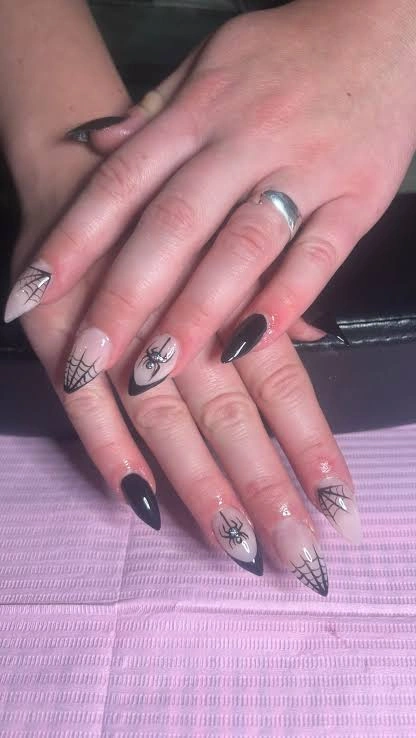
#12. Black French Stiletto Spiders
Here’s a set that goes heavier on the spider itself rather than just the web. Glossy black stiletto tips pair with nude nails featuring full hand-painted spiders and webs, giving it a more literal, costume-ready Halloween feel.
Best For — trick-or-treating with kids and full costume days
Pro Tip — Paint the spider’s body as two small ovals first, let it cure for 30 seconds, then add eight legs on top so they stay crisp instead of dragging through wet polish.
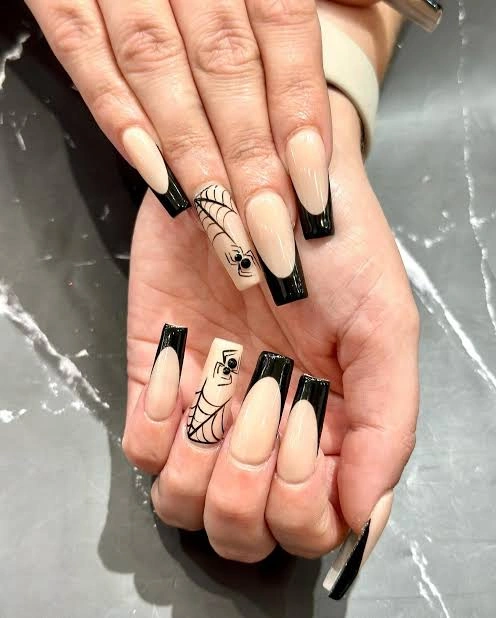
#13. Nude Coffin Black Tip Spider
Long coffin nails in a warm nude get bold, blunt black french tips here, with one accent nail dedicated entirely to a large hand-painted spider and web. That’s not all — the clean geometry of the tips makes it feel more high-fashion than horror.
Best For — fans of bold, editorial-style Halloween manicures
Pro Tip — Use a French tip guide sticker positioned exactly 5mm from the tip on every nail so the black line stays perfectly even across all ten fingers.
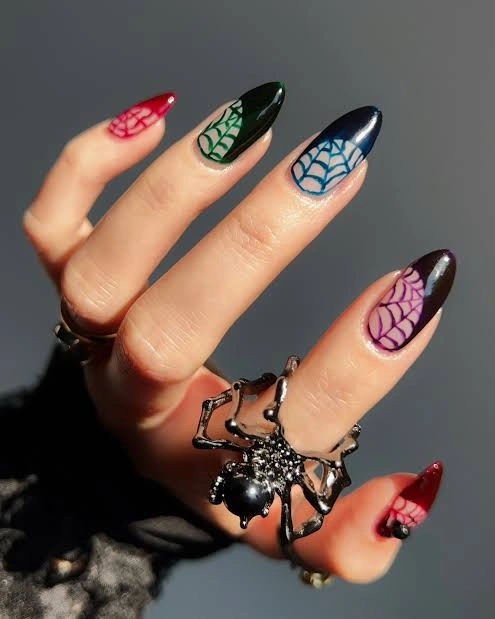
#14. Jewel Tone Web Rainbow
This one’s for the free spirits who don’t want to pick just one color. Each almond nail gets its own deep jewel tone — ruby, emerald, sapphire, plum — with a matching web painted in a lighter shade over the top, finished off with a dramatic 3D spider ring.
Best For — those who never settle on a single nail color
Pro Tip — Paint each web in a color two shades lighter than its base nail so the pattern stays visible instead of blending in under gel top coat.
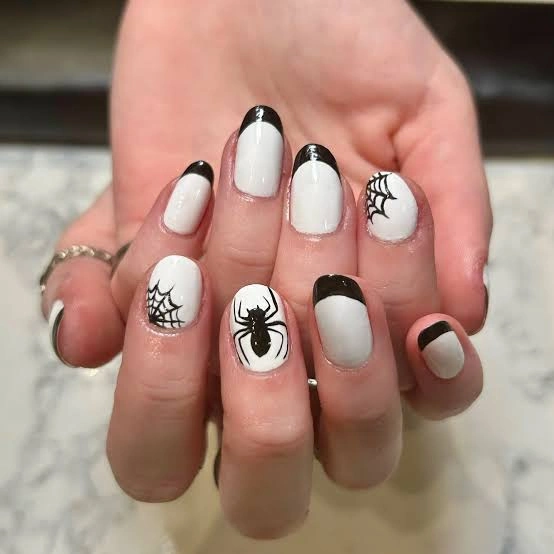
#15. White Square Black Tip Spider
Crisp white square nails with solid black diagonal tips make a simple, graphic base, then a single accent nail brings in a bold black spider and a smaller nail gets a delicate web outline. The high-contrast palette keeps every detail easy to see, even from across the room.
Best For — square-nail lovers who want maximum contrast
Pro Tip — Paint your white base in two coats, waiting a full 2 minutes between coats, so the black tip doesn’t drag streaks of white into it.
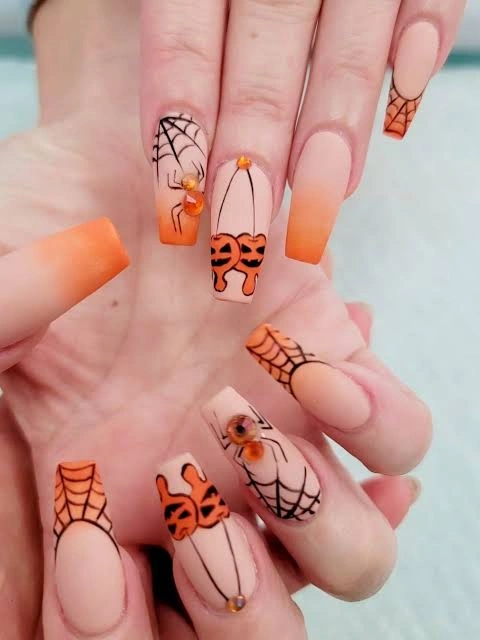
#16. Orange Ombre Pumpkin Spider
Unlike the darker looks on this list, this one leans fully into classic Halloween orange. Matte orange ombre tips pair with 3D pumpkin nail charms, hand-painted spiders, webs, and little jeweled accents for a maximalist, trick-or-treat-ready set.
Best For — go-big-or-go-home Halloween enthusiasts
Pro Tip — Attach 3D charms with a small dot of thick gel builder rather than regular top coat, curing for a full 60 seconds so they don’t lift within the first week.
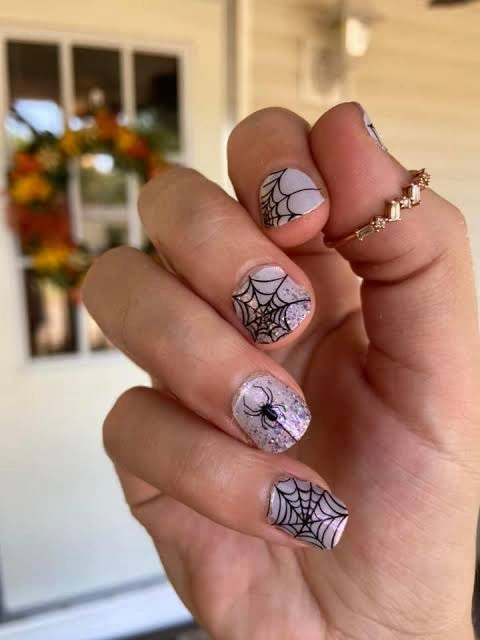
#17. Lavender Glitter Web Round
Rounding out the list is a soft, short-nail-friendly set: pale lavender and white nails in a mix of matte and glitter finishes, each carrying a different-sized black spiderweb, with one nail adding a small hand-painted spider for good measure.
Best For — a low-maintenance everyday Halloween manicure
Pro Tip — Mix a pea-sized drop of holographic glitter into your top coat rather than applying it loose, for even sparkle distribution in one pass.
How to Choose the Right Nail Design
With 17 options in front of you, narrowing it down comes down to a few practical factors. Here’s what actually matters when picking your set.
- Nail shape — Stiletto and almond shapes show off full-nail webs beautifully, while square and short round nails work best with accent-nail or tip-only designs.
- Skin tone — Warmer skin tones tend to glow next to orange, brown, and gold-toned designs, while cooler tones pop against silver, lavender, and jewel colors.
- Occasion — Save the rainbow ombre and chrome looks for parties and photos, and lean on the nude french or fine-line designs for work or school.
- Skill level — If you’re doing this yourself, start with fine-line or single-accent-nail designs before attempting full hand-painted spiders.
What You’ll Need
Whether you’re headed to the salon with inspo pics or doing this at your kitchen table, these are the tools that make spider nail art actually look clean.
For fine web lines and spider legs
Thin, controllable formula made for linework
For clean french tips and straight lines
For curing gel polish between design layers
Spiders, pumpkins, and rhinestones for accent nails
Seals designs and adds long-lasting shine
Pro Tips for a Long-Lasting Manicure
Cap Every Free Edge
Always swipe your top coat across the very tip of the nail, not just the top. This one habit alone can add several extra days of wear before chipping starts.
Cure in Thin Layers
Thick gel layers trap uncured product underneath, which leads to peeling. Keep each layer thin and cure for the full recommended time before adding detail work on top.
Wipe the Tacky Layer Correctly
After your final cure, wipe with a lint-free pad soaked in cleanser using one direction only. Going back and forth can drag your fine web lines.
Apply Cuticle Oil Daily
Dry cuticles pull polish away from the edges faster than almost anything else. A quick swipe of oil each night keeps your design sealed in place longer.
Frequently Asked Questions
Q: How do you paint a simple spiderweb on your nails?
A: Start with one straight vertical line down the center of the nail, then add 4-5 curved horizontal lines crossing it, working from the base outward. Connect the lines with small dots or dashes for extra texture.
Q: What nail shape looks best with spiderweb designs?
A: Almond and stiletto shapes give webs the most surface area to spread across, but square and round shapes work great for simpler tip or accent-nail versions.
Q: Can you do spider nails without press-ons or a salon visit?
A: Yes. A detail brush, striping polish, and a steady hand are all you really need to hand-paint most of the designs on this list at home.
Q: How long do Halloween nail designs typically last?
A: With gel polish and proper edge-capping, most of these designs hold up for two to three weeks before you’ll notice any lifting or chipping.
Recommended Product
Professional Nail Art Detail Brush Set
★★★★☆ Highly rated on Amazon
If you’re attempting any of the hand-painted web or spider looks on this list, a proper detail brush set makes the linework so much easier to control.
As an Amazon Associate, we earn from qualifying purchases.
Final Thoughts
From soft lavender ghosts to full-on chrome webs, there’s a spider design here for every comfort level and every Halloween mood. The best part is that most of these can be scaled up or down depending on how bold you’re feeling this year.
Which of these nail looks are you trying first? Save this post to Pinterest so you can come back to it whenever you need fresh nail inspo!

Hi, I’m Jessica, the creator behind Unique Lash & Nails Katy.
I created this website for anyone who loves beautiful nails as much as I do. Here, I share trendy nail designs, seasonal manicure ideas, easy nail care tips, honest product recommendations, and step-by-step guides to help you create salon-worthy nails at home. Whether you’re looking for everyday inspiration or your next favorite nail trend, I hope you’ll find something you love.