Peeling Nails After Gel or Acrylic Removal: Easy Care
Quick Answer
To care for peeling nails after gel or acrylic removal, keep your nails short, gently smooth snagged edges, and apply cuticle oil or petroleum jelly several times daily. Avoid buffing, picking, harsh removers, and new enhancements while your nails recover. Wear gloves during wet chores and allow healthier nail to grow in. Minor dryness can improve within days, but damaged nail layers may take several months to grow out completely.
Just removed your gel or acrylic manicure and discovered thin, flaky nails underneath? Those peeling layers can look alarming, especially when your natural nails felt strong before your appointment.
The good news is that many cases of surface damage improve with gentle care and time. You don’t need an expensive repair treatment or another manicure to hide the problem.
Here’s how to protect your peeling nails, choose helpful products, recognize warning signs, and build a simple recovery routine that actually fits your day.


Why Do Nails Peel After Gel or Acrylic Removal?
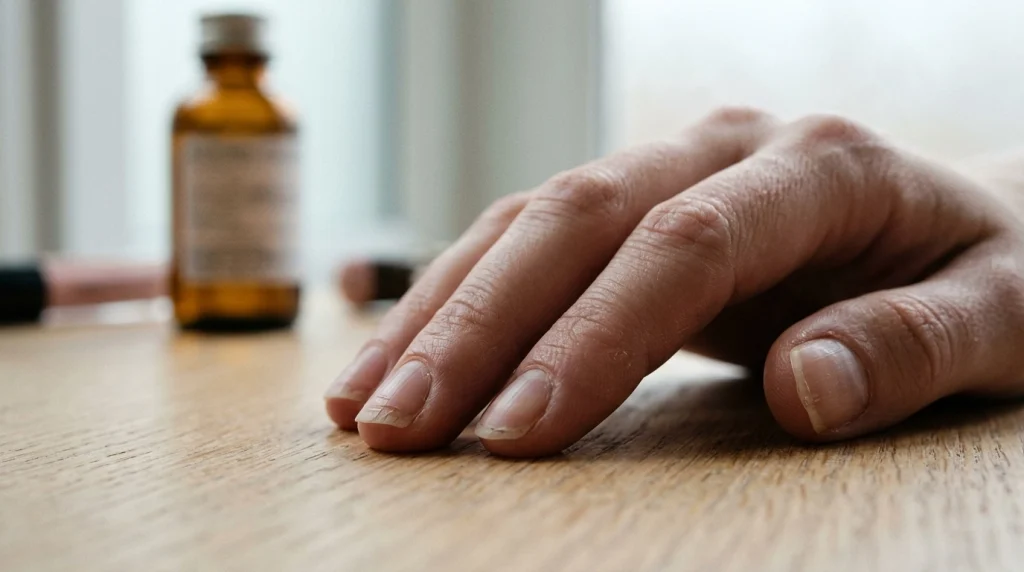
Your natural nail plate consists of tightly packed keratin layers. When those layers become damaged or start separating, the tips may appear flaky, thin, or uneven.
Gel and acrylic manicures don’t automatically damage every nail. However, aggressive preparation, repeated chemical exposure, improper removal, and everyday wear can contribute to peeling.
1. Peeling Off Gel Polish Removes Nail Layers
When you pull cured gel polish away from your natural nail, some of the upper nail plate may come with it. This leaves the surface thinner and more vulnerable to splitting.
Even if the gel is already lifting, forcing the remaining product off can cause further damage.
2. Excessive Filing Thins the Nail Plate
Acrylic application often involves filing the natural nail surface to improve adhesion. Removing acrylics may involve additional filing.
If too much natural nail is removed, your nails can feel unusually flexible, sensitive, or fragile.
Learn more about how gel polish affects natural nail strength and why gentle preparation matters.
3. Acetone Can Leave Nails and Skin Dry
Acetone dissolves many nail coatings, making it useful for removing soak-off products. However, prolonged or repeated exposure can dry the surrounding skin and contribute to brittle-looking nails.
Acetone doesn’t necessarily cause every peeling problem. Mechanical damage from scraping, picking, or over-filing is often an important factor.
4. Repeated Water Exposure Makes Peeling Worse
Your nail plate repeatedly absorbs and releases moisture during washing, cleaning, and bathing. Frequent wet-dry cycles can increase brittleness and splitting.
Without protection, weakened nail tips may continue separating long after you’ve removed your manicure.
How Can You Tell If Your Nails Are Damaged?
Peeling nails after acrylic or gel removal can look different depending on the severity of the damage.
Common signs of cosmetic nail plate damage include:
- Layered peeling: Thin sheets separate near the free edge.
- White flaky patches: The nail surface looks rough or chalky.
- Unusual flexibility: Previously firm nails bend more easily.
- Rough tips: Nail edges catch on clothing or hair.
- Frequent splitting: Small cracks develop before nails reach their usual length.
- Surface unevenness: The nail plate looks less smooth after removal.
These changes may follow manicure damage, but they aren’t proof of a particular cause. Fungal infections, inflammatory conditions, and other nail disorders can sometimes produce similar appearances.
Warning
Significant pain, swelling, spreading redness, pus, green or dark discoloration, or separation of the nail from its nail bed requires professional evaluation. Don’t cover suspicious changes with gel, acrylic, or glue. Seek prompt medical advice if symptoms suggest an infection.
How Do You Care for Peeling Nails After Gel or Acrylic Removal?
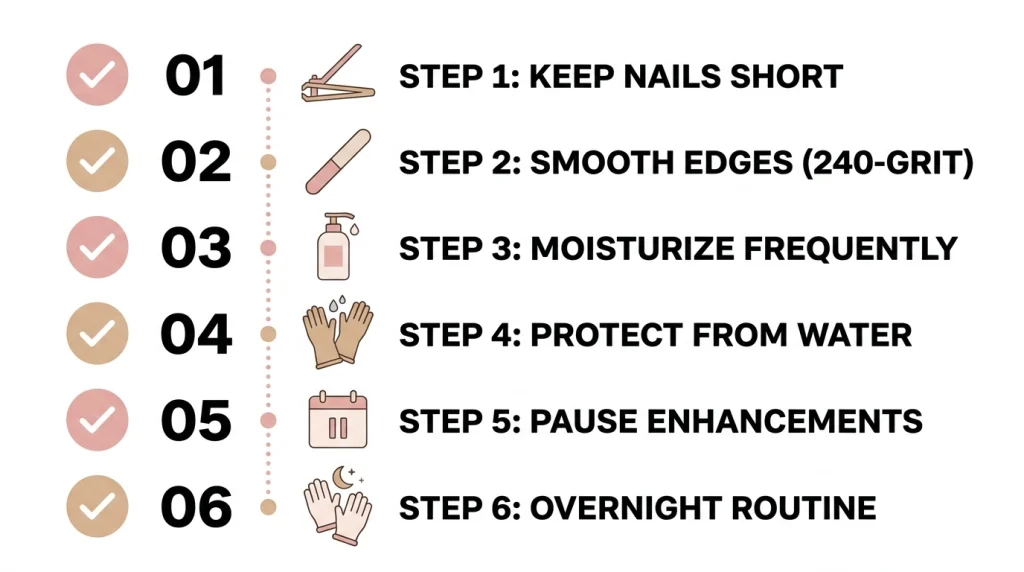
The most useful recovery routine focuses on protecting the existing nail plate while healthier nail grows forward.
You can’t permanently glue damaged keratin layers back together with oil or cream. However, you can reduce additional splitting, improve dryness, and prevent small areas of damage from becoming larger.
Step 1: Keep Your Nails Short and Comfortable
Start by shortening any nail tips that repeatedly catch on clothing or bend during everyday activities.
Use clean, sharp nail clippers to remove excess length gradually. Leave a small comfortable free edge instead of cutting directly into the skin.
Shorter nails experience less leverage when you type, wash your hair, or reach for objects, helping prevent additional splitting.
Common mistake: Cutting damaged nails extremely short. This can expose sensitive skin and make normal activities uncomfortable.
Step 2: Smooth Rough Edges Without Over-Filing
Choose a fine-grit nail file, such as a 240-grit file, to smooth small snags around your nail tips.
Work gently and stop once the edge feels comfortable. You don’t need to file away every visible surface imperfection.
Avoid coarse electric files, aggressive buffing blocks, and repeated filing across the top of a thin nail plate.
Common mistake: Trying to make damaged nails look perfectly smooth by buffing the surface. Removing additional keratin can worsen existing thinning.
Step 3: Moisturize Your Nails and Cuticles Frequently
Moisturizing is one of the easiest ways to improve the comfort and appearance of dry, peeling nails.
Apply a small amount of cuticle oil, fragrance-free hand cream, or petroleum jelly to your nails and surrounding skin.
Massage gently for approximately 20–30 seconds. Repeat after washing your hands and before bedtime.
Petroleum jelly is especially useful when you want a simple, affordable option that helps limit moisture loss.
Common mistake: Applying moisturizer only to the cuticle line. Spread it across the exposed nail surface and surrounding skin as well.
Step 4: Protect Your Nails From Water and Cleaning Chemicals
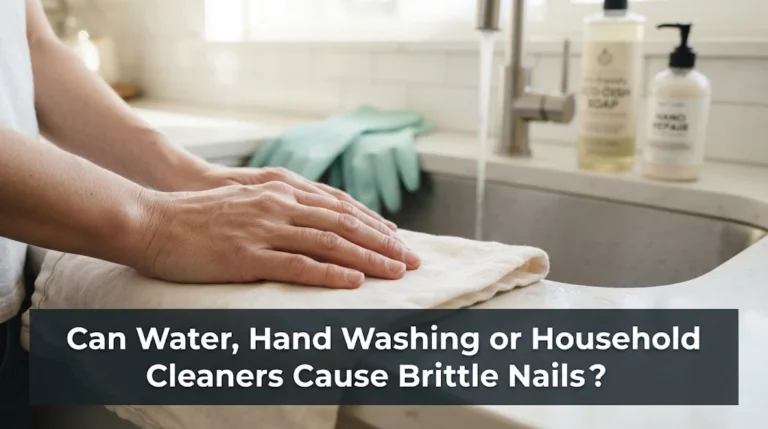
Wear protective gloves when washing dishes, cleaning bathrooms, or using household detergents.
For longer wet chores, consider cotton-lined waterproof gloves or a comfortable cotton liner underneath your cleaning gloves.
Dry your hands thoroughly afterward and apply moisturizer.
Routine handwashing is still important. The goal is to reduce unnecessary prolonged water exposure, not avoid normal hygiene.
Common mistake: Keeping damp gloves on after cleaning. Trapped moisture can irritate the skin around your nails.
Step 5: Give Your Nails a Break From Enhancements
When nails are visibly peeling, avoid immediately replacing your removed manicure with fresh acrylics, hard gel, dip powder, or another adhesive enhancement.
Dermatologists commonly recommend taking a one- to two-week polish break after gel manicures, or longer when needed.
Severely thinned nails may need substantially more time before another enhancement is sensible.
The purpose of this break isn’t to let nails breathe. Nails don’t require oxygen from the surrounding air. Instead, the break reduces additional filing, solvent exposure, and mechanical stress.
Common mistake: Assuming a thick overlay will repair damaged nails. Covering fragile nails may hide worsening problems rather than solve them.
Step 6: Use a Gentle Overnight Moisturizing Routine
Before going to bed, wash your hands with mild soap, dry them carefully, and apply fragrance-free moisturizer.
Massage petroleum jelly over the exposed nail plates and cuticle areas. If comfortable, wear clean cotton gloves to keep the product in place.
This routine can help soften dry surrounding skin and reduce moisture loss overnight.
Common mistake: Expecting one overnight treatment to reverse structural damage. Consistent protection and new nail growth are what make the long-term difference.
Pro Tip
Keep a small tube of hand cream beside your sink and another near your bed. Pairing moisturizer with something you already do makes daily nail care easier to maintain than relying on occasional intensive treatments.
What Products Help Peeling Nails Recover?
You don’t need a large nail-repair collection. A few simple products can help protect fragile nails and make your routine more comfortable.
Affiliate disclosure: As an Amazon Associate, we earn from qualifying purchases. Product links below lead to Amazon search results, where you can compare current options.
1. Fragrance-Free Petroleum Jelly
Petroleum jelly is an affordable option for protecting dry nails and cuticles from moisture loss.
It’s especially suitable if your skin feels dry or sensitive after polish removal. Choose a plain, fragrance-free formula rather than a heavily scented balm.
Recommended Product
Vaseline Original Petroleum Jelly
Helps seal in moisture on exposed nails and dry cuticles without requiring a complicated treatment routine.
As an Amazon Associate, we earn from qualifying purchases.
2. Jojoba-Based Cuticle Oil
A lightweight cuticle oil can make regular moisturizing more convenient, particularly when you’re working or traveling.
Look for a formula containing jojoba oil or another well-tolerated emollient. Avoid strongly fragranced formulas if your skin is irritated.
Cuticle oil conditions the nail and surrounding skin, but it doesn’t permanently repair lost nail layers.
Recommended Product
CND SolarOil Nail and Cuticle Care
A convenient conditioning oil for moisturizing dry cuticles and improving the feel of exposed nail surfaces.
As an Amazon Associate, we earn from qualifying purchases.
3. A Fine-Grit Nail File
A gentle nail file helps remove snags before they develop into larger splits.
Choose a fine abrasive suitable for natural nails and avoid applying heavy pressure.
Recommended Product
240-Grit Natural Nail File
A fine-grit file lets you smooth fragile nail edges without using a coarse surface intended for artificial enhancements.
As an Amazon Associate, we earn from qualifying purchases.
How Long Does It Take for Peeling Nails to Recover?
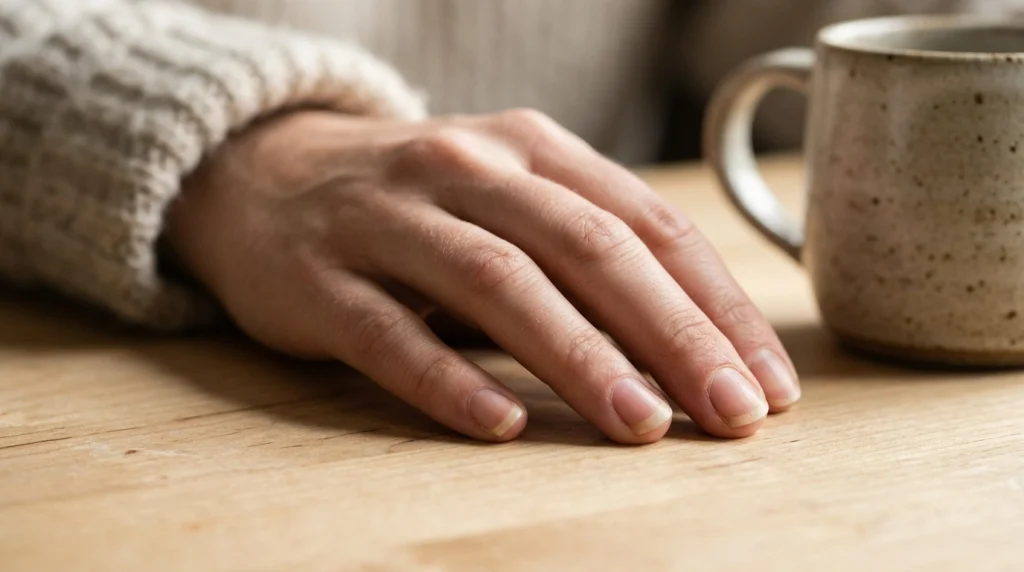
Recovery depends on how much nail plate was damaged, where the damage sits, and whether your nails experience additional trauma.
Fingernails generally grow approximately 3 millimeters per month, although growth rates vary.
Because existing nail plate damage cannot be fully reversed, healthier nail must gradually replace the affected portion.
During the First Week
Regular moisturizing may improve dryness and make your nail surfaces feel more comfortable.
Keeping your nails short and eliminating snags can also reduce new breakage. However, the visible peeling may remain.
After Two to Four Weeks
You may notice fresh nail growth near the cuticle and fewer new splits if you’ve minimized further damage.
The old peeling sections might still be visible toward the nail tips. Continue protecting them rather than trying to buff them away.
After Two to Three Months
More of the original damaged nail plate may have grown forward, allowing you to trim away some affected areas.
Improvement may be uneven across different fingers because each nail can have a different level of damage.
After Four to Six Months or Longer
A fingernail commonly takes around four to six months to replace most or all of its length, and some nails require longer.
If the nail-forming area was injured, recovery can be slower or incomplete. Persistent peeling despite careful protection deserves professional assessment.
For additional guidance, see how to stop nails from breaking while damaged areas grow out.
What Should You Do and Avoid While Your Nails Heal?
Do
- Keep nails comfortably short.
- Moisturize several times daily.
- File small snags gently.
- Wear gloves for wet chores.
- Use clean manicure tools.
- Allow damaged nail to grow out.
Don’t
- Peel away separated nail layers.
- Buff thin nails aggressively.
- Apply fresh acrylic over damage.
- Use harsh DIY chemical treatments.
- Cut or dig into healthy cuticles.
- Ignore painful nail changes.
Can Nail Hardeners Fix Peeling Nails?
Nail hardeners can make the surface feel temporarily more rigid, but harder doesn’t always mean healthier.
When nails are already brittle, an excessively stiff coating may increase the chance of cracking rather than improve flexibility.
Some hardeners contain formaldehyde-based ingredients that can irritate skin or contribute to excessive brittleness with improper use.
For freshly damaged nails, moisturizing and reducing physical stress are generally better starting points than immediately applying multiple strengthening coatings.
If you’re considering a treatment product, choose one formulated for fragile natural nails and follow its instructions carefully.
Don’t apply a cosmetic hardener over inflamed skin, open injuries, or suspicious nail discoloration.
What If Your Nails Keep Peeling Despite Care?
Continuing peeling doesn’t always mean your routine has failed. Existing damage may remain visible until it grows out.
However, certain patterns can indicate that something else needs attention.
Your Nail Tips Keep Splitting
Immediate fix: Trim any long, flexible tips and gently smooth rough corners.
Prevention: Keep nails short, moisturize regularly, and avoid using your nails to open packaging or scrape surfaces.
Your Nails Still Look White and Chalky
Immediate fix: Stop buffing and apply a fragrance-free moisturizer.
Prevention: Avoid unnecessary solvent exposure and let the roughened nail grow forward. Seek evaluation if discoloration persists, spreads, or changes.
Your Cuticles Feel Dry or Irritated
Immediate fix: Pause fragranced oils and other potentially irritating products. Use a bland, fragrance-free ointment instead.
Prevention: Avoid trimming cuticles and limit prolonged contact with harsh cleaning products.
Your Nails Remain Thin for Months
Immediate fix: Continue gentle protection and arrange a dermatologist appointment, particularly if new nail growth also appears abnormal.
Prevention: Avoid repeated enhancement removal until you’ve identified the reason for the persistent weakness.
How Can You Prevent Peeling After Your Next Manicure?
Once your nails have recovered, you can still enjoy beautiful nail designs. The key is choosing application and removal methods that minimize unnecessary damage.
Choose Gentle Nail Preparation
Ask your nail technician to avoid excessive filing of your natural nail surface.
The goal of preparation is appropriate adhesion, not removing large amounts of healthy nail plate.
Never Force Gel or Acrylic Products Off
Different products require different removal methods. Some gels dissolve with the appropriate solvent, while hard gels and certain enhancement systems require professional filing.
If a coating doesn’t release easily, don’t scrape or pry it away. Ask a qualified technician to remove it safely.
Take Breaks When Damage Appears
Healthy nails don’t necessarily require routine breaks from ordinary polish, but visibly damaged nails benefit from time without additional enhancements.
Use these periods to moisturize, maintain a comfortable length, and monitor new nail growth.
Maintain a Consistent Nail Care Routine
Simple habits usually provide more benefit than occasional expensive treatments.
Start with the ideas in our best nail care routine guide, then adjust the steps to suit your lifestyle.
You can also explore daily nail care habits to keep your nails protected between manicures.
Frequently Asked Questions About Peeling Nails After Gel or Acrylic Removal
Q: Will peeling nails repair themselves after acrylic removal?
A: Damaged nail layers cannot completely rebuild themselves. However, healthier nail can grow from the nail matrix and gradually replace the affected sections. Moisturizing and gentle protection help prevent additional breakage during this process.
Q: Is cuticle oil or nail strengthener better for peeling nails?
A: Moisturizing products are generally a gentler first choice for dry, peeling nails. Cuticle oil or petroleum jelly helps condition the nail surface, while certain hardeners can make already brittle nails excessively stiff.
Q: Can I put gel polish over peeling nails?
A: It’s better to avoid gel polish when your nails are visibly damaged. Additional preparation, curing, and removal can expose fragile nails to more stress. Allow the damaged sections to improve or grow out before considering another enhancement.
Q: Does olive oil help peeling nails?
A: Olive oil can act as an emollient, but there’s limited evidence that it repairs damaged nail layers. Plain petroleum jelly or a well-tolerated nail moisturizer is a practical alternative. Avoid any product that irritates your skin.
Q: Should I take biotin to help damaged nails grow?
A: Biotin isn’t a proven quick fix for manicure-related damage. Supplements may also interfere with certain medical laboratory tests. Speak with a healthcare professional before taking supplements for persistent nail problems.
Final Thoughts: Give Your Natural Nails Time to Recover
Peeling nails after gel or acrylic removal can be frustrating, but consistent gentle care makes a meaningful difference. Keep your nails short, moisturize often, protect them from unnecessary stress, and avoid covering active damage with new enhancements.
Remember that visible recovery depends on healthy new growth, not instant repair products. Save this guide to your Pinterest nail care board so you can return to your recovery routine whenever your nails need extra attention.

Hi, I’m Jessica, the creator behind Unique Lash & Nails Katy.
I created this website for anyone who loves beautiful nails as much as I do. Here, I share trendy nail designs, seasonal manicure ideas, easy nail care tips, honest product recommendations, and step-by-step guides to help you create salon-worthy nails at home. Whether you’re looking for everyday inspiration or your next favorite nail trend, I hope you’ll find something you love.