How to Protect Your Nails After Gel Polish Removal
Quick Answer
To protect nails after gel removal, keep them short, gently smooth rough edges, and apply cuticle oil and moisturizer daily. Avoid buffing, picking, and another gel manicure while your nails recover. Wear gloves during cleaning and give damaged nails at least one to two weeks without polish, or longer if needed. Existing damage must gradually grow out, so consistent protection matters more than quick-fix treatments.
Time Needed
5–10 minutes daily
Difficulty
Beginner
Items Needed
4 basic essentials
Care Duration
Until damage grows out
Just removed your gel manicure and noticed your nails feel paper-thin, rough, or unusually flexible? Don’t rush to cover them with another coat of polish. Your natural nails may need extra protection after the removal process.
The good news is that you can reduce further damage with a few simple habits. This guide explains exactly how to protect nails after gel removal, what to avoid, and how to support healthier new growth without spending a fortune on unnecessary treatments.


Why Do Nails Feel Weak After Gel Removal?
Gel manicures are popular because they resist chipping and keep their glossy finish for weeks. However, removing them can leave your natural nails looking and feeling different.
One major cause is mechanical damage. When gel polish is peeled, scraped, or aggressively filed away, small layers of the natural nail plate may come off with it. The result can be a thinner nail that bends, splits, or catches on clothing.
Acetone is another factor. Although it’s effective for dissolving soak-off gel, repeated or prolonged exposure can dry out your nails and surrounding skin. That dryness may make already vulnerable nails feel even more brittle.
Excessive buffing before a manicure can also contribute to weakness. If the nail surface was repeatedly filed to help products adhere, there may be less nail thickness remaining after removal.
These issues don’t mean every gel manicure permanently damages your nails. Proper application, careful removal, and breaks when needed can reduce the risk.
What Are the Signs Your Nails Need Extra Protection?
Before beginning your aftercare routine, inspect all ten nails in natural light. Look for changes that appeared during or after the manicure.
- Peeling layers: Thin pieces of nail separate near the tips or surface.
- Unusual flexibility: Nails bend more easily than normal.
- Rough texture: The surface feels uneven or appears scratched.
- Dry cuticles: Skin around the nails looks flaky or feels tight.
- Frequent splitting: Nail tips crack during everyday activities.
- White patches: Chalky-looking areas may appear where the nail surface has been disturbed.
Mild dryness and superficial peeling can often be managed with gentle care. However, severe pain, bleeding, significant nail lifting, or skin inflammation deserves professional attention.
Warning
Don’t cover nails that are painful, swollen, greenish, increasingly discolored, or separating from the nail bed. These changes can signal problems beyond routine dryness. Stop cosmetic treatments and consult a healthcare professional or dermatologist.
What Do You Need to Care for Nails After Gel Removal?
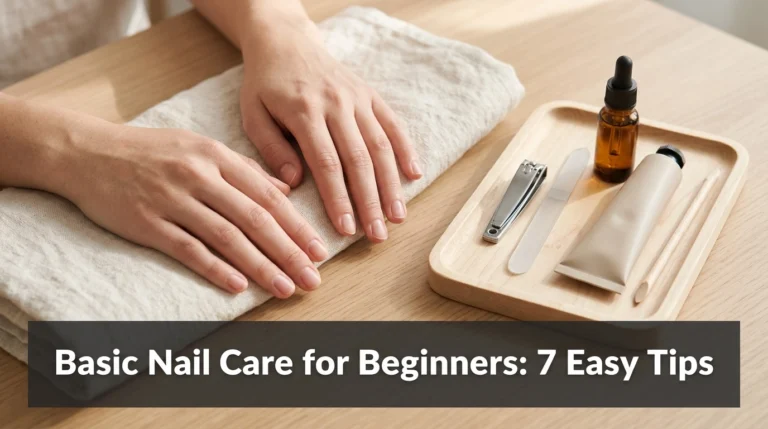
You don’t need an expensive recovery kit. Four practical essentials can make everyday protection much easier.
- Fine-grit glass nail file: Smooths small snags without requiring aggressive surface buffing.
- Cuticle oil: A jojoba-based formula helps condition dry nails and surrounding skin.
- Fragrance-free hand cream: Supports the skin barrier after washing and exposure to removers.
- Protective cleaning gloves: Reduce contact with detergents and prolonged water exposure.
Plain petroleum jelly is another useful option if your skin feels especially dry. You can apply a small amount around your nails before bedtime to help reduce moisture loss.
How to Protect Nails After Gel Removal: 7 Easy Steps
Start this routine as soon as your gel polish has been completely removed. The goal isn’t to make your nails instantly hard. Instead, you’re minimizing further stress while healthier nail material gradually grows from the base.
1 Clean Your Nails Gently
Wash your hands with lukewarm water and mild soap to remove any remaining acetone or product residue. Pat them dry with a soft towel, paying attention to the skin around each nail. Avoid scrubbing with a stiff nail brush.
Common mistake: Using very hot water or vigorous scrubbing. Both can irritate already dry skin.
2 Shorten Weak Nail Tips
Keep your nails at a comfortable short length while they’re flexible or peeling. Trim small sections carefully rather than making one large cut. Shorter tips are less likely to bend backward, snag fabric, or split during everyday tasks.
Common mistake: Keeping long, weakened tips because you don’t want to lose length. Extra leverage can turn a small split into a painful break.
3 Smooth Rough Edges Carefully
Use a fine-grit glass file to smooth rough free edges with light, controlled strokes. Stop once the snag disappears. Leave the upper surface of the nail alone, even if it looks uneven, because additional buffing can remove more thickness.
Common mistake: Buffing away every ridge or white patch. This can make an already thin nail even weaker.
4 Apply Cuticle Oil
Place a small drop of jojoba-based cuticle oil near each nail and gently massage it across the surface and surrounding skin. Repeat after handwashing when practical, especially if your nails feel dry. Oil conditions the surface but cannot permanently repair removed nail layers.
Common mistake: Applying oil only once a week. Small, regular applications are more useful for ongoing dryness.
5 Moisturize Your Hands and Nail Folds
Massage a fragrance-free hand cream over your fingers, nail folds, and cuticles. Choose a formula with ingredients such as glycerin or petrolatum to support moisture retention. Reapply after washing your hands and before going to sleep.
Common mistake: Moisturizing only the palms. The skin beside your nails also needs protection.
6 Protect Your Nails From Water and Chemicals
Wear waterproof household gloves when washing dishes, cleaning surfaces, or handling detergents. Repeated wetting and drying can stress fragile nails. If your hands become sweaty inside the gloves, remove them, dry your skin, and use a fresh dry pair when needed.
Common mistake: Wearing damp gloves for long periods. Trapped moisture can irritate the skin around your nails.
7 Take a Break From Gel Polish
Give your nails at least one to two weeks without polish when they show signs of dryness or brittleness. If peeling or thinning is noticeable, a longer break from gel may be sensible. Check the new growth near your cuticles and avoid another manicure that requires aggressive filing or acetone soaking.
Common mistake: Reapplying gel immediately to hide damaged nails. Covering them can conceal changes and expose them to another removal cycle.
How Long Do Nails Take to Recover After Gel Removal?
Recovery depends on the type and extent of damage. If your nails only feel dry, regular moisturizing may improve their comfort and appearance within several days. However, a nail plate that’s been physically thinned cannot instantly regain its missing layers.
Your fingernails generally take around six months to grow out completely. New nail forms near the base, gradually pushing older material toward the free edge.
Days 1–7: Focus on Moisture and Protection
During the first week, your priority is preventing further breakage. Keep nails short, moisturize regularly, and avoid aggressive filing. Dry skin may begin feeling more comfortable, although the nail surface may still look rough.
Weeks 2–4: Watch for Healthier New Growth
Continue your routine and inspect the narrow area near your cuticles. This is where you may begin noticing smoother new growth. Don’t expect a damaged tip to repair itself simply because the nail looks shinier.
Months 2–6: Allow Damaged Areas to Grow Out
Over the following months, the older nail material moves toward the tip where it can be trimmed away. The exact timeline varies with your growth rate, injury severity, health, and daily habits.
If you’d like to understand whether bare nails are beneficial during this period, explore our guide on whether nails are healthier without nail polish.
What Should You Avoid After Removing Gel Nails?
Some popular nail treatments may make damage worse when used at the wrong time. Protecting your nails means knowing which habits to postpone until your natural nail plate is in better condition.
Avoid Aggressive Buffing
Buffing can temporarily make an uneven nail look smoother, but it works by removing surface material. If your nails are already thin from gel removal, additional buffing may increase their vulnerability to splitting.
Don’t Peel Remaining Gel Residue
If you notice leftover gel, don’t scratch it away with another nail or metal tool. Peeling can lift the upper layers of natural keratin. Ask a qualified nail professional to assess stubborn product, especially if you’re unsure which gel system was used.
Skip Harsh DIY Nail Treatments
Lemon juice, baking soda scrubs, and abrasive whitening mixtures aren’t necessary for recovery. These treatments may irritate skin or increase friction without restoring missing nail thickness.
Be Cautious With Nail Hardeners
Some hardeners make nails feel temporarily firmer, but very rigid coatings can crack rather than flex. Certain formulas also contain ingredients that irritate sensitive skin. If your nails are unusually fragile, ask a dermatologist before trying intensive hardening treatments.
Pro Tip
Take a clear photograph of your bare nails immediately after removal. Take another photo every two weeks in similar lighting. Comparing the new growth near your cuticles helps you track changes without repeatedly touching or testing fragile nails.
What Is the Best Daily Nail Care Routine After Gel Removal?
The easiest recovery routine is one you can repeat without buying extra treatments. Divide your aftercare into three short checkpoints throughout the day.
Morning: Moisturize Before You Start Your Day
After washing your hands, apply a thin layer of cuticle oil followed by hand cream. Check for rough tips and smooth only the sections that might snag. Avoid cutting or pushing back your cuticles.
Daytime: Prevent Everyday Nail Damage
Use gloves for wet household work and apply cream after frequent handwashing. Open cans, peel labels, and scrape stickers with tools rather than your fingernails.
Prolonged exposure to hot water is especially unhelpful when nails are already peeling. Learn more about how hot water can damage your nails and what you can do to reduce the problem.
Night: Give Dry Nails Extra Moisture
Before bed, massage cuticle oil into each nail and apply a generous amount of fragrance-free cream. For particularly dry skin, a small amount of petroleum jelly around the nail folds can help limit moisture loss overnight.
Keep this routine simple. Consistency is more valuable than rotating between multiple oils, hardeners, and expensive treatments.
Do’s and Don’ts for Protecting Nails After Gel Removal
Do
- Keep weak nails short
- Moisturize after washing
- Apply cuticle oil regularly
- Wear gloves for cleaning
- Monitor healthy new growth
Don’t
- Peel remaining gel
- Buff thin nail surfaces
- Cut living cuticles
- Use nails as tools
- Cover painful nail changes
Which Products Help Protect Nails After Gel Removal?
Most post-gel aftercare products work by reducing dryness or physical stress rather than rebuilding damaged keratin. Start with the simplest options and choose formulas your skin tolerates comfortably.
Recommended Product
Jojoba Cuticle Oil
A simple jojoba-based oil helps condition dry nail surfaces and cuticles, making it a practical choice for daily aftercare.
As an Amazon Associate, we earn from qualifying purchases.
Recommended Product
Fine-Grit Glass Nail File
A reusable glass file makes it easier to smooth small snags without repeatedly filing the upper nail surface.
As an Amazon Associate, we earn from qualifying purchases.
Recommended Product
Fragrance-Free Hand Cream
A rich, fragrance-free cream helps maintain moisture around your nails after frequent handwashing or exposure to polish remover.
As an Amazon Associate, we earn from qualifying purchases.
Recommended Product
Reusable Household Cleaning Gloves
Comfortable waterproof gloves help shield vulnerable nails from detergents and repeated soaking during household chores.
As an Amazon Associate, we earn from qualifying purchases.
What If Your Nails Keep Peeling or Breaking?
Even with careful aftercare, you might notice problems while the old nail plate grows out. The right response depends on what you’re seeing.
Problem: Nail Tips Keep Peeling
Trim the affected free edge when possible, gently smooth snags, and moisturize regularly. Don’t pull off peeling layers. Prevent further damage by avoiding aggressive surface filing and repeated water exposure.
Problem: Nails Bend Too Easily
Keep your nails short and avoid pressure on their tips. Don’t repeatedly bend them to check their strength. For future manicures, request minimal surface preparation and careful removal to preserve nail thickness.
Problem: Cuticles Feel Dry or Irritated
Apply fragrance-free moisturizer or petroleum jelly and avoid harsh fragranced products. Don’t trim the irritated skin. If redness, swelling, or discomfort persists or worsens, seek medical advice.
Problem: White Spots or Rough Patches Remain
Avoid buffing the patches away. Moisturize and observe whether smooth new nail grows from the base. If the changes spread, appear with lifting, or don’t fit ordinary removal damage, have them evaluated.
Can Food and Supplements Help Nails Recover?
Your nails are made primarily of keratin, a protein produced by cells in the nail matrix. Eating enough protein and maintaining a balanced diet supports normal nail growth, but food cannot instantly rebuild nail layers removed during a manicure.
Include a variety of protein sources, vegetables, fruit, whole grains, and foods containing iron and zinc. If your diet is restricted or you suspect a nutritional deficiency, a healthcare professional can help determine whether testing is appropriate.
Be careful with supplements advertised as instant nail-repair solutions. Biotin isn’t necessary for everyone, and high-dose supplements can interfere with certain laboratory tests. Treat a confirmed deficiency rather than assuming every brittle nail needs vitamins.
For everyday meal ideas, see our guide to foods that support stronger, healthier nails.
When Is It Safe to Get Another Gel Manicure?
There’s no universal date when every nail is ready for gel again. Your next appointment should depend on the condition of your natural nails rather than how quickly you want fresh color.
If your nails remain soft, peeling, sore, or visibly thinned, continue your break from gel. A one- to two-week polish holiday may help with mild dryness, but extensive damage can take months to grow out.
When your nails are comfortable and showing healthy growth, consider traditional nail polish before returning to another gel manicure. Ordinary polish is usually easier to remove without prolonged acetone contact or mechanical filing.
If you’re interested in a glossy look without gel, explore how to shine nails without polish. Avoid intensive buffing techniques while your nails are thin or damaged.
For your next gel appointment, choose a skilled nail technician who prioritizes gentle preparation and appropriate removal. Ask about soak-off formulas, avoid cuticle cutting, and never peel lifting gel at home.
Pro Tip
Before booking your next manicure, photograph your nails in bright natural light. Comparing their appearance with your post-removal photo can help you decide whether they look healthier or still need more time without gel.
Frequently Asked Questions
Q: Should you leave nails bare after gel removal?
A: Yes, especially if your nails are dry, peeling, or thin. A break helps you inspect and moisturize them while avoiding another round of gel preparation and removal. Nails don’t need air to breathe, but damaged areas need time to grow out.
Q: What is the best oil for nails after gel removal?
A: Jojoba-based cuticle oil is a practical choice for conditioning dry nails and surrounding skin. Plain petroleum jelly can also help reduce dryness. Neither product permanently repairs damaged nail layers, so consistent protection remains important.
Q: Can thin nails become thick again after gel removal?
A: Nails that were thinned by filing or peeling can improve as healthy new nail grows in. The missing layers on the existing nail plate won’t regenerate in place. Protect the growing nail and gradually trim away the damaged portion.
Q: Can you use regular nail polish after removing gel?
A: Regular polish may be an option once your nails and surrounding skin are comfortable and free of concerning changes. If they’re actively peeling or irritated, start with a bare-nail break. Choose gentle removal methods and avoid picking the new polish.
Q: How can you stop nails from breaking after gel removal?
A: Keep nails short, smooth rough edges gently, moisturize daily, and wear gloves during wet chores. Avoid excessive filing and using your nails as tools. Seek professional advice if splitting is severe, painful, or continues despite careful protection.
Final Thoughts: Give Your Natural Nails Time to Recover
Learning how to protect nails after gel removal doesn’t require a complicated routine. Keep your nails short, moisturize consistently, avoid unnecessary filing, and protect them from everyday stress while healthy new nail grows.
Give your nails the time they need instead of hiding damage beneath another manicure. Save this guide to Pinterest so your next gel removal is followed by a gentler, healthier nail care routine.

Hi, I’m Jessica, the creator behind Unique Lash & Nails Katy.
I created this website for anyone who loves beautiful nails as much as I do. Here, I share trendy nail designs, seasonal manicure ideas, easy nail care tips, honest product recommendations, and step-by-step guides to help you create salon-worthy nails at home. Whether you’re looking for everyday inspiration or your next favorite nail trend, I hope you’ll find something you love.