15 Medium Length Halloween Nails to Try This Season
Halloween nail season is here, and medium length nails are the sweet spot — long enough for real art, short enough that you can still text without stabbing yourself. If you’re hunting for your next mani inspo, you’re in the right place. Below you’ll find fifteen genuinely wearable Halloween looks, from moody black French tips to pastel ghost squads. Save your favorites and let’s get spooky.
✦ Our Top Picks at a Glance
Best Overall — Glossy Black Ghost and Spiderweb Nails
Best for Beginners — Classic White Tip Nails with Pumpkin and Bat Silhouettes
Most Trendy — Black French Tips with a Yin-Yang Ghost Accent Nail
Best for Special Occasions — Black French Tips with Gold Spiderweb Accents
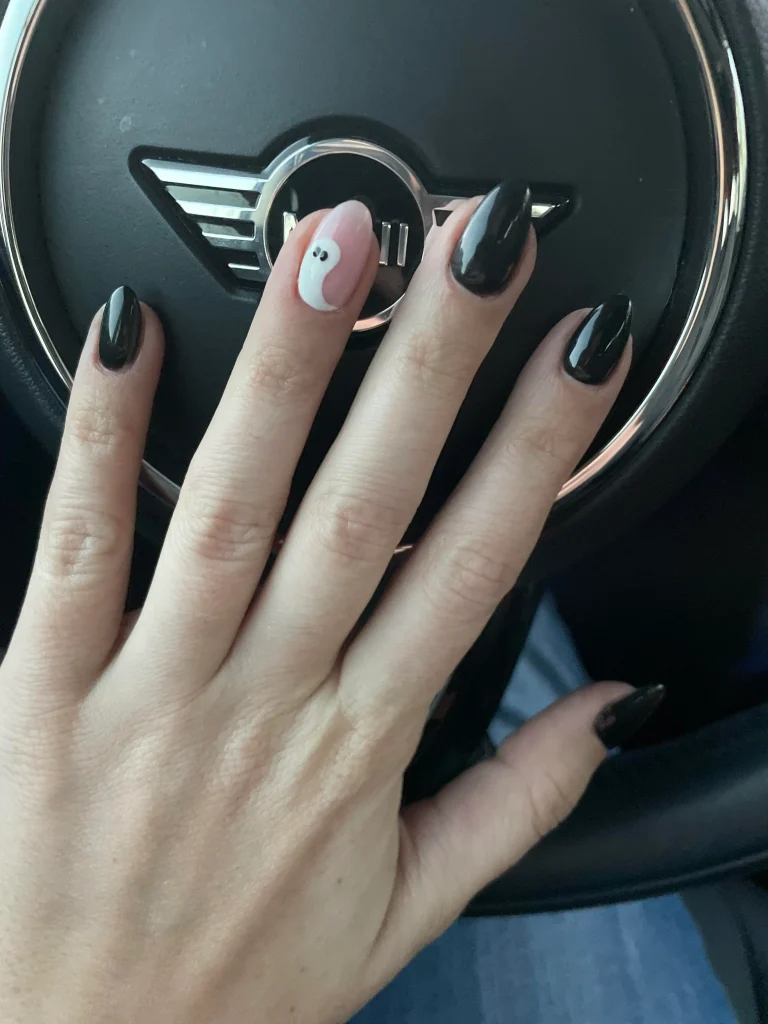


#1. Black French Tips with a Yin-Yang Ghost Accent Nail
Glossy black almond tips cover most of the hand, but one nail breaks away with a swirled pink-and-white yin-yang ghost that steals the whole show. It’s moody and playful at the same time, which is exactly why it keeps popping up on Pinterest.
Best For — fans of minimal, one-accent-nail Halloween looks
Pro Tip — Use a fine detail brush dipped in white polish first, then add the ghost’s black dot eyes last so they stay crisp instead of smudging into wet white.
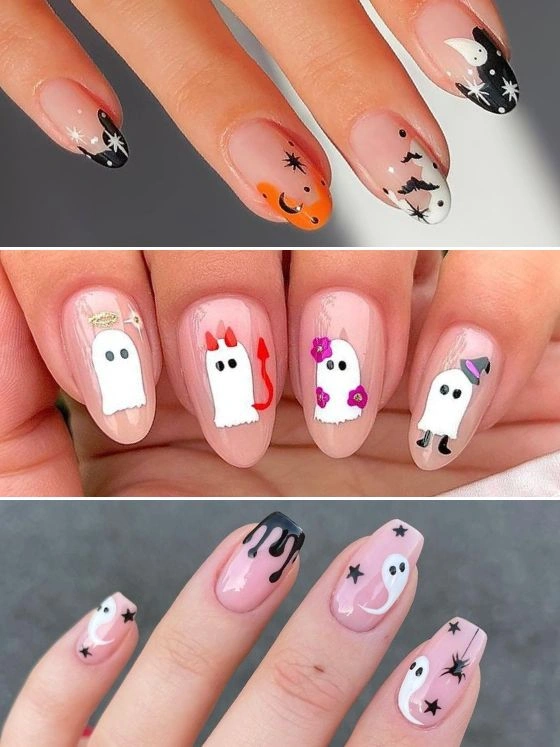
#2. Pastel Ghost Squad Nails
A little lineup of white ghosts each gets its own tiny personality — a halo, devil horns, a flower crown, a witch hat. It’s soft, sweet, and honestly a little bit funny, which makes it feel less “costume” and more “cute everyday nails with a theme.”
Best For — anyone who wants Halloween nails that still read as chic
Pro Tip — Paint each ghost’s blob shape first and let it fully dry before adding the tiny accessories, or the little details will bleed into the white base.
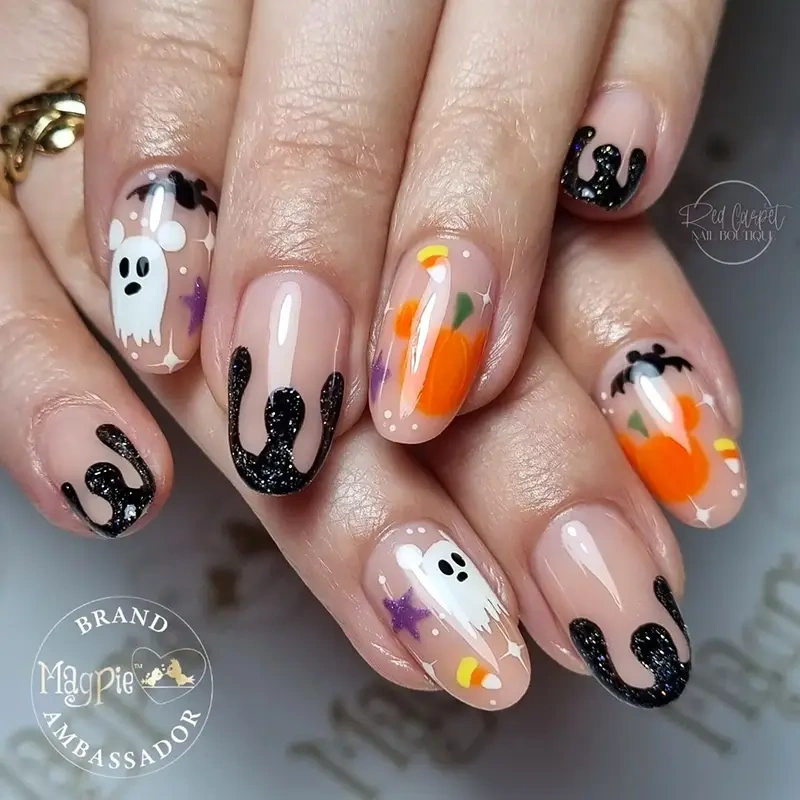
#3. Drippy Black Ghosts and Pumpkins Nails
Thick, glittery black “drip” tips sit next to nude nails loaded with friendly ghosts, tiny pumpkins, and a stray bat. There’s a lot going on here, but the nude background keeps it from feeling cluttered.
Best For — people who want a statement set with real texture
Pro Tip — Mix a little black glitter gel polish into your drip tips instead of plain black — the sparkle catches light and makes the “drip” look intentional, not messy.
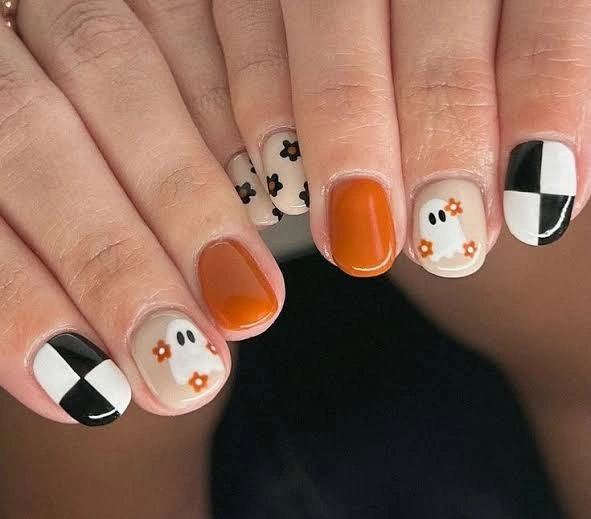
#4. Checkerboard and Floral Ghost Nails
Burnt orange solid nails sit alongside black-and-white checkerboard tips and a nude nail dotted with a daisy-covered ghost. It’s a fun mash-up of Y2K checkerboard and cozy autumn florals.
Best For — trend-lovers who want Halloween nails with a Y2K twist
Pro Tip — Sketch your checkerboard squares lightly with a striping brush before filling them in — freehand squares get wobbly fast without a guide line.
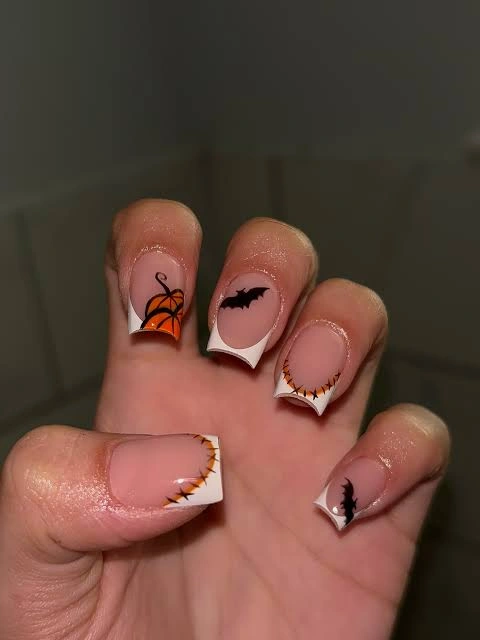
#5. Classic White Tip Nails with Pumpkin and Bat Silhouettes
Simple white French tips get a Halloween upgrade with a hand-drawn pumpkin vine, a bat silhouette, and a stitched “Frankenstein” edge. It’s proof you don’t need a full nail art kit to make a statement.
Best For — beginners easing into their first Halloween nail art
Pro Tip — Use pre-made Halloween nail decals for the pumpkin and bat if freehand isn’t your thing yet — they peel on in seconds.
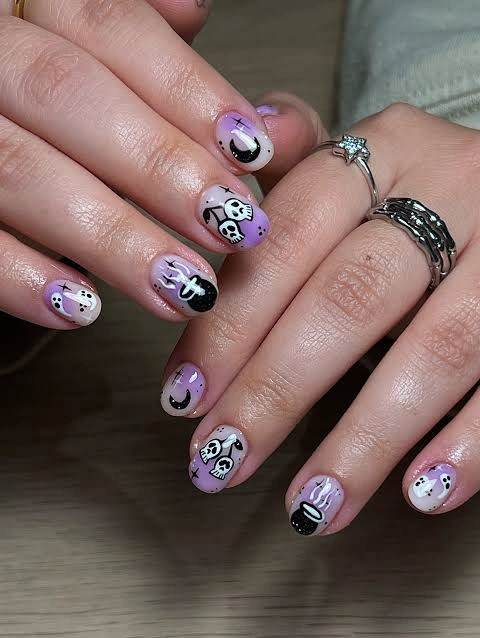
#6. Lavender Skull and Cauldron Nails
A soft lavender wash sits under bold black skulls, a smoking cauldron, and a crescent moon. The pastel background keeps the spooky imagery from feeling heavy, which is a nice balance if black-on-black feels like too much.
Best For — people who love witchy imagery but want a soft color story
Pro Tip — Airbrush or sponge the lavender base for a soft gradient before you add the black line art — a flat purple base makes the skulls look pasted on rather than painted.
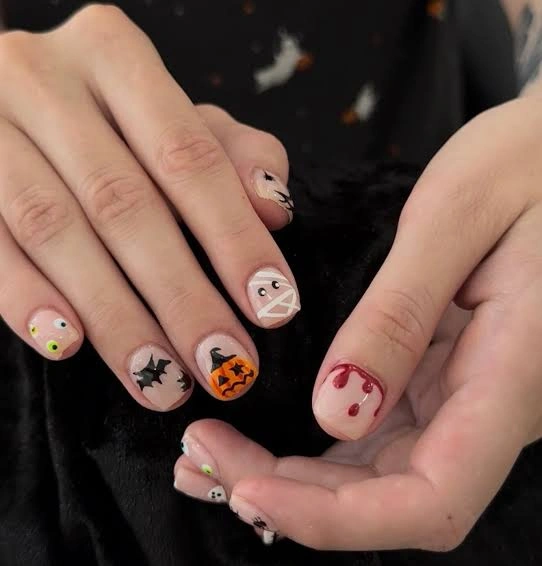
#7. Mixed Icon Halloween Nails with Blood Drip Accent
Every nail tells its own mini story — a googly-eyed monster, a mummy, a jack-o’-lantern in a witch hat, and one dramatic blood-drip tip. This is the set to pick if you want maximum variety in one manicure.
Best For — nail art lovers who can’t pick just one design
Pro Tip — Plan which nail gets which design before you start polishing — mapping it out on paper first keeps the whole hand feeling curated instead of random.
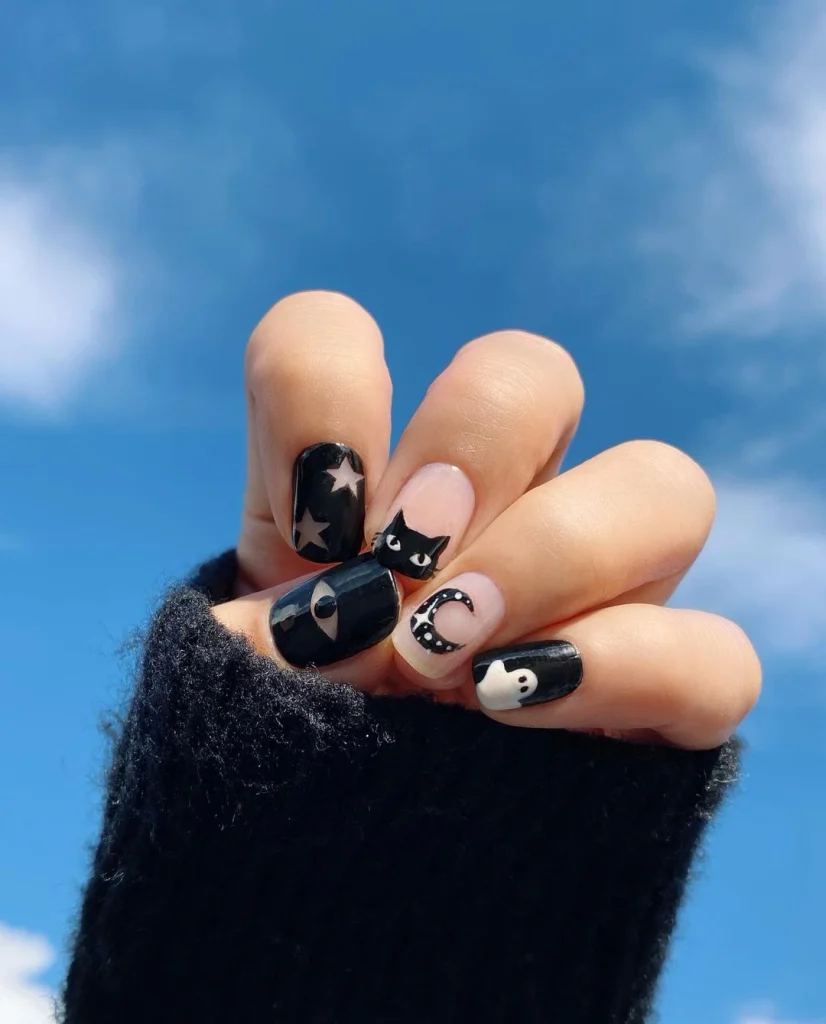
#8. Starry Night Black Cat Nails
Deep black nails scattered with tan stars, a crescent moon, and a peeking black cat face feel more “witchy autumn night” than “trick or treat.” One bare nail with a thin moon keeps the whole look from feeling too dark.
Best For — cat lovers who want a celestial, moody manicure
Pro Tip — Use a dotting tool for the stars so every point stays even — freehand stars are one of the trickiest shapes to keep symmetrical.
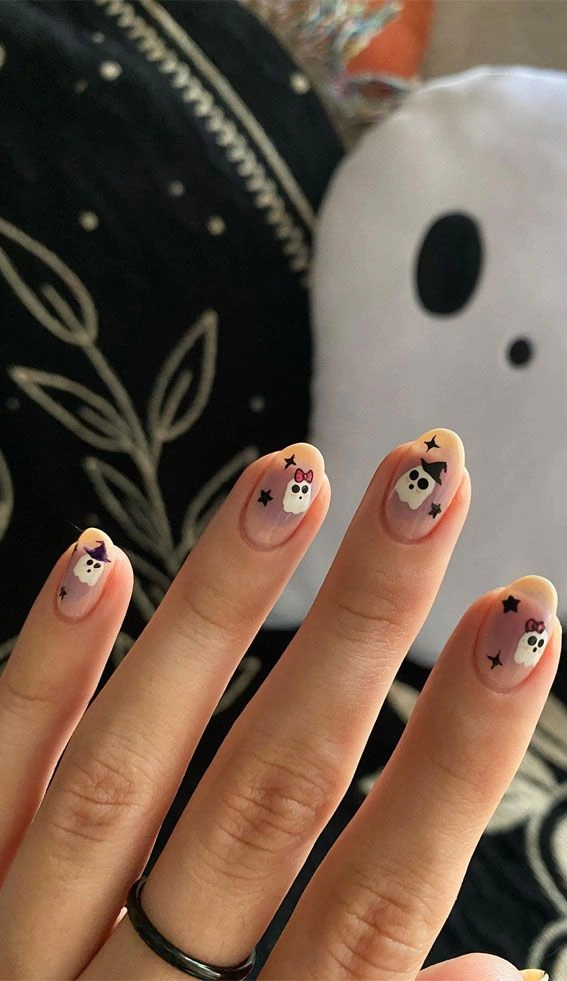
#9. Sunset Ombre Ghost Nails
A dreamy sunset-toned ombre base — think peach fading into lavender — gets topped with tiny witch-hat ghosts and scattered stars. It reads more “autumn evening” than traditional orange-and-black Halloween.
Best For — anyone who wants Halloween nails that still look elegant
Pro Tip — Blend your ombre with a makeup sponge while the base is still tacky, then seal with a glossy top coat so the gradient looks airbrushed instead of streaky.
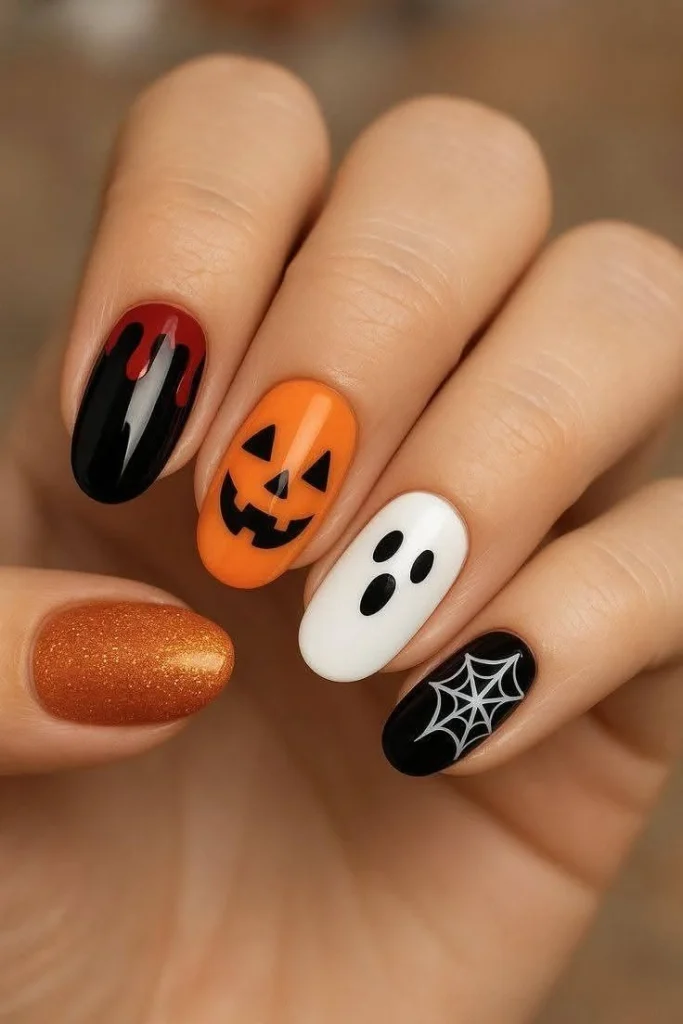
#10. Classic Jack-o’-Lantern and Ghost Nails
This is the Halloween nail set everyone pictures — a solid orange glitter nail, a black drip tip, a grinning jack-o’-lantern, a wide-eyed white ghost, and a spiderweb. Every classic symbol gets its own nail without feeling overcrowded.
Best For — anyone who wants an unmistakably “Halloween” manicure
Pro Tip — Paint your jack-o’-lantern face with a thin liner brush and black polish once the orange base is fully cured, so the triangle eyes stay sharp instead of feathering.
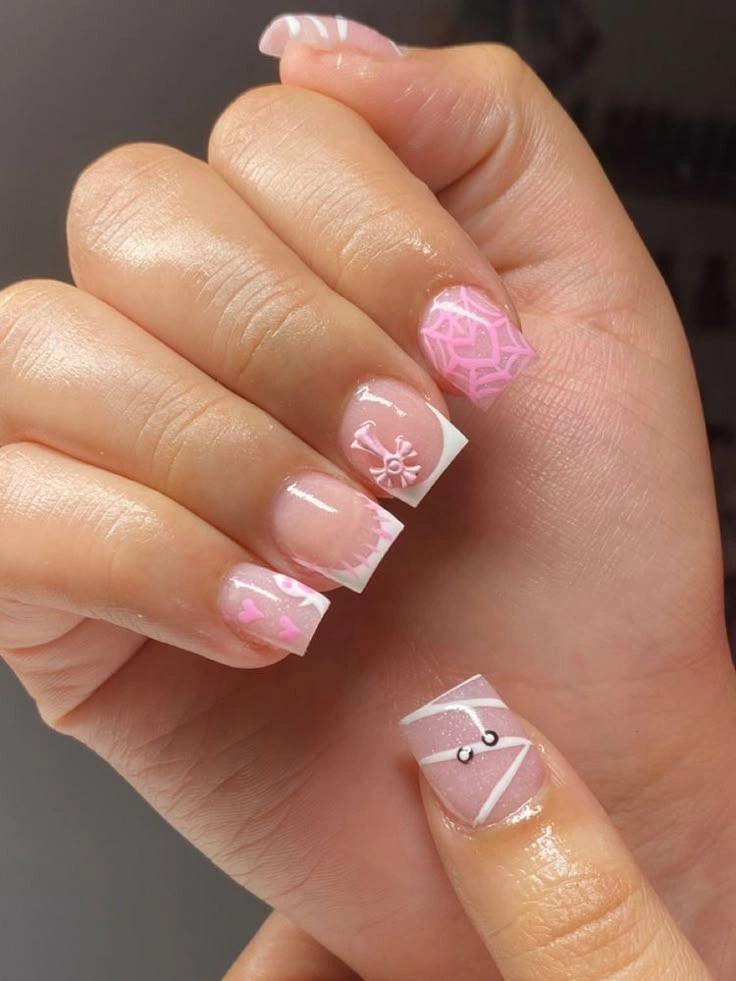
#11. Pink Spiderweb French Tip Nails
Who says Halloween has to be black and orange? Soft pink spiderwebs, tiny hearts, and a bandaged “mummy” nail with rhinestone eyes turn the holiday into something delicate and a little bit coquette.
Best For — girly-girls who still want in on Halloween nail art
Pro Tip — Press small flat-back rhinestones into the mummy’s eyes while your top coat is still wet so they set without extra glue.
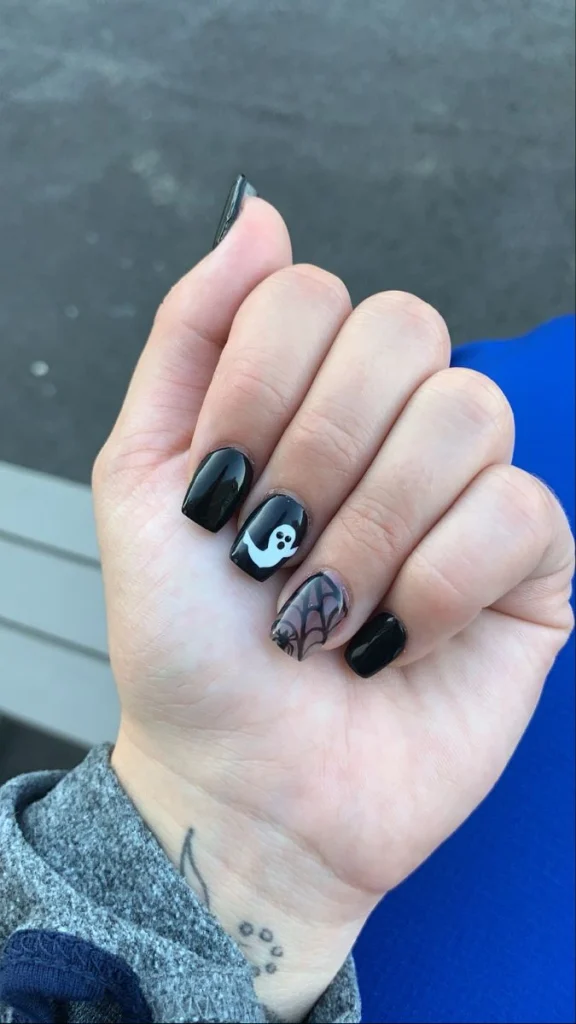
#12. Glossy Black Ghost and Spiderweb Nails
High-shine black nails pair with one nude nail featuring a cute white ghost and another with a fine spiderweb and spider. The mirror-like gloss makes this simple combo look expensive.
Best For — anyone who wants maximum polish with minimal design work
Pro Tip — Finish black nails with a high-gloss top coat made for dark polish — regular top coats can leave black looking slightly dull instead of mirror-shiny.
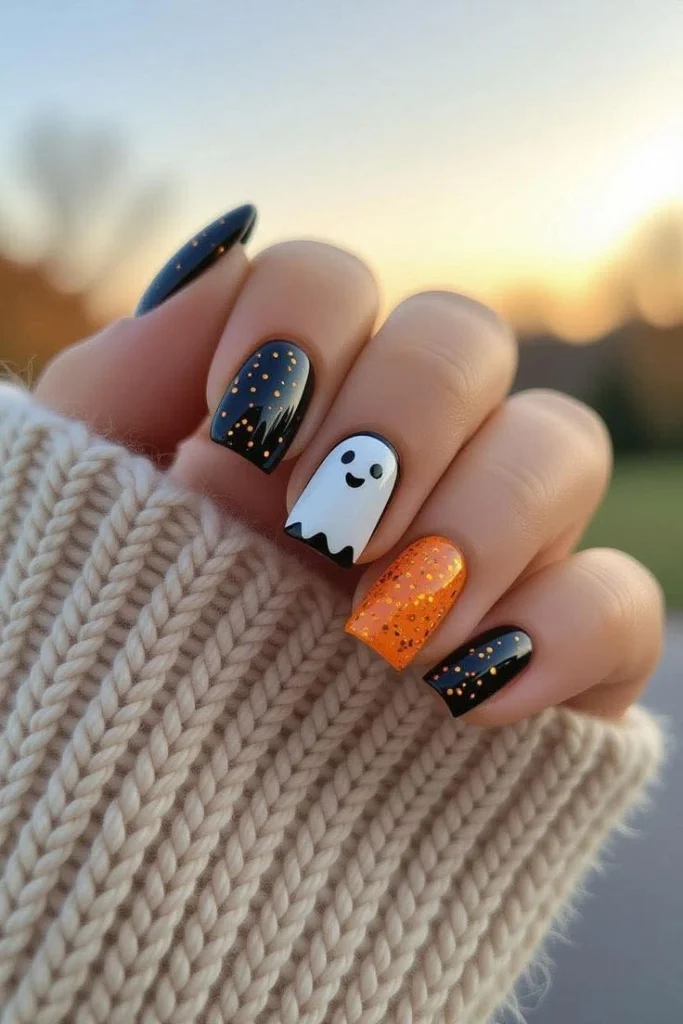
#13. Cozy Sweater-Weather Ghost and Glitter Nails
A smiling ghost, a starry night sky nail, and a glittery orange accent bring warm, sweater-season energy to a Halloween set. It feels less “scary” and more “cozy October evening,” which makes it easy to wear well past October 31st.
Best For — fans of a cute, non-scary Halloween look
Pro Tip — Dab your glitter accent nail with a makeup sponge instead of a brush — it packs the glitter in evenly with far less streaking.
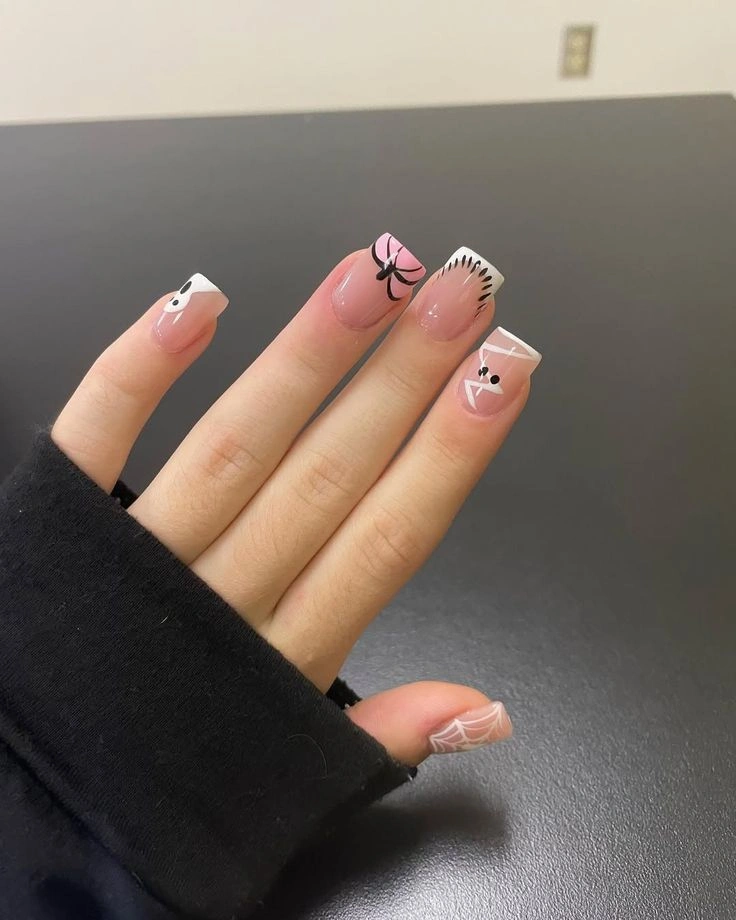
#14. Bow and Web Halloween French Tips
Sheer white French tips get a coquette twist with a tiny black bow, a fine spiderweb, and delicate ghost eyes peeking through the sheer base. It’s proof Halloween nails can still feel soft and romantic.
Best For — fans of the coquette and “clean girl” nail trends
Pro Tip — Keep your base sheer with a milky pink polish rather than solid white — it lets the black bow and web details stand out more crisply against the nail.
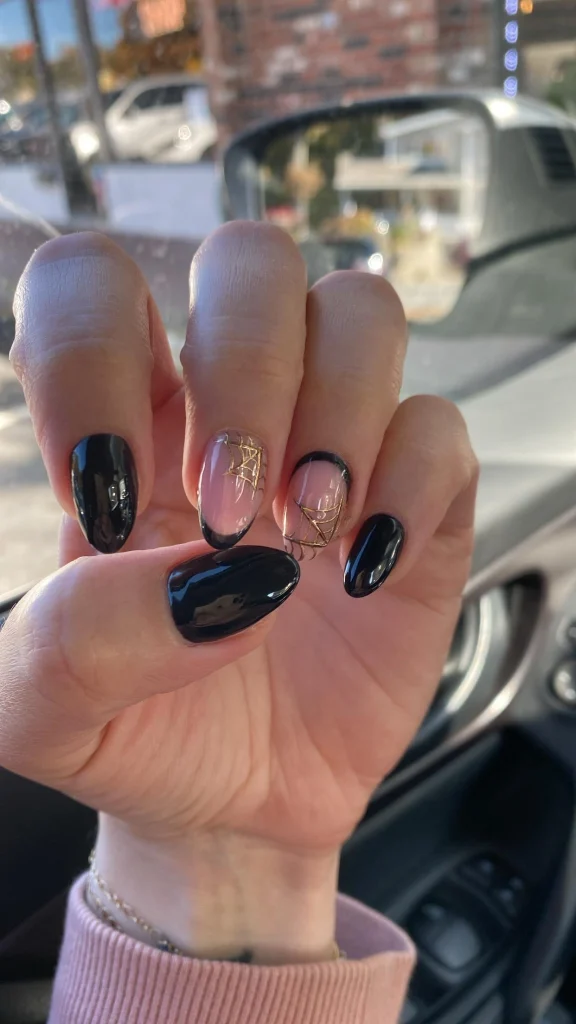
#15. Black French Tips with Gold Spiderweb Accents
Glossy black French tips get an unexpected upgrade with fine gold spiderweb line art traced over sheer pink nails. The metallic detail makes this one feel dressy enough for a Halloween party or a fall wedding.
Best For — special occasions that call for elevated Halloween nails
Pro Tip — Use a gold nail art striping brush or tape for the web lines — it gives you a clean metallic finish that a regular polish brush can’t match.
How to Choose the Right Nail Design
With fifteen looks to pick from, narrowing it down comes down to a few simple factors.
- Nail Shape — Almond and coffin shapes give art like the yin-yang ghost or the checkerboard tips more surface area to shine. Rounder shapes suit simpler designs, like the classic white French with a pumpkin accent.
- Skin Tone — Warm oranges and burnt caramel tones tend to pop on deeper skin tones, while pastel lavender and sunset ombre looks are especially flattering on lighter, cooler undertones.
- Occasion — Save the gold spiderweb French tips or the glossy black ghost design for parties and photos. Save the cozy sweater-weather ghosts for everyday wear at work or school.
- Skill Level — If you’re newer to nail art, start with sticker-friendly designs like the classic white tip look. Save freehand-heavy sets, like the mixed-icon manicure, for once you’re more confident with a liner brush.
What You’ll Need
A handful of affordable tools will get you through almost every design on this list.
Essential for ghost faces, spiderwebs, and jack-o’-lantern details
The base for most of the moody, glossy looks on this list
Makes even stars, eyes, and small round accents effortless
A quick shortcut for pumpkins, bats, and ghosts if freehand isn’t your thing
Seals your art and gives dark polish that mirror-like shine
Keeps skin around the nail hydrated so art looks clean, not dry
Pro Tips for a Long-Lasting Manicure
Prep Your Nails First
Push back cuticles and lightly buff the nail surface before polish goes on. A smooth, oil-free surface is what actually makes gel or regular polish grip and last.
Cap the Free Edge Every Time
Swipe your top coat over the very tip of the nail, not just the top. This one habit alone is what stops chipping at the edges.
Wait Before You Get Your Hands Wet
Regular polish stays soft for hours after it looks dry. Skip dishwashing or hot showers for at least an hour after painting to avoid dents and smudges.
Moisturize Around the Nail Daily
Dry cuticles cause polish to lift at the edges faster. A quick swipe of cuticle oil every night keeps your Halloween art intact longer.
Frequently Asked Questions
Q: How long do medium length Halloween nails typically last?
A: With gel polish and proper prep, most of these designs hold up for two to three weeks. Regular polish versions usually last about a week before chipping starts.
Q: What’s the best nail shape for medium length Halloween nails?
A: Almond and squoval shapes are the most versatile at medium length. They give detailed art enough room while still being practical for daily typing and tasks.
Q: Can I recreate these Halloween nail designs with press-ons?
A: Absolutely. Press-ons are actually one of the easiest ways to get detailed looks like the checkerboard or gold spiderweb design without freehand painting.
Q: How do I make Halloween nail art last through the whole season?
A: Reapply a glossy top coat every four to five days to refresh the shine and reseal any early lifting at the tips, especially on high-detail accent nails.
Recommended Product
Halloween Nail Art Sticker and Decal Set
★★★★☆ Highly rated on Amazon
If you loved the ghost, pumpkin, and spiderweb designs above but aren’t confident freehanding them, a good decal set gets you the same look in minutes.
As an Amazon Associate, we earn from qualifying purchases.
Final Thoughts
Halloween nails don’t have to mean sticky costume-store polish or an all-day salon appointment. Whether you gravitate toward moody black French tips or a soft pastel ghost squad, there’s a medium length design here that fits your vibe.
Which of these nail looks are you trying first? Save this post to Pinterest so you can come back to it whenever you need fresh nail inspo!

Hi, I’m Jessica, the creator behind Unique Lash & Nails Katy.
I created this website for anyone who loves beautiful nails as much as I do. Here, I share trendy nail designs, seasonal manicure ideas, easy nail care tips, honest product recommendations, and step-by-step guides to help you create salon-worthy nails at home. Whether you’re looking for everyday inspiration or your next favorite nail trend, I hope you’ll find something you love.