17 Rhinestone Halloween Nails to Copy This Year
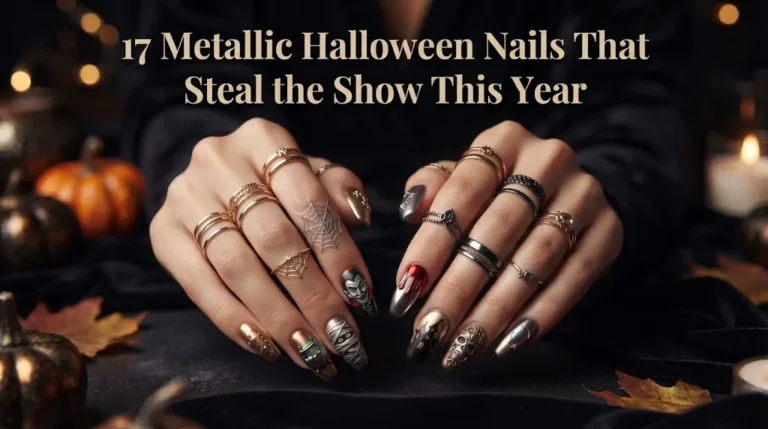
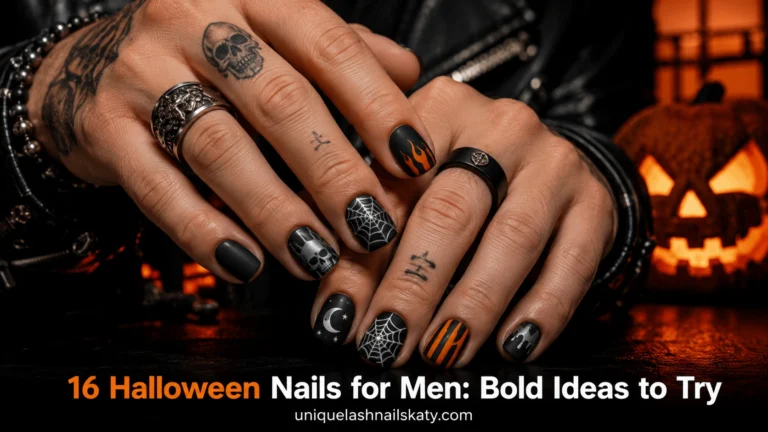
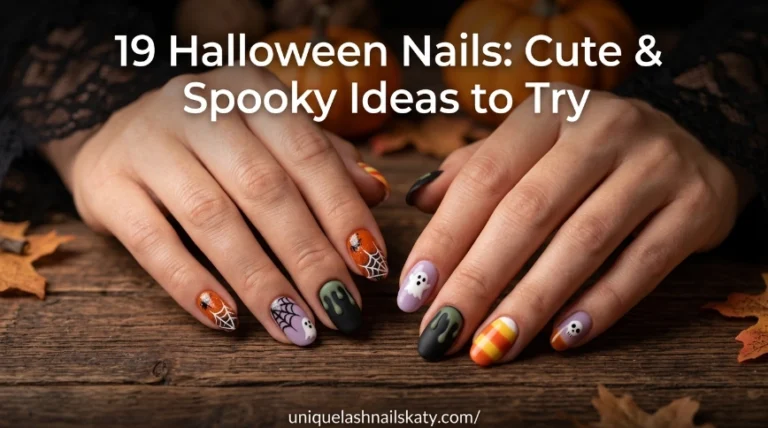
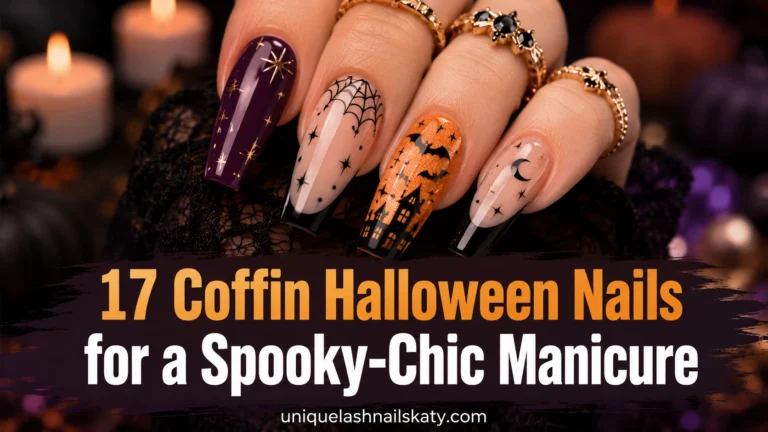
Halloween nails are the one time of year you can go as extra as you want, and rhinestones make that so much easier. Whether you’re into bling skulls, 3D ghosts, or a full chrome spider crawling across your hand, there’s a look here you can actually recreate. Let’s get into the 17 designs worth saving to your board this year.
✦ Our Top Picks at a Glance
Best Overall — Black Ombre Stiletto with Bling Skull
Best for Beginners — Glittery White Nail with Cute Ghost Face
Most Trendy — Orange Ombre Stiletto with Holographic Web
Best for Special Occasions — Silver Chrome Stiletto with 3D Spider Charm
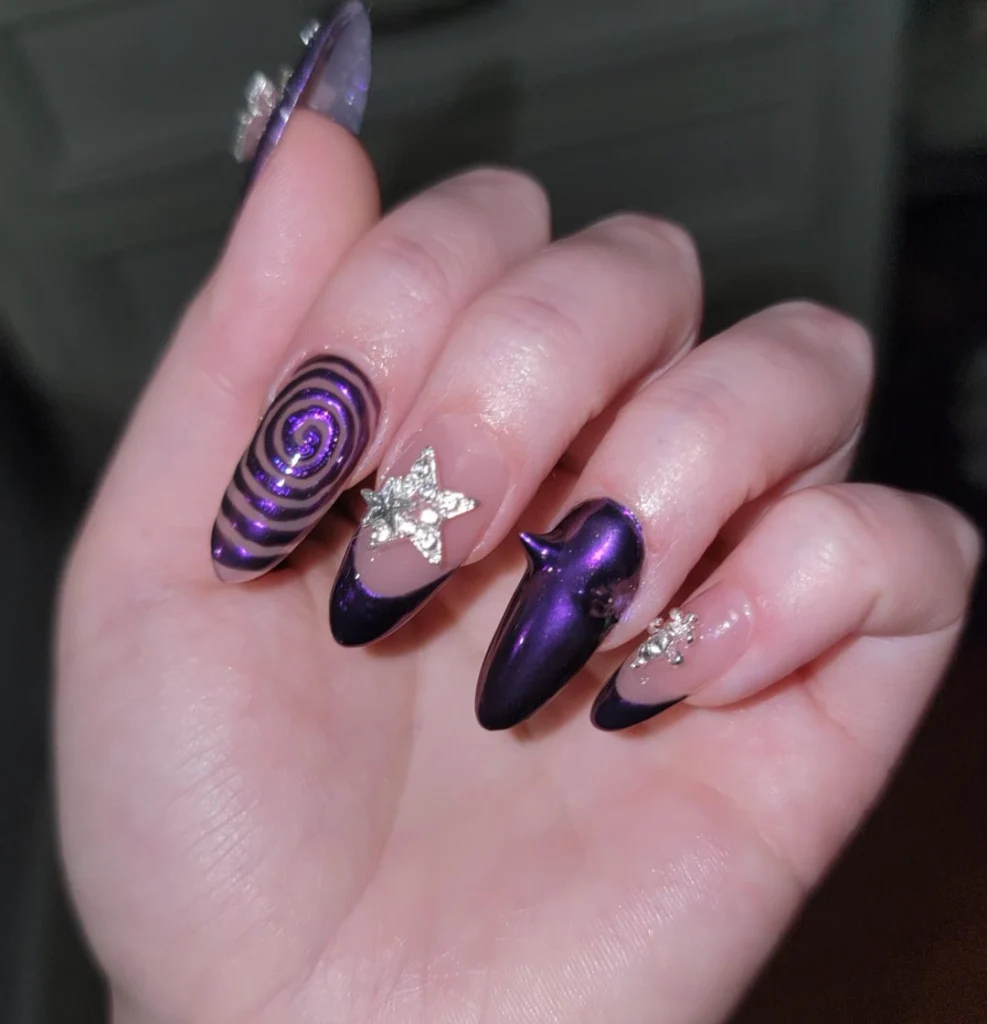


#1. Purple Chrome Swirl with Silver Star Accents
Picture a lilac base broken up by one nail wrapped entirely in a glossy purple spiral, then paired with a smooth chrome accent that curves into a sculpted point. A single silver star charm rests on bare pink, keeping the whole set from feeling too heavy.
Best For — anyone who wants drama without full nail coverage
Pro Tip — Apply chrome nail powder while the gel base is still tacky, then buff with a soft brush for exactly 15 seconds to avoid streaking.
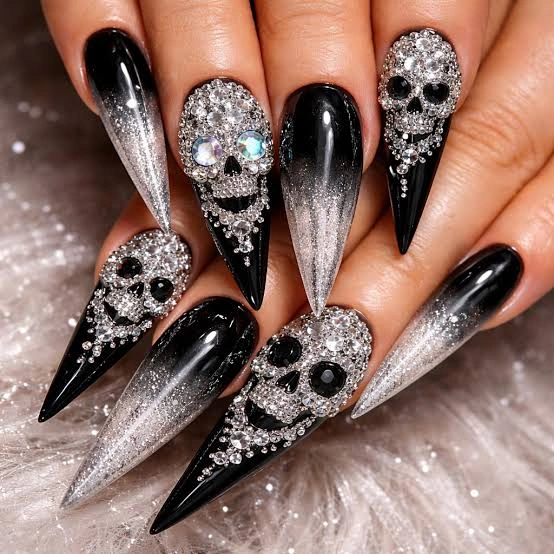
#2. Black Ombre Stiletto with Bling Skull
This one’s for the girls who want their nails to announce them from across the room. Two stiletto tips fade from jet black into a soft silver mist, while the center nails carry rhinestone skulls with glassy AB crystal eyes.
Best For — Halloween parties where subtlety isn’t the goal
Pro Tip — Press flatback rhinestones into the gel one at a time with a wax pencil, working outward from the eye sockets so the pattern stays symmetric.
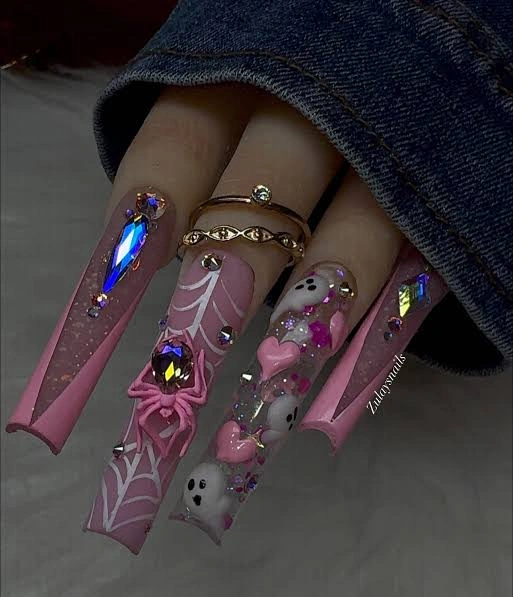
#3. Pink Coffin Nails with Ghosts and Spiderwebs
Unlike the darker looks on this list, this one keeps things soft with a milky pink base instead of black. Hand-painted spiderwebs, a plump 3D spider, and two round-eyed ghosts share space with scattered rhinestones and a tiny heart charm.
Best For — fans of cute-meets-creepy pastel Halloween looks
Pro Tip — Let the 3D spider’s gel body cure for a full 60 seconds under an LED lamp before adding the legs, or they’ll sink into the wet gel.
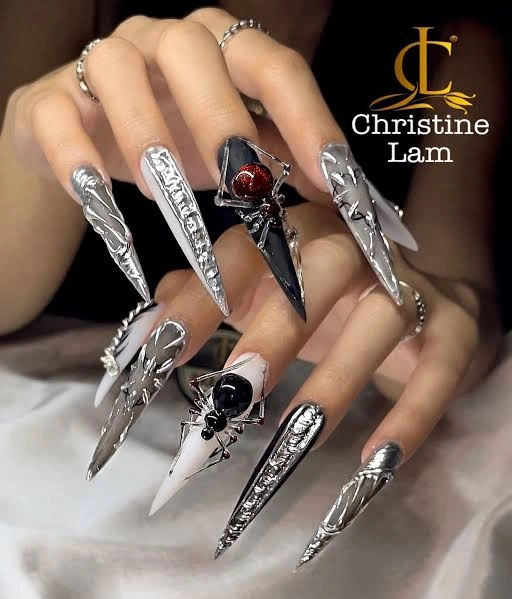
#4. Silver Chrome Stiletto with 3D Spider Charm
A mirror-chrome finish wraps each stiletto in liquid silver, broken only by one moody black-and-white marbled nail. A 3D spider with a deep red gem body perches right at the center, legs spread across two nails at once.
Best For — special occasions that call for showstopper length
Pro Tip — Seal the spider charm with a thick layer of no-wipe top coat, then cure at a 45° angle so the gel pools evenly around the legs.
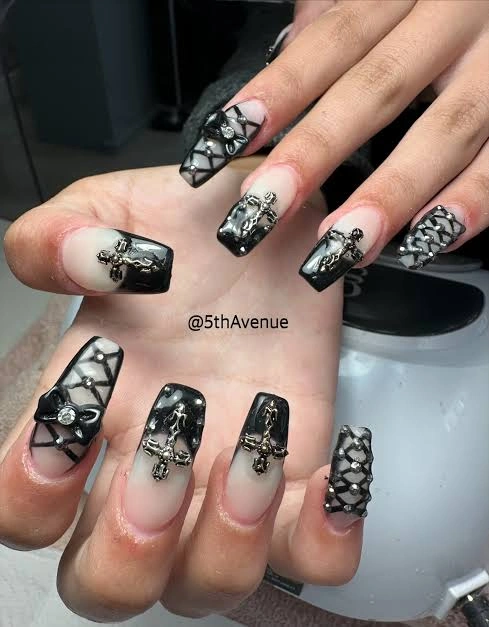
#5. Black French Tip with Fishnet and Cross Charms
If you love a gothic edge, this set delivers it through a sheer nude base and glossy black French tips. Silver fishnet lines climb up two nails, and small dangling cross charms add movement when you talk with your hands.
Best For — anyone drawn to a moodier, gothic Halloween style
Pro Tip — Draw the fishnet lines with a striping brush loaded with thin polish, holding it at a shallow angle so the lines stay hairline-thin.
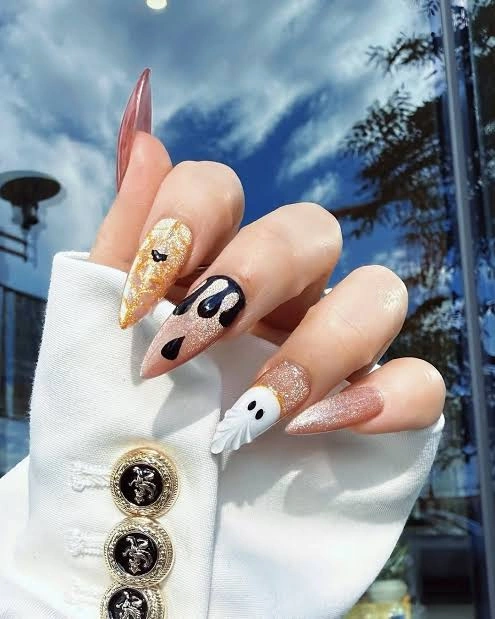
#6. Nude Gold Glitter with Dripping Ghost Art
Where the last set leaned gothic, this one goes glam with a warm gold glitter base that catches the light. A hand-painted black drip design and a sculpted 3D ghost with a sleepy expression give it just enough spook factor.
Best For — daytime Halloween events and fall brunches
Pro Tip — Thin your black gel polish with one drop of clear base before painting the drips, so they flow downward instead of sitting flat.
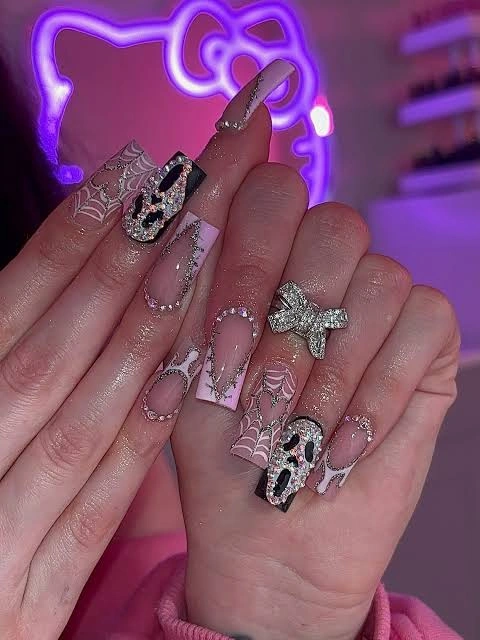
#7. Pink and White Coffin with Rhinestone Skull
Long coffin nails split the difference between soft pink shimmer and crisp white, with one nail carrying a rhinestone-paved skull outline. Delicate spiderweb linework and a bow ring finish off the girly-meets-creepy balance.
Best For — nights out where you want length and sparkle
Pro Tip — Outline the skull shape in pencil first, then fill it in rhinestone by rhinestone using tweezers held at a 90° angle for even spacing.
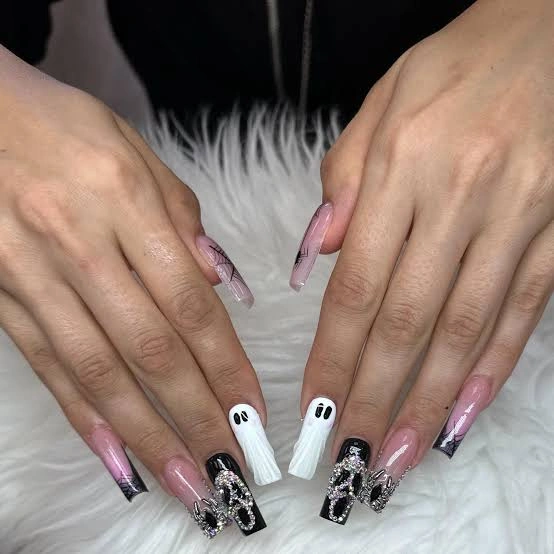
#8. Ombre Pink Coffin with 3D Ghost Sculpts
This one’s for anyone who can’t decide between elegant and playful, because it does both. Pink fades into clear near the cuticle, black spiderwebs trail across the tips, and two puffy white 3D ghosts sit right at the center.
Best For — those who want ghosts without going full black
Pro Tip — Sculpt the ghost shape in three thin acrylic layers rather than one thick one, letting each layer set for 30 seconds before adding the next.
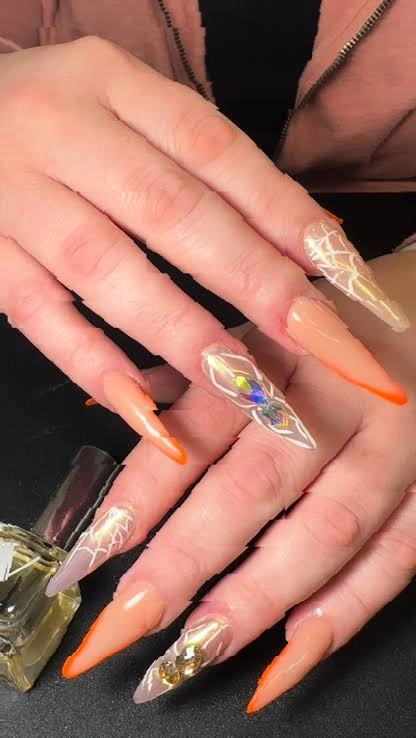
#9. Orange Ombre Stiletto with Holographic Web
Unlike the pink and black sets before it, this stiletto set leans into classic Halloween orange with a soft peachy fade. A holographic spiderweb overlay and an iridescent gem spider bring the sparkle without any dark color at all.
Best For — fans of bright, non-traditional Halloween shades
Pro Tip — Apply holographic web decals over a fully cured base coat, then seal edges with top coat brushed outward at a low angle to prevent lifting.
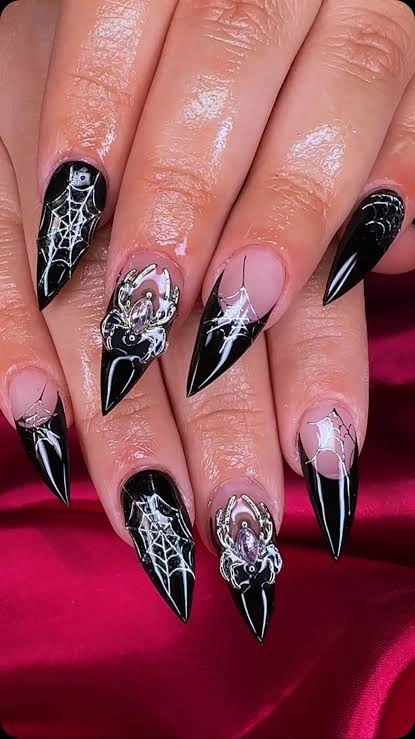
#10. Black and Nude Stiletto with Silver Spider
Sharp black stiletto tips meet bare pink negative space, with fine white spiderwebs hand-painted across every black section. A dimensional silver spider with a pale gem body crawls across the center nail for the focal point.
Best For — anyone who wants a classic look done with precision
Pro Tip — Use a size 000 detail brush for the web lines and reload it after every two strokes so the white stays opaque.
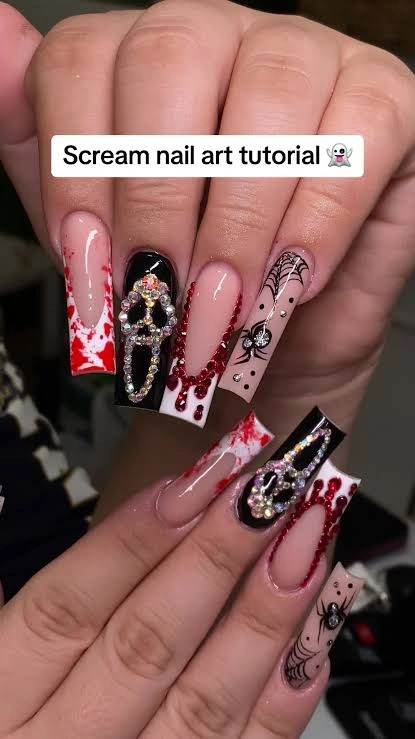
#11. Scream Ghost Face with Red Blood Drips
For the horror movie fans, this set is basically wearable fan art. A rhinestone-lined ghost-face mask sits on black, red gel drips run down two nails like fresh blood, and a small spiderweb ties the rest of the set together.
Best For — costume parties with a slasher-movie theme
Pro Tip — Build the blood drip effect in two thin coats of red gel, curing for 30 seconds between each so the drip keeps its shape instead of spreading.
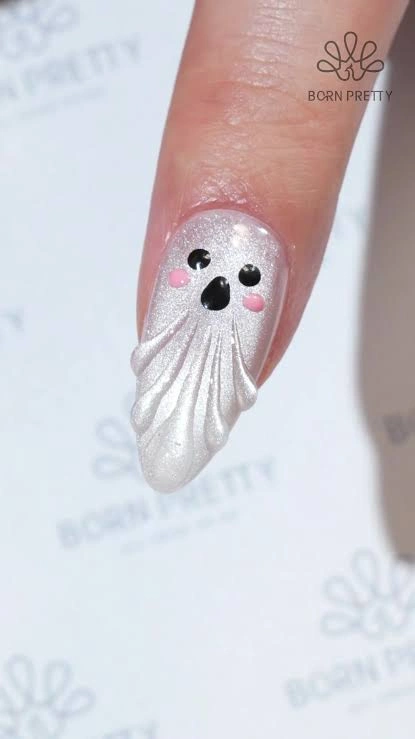
#12. Glittery White Nail with Cute Ghost Face
Compared to the bolder designs on this list, this single nail keeps it minimal and sweet. A soft iridescent glitter base holds a hand-painted ghost with rounded black eyes and two dabs of pink blush on its cheeks.
Best For — beginners trying their first Halloween nail art
Pro Tip — Paint the ghost’s tail with three wavy strokes in one direction, then cure immediately for 60 seconds before it can smudge.
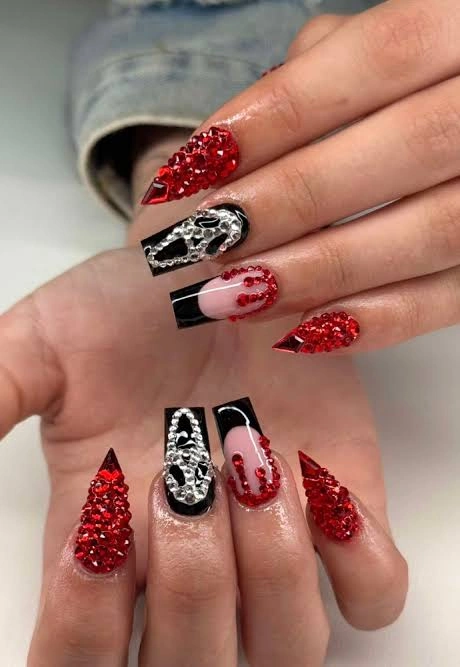
#13. Red Rhinestone Pave with Black Skull Accent
Solid red rhinestones cover two full nails edge to edge, catching light like tiny embers. A black nail with a rhinestone skull and a sheer negative-space nail with a red French line balance out all that sparkle.
Best For — bold dressers who want maximum shine
Pro Tip — Press rhinestones into wet gel starting from the cuticle and working toward the tip, so gravity doesn’t pull them out of place before curing.
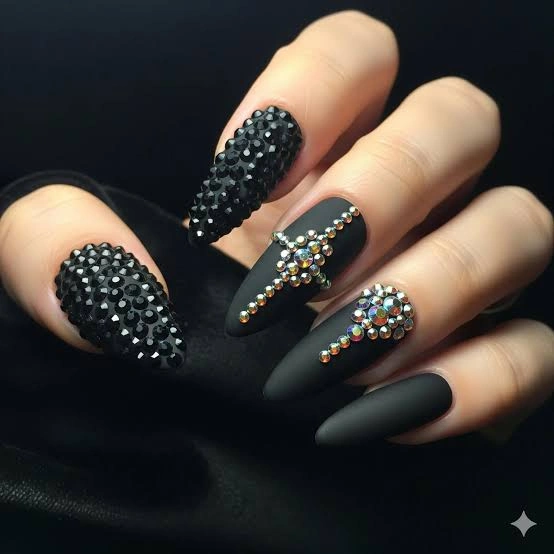
#14. Matte Black with Caviar Beads and Crystal Cross
This set is for anyone who wants texture you can actually feel under your fingertips. Two nails are coated in tiny black caviar beads for a raised, pebbled surface, while a matte black nail carries a full crystal cross design.
Best For — fans of edgy, textured nail art
Pro Tip — Press caviar beads into tacky gel using a foam applicator rather than your fingers, and cure for a full 90 seconds since the extra thickness needs more time.
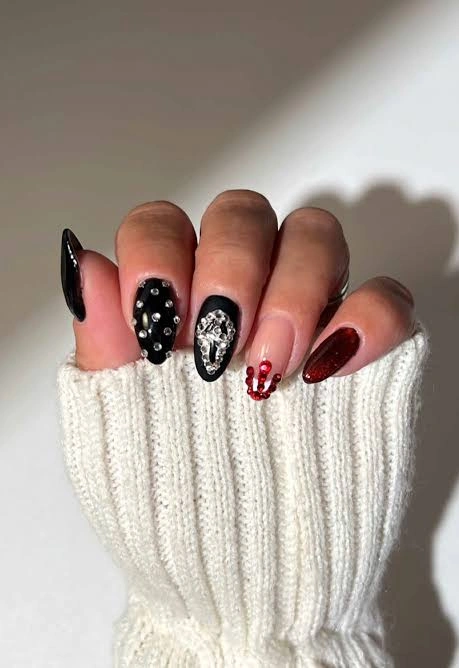
#15. Black Studded Nails with Red Glitter Accent
Simpler than the caviar-textured set before it, this one uses individual silver studs instead of an all-over bead coat. A hand-painted skull nail and one glittery red accent nail keep the palette moody but still eye-catching.
Best For — cozy fall days when you still want an edge
Pro Tip — Place studs with a dotting tool dipped lightly in top coat so they grip instantly instead of sliding around on the wet gel.
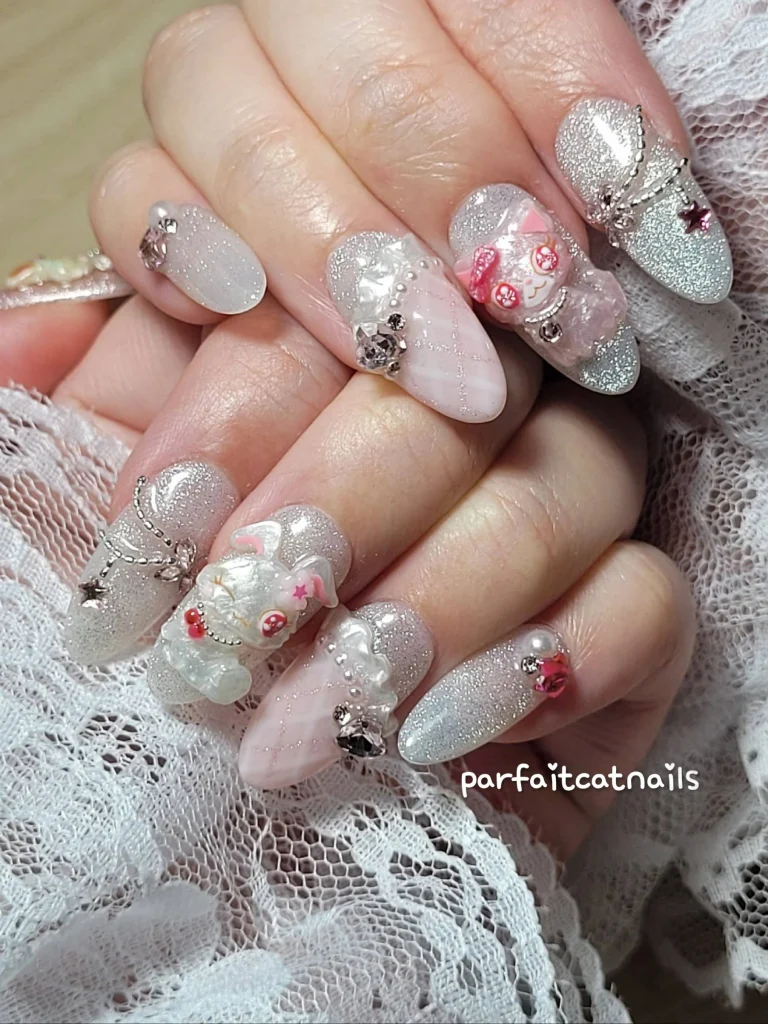
#16. Sparkly Silver Nails with 3D Kawaii Cat Charms
A shimmery silver-white base gets dressed up with two sculpted 3D cat charms, complete with pink bows and tiny painted faces. Pearl accents, chain details, and a soft star charm round out this glittery, collector-style set.
Best For — anyone who loves kawaii nail art year-round
Pro Tip — Attach 3D charms with a small dot of thick gel rather than glue, curing for 60 seconds before adding any nearby rhinestones so they don’t shift.
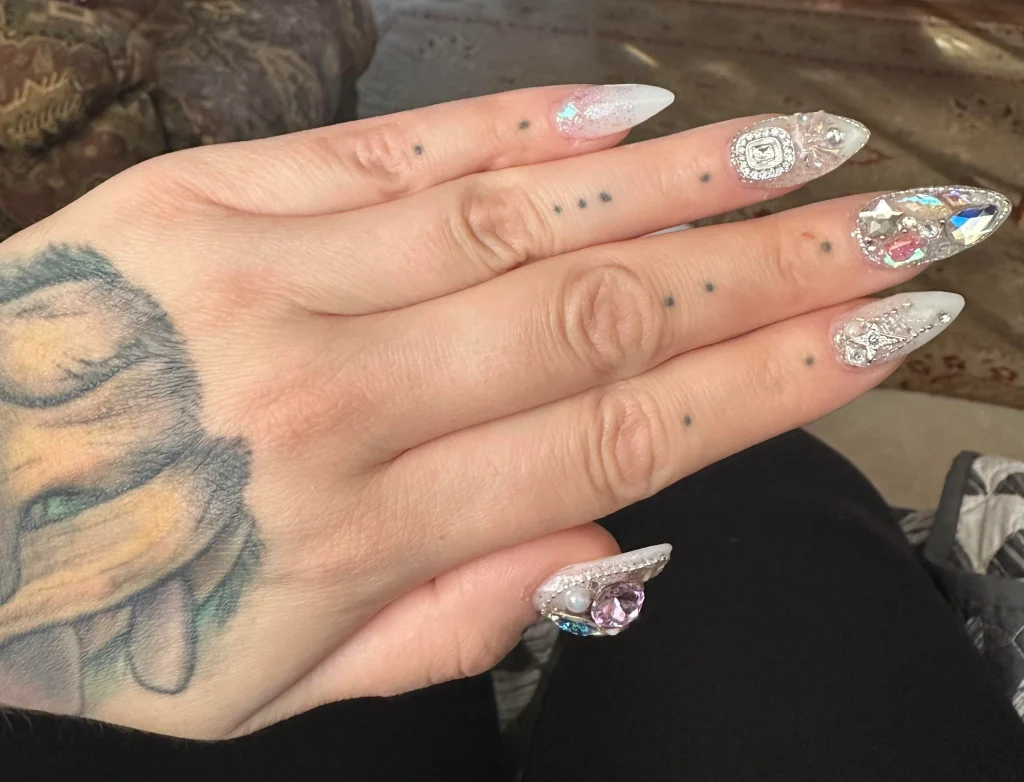
#17. Clear Glitter Stiletto with Oversized Gem Clusters
If you want your hands to do all the talking, this is the set for you. Long clear stiletto nails are loaded with oversized multicolor gem clusters, mixed metallic charms, and one soft pink stone that anchors the whole hand.
Best For — editorial-style looks and special photo shoots
Pro Tip — Balance large gem clusters across two or three nails max, gluing them with nail-safe resin cured for 90 seconds so the weight doesn’t cause lifting.
How to Choose the Right Nail Design
With this many options, narrowing it down comes down to a few practical things. Here’s what to think about before you book your appointment or start prepping supplies.
- Nail shape — Stiletto and coffin shapes give 3D charms and gem clusters more surface area to sit on, while shorter almond or round shapes suit hand-painted details like the ghost face or spiderwebs better.
- Skin tone — Warm tones like the gold glitter or orange ombre pop beautifully against deeper skin, while cool tones like silver chrome and icy white read especially crisp on fair to medium skin.
- Occasion — Save the oversized gem clusters and full rhinestone pave for parties or shoots, and keep the single ghost nail or subtle web lines in rotation for work or school.
- Skill level — Hand-painted linework and 3D sculpting take practice, so if you’re new to nail art, start with press-on rhinestones or simple dotting-tool designs before attempting a full 3D charm.
What You’ll Need
Most of these looks use the same core toolkit, just applied differently from nail to nail. Here’s what to have on hand before you start.
Covers everything from full pave to single accent stones.
Needed for spiderwebs, drips, and fine linework.
Gives that mirror-silver finish seen on the chrome designs.
Spiders, ghosts, and kawaii charms in one pack.
Makes placing tiny stones so much easier.
Seals charms and rhinestones without a sticky layer.
Pro Tips for a Long-Lasting Manicure
Cap the free edge every time
Swipe your top coat over the very tip of the nail on every application. This one habit alone can add several extra days of wear before chipping starts.
Cure in short bursts for heavy embellishments
When you’re stacking rhinestones or 3D charms, cure for 30-second intervals instead of one long cure. It keeps the gel from shrinking unevenly under the extra weight.
Wipe with alcohol between coats
A quick swipe with 91% isopropyl alcohol removes the tacky layer between coats and helps the next one bond properly, which matters most on textured looks like caviar beads.
Apply cuticle oil daily
Rub a drop of cuticle oil into the base of each nail every night. Hydrated cuticles mean less lifting around rhinestones and charms placed near the cuticle line.
Frequently Asked Questions
Q: How long do rhinestone Halloween nails usually last?
A: With gel application and proper sealing, rhinestone nails typically last two to three weeks. Stones near high-friction areas, like fingertips, may need a touch-up sooner.
Q: Can I do 3D charm nails at home without acrylic experience?
A: Yes, if you start with pre-made 3D charms instead of sculpting your own. Attach them with thick gel and cure carefully, and you can skip acrylic sculpting entirely.
Q: What’s the easiest Halloween nail design for beginners?
A: A single hand-painted ghost nail or press-on spiderweb decal is the easiest entry point. Both require minimal freehand skill and still look intentional.
Q: How do I keep heavy rhinestone nails from lifting?
A: Seal stones fully with no-wipe top coat, avoid soaking your hands for long periods, and reapply top coat every few days to reinforce the seal around each stone.
Recommended Product
Flatback Rhinestone Nail Art Mixed Size Kit
★★★★☆ Highly rated on Amazon
A mixed-size rhinestone kit is genuinely the most useful thing to have on hand since so many of these looks rely on different stone sizes for pave, accents, and outlines.
As an Amazon Associate, we earn from qualifying purchases.
Final Thoughts
From bling skulls to sculpted ghosts, this list proves rhinestone Halloween nails can go as subtle or as extra as you want. Pick whichever look matches your comfort level with nail art, then build up from there next time.
Which of these nail looks are you trying first? Save this post to Pinterest so you can come back to it whenever you need fresh nail inspo!

Hi, I’m Jessica, the creator behind Unique Lash & Nails Katy.
I created this website for anyone who loves beautiful nails as much as I do. Here, I share trendy nail designs, seasonal manicure ideas, easy nail care tips, honest product recommendations, and step-by-step guides to help you create salon-worthy nails at home. Whether you’re looking for everyday inspiration or your next favorite nail trend, I hope you’ll find something you love.