How to Clean Under Nails: 6 Quick Steps That Work
Quick Answer
Soak your fingertips in warm, soapy water for two to three minutes to loosen trapped debris. Scrub gently under each nail with a soft nail brush, then lift any stubborn bits with a damp orangewood stick instead of anything sharp. Rinse well, pat your nails completely dry, and finish with cuticle oil so the skin stays soft and traps less dirt next time.
Time needed
5-10 minutes
Difficulty
Beginner
Items needed
4 basic tools
Result lasts
2-3 days
Grab a small bowl, warm water, and a nail brush, because you’re about to get the cleanest nails of your week in under ten minutes. Dirt, lint, makeup residue, and garden soil love hiding under your free edge, and regular handwashing barely touches them since soap can’t reach into that tight groove. This guide walks you through a gentle six-step method that lifts everything out without scratching your nail plate or irritating your cuticles. You’ll also learn which tools are worth buying, the mistakes that cause most damage, and a few pro tricks that keep your nails cleaner for days.


What Do You Need to Clean Under Your Nails?
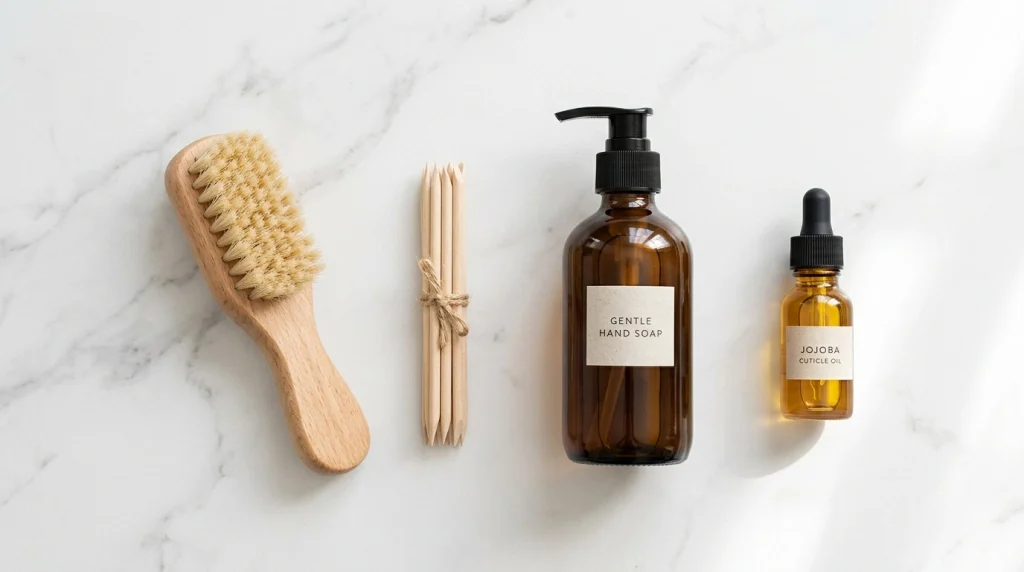
You only need four simple tools, and you probably own half of them already. Each one does a job the others can’t, which is why this short list works better than a drawer full of gadgets.
- A soft nail brush — the bristles reach into the groove under your free edge where your fingers can’t. Choose a soft nail brush for cleaning under nails with flexible bristles that scrub without scratching the underside of the nail.
- Orangewood sticks — these gently lift stubborn, packed-in debris that bristles leave behind. Keep a pack of orangewood cuticle sticks in your kit because wood is firm enough to scoop yet soft enough not to gouge your nail bed.
- A gentle hand soap — a mild, moisturizing formula loosens oils and grime without stripping your skin. Harsh antibacterial soaps dry out your cuticles, and dry cuticles crack, which creates more places for dirt to hide.
- Cuticle oil — applied at the end, it keeps the skin around your nails supple so debris slides off instead of sticking. Jojoba-based oils absorb fastest because jojoba closely mimics your skin’s natural oils.
Skip metal cuticle pushers and pointed tools for this job entirely. Metal concentrates force on one tiny point, so a small slip can dent your nail plate or break the seal between your nail and skin, and that opening invites bacteria in.
Why Does Dirt Get Stuck Under Your Nails?
Your free edge forms a shallow pocket called the hyponychium area, and it acts like a tiny scoop every time you touch something. Gardening, cooking, applying makeup, and even scrolling on your phone push microscopic particles into that groove, where moisture and natural skin oils glue them in place. Longer nails trap noticeably more because the pocket is deeper, which is one reason short, neatly filed nails stay cleaner with less effort.
Understanding this changes how you clean. Soaking first matters because water softens the dried, glue-like mixture of oil and debris, letting your brush sweep it out instead of grinding it deeper. If you garden often, protecting your nails while gardening with gloves prevents most of the problem before it starts.
How Do You Clean Under Your Nails Step by Step?
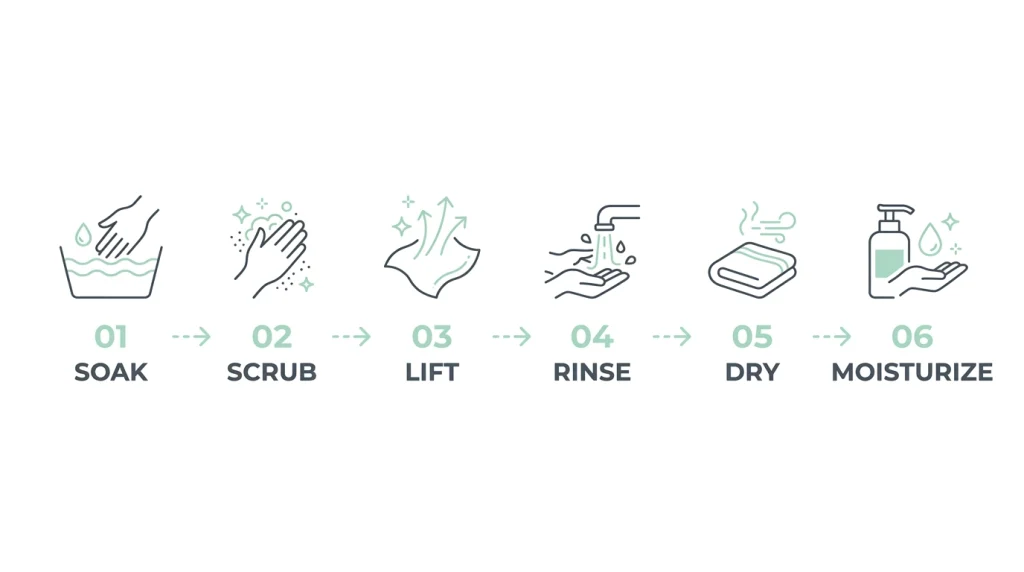
Work through these six steps in order, giving each nail about thirty seconds. Rushing the soak is the number one reason people end up scrubbing too hard, so let the water do the heavy lifting for you.
1
Soak Your Fingertips in Warm, Soapy Water
Fill a small bowl with comfortably warm water and add a pump of gentle hand soap. Submerge your fingertips for two to three minutes, wiggling them slightly so the soapy water flows under each free edge. Warmth softens dried debris and loosens the oils holding it in place, which means every step after this takes half the effort.
Common mistake: Using hot water to “disinfect” your nails. Water hot enough to kill germs would scald your skin, and excessive heat dries out your cuticles, leaving them cracked and more likely to trap dirt later.
2
Scrub Gently With a Nail Brush
Wet your nail brush and add a drop of soap to the bristles. Hold the brush at a slight angle and sweep it back and forth under each nail, letting the bristle tips do the work instead of pressing hard. Short, light strokes lift loosened debris out of the groove, while heavy pressure just bends the bristles flat so they skip over the dirt.
Common mistake: Scrubbing side to side across the whole fingertip. That motion pushes debris deeper under the nail instead of out, so always brush from the cuticle toward the free edge and out.
3
Lift Stubborn Debris With an Orangewood Stick
Dampen the flat end of an orangewood stick and slide it gently under your nail, using a light scooping motion toward the tip. The damp wood glides instead of dragging, so it picks up packed-in residue the brush left behind without scratching. Work on one nail at a time and wipe the stick on a tissue between nails so you’re not just moving dirt around.
Common mistake: Digging the stick deep toward the cuticle side. The skin seal under your nail tears easily there, and once that seal breaks, bacteria get a direct path in, which is how painful infections start.
4
Rinse Thoroughly and Inspect Each Nail
Hold your hands under comfortably warm running water with your fingertips pointing down so debris washes away from your cuticles. Look at each nail in good light, turning your hand so you can see under the free edge. Catching a missed spot now takes five seconds, while discovering it later means repeating the whole routine.
Common mistake: Rinsing with fingertips pointing up. Water then runs from your nails toward your cuticles, carrying loosened dirt straight into the cuticle area where it causes irritation.
5
Dry Your Nails Completely
Pat your hands dry with a clean towel, pressing gently around each nail to wick moisture from under the free edge. Trapped dampness is the main reason nails develop that musty smell, because bacteria and yeast multiply fast in warm, wet grooves. If your nails are long, let them air-dry for an extra minute after toweling so no moisture stays hidden underneath.
Common mistake: Shaking your hands dry and calling it done. Air-drying alone leaves water sitting under the free edge for several minutes, which softens the nail and invites the exact odor you’re trying to prevent.
6
Moisturize Nails and Cuticles
Massage a drop of cuticle oil into each nail bed and around every cuticle, then rub any excess into your fingertips. Hydrated skin lies flat and smooth, so there’s less texture for dirt to cling to between cleanings. This final step also restores the moisture that soap and water stripped away, keeping your cuticles flexible instead of flaky.
Common mistake: Skipping oil because your hands “feel fine.” Cleaned nails lose surface oils during the soak and scrub, and without replenishing them, your cuticles dry out within hours and start snagging debris again by evening.
Warning
Never use sharp metal tools, pins, or toothpicks to dig under your nails. A slip can puncture the hyponychium, the delicate skin sealing your nail to your fingertip, and that tiny wound becomes an entry point for staph bacteria. If you notice redness, swelling, or throbbing pain after cleaning, stop and check the signs of unhealthy nails so you can tell normal irritation from an early infection.
How Long Will Your Nails Stay Clean?
Expect visibly clean nails for two to three days with normal daily activity. Cooking, gardening, or wearing dark makeup shortens that window because pigments and soil stain the underside faster than everyday dust does. A thirty-second brush during your nightly handwash stretches the results, since fresh debris hasn’t had time to harden into that stubborn, glue-like layer. For a full routine that keeps the rest of your nail in the same shape, follow this guide to cleaning your nails at home once a week.
What Should You Do (and Avoid) When Cleaning Under Nails?
Do
- +Soak first so debris softens before you touch it
- +Use soft tools like a brush or orangewood stick
- +Dry thoroughly, especially under long nails
- +Finish with cuticle oil every single time
Don’t
- −Dig with metal tools, pins, or sharp points
- −Scrub aggressively on dry, unsoaked nails
- −Leave moisture trapped under the free edge
- −Push the stick deep toward the nail bed
What Are the Best Pro Tips for Keeping Nails Clean Longer?
These four tricks go beyond the basic routine and solve the problems that bring most people back to this guide. Each one takes less than a minute once it becomes a habit.
Pro Tip
Scrape your nails across a bar of soap before messy jobs like gardening or kneading dough. The soap packs under your free edge and blocks dirt from getting in, then rinses straight out afterward. This old salon trick saves you the entire deep-clean routine later.
Pro Tip
Keep a nail brush by every sink you use daily. Visibility is the whole strategy here, because you’ll actually use the brush when it’s sitting next to the soap instead of buried in a drawer. A quick ten-second brush during regular handwashing prevents buildup from ever hardening.
Pro Tip
File your nails into a smooth oval or squoval shape with no rough edges underneath. Jagged free edges catch lint and fibers like Velcro, while a smooth, sealed edge gives debris nothing to snag on. Run your file in one direction only, since sawing back and forth creates the micro-tears that trap grime.
Pro Tip
Add this routine to your daily nail care routine instead of treating it as a separate chore. Pairing the quick brush with something you already do, like your evening cleanse, turns it into an automatic habit within a week. Habits stuck to existing routines survive far longer than standalone reminders.
What If the Dirt Won’t Come Out?
Sometimes debris hardens into a layer that resists the standard routine. Try these targeted fixes before you reach for anything sharper, because stronger tools are rarely the answer and gentler chemistry usually is.
Dark staining under the nails won’t budge after scrubbing
Soak for five extra minutes, then rub the underside gently with a paste of baking soda and water, which lifts pigment without bleach. Next time, wear gloves for staining tasks like cooking with turmeric or self-tanner, since prevention beats every removal method.
A musty smell lingers even after cleaning
That odor means moisture-loving bacteria are still living in the groove, so rewash with soap, rinse well, and dry completely, even using a cool hairdryer for ten seconds under long nails. Going forward, never skip the drying step, because dampness is what lets the smell return overnight.
The skin under your nail feels sore after cleaning
You pressed too hard or went too deep, so give your nails a full day of rest and dab on cuticle oil to calm the skin. On your next clean, soak longer and let the brush do the work with barely any pressure, because clean should never hurt.
Which Products Actually Help Clean Under Nails?
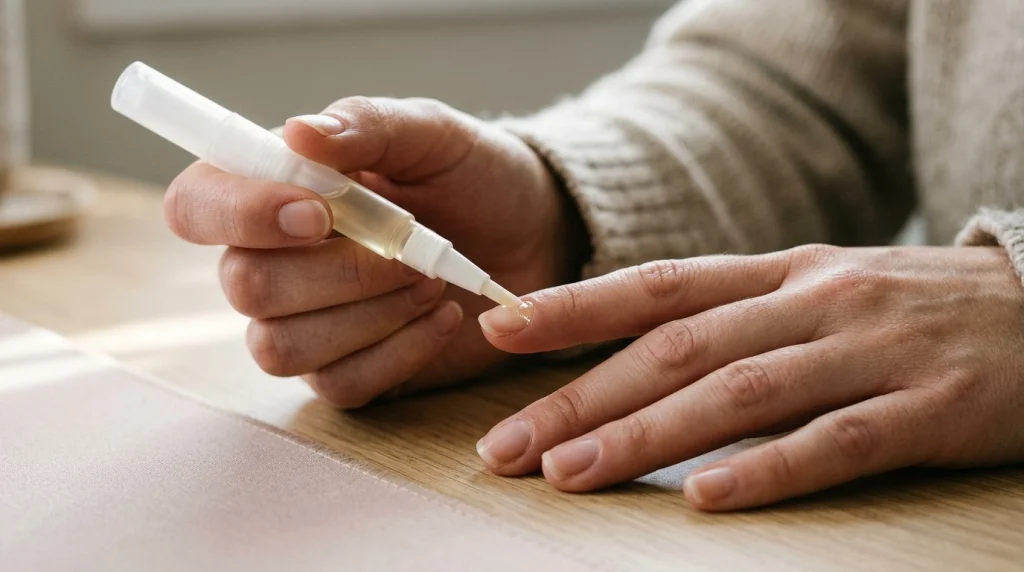
You don’t need a big kit, but one quality oil makes the finishing step genuinely enjoyable instead of skippable. A cuticle oil pen for nails lives in your bag or on your nightstand, so you’re far more likely to use it nightly than a fiddly dropper bottle.
Recommended Product
Jojoba-Based Cuticle Oil Pen
★★★★☆ Highly rated on Amazon
The twist-up pen format puts one precise drop exactly where you need it, and jojoba oil absorbs quickly without a greasy residue on your phone screen.
As an Amazon Associate, we earn from qualifying purchases.
Frequently Asked Questions
Q: Is it bad to clean under your nails with a toothpick?
A: Yes, it’s risky because toothpicks are sharp enough to puncture the skin seal under your nail, and wood splinters can break off inside the groove. Grab a damp orangewood stick instead — it’s wider, softer, and designed for this exact job.
Q: How do you clean under nails without a nail brush?
A: Soak your fingertips in warm, soapy water for three minutes, then work an old soft-bristled toothbrush under each nail using the same gentle strokes. It works because its small head and soft bristles mimic a nail brush, though you’ll want to replace it sooner since the bristles splay faster.
Q: Why do my nails smell bad underneath?
A: The smell comes from bacteria and yeast feeding on trapped debris in a damp groove under your free edge. Wash thoroughly with soap, rinse with fingertips pointing down, and dry completely, since removing both the food source and the moisture starves the odor-causing microbes.
Q: How often should you clean under your nails?
A: Do the full six-step routine once or twice a week, and add a quick ten-second brush during your nightly handwash on other days. This rhythm works because daily light maintenance stops debris from hardening into the stubborn layer that needs a deep clean.
Q: Can dirt under nails cause an infection?
A: It can, because packed debris harbors bacteria and aggressive digging creates tiny breaks in the skin that let them in. Keep your nails at a practical length, clean gently without breaking the skin, and watch for redness or swelling that doesn’t fade within a day.
The single most important takeaway is simple: soak first, use soft tools, and never dig. Clean under your nails once or twice a week with this gentle routine, and you’ll spend less time scrubbing while your nails look fresher every day. Save this guide to your nail care board on Pinterest so it’s waiting the next time your nails need a reset.

Hi, I’m Jessica, the creator behind Unique Lash & Nails Katy.
I created this website for anyone who loves beautiful nails as much as I do. Here, I share trendy nail designs, seasonal manicure ideas, easy nail care tips, honest product recommendations, and step-by-step guides to help you create salon-worthy nails at home. Whether you’re looking for everyday inspiration or your next favorite nail trend, I hope you’ll find something you love.