How to Clean Nail Tools: Simple Step-by-Step Guide
Quick Answer
Scrub your nail tools with warm soapy water after every use, and soak the metal ones in 70% isopropyl alcohol for 10 minutes once a week (or after every use if you share your kit). Rinse everything well, dry each piece completely, and store your tools in a clean, dry case. Wash porous files and buffers with soap, dry them fully, and replace them once the grit wears smooth, since they can’t be truly disinfected.
Time needed
15 minutes
Difficulty
Beginner
Items needed
6 basic tools
Result lasts
Until your next manicure
You probably wipe your clippers on a towel and call it done — most people do. But your tools collect skin cells, nail dust, and natural oils every time you use them, and a quick wipe leaves almost all of that behind. This guide gives you a simple 15-minute routine that actually keeps your kit hygienic. You’ll learn exactly what to soak, what to toss, and the drying step that almost everyone skips.


What Do You Need to Clean Nail Tools?
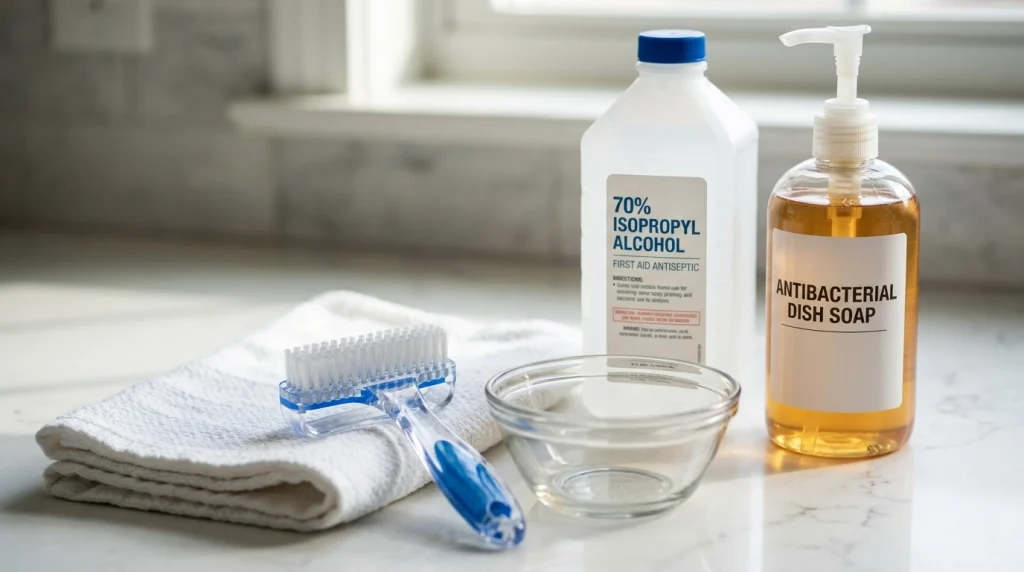
You don’t need a salon-grade setup for this routine. Everything on the list below is easy to find, and half of it is probably already in your bathroom. If you’re building your kit from scratch, our guide to basic nail care for beginners pairs perfectly with this cleaning routine.
- A small stiff brush — an old toothbrush works, but a dedicated nail tool cleaning brush scrubs debris out of clipper hinges and textured grips where germs love to hide.
- Antibacterial dish soap and warm water — soap dissolves the skin oils that trap bacteria against metal, which is why plain water never fully cleans on its own.
- 70% isopropyl alcohol — a bottle of 70% isopropyl alcohol disinfects pre-cleaned metal tools in about 10 minutes. The 70% strength actually outperforms stronger concentrations because its water content slows evaporation and helps the alcohol penetrate germ cell walls.
- A small bowl — choose one deep enough to submerge your clippers and nippers completely, since any part sticking out above the liquid stays undisinfected.
- Clean, lint-free towel — thorough hand-drying prevents rust spots, which is exactly why leaving tools to air-dry in a damp bathroom doesn’t count as real drying.
- Disinfectant soak (optional but recommended) — if you share tools with anyone, an EPA-registered soak such as Barbicide disinfectant gives you salon-level disinfection. Just follow the dilution ratio and contact time printed on its label.
How Do You Clean Nail Tools Step by Step?
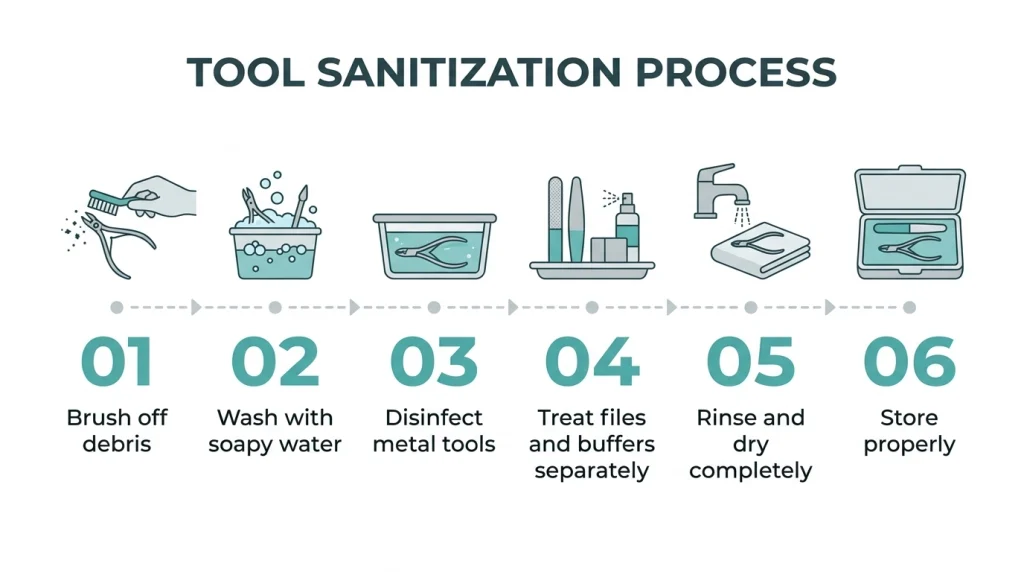
Here’s the full routine in order. Each step builds on the last one, so don’t skip ahead — disinfecting a tool that’s still coated in debris simply doesn’t work.
1
Brush Off Every Bit of Debris
Hold each tool over a trash bin and tap it firmly to knock loose the obvious dust. Then scrub every surface with your stiff brush, paying special attention to clipper hinges, the grooves of cuticle pushers, and the grit of your files. Dry debris physically blocks disinfectant from reaching the surface underneath, so this unglamorous first step decides how well everything after it works.
Common mistake: rinsing first and skipping the dry brushing. Water turns fine nail dust into a paste that packs into hinges instead of washing away, so always brush before anything gets wet.
2
Wash With Warm, Soapy Water
Fill your bowl with comfortably warm water and a few drops of antibacterial dish soap. Scrub each tool for 30 to 60 seconds, getting into joints and textured areas with your brush. Soap lifts the skin oils that glue bacteria to metal, which is the whole reason water alone leaves tools feeling clean without actually being clean.
Common mistake: using scalding-hot water. Extreme heat can warp plastic handles and loosen the glue holding brush bristles in place, so keep the water warm enough to feel comfortable on your hands.
3
Disinfect Your Metal Tools
Lay your pre-cleaned metal tools — clippers, nippers, cuticle pushers, tweezers — in the bowl and cover them completely with 70% isopropyl alcohol. Set a timer for 10 minutes, which gives the alcohol enough contact time to disinfect already-clean metal. If you’re using a concentrated soak like Barbicide instead, mix it exactly as the label directs, because the right dilution is what makes it effective.
Common mistake: soaking tools for an hour to be extra safe. Extended soaks pit the metal, corrode hinges, and dull cutting edges, so longer is genuinely worse here, not better.
Warning
Treat disinfectants with respect: work in a ventilated room, never mix bleach with any other cleaner because the fumes can be dangerous, and keep all soaking solutions away from your eyes and any open cuts on your hands.
4
Treat Files, Buffers, and Brushes Differently
Emery boards, foam buffers, and orangewood sticks are porous, which means no soak can fully disinfect them. Wash them with warm soapy water, rinse well, and stand them somewhere airy until they’re bone dry — then replace them once the grit feels smooth. For nail brushes, swirl the bristles in gentle soapy water, rinse with the bristles pointing down, reshape them with your fingers, and lay the brush flat so water can’t seep into the handle joint.
Common mistake: soaking wooden tools or emery boards for a long time. They absorb liquid, swell up, and can grow mildew deep inside where you’ll never see it.
5
Rinse and Dry Everything Completely
Rinse each disinfected tool under clean running water to wash away every trace of chemical residue. Then towel-dry every piece right away instead of leaving the batch to air-dry on its own. Leftover moisture breeds rust on carbon steel and gives any surviving microbes a damp home, quietly undoing the disinfecting work you just finished.
Common mistake: tossing slightly damp tools straight into your case. A closed case traps humidity against the metal for hours, so each tool should feel completely dry to the touch first.
6
Store Your Clean Tools Properly
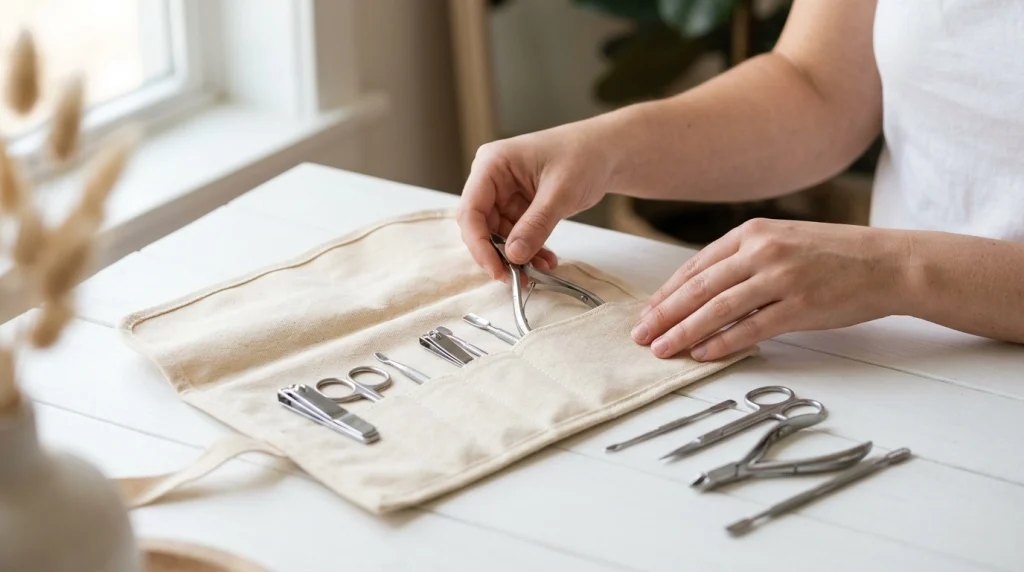
Place your bone-dry tools in a clean pouch or hard case, and wipe the inside of that case with a disinfectant wipe once a month. Even freshly cleaned tools pick up dust and germs from a grimy case within days, so the case itself is genuinely part of the routine. Once your tools are spotless, follow how to clean your nails at home before your next manicure so the whole process stays hygienic from start to finish.
Common mistake: keeping tools loose in a bathroom drawer. Bathrooms stay humid around the clock, and loose tools knock together, which nicks cutting edges and chips protective coatings.
How Often Should You Clean Your Nail Tools?
Readers always ask for the schedule, so here it is in plain numbers. Wash your tools with soap and water after every single use — that part is non-negotiable. Disinfect the metal pieces once a week if the kit is only yours, and after every use if anyone else borrows it, because shared tools carry a meaningfully higher infection risk. Swap out emery boards and buffers every few months or as soon as the grit smooths, and deep-clean your storage case once a month. To fold this into a full routine, check how often you should care for your nails and pair the two schedules together.
- After every use: soap-and-water wash for all tools, then dry completely.
- Weekly (personal kit): 10-minute disinfecting soak for metal tools.
- After every use (shared kit): full disinfecting soak for metal tools.
- Monthly: wipe out the storage case and inspect hinges for early rust.
- As needed: replace porous files, buffers, and orangewood sticks.
Pro Tips That Keep Your Tools Cleaner for Longer
The steps above cover the essentials. These four extras come from salon habits and fix the small problems that wear tools out early — and they help you avoid common nail health mistakes to avoid when you’re doing your own nails at home.
Pro Tip
Oil the hinges after disinfecting. Place one tiny drop of clipper oil for nail tools on each hinge and joint once your tools are fully dry. The oil keeps the cutting action smooth and forms a moisture barrier that stops rust before it starts. Just wipe away the excess so it never transfers onto your nails mid-manicure.
Pro Tip
Keep a dedicated dirty pouch. Toss used tools into a small separate pouch instead of back into your clean case. This one habit stops dirty and clean tools from touching each other, which means your disinfected set actually stays disinfected between manicures.
Pro Tip
Date your files when you open them. Write the month on the back of each new emery board with a marker. Grit wears down at a microscopic level you can’t see, and a date stamp tells you at a glance whether that file is fresh or six months past its prime.
Pro Tip
Treat a UV sanitizer box as a bonus, not a replacement. UV light can’t reach into hinges or penetrate caked-on debris, so it never substitutes for washing and soaking. Use it as a finishing touch after the real cleaning is done — dessert, not dinner.
Recommended Product
Barbicide Disinfectant Concentrate
★★★★★ Highly rated on Amazon
It’s the blue liquid you’ve seen in salon disinfectant jars, and one bottle makes many batches of properly diluted soak that disinfects metal implements in 10 minutes.
As an Amazon Associate, we earn from qualifying purchases.
Troubleshooting: When Cleaning Doesn’t Go as Planned
Rust spots showed up on your clippers
Rub the spots gently with a paste of baking soda and water, then rinse, dry immediately, and add a drop of oil to the joint. To prevent it next time, towel-dry every tool the moment it leaves the rinse — rust starts from moisture left sitting on steel, not from the disinfectant itself.
Your tools still smell like disinfectant
Rinse them longer under running water and let them air-dry for 10 minutes before casing them up. Going forward, stick to the soak time on the label, because over-soaking is what bakes that chemical smell into handles and grips.
Your file feels smooth but looks fine
Replace it — abrasive grit breaks down at a microscopic level long before your eyes notice the difference. Keep a spare set on hand and write the date on each file when you open it, so you’re never guessing how old it is.
Brush bristles dried splayed and stiff
Rewash the bristles in gentle soapy water, reshape them with damp fingers, and dry the brush flat with the bristles hanging just past the counter’s edge. Never stand brushes bristle-up in a cup while wet, since water then drains straight down into the handle glue and loosens it.
Frequently Asked Questions
Q: Can I clean nail tools with just soap and water?
A: Soap and water remove visible dirt, oils, and a good share of surface germs, so they’re a solid baseline after every personal use. But soap doesn’t reliably kill everything, which is why a weekly disinfecting soak matters — think of washing as tidying and disinfecting as deep cleaning.
Q: How long should nail tools soak in alcohol?
A: Ten minutes in 70% isopropyl alcohol is the sweet spot for pre-cleaned metal tools. Shorter soaks may not finish the job, and much longer ones start corroding hinges and dulling edges, so set a timer and stick to it.
Q: Can I clean nail tools in the dishwasher?
A: You can run solid stainless tools through a dishwasher in a pinch, but it’s rough on them. Harsh detergent pits the finish, high heat warps handles, and tools rattling against the rack dull their edges. Hand washing takes a few minutes and keeps your tools sharper for years.
Q: How do I clean tools after a nail infection?
A: Start by not sharing tools while any infection is active. Afterwards, wash everything thoroughly, give metal tools a full disinfecting soak, and throw away porous files and buffers that touched the area. If you notice redness, swelling, or anything spreading on your own nails, see a professional promptly.
Q: Should I clean brand-new nail tools before using them?
A: Yes — new tools arrive coated in manufacturing oils and warehouse dust. Give them one full wash and disinfecting cycle before they touch your nails, and they’ll perform better from the very first use.
The Takeaway: Clean Tools, Healthier Nails
Clean tools are the quiet foundation of every good manicure — they protect you from infection and keep your implements working like new. Wash after every use, disinfect weekly, dry everything completely, and replace what wears out. For the bigger picture, building a routine nail care habit ties tool hygiene together with everything else your nails need. Save this guide to your nail-care board on Pinterest so the routine is always one tap away!

Hi, I’m Jessica, the creator behind Unique Lash & Nails Katy.
I created this website for anyone who loves beautiful nails as much as I do. Here, I share trendy nail designs, seasonal manicure ideas, easy nail care tips, honest product recommendations, and step-by-step guides to help you create salon-worthy nails at home. Whether you’re looking for everyday inspiration or your next favorite nail trend, I hope you’ll find something you love.