18 Jack O Lantern Halloween Nails for Spooky Season
Jack o lantern Halloween nails are one of the easiest ways to make your manicure feel instantly festive without losing your personal style.
From tiny pumpkin faces on short natural nails to glowing orange coffin tips and sparkling Halloween art, these 18 designs give you plenty of ideas to save for your next spooky-season manicure.
Some are detailed, some are wonderfully simple, and several can be recreated at home with a fine brush, dotting tool, or Halloween nail decals.
✦ Our Top Picks at a Glance
Best Overall — Neon Orange Pumpkin Coffins
Best for Beginners — Nude Mini Pumpkin Accents
Most Trendy — Green Glitter Pumpkin Stilettos
Best for Special Occasions — Orange Pumpkin Almonds with Glitter
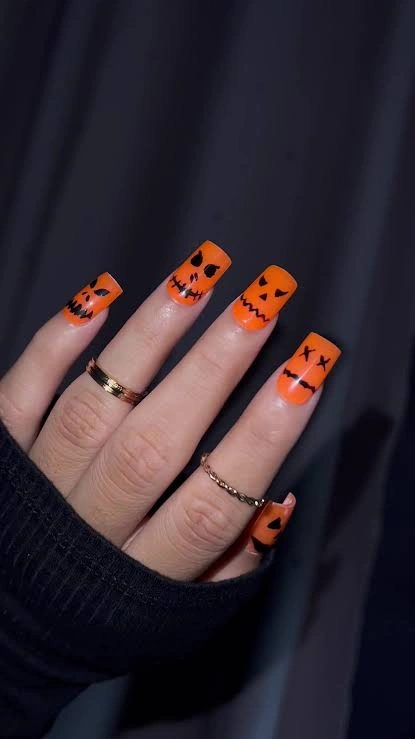
#1. Orange Monster Face Squares
Bright orange square tips turn into a tiny lineup of mischievous Halloween faces, with stitched mouths, crooked eyes, and different expressions on every nail. The slim gold rings and dark sleeve make the fiery color stand out even more.
Best For — Bold Halloween parties and costume nights
Pro Tip — Use a black nail art liner with a 5-7 mm detail brush and paint the eyes before adding mouths so each face stays balanced.
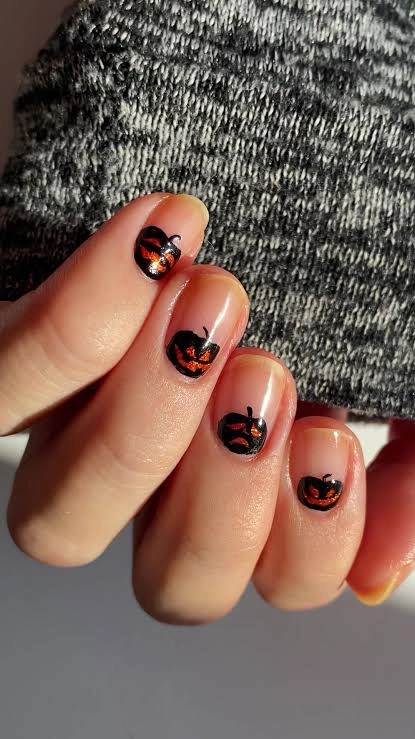
#2. Nude Mini Pumpkin Accents
If you prefer understated Halloween nails, this glossy nude manicure keeps the base almost bare and adds tiny black pumpkin silhouettes near the tips. Warm orange glitter inside the faces catches the sunlight against the textured gray knit background.
Best For — Minimalists wanting subtle spooky nail art
Pro Tip — Place each pumpkin about 2 mm above the free edge, then seal the artwork with two thin top-coat layers instead of one thick coat.
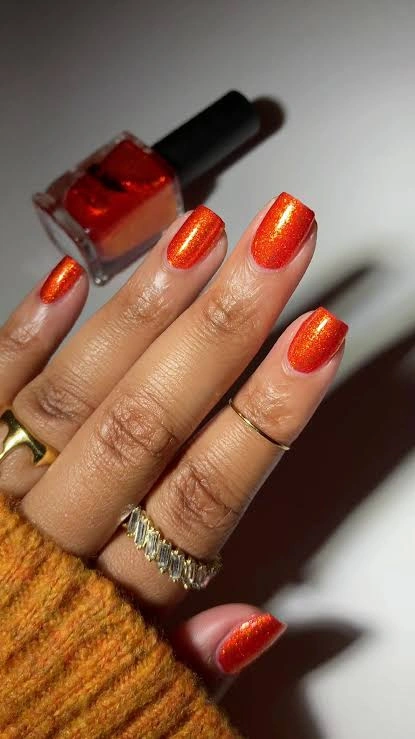
#3. Metallic Orange Shimmer Nails
Unlike the illustrated pumpkin looks, this manicure lets molten orange shimmer do all the work. The compact square shape and glowing gold-red reflection make it an easy base for a last-minute jack o lantern accent.
Best For — Easy Halloween manicures with maximum shine
Pro Tip — Apply two thin coats of orange shimmer nail polish, waiting about 2 minutes between coats to prevent streaking.
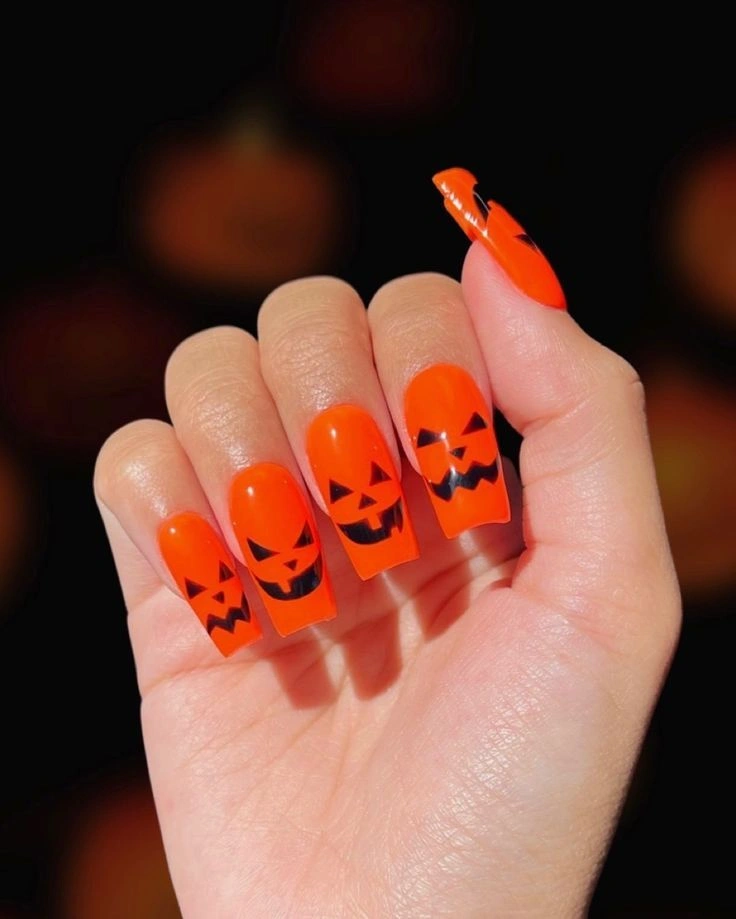
#4. Neon Orange Pumpkin Coffins
Long coffin nails become a full pumpkin patch with vivid orange polish and oversized black jack o lantern faces. Each expression changes slightly, which gives the manicure a playful hand-painted character rather than a perfectly repeated pattern.
Best For — Statement manicures throughout Halloween weekend
Pro Tip — Sketch each face with three tiny guide dots first, then connect the shapes using a brush held at roughly a 45° angle.
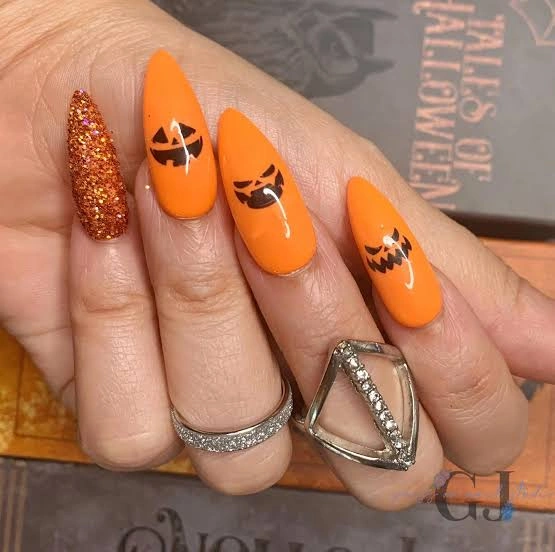
#5. Orange Pumpkin Almonds with Glitter
This one’s made for anyone who wants Halloween art to feel a little polished and glamorous. Smooth orange almond nails feature delicate black pumpkin expressions, while one copper-glitter accent adds sparkle beside chunky silver rings.
Best For — Dressy dinners and October date nights
Pro Tip — Keep the pumpkin details at least 1 mm from the sidewalls so the black artwork doesn’t visually widen the almond shape.
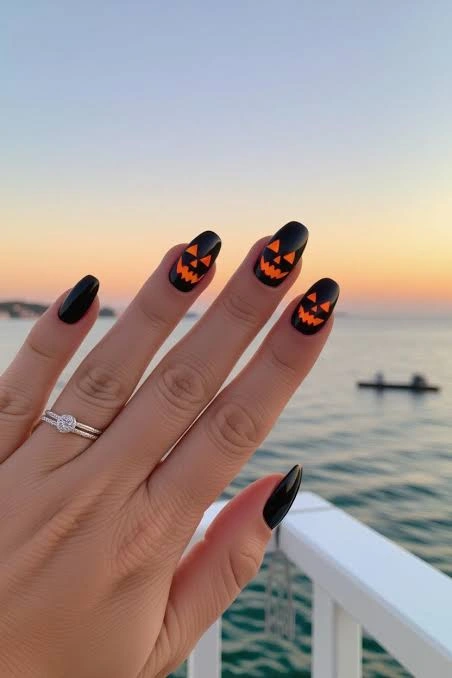
#6. Black Pumpkin Sunset Nails
A glossy black base gives these medium almond nails a moodier twist, while bright orange pumpkin faces glow from the center. Photographed against a soft waterfront sunset, the contrast feels dramatic without needing lots of extra detail.
Best For — Moody looks with sunset-season energy
Pro Tip — Let black polish dry for at least 5 minutes before painting orange details so the lighter color stays crisp instead of dragging.
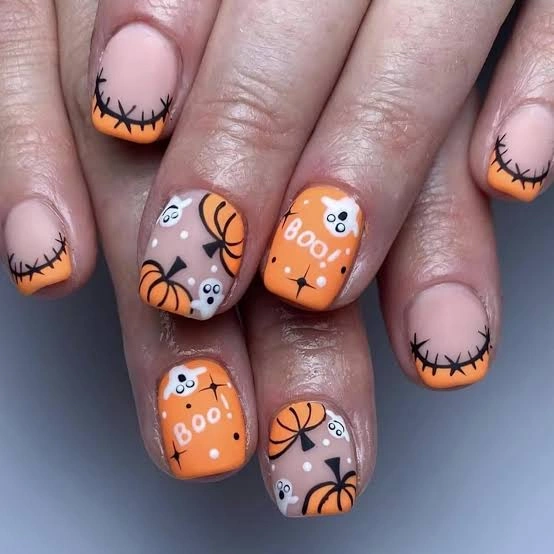
#7. Cute Pumpkin Ghost Mix
Playful details cover these short rounded nails, mixing miniature pumpkins, white ghosts, stitched orange French tips, and cheerful “Boo” lettering. The soft nude base keeps all those tiny Halloween elements from feeling too busy.
Best For — Cute Halloween lovers and beginners
Pro Tip — Use a nail art dotting tool around 1 mm wide for ghost eyes and tiny pumpkin dots.
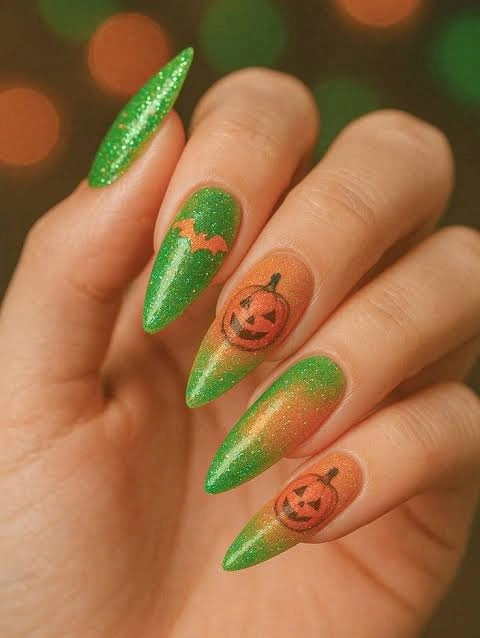
#8. Green Glitter Pumpkin Stilettos
Green sparkle makes this pointed stiletto set unexpectedly fresh, especially beside warm orange ombré panels and stamped pumpkin faces. It’s a fun break from the usual orange-and-black palette while still reading instantly Halloween.
Best For — Trend-setters craving unexpected Halloween color
Pro Tip — Sponge the orange transition across the center third of each nail, using three light passes instead of one heavy layer for a smoother fade.
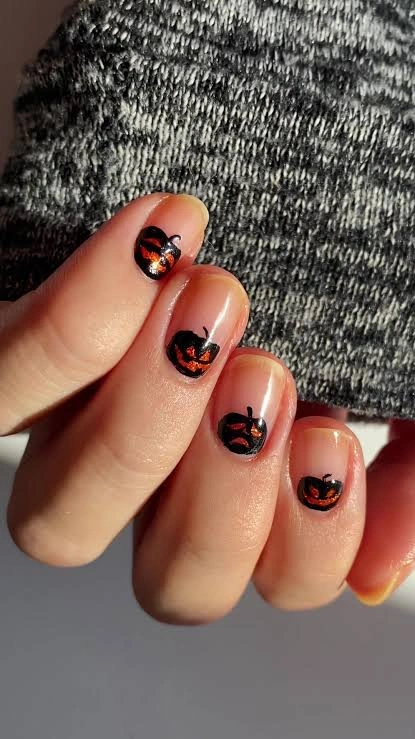
#9. Glossy Nude Pumpkin Minis
For an almost bare manicure, tiny black pumpkins sit neatly near the ends of short glossy nails with flashes of orange sparkle inside. Strong side lighting creates a glassy shine, while the gray knit backdrop gives the look a cozy fall feel.
Best For — Work-friendly October manicures with personality
Pro Tip — Paint your miniature pumpkin no wider than one-third of the nail plate to preserve this clean, negative-space effect.
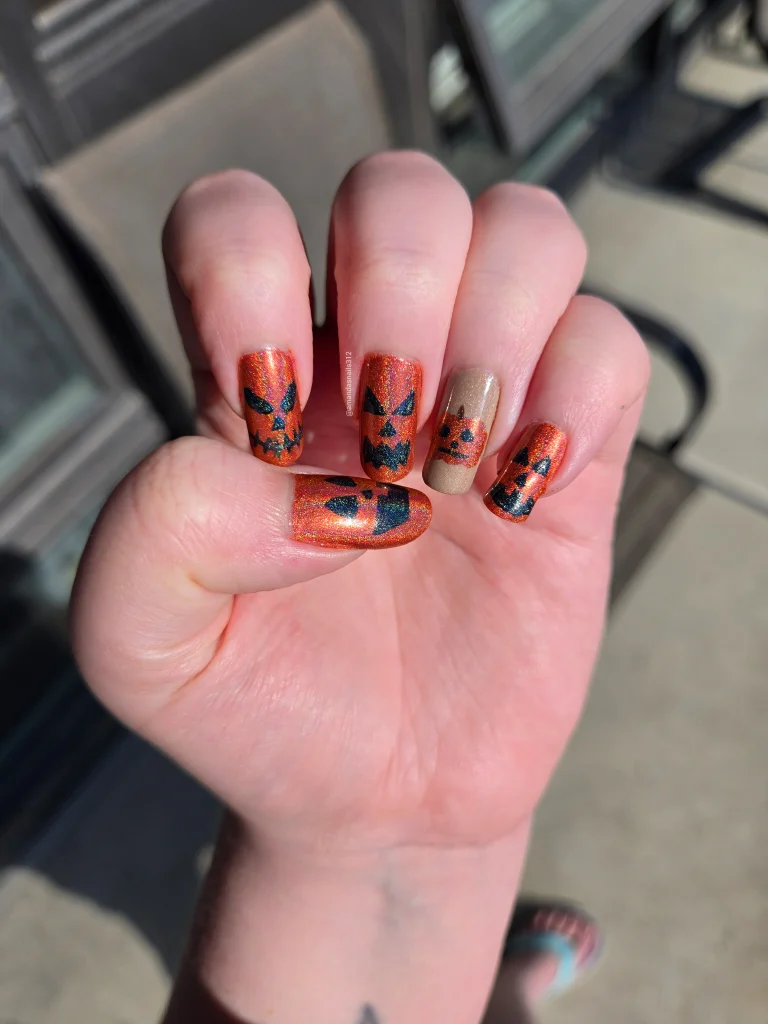
#10. Orange Glitter Jack-O’-Lantern Squares
Dense orange holographic glitter gives these squared nails a sparkling pumpkin-shell effect, topped with bold black carved faces. A single beige accent nail with a smaller pumpkin breaks up the orange and makes the set more dimensional.
Best For — Sparkly costumes and Halloween photo shoots
Pro Tip — Apply orange holographic glitter polish in two thin coats, then float top coat over the surface without pressing the brush down.
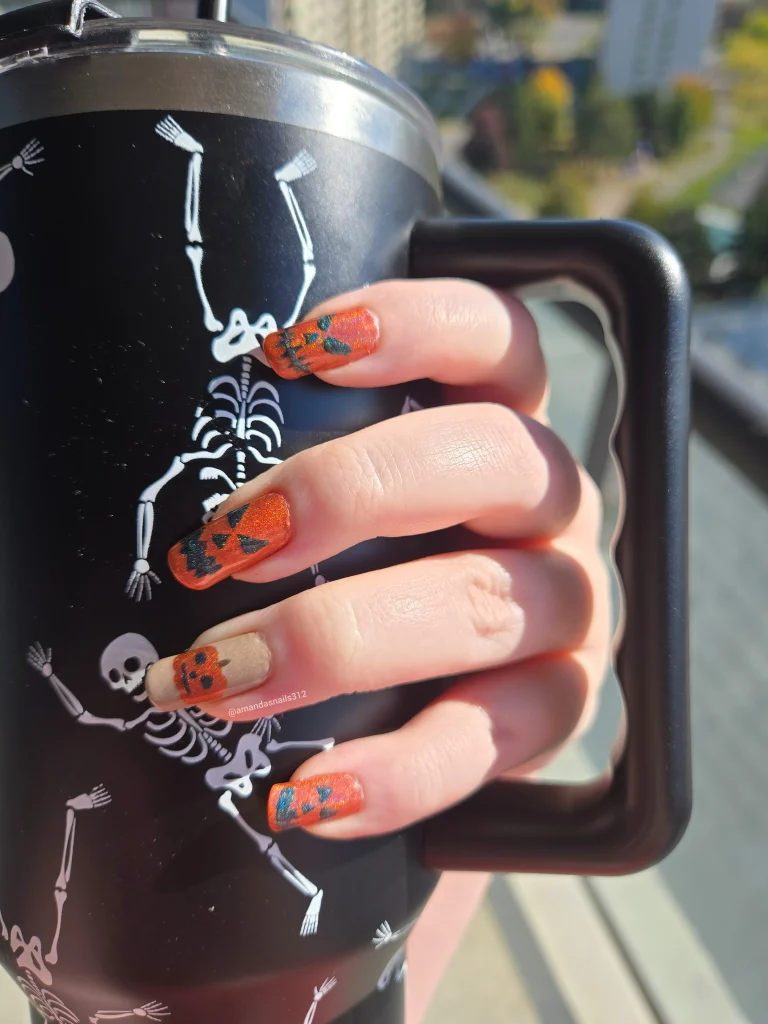
#11. Skeleton Mug Pumpkin Mani
Nothing says October quite like glittery pumpkin nails wrapped around a black skeleton mug. Orange shimmer, black jack o lantern features, and one neutral accent nail create a casual DIY manicure that feels especially fun for cozy seasonal photos.
Best For — Cozy coffee dates and Halloween gatherings
Pro Tip — Wait 10 minutes before gripping props after top coat, since pressure on partially dried polish can leave dents near the nail edges.
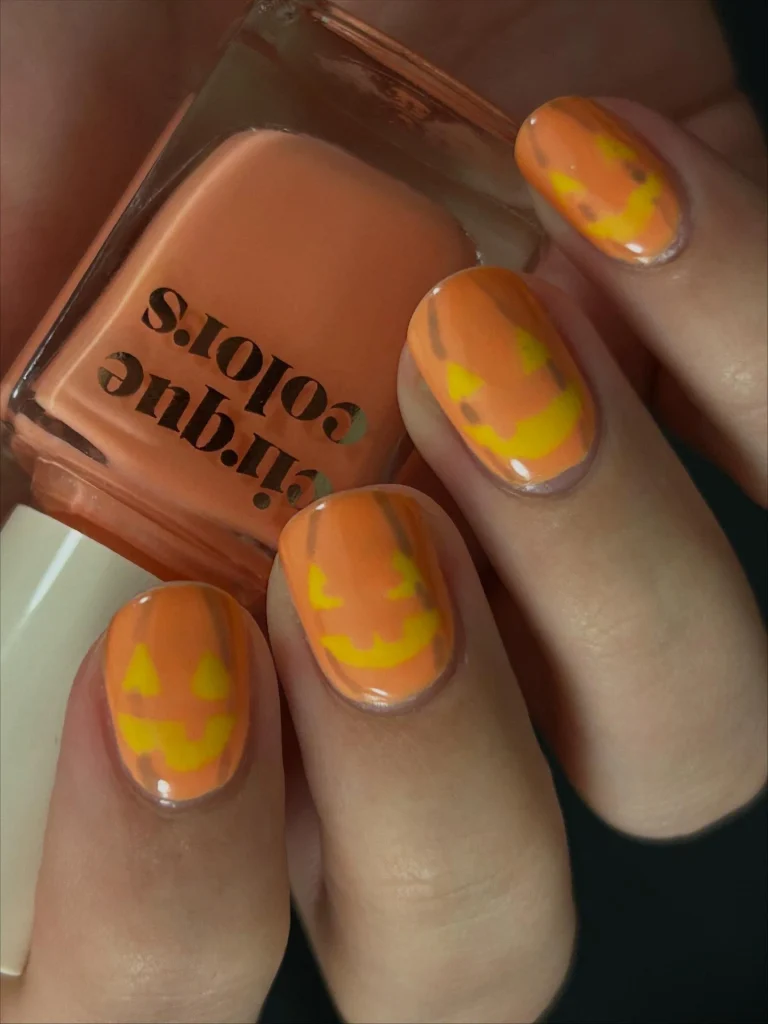
#12. Peachy Glow Pumpkin Nails
Soft peach-orange polish gives these rounded nails a hazy, vintage glow rather than a bright neon finish. Yellow jack o lantern features look almost illuminated from within, especially beside the matching square polish bottle.
Best For — Soft autumn palettes and retro styling
Pro Tip — Mix one drop of yellow polish with one drop of clear polish before painting the faces to create a softer glowing effect.
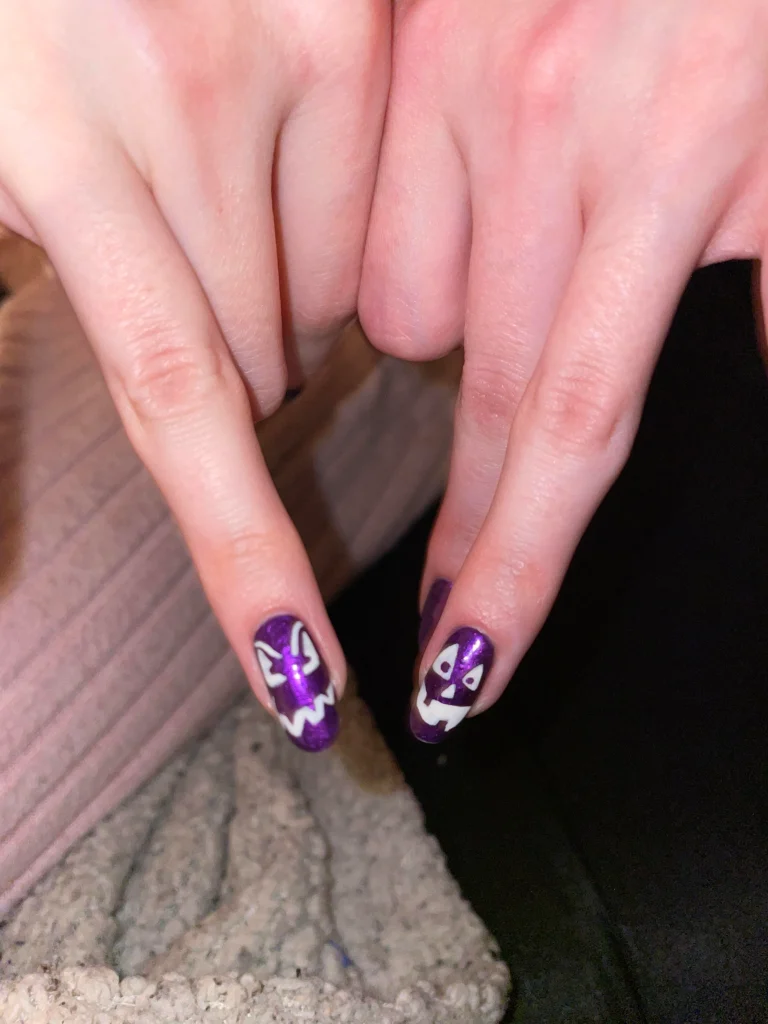
#13. Purple Glitter Ghost Pumpkins
Purple metallic glitter gives this playful two-nail design a completely different Halloween mood. Chunky white ghost-and-pumpkin faces are intentionally graphic, so the manicure feels handmade, cheerful, and a little quirky.
Best For — Purple lovers wanting playful spooky art
Pro Tip — Use a fine nail art brush set and outline the white shapes with a brush under 7 mm long for better control.
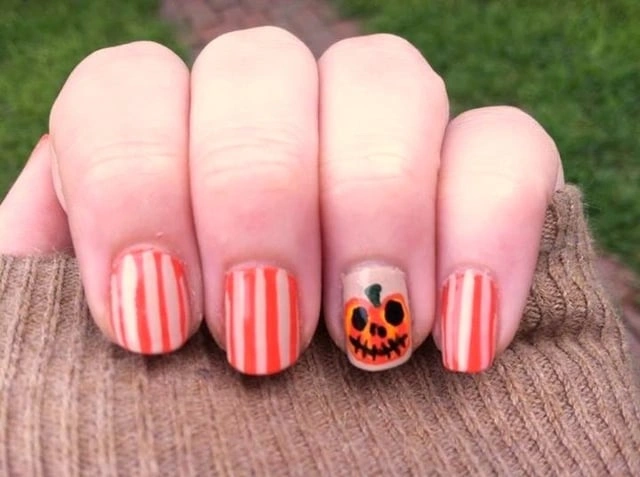
#14. Striped Pumpkin Accent Nails
Instead of covering every nail with Halloween art, this short manicure uses crisp coral-orange stripes and one nude pumpkin accent. The tiny green stem and stitched black smile make that single feature nail instantly noticeable.
Best For — Simple DIY manicures on short nails
Pro Tip — Space the stripes about 2-3 mm apart and remove striping tape while the polish is still wet for cleaner lines.
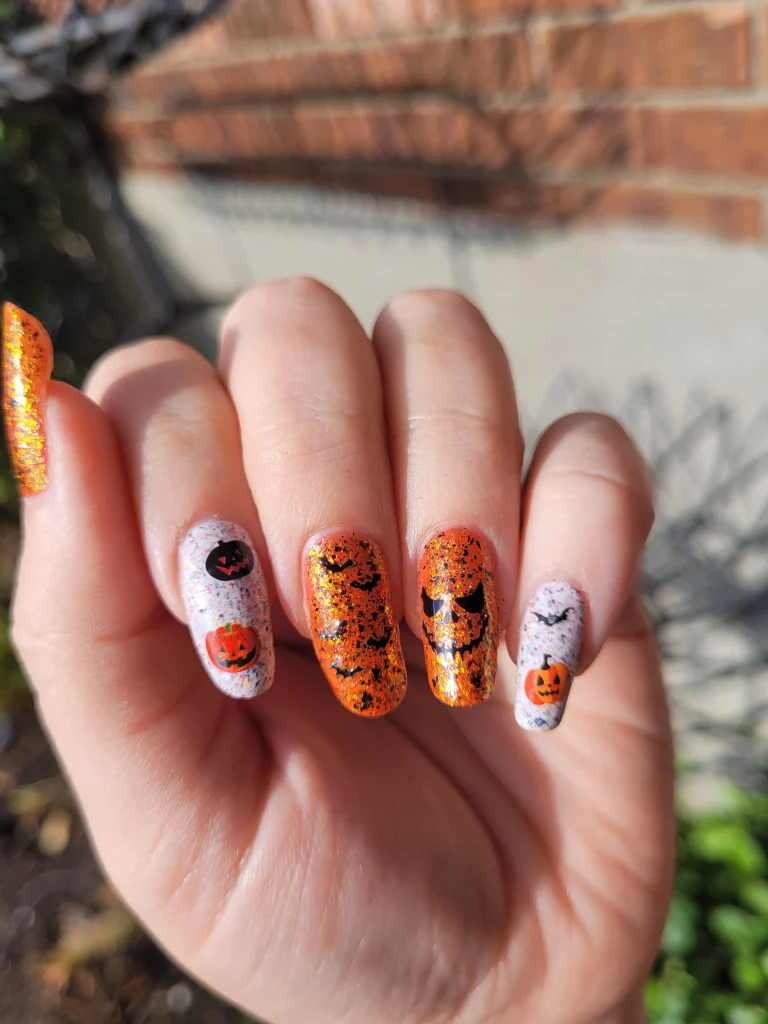
#15. Glitter Pumpkin Sticker Mix
Orange glitter takes center stage on the middle nails, while pale speckled accents carry tiny pumpkins, bats, and spooky black motifs. The mix feels like a miniature Halloween sticker sheet brought to life on a longer rounded shape.
Best For — Detailed looks without advanced freehand painting
Pro Tip — Press Halloween nail art decals flat with silicone tweezers, then leave a 1 mm top-coat border around each decal to seal it.
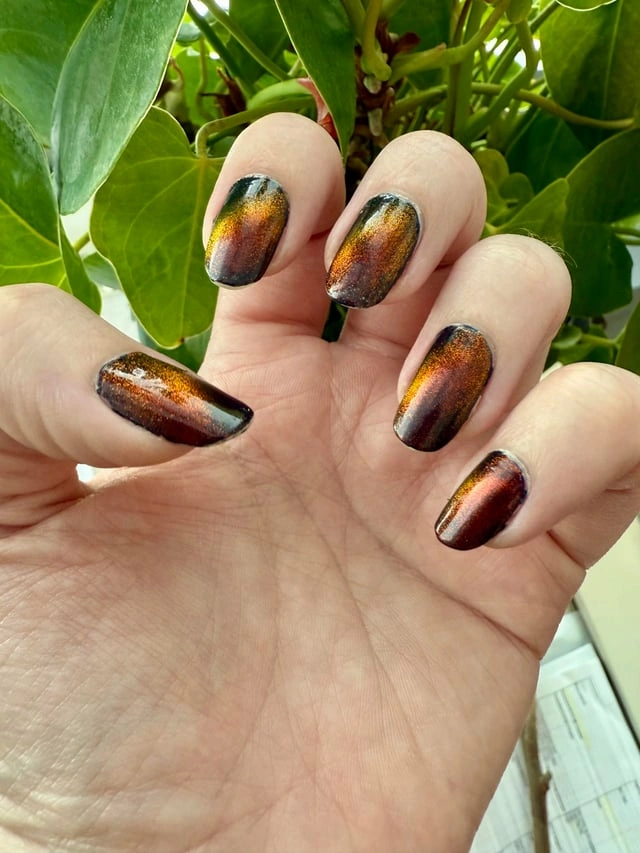
#16. Bronze Cat-Eye Halloween Nails
For a Halloween manicure without literal pumpkins, this bronze-brown cat-eye finish brings plenty of autumn drama. The reflective amber stripe shifts against nearly black edges, echoing the glow of a jack o lantern after dark.
Best For — Elegant Halloween events and fall outfits
Pro Tip — Hold a cat-eye magnet about 3-5 mm above uncured gel for 10 seconds before curing to sharpen the reflective line.
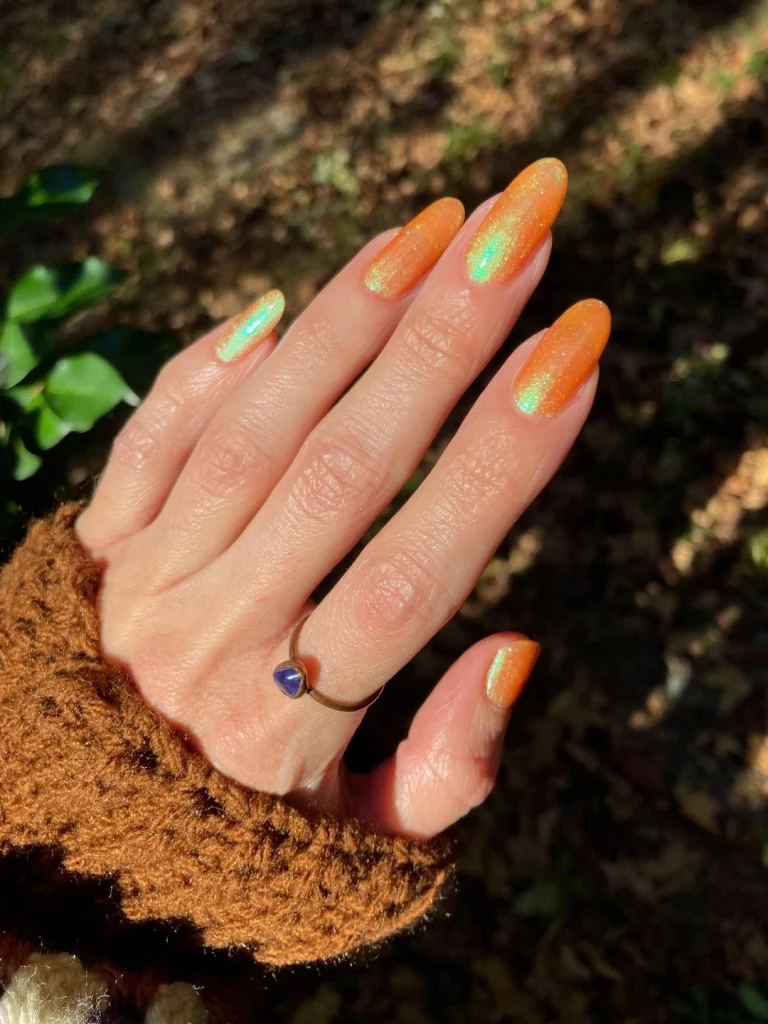
#17. Iridescent Orange Almond Nails
Sunlight transforms this juicy orange manicure with flashes of green-gold iridescence across long almond nails. It’s a clean option when you want pumpkin-inspired color without faces, decals, or busy Halloween motifs.
Best For — Minimal fall looks with luminous shine
Pro Tip — Rub iridescent powder over a no-wipe top coat for 20-30 seconds, then cap every free edge before the final cure.
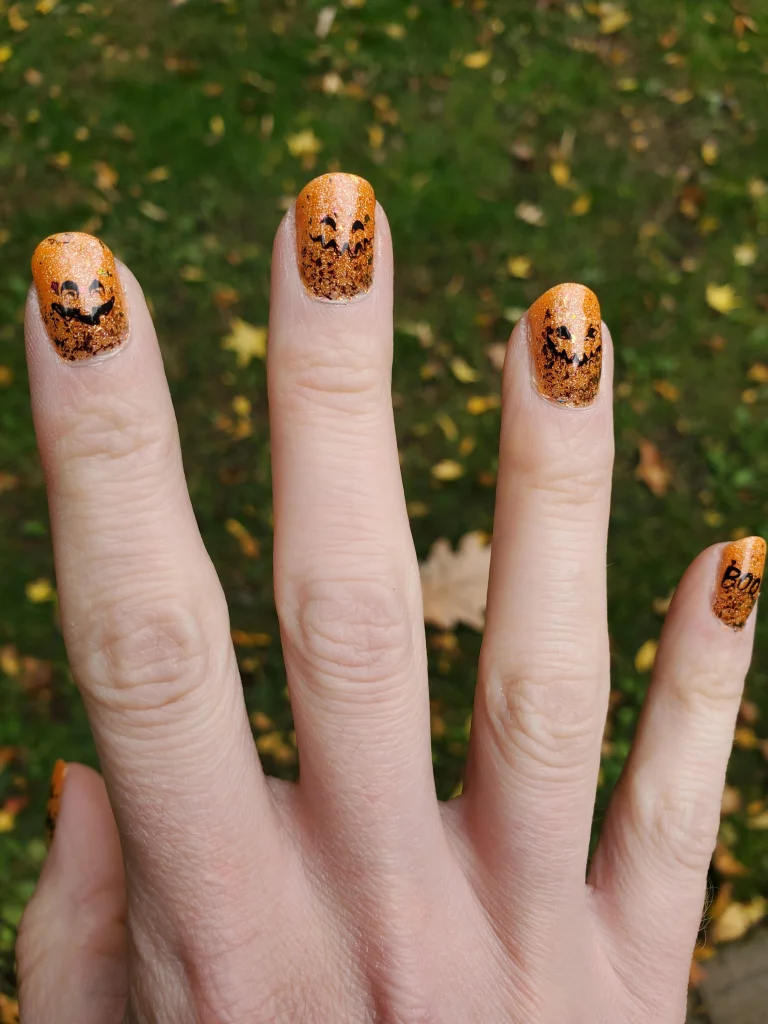
#18. Glitter Smiley Pumpkin Nails
Warm copper-orange glitter makes these short nails sparkle like tiny carved pumpkins in sunshine. Each black smiling face is slightly different, and the petite “BOO” detail on the pinky gives the set a charming finishing touch.
Best For — Cheerful outdoor Halloween celebrations and photos
Pro Tip — Write the tiny “BOO” with a liner brush no wider than 1 mm, rotating your finger rather than twisting the brush around each letter.
How to Choose the Right Nail Design
The best jack o lantern Halloween nails are the ones that fit your nail length, plans, and comfort level. Use these four details to narrow down your favorite.
- Nail shape — Long coffin and almond nails give you more room for large carved faces, while short round or square nails look especially good with tiny pumpkins, accent art, or compact decals.
- Skin tone — Bright true orange creates strong contrast on many complexions, while peach, burnt orange, copper, and bronze offer softer alternatives if neon shades feel too intense.
- Occasion — Choose glitter, long extensions, or multiple pumpkin faces for parties and photos. For work or everyday wear, nude bases, short lengths, and one accent pumpkin are easier to style.
- Skill level — Simple triangle eyes and zigzag mouths are beginner-friendly. Detailed ghosts, lettering, gradients, and miniature artwork are easier with decals, dotting tools, or a very fine liner brush.
What You’ll Need
You don’t need a professional nail-art drawer to recreate these ideas. A few dependable basics will cover most of the pumpkin faces, glitter finishes, and tiny Halloween details shown above.
Creates the classic pumpkin base for bright and glittery designs.
Makes triangle eyes, stitched mouths, bats, and fine outlines easier.
Helpful for small pumpkin expressions, stems, lettering, and outlines.
Useful for eyes, dots, ghost details, and rounded pumpkin shapes.
Give beginners neat pumpkins and bats without detailed freehand work.
Protects painted faces and smooths glitter or decal edges.
Pro Tips for a Long-Lasting Manicure
Prep Before You Polish
Wipe each nail with 90% isopropyl alcohol after shaping and cuticle work. Removing surface oils helps the base coat grip instead of lifting at the edges.
Work in Thin Layers
Two or three thin color coats usually dry more evenly than one thick coat. If you’re using gel, cure each layer for the full lamp-recommended time before adding pumpkin artwork.
Let Detailed Art Set
With regular polish, give fine black lines roughly 3-5 minutes to set before top coat. Float the top-coat brush over the design instead of repeatedly brushing the same area.
Cap the Free Edge
After your final coat, run the brush horizontally across the outer 1 mm of each nail. This small step helps reduce early tip wear on darker Halloween colors.
Frequently Asked Questions
Q: How do you make easy jack o lantern Halloween nails at home?
A: Start with an orange base, then add two small triangle eyes and a zigzag mouth using black polish and a fine brush. Beginners can practice the face on paper first or use pumpkin nail decals.
Q: Can jack o lantern nail art work on short nails?
A: Absolutely. Keep the pumpkin face small, use one accent nail, or place tiny motifs near the tip so the design doesn’t overwhelm a shorter nail plate.
Q: What colors look good with orange pumpkin Halloween nails?
A: Black is the classic pairing, but nude, cream, purple, green, bronze, and gold glitter also work beautifully. Pick one supporting shade so detailed pumpkin artwork stays easy to see.
Q: How can I make pumpkin nail art last longer?
A: Prep away surface oils, keep color layers thin, and allow painted details to dry before sealing. Finish by capping the free edge with top coat and reapply a thin protective coat after several days if needed.
Recommended Product
Fine Nail Art Detail Brush Set
★★★★☆ Highly rated on Amazon
A fine detail brush makes it much easier to control the small eyes, mouths, stems, and outlines used throughout jack o lantern nail art.
As an Amazon Associate, we earn from qualifying purchases.
Final Thoughts
Whether you love tiny pumpkin accents or full-on orange glitter, these jack o lantern Halloween nails show how many ways you can make the classic Halloween motif your own.
Pick the shape and level of detail that suit you best, then have fun changing the expressions, colors, and finishes to create a manicure that feels personal.
Which of these nail looks are you trying first? Save this post to Pinterest so you can come back to it whenever you need fresh nail inspo!

Hi, I’m Jessica, the creator behind Unique Lash & Nails Katy.
I created this website for anyone who loves beautiful nails as much as I do. Here, I share trendy nail designs, seasonal manicure ideas, easy nail care tips, honest product recommendations, and step-by-step guides to help you create salon-worthy nails at home. Whether you’re looking for everyday inspiration or your next favorite nail trend, I hope you’ll find something you love.