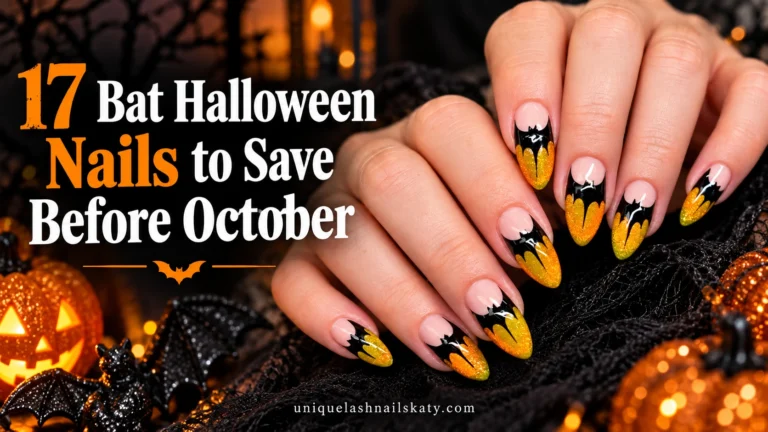
17 Metallic Halloween Nails That Steal the Show This Year
Halloween nails are supposed to feel a little dangerous, and nothing does that better than metal. Chrome, foil, and liquid-silver finishes catch the light in a way flat polish just can’t, turning even a simple design into something that looks lit from within. Below you’ll find 17 real metallic looks — from full chrome sets to blood-drip accents — plus the tools and tricks to actually pull them off at home.
✦ Our Top Picks at a Glance
Best Overall — Multicolor Chrome Metallic Stiletto Mix
Best for Beginners — Nude Base Ghost French Tip Nails
Most Trendy — Chrome Silver with Dripping Red Blood Nails
Best for Special Occasions — Sheer Nude with Silver Glitter Ombré Tips
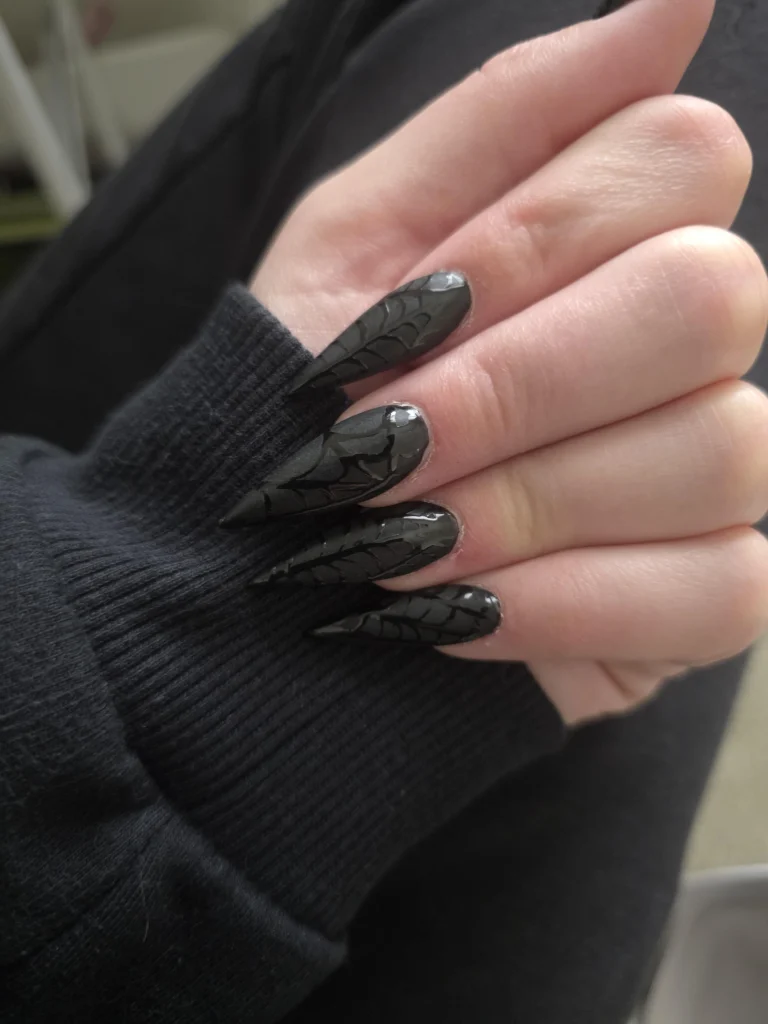


#1. Matte Black Scale-Textured Stiletto Claws
Picture long, sharp stiletto tips covered in a raised, snake-scale texture that catches shadow instead of shine. The matte-meets-glossy contrast on each scale gives the set real dimension without a single rhinestone.
Best For — Goth-leaning brides or dark-academia costume looks
Pro Tip — Use a fine detail brush held at a 45° angle to layer the scale lines, and cure each layer for a full 30 seconds before adding the next.
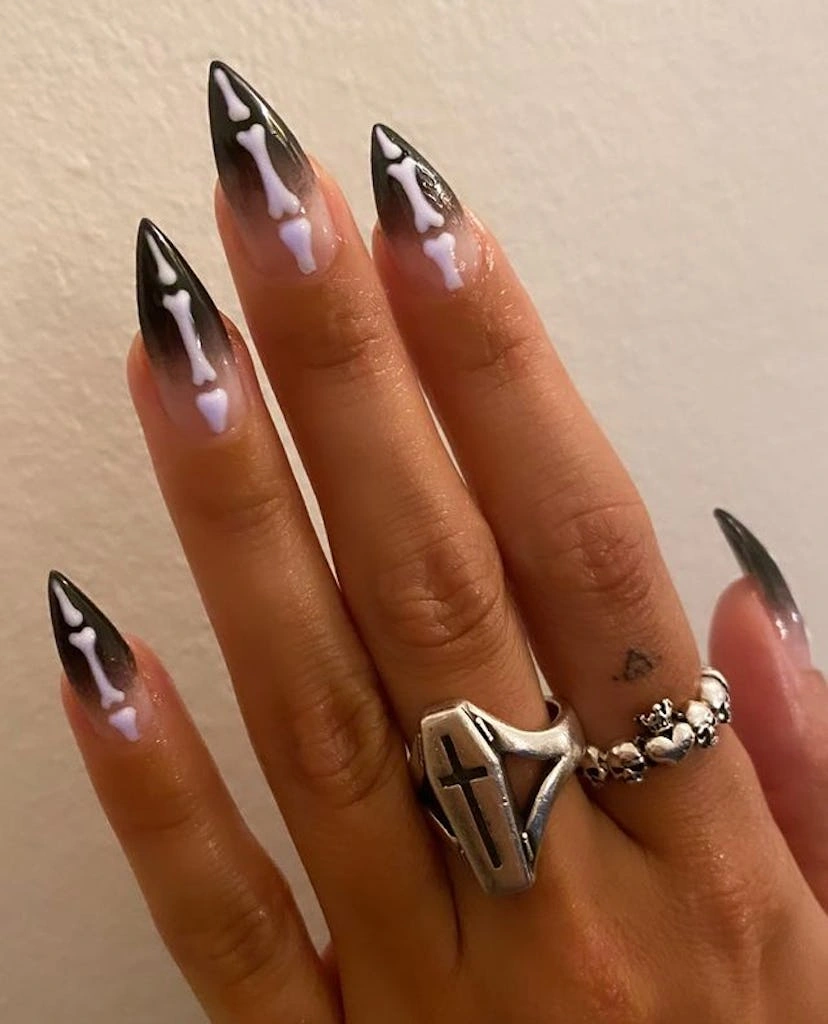
#2. Black Ombré Skeleton Bone Accent Nails
This one’s for anyone who wants “spooky” without going full gore. A soft black-to-nude ombré fades down the nail while a single hand-painted white bone sits stamped right down the center of each tip.
Best For — First-time Halloween nail art beginners
Pro Tip — Sponge the ombré using a makeup wedge dabbed 3-4 times per nail, letting it dry 60 seconds between coats so the fade doesn’t smudge.
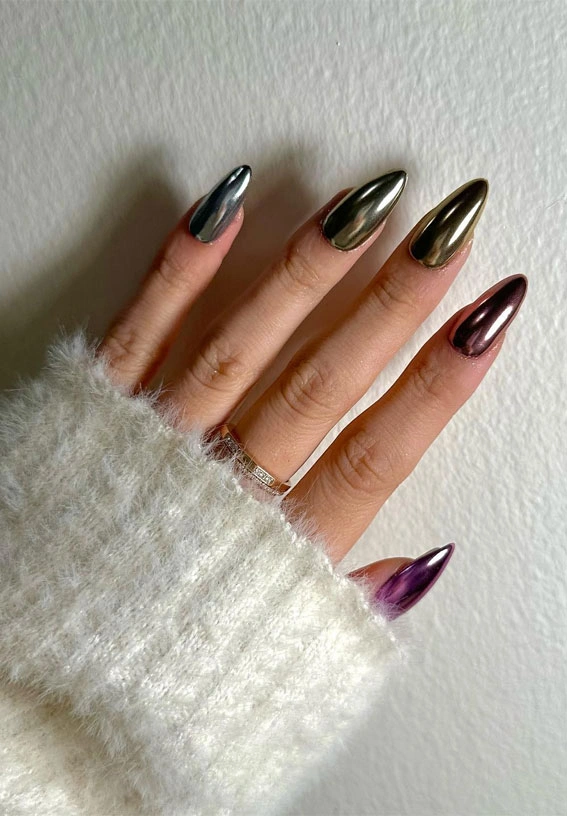
#3. Multicolor Chrome Metallic Stiletto Mix
Unlike the softer looks on this list, this one goes bold with a different chrome shade on every single nail — gunmetal, olive gold, deep bronze, and plum all in one hand. It’s the definition of “metallic Halloween nails,” and it needs zero hand-painted detail to look expensive.
Best For — Anyone who wants maximum shine with minimum effort
Pro Tip — Buff the gel base to a satin finish before applying chrome nail powder, then rub it in with a silicone applicator for exactly 10 seconds per nail.
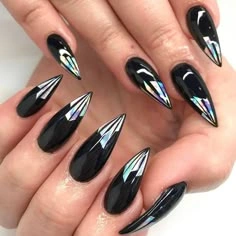
#4. Glossy Black with Holographic Foil Shards
Here’s why this look works so well for Halloween: the mirror-black base is dramatic on its own, but the jagged holographic foil pieces scattered near the cuticle mimic shattered glass. It reads as edgy rather than cutesy, which makes it easy to wear past October 31st too.
Best For — Date-night looks or a costume party after-hours
Pro Tip — Press the foil shards on while the top coat is still slightly tacky, about 20 seconds after application, so they bond without air bubbles.
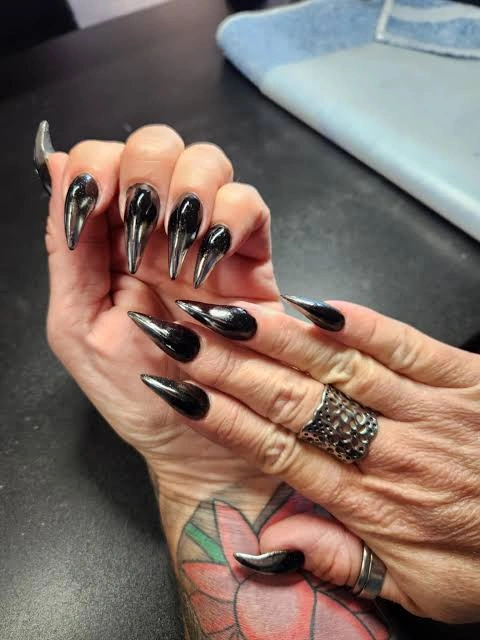
#5. Gunmetal Chrome Ombré Stiletto Points
These extra-long stilettos fade from a smoky silver base into deep black at the very tip, like the metal is cooling as it reaches the point. It’s a proven classic that’s been worn for years and still photographs beautifully in any lighting.
Best For — Nail veterans comfortable with dramatic length
Pro Tip — Blend the ombré with a damp makeup sponge in small circular motions, wiping the sponge clean every 2 nails to avoid muddying the gradient.
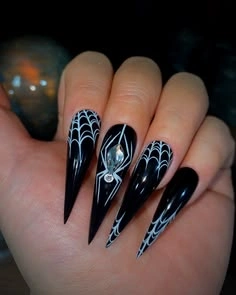
#6. Black Glossy Spiderweb with 3D Spider
You can’t do a Halloween nail roundup without a spiderweb, and this version earns its spot. Fine white lines fan out across a glass-black base on every finger, while one accent nail gets a tiny 3D spider charm with a rhinestone belly.
Best For — Trick-or-treating with kids or classic costume parties
Pro Tip — Thin your white gel polish with one drop of gel polish thinner so the web lines pull into fine threads instead of thick blobs.
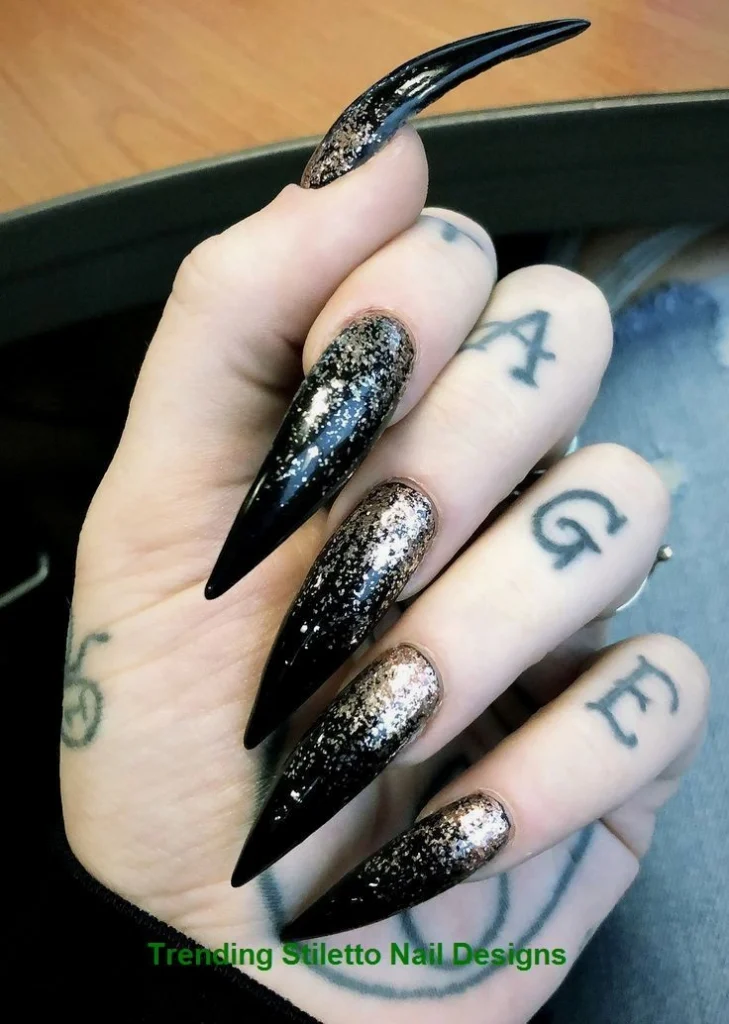
#7. Bronze Glitter Fade Curved Claw Stiletto
This set takes the claw shape to its most dramatic extreme, with one nail curving into an actual talon. Bronze and gold glitter climbs up from the base like embers, while the curved claw nail stays a solid glossy black for contrast.
Best For — Statement costumes needing a witch or dragon vibe
Pro Tip — Pack chunky glitter in with a dotting tool rather than a brush, pressing straight down so the flakes sit flat instead of standing on edge.
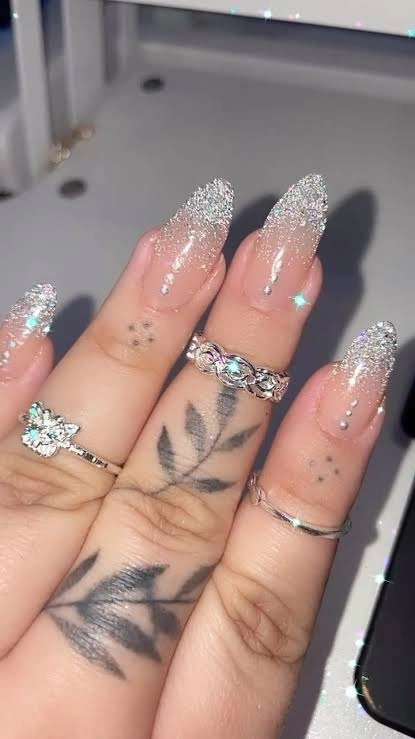
#8. Sheer Nude with Silver Glitter Ombré Tips
Not every Halloween look needs to be dark, and this one proves it. Silver glitter concentrates at the tips and fades into a sheer, almost-bare base, finished with a scatter of tiny rhinestones near the cuticle for extra sparkle.
Best For — Fall weddings or Halloween-adjacent formal events
Pro Tip — Seal loose glitter under two coats of high-shine gel top coat, curing 60 seconds per coat so nothing catches on fabric.
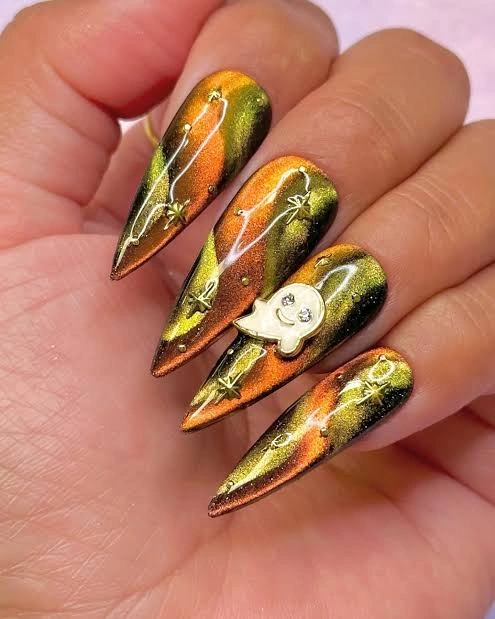
#9. Aurora Chrome Chameleon Stiletto with Charm
This is one of the most technically impressive looks on the list, with a color-shifting chrome that swings between orange, green, and gold depending on the angle. Fine white thread-like linework and a tiny crescent-moon charm keep it from feeling too busy.
Best For — Nail art lovers chasing something totally unique
Pro Tip — Apply chameleon chrome pigment over a black gel base in two thin coats, buffing lightly for 5 seconds between coats to build the full color shift.
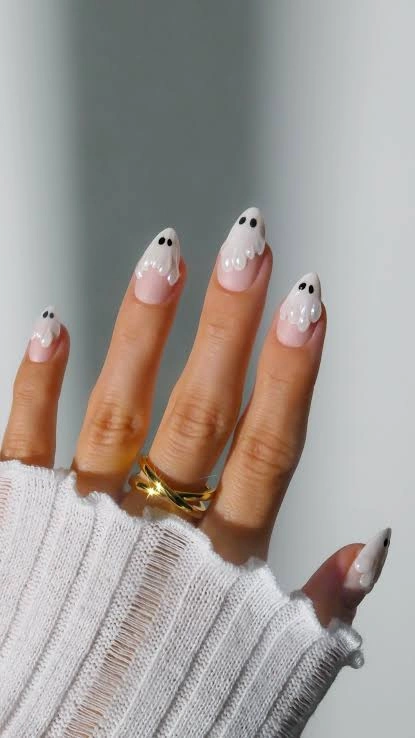
#10. Nude Base Ghost French Tip Nails
Feeling nervous about freehand nail art? Start here. A sheer nude base gets a simple white ghost shape painted over the tip, with two tiny black dots for eyes — that’s genuinely the whole design.
Best For — Office-friendly Halloween nails that still read festive
Pro Tip — Sketch the ghost outline first with a fine nail art dotting tool, then fill it in — the outline keeps the shape symmetrical on both hands.
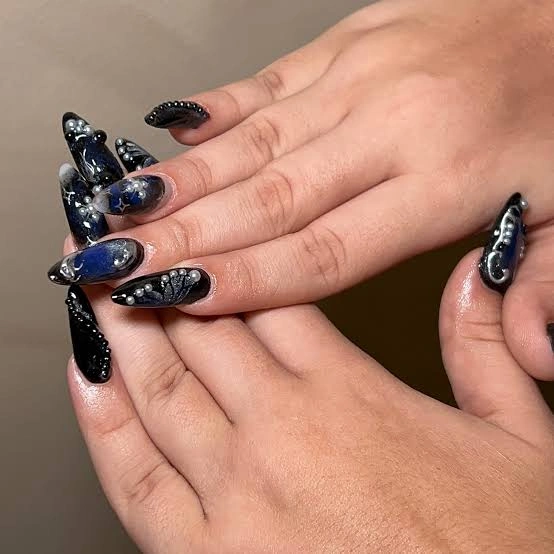
#11. Black Galaxy Marble with Silver Studs
Deep black and midnight-blue polish get swirled together into a marbled, galaxy-like finish across this almond-shaped set. Tiny silver studs and pearls are pressed in at random points, plus lace-like white detailing climbs up two accent nails.
Best For — Witchy aesthetics or dark celestial costume themes
Pro Tip — Swirl the blue into wet black polish using a thin striping brush within the first 15 seconds of application, before the base starts to set.
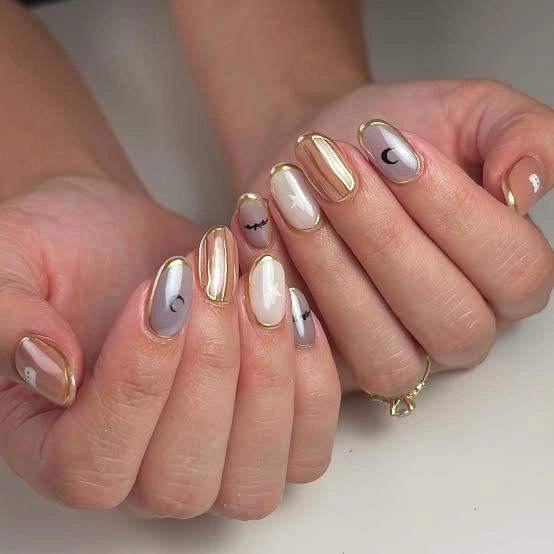
#12. Nude Glazed Nails with Gold Foil Outlines
So what does this look like when you want metallic without going full dark academia? This one traces a thin gold line around the edge of each glazed, milky-nude nail, then adds a tiny painted moon or star as the only nod to the season.
Best For — Minimalists who still want a metallic edge
Pro Tip — Trace the gold outline with a size 000 detail brush loaded lightly, wiping excess polish off the brush before every stroke to keep the line under 1mm wide.
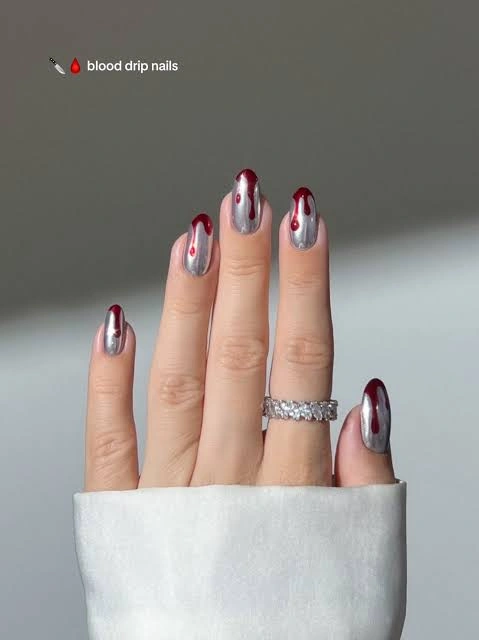
#13. Silver Chrome with Red Blood Drip Design
But here’s the thing about blood-drip nails — they only work if the “blood” actually looks wet, and this one nails it. A full chrome silver base gets deep red polish dripped from the cuticle down, with one perfect round drop left sitting at the tip.
Best For — Vampire, slasher, or horror-movie costume nights
Pro Tip — Drip the red gel from a thin nozzle bottle held about 2 inches above the nail, letting gravity pull it down instead of dragging it with a brush.
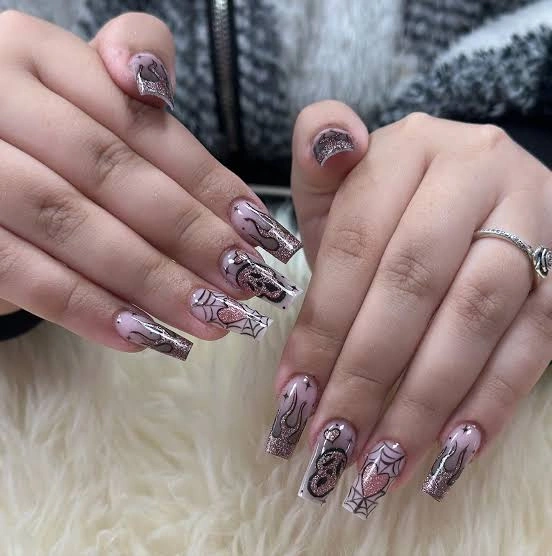
#14. Sheer Pink with Hand-Painted Spiderweb Snake
That’s not all this coffin-shaped set has going on — alongside a hand-painted web and a coiled snake in deep maroon-brown, glitter french tips give each nail a soft, wearable base. The sheer pink underneath keeps the whole thing from feeling too heavy.
Best For — Long coffin nail fans who want detailed art
Pro Tip — Paint the snake’s body in three separate value shades, letting each dry for 90 seconds before adding the next, so the coils read as dimensional instead of flat.
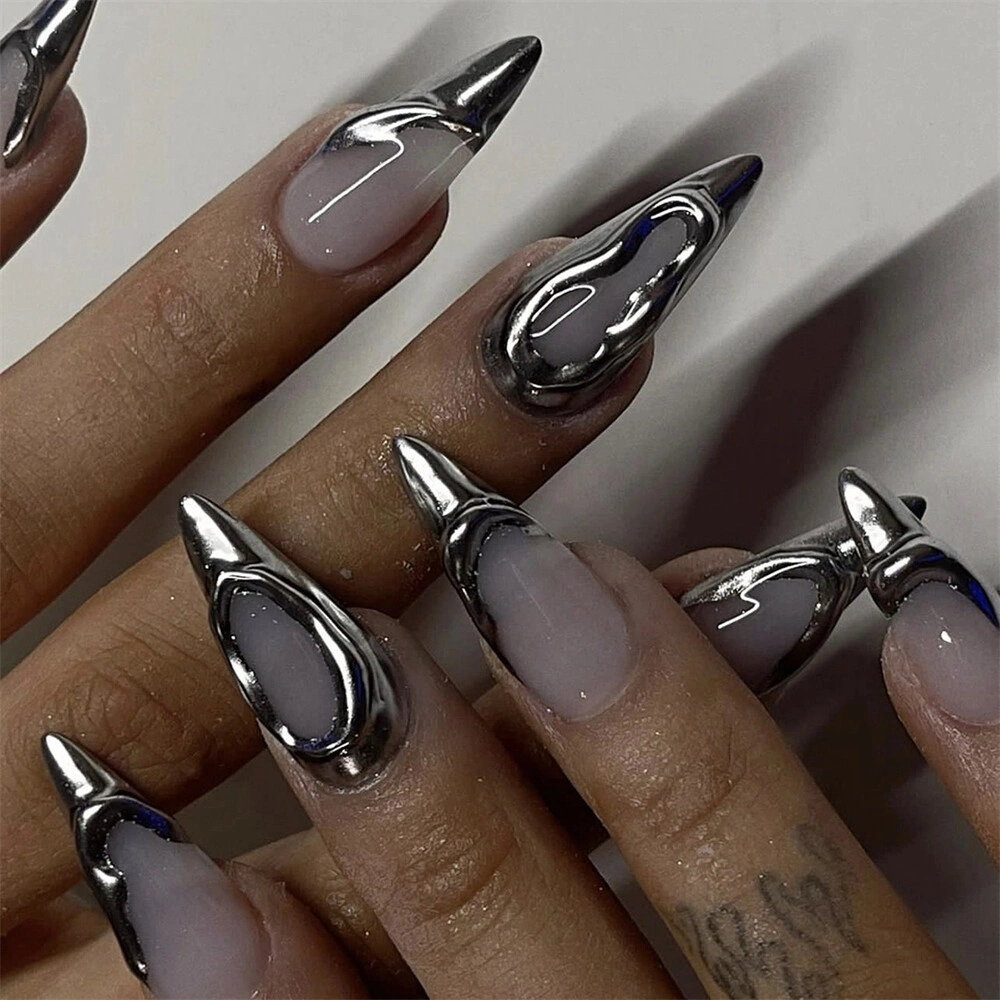
#15. Nude Base with Liquid Chrome Swirl Accents
This design leans into 3D texture rather than flat polish, with raised, liquid-looking silver chrome swirling across a sheer nude base like mercury frozen mid-pour. It’s the kind of look that photographs almost better than it looks in person, because the light bounces off every curve.
Best For — Experienced nail artists wanting a sculptural finish
Pro Tip — Build the raised swirl with clear gel in 3 thin layers, curing 30 seconds between each, before chroming over the top so the shape holds without cracking.
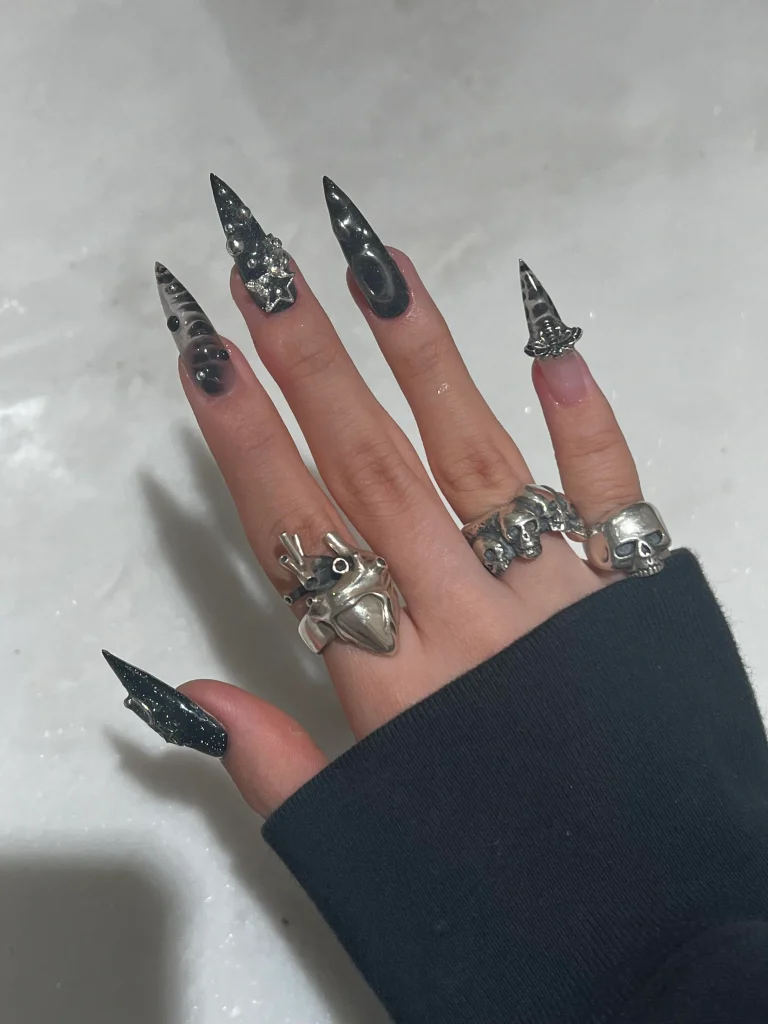
#16. Mixed Black Stiletto Set with 3D Charms
No two nails match here, and that’s exactly the point. Leopard print, a rhinestone star cluster, black galaxy glitter, and glossy solid black all sit side by side, finished off with sculptural skull and heart rings stacked on top.
Best For — Anyone bored of matching manicures
Pro Tip — Plan your mismatched set on paper first, numbering each nail 1 through 5, so the pattern feels intentional rather than random once it’s on your hand.
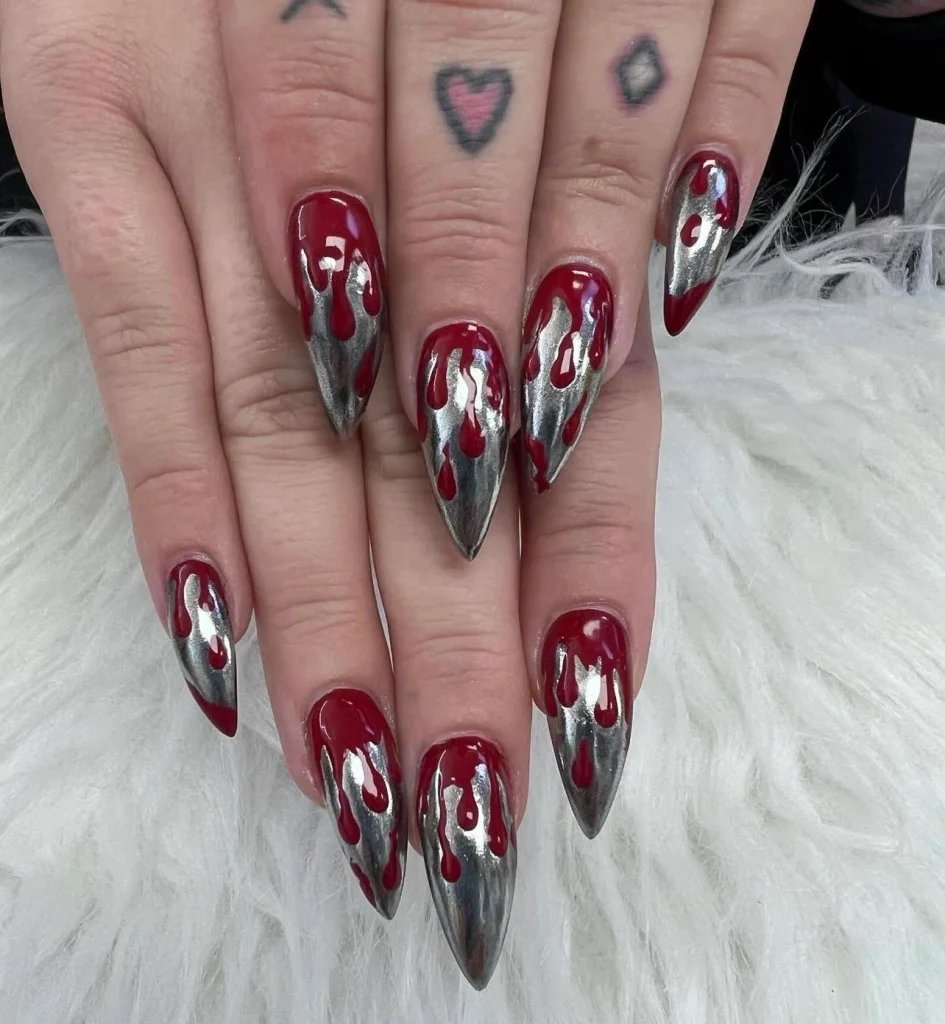
#17. Chrome Silver with Dripping Red Blood Nails
Closing out the list is the boldest blood-drip take here, with thick, glossy red streaks running the full length of a mirror-chrome almond nail. Every finger gets its own drip pattern, so nothing looks copy-pasted from nail to nail.
Best For — Halloween parties where you want the boldest hands in the room
Pro Tip — Chrome the full nail first and cure it completely, then paint the drips on top in a separate step — mixing the two in one layer makes the red go muddy.
How to Choose the Right Nail Design
With 17 options, narrowing it down comes down to a few practical things. Here’s what actually matters when you’re picking your look.
- Nail shape — Stiletto and almond shapes show off chrome and foil best because the curve catches more light. Shorter shapes like a soft square work better for detailed hand-painted art like spiderwebs.
- Skin tone — Warm gold and bronze chrome tends to glow against deeper skin tones, while cool silver and gunmetal chrome pops especially well on fair to medium tones. Nude and glazed bases flatter almost everyone.
- Occasion — Save the blood-drip and 3D charm sets for costume parties, and lean toward the ghost french tip or gold-outline glazed look for work or school-appropriate Halloween spirit.
- Skill level — Chrome powder and ombré fades are beginner-friendly since they don’t require freehand painting. Save spiderwebs, snakes, and liquid chrome swirls for once you’ve had a bit of practice.
What You’ll Need
Most of these looks come together with a handful of core supplies. Here’s what to keep in your kit.
The core of any mirror-chrome look, from gunmetal to holographic.
Needed for spiderwebs, bones, snakes, and thin gold outlines.
Cures gel layers so chrome and 3D details actually hold.
Creates the shattered-glass shard effect and reflective accents.
For spider, skull, and star accents like the ones featured above.
Locks in glitter and chrome so the finish stays smooth and shiny.
Pro Tips for a Long-Lasting Manicure
Prep Like It’s a Job Interview
Push back cuticles and lightly buff the nail plate before anything else. Skipping this step is the #1 reason chrome and gel designs lift within a week.
Cap the Free Edge Every Time
Run your top coat over the very tip of the nail, not just the top surface. This seals the edge and stops chips from starting at the corners.
Wipe Off the Tacky Layer
After the final cure, wipe each nail with 91% isopropyl alcohol on a lint-free pad. That sticky residue attracts dust and dulls chrome fast if it’s left on.
Moisturize the Skin, Not Just the Nail
Rub cuticle oil around the nail bed every night. Hydrated skin means less peeling and fewer snags on delicate 3D charms and foil.
Frequently Asked Questions
Q: How long do metallic Halloween nails typically last?
A: A gel-based chrome or foil set usually holds up for 2-3 weeks with proper prep and a sealed edge. Press-ons or regular polish versions tend to last closer to 5-7 days.
Q: Can I do chrome nail powder without gel polish?
A: Chrome powder needs a tacky gel base to grip onto, so a cured gel top coat is essential. It won’t bond properly over regular air-dry polish.
Q: What nail shape works best for Halloween chrome designs?
A: Stiletto and almond shapes reflect the most light off a curved chrome surface, which is why they show up so often in metallic Halloween looks. Coffin and square shapes work better for flat, hand-painted art.
Q: How do I remove chrome or foil nails without damaging my natural nails?
A: Soak cotton pads in acetone, place them on each nail, and wrap in foil for 10-15 minutes. Gently push off the softened gel with a cuticle stick rather than scraping or peeling.
Recommended Product
Professional Chrome Nail Powder Kit
★★★★☆ Highly rated on Amazon
This is the single easiest way to recreate the mirror and gunmetal finishes across this list, no airbrush required.
As an Amazon Associate, we earn from qualifying purchases.
Final Thoughts
Whether you go full chrome, add one small ghost, or drip fake blood down a mirror-silver base, metallic finishes are what push a Halloween mani from cute to unforgettable. Start with whichever design matches your skill level and build from there.
Which of these nail looks are you trying first? Save this post to Pinterest so you can come back to it whenever you need fresh nail inspo!

Hi, I’m Jessica, the creator behind Unique Lash & Nails Katy.
I created this website for anyone who loves beautiful nails as much as I do. Here, I share trendy nail designs, seasonal manicure ideas, easy nail care tips, honest product recommendations, and step-by-step guides to help you create salon-worthy nails at home. Whether you’re looking for everyday inspiration or your next favorite nail trend, I hope you’ll find something you love.