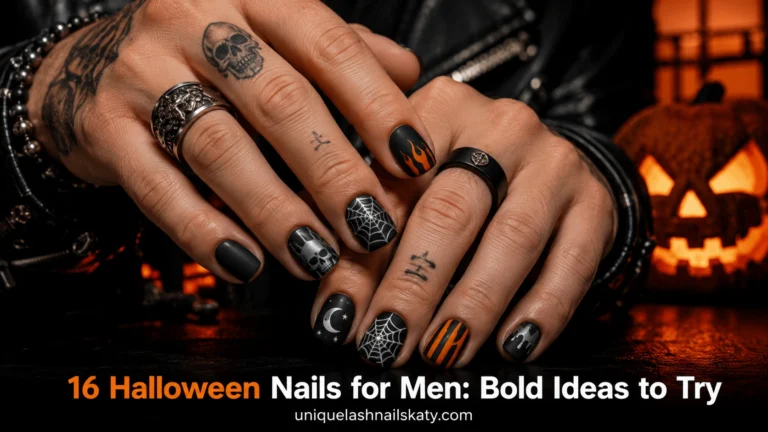
16 Devil Halloween Nails for a Spooky, Stylish Manicure
Devil Halloween nails are perfect when you want your manicure to feel spooky without losing its stylish side. Red flames, sharp black details, gothic finishes, and tiny devil symbols can turn even a simple manicure into a Halloween statement.
This collection moves from wearable short nails to dramatic stiletto designs, so you can choose how bold you want to go. Some looks are unmistakably devil-inspired, while others lean into the darker gothic mood that works beautifully for Halloween.
Use these ideas as inspiration for your next salon appointment or recreate the easier details at home. There’s plenty of room to make each design your own.
✦ Our Top Picks at a Glance
Best Overall — Red Devil French Tips
Best for Beginners — Black Demon Eye Nails
Most Trendy — Nude Red Devil Flames
Best for Special Occasions — Jeweled Occult Stiletto Nails
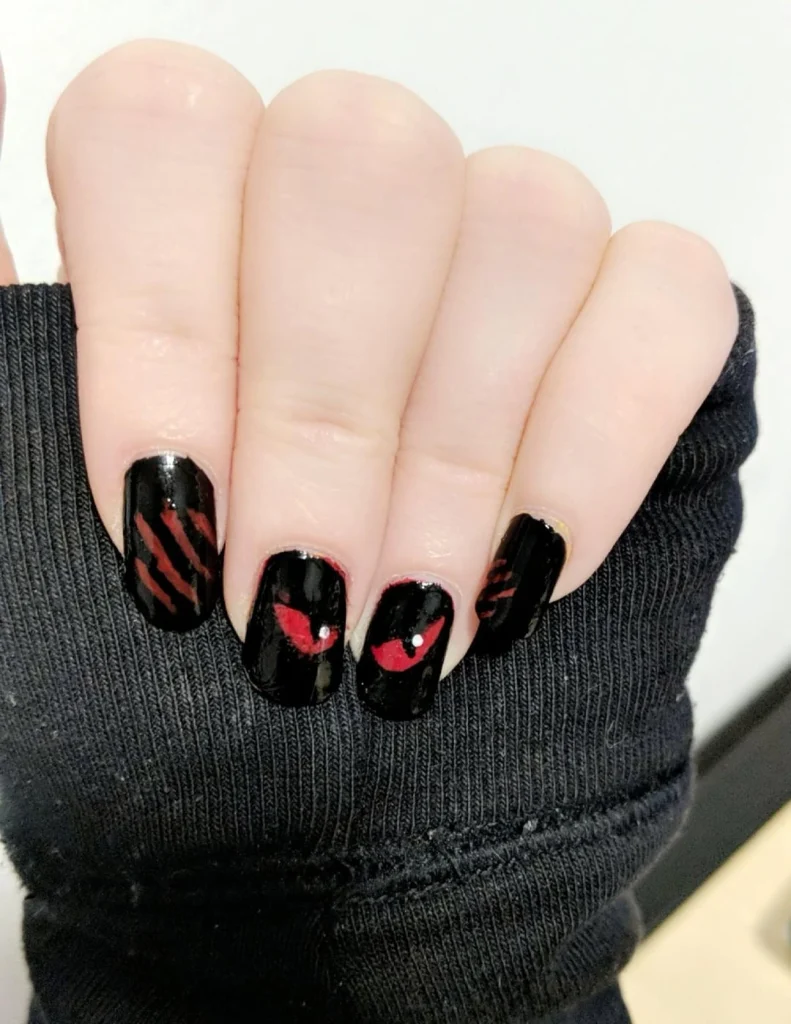


#1. Black Demon Eye Nails
Glossy black natural nails get a sinister twist with scratch-like red strokes and two tiny red demon eyes across the middle fingers. The short squared shape and black sweater background make this feel wonderfully achievable rather than costume-like.
It’s a strong choice when you want devil Halloween nails that still work with everyday outfits.
Best For — Short-nail lovers wanting subtle Halloween drama
Pro Tip — Paint each red scratch with a 7-9 mm liner brush, keeping the three strokes roughly 2 mm apart so they stay crisp.
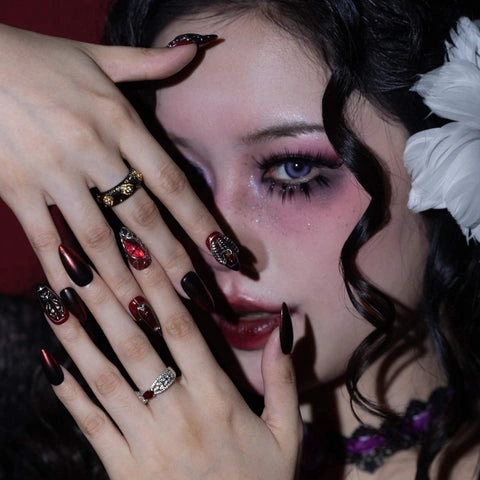
#2. Burgundy Gothic Gem Nails
For something richer, deep wine-red and near-black nails create a romantic gothic effect with metallic embellishments and intricate accent art. The long pointed silhouette, dark rings, and dramatic makeup in the image push the manicure into full vampire-meets-devil territory.
A dark red chrome nail polish can help recreate that glowing burgundy finish.
Best For — Gothic parties and dramatic Halloween photos
Pro Tip — Apply chrome powder for 20-30 seconds over a no-wipe top coat, then seal the free edge twice to prevent lifting.
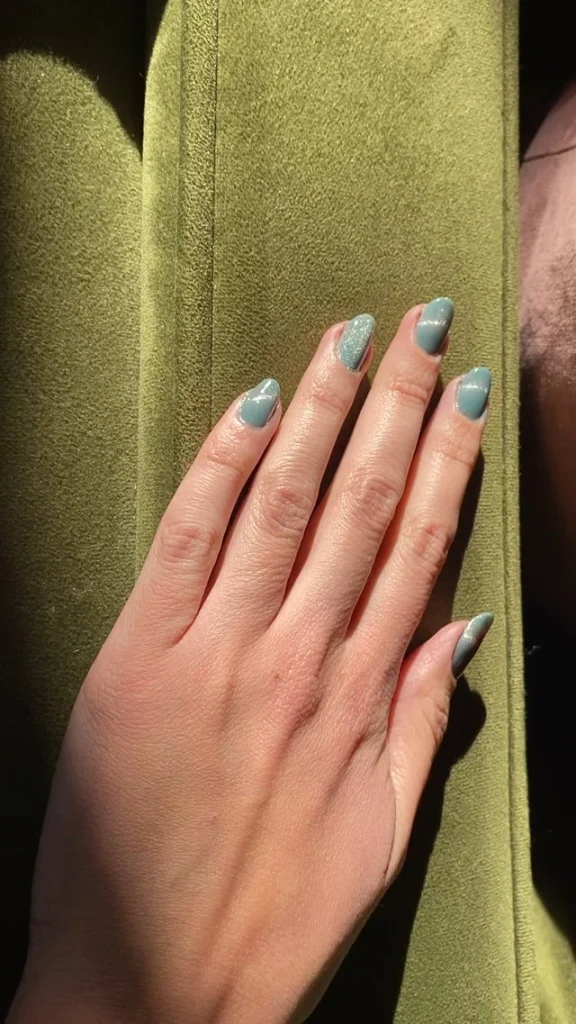
#3. Sage Green Shimmer Nails
Not every Halloween manicure has to be red and black. This muted sage-green set uses a soft silvery shimmer on selected nails, giving you an eerie, almost foggy color palette that feels understated beside the bolder devil designs.
The short rounded shape makes it especially wearable, and the sunlight catches the shimmer without overwhelming the cool green base.
Best For — Minimalists who prefer muted spooky colors
Pro Tip — Sponge one thin shimmer layer onto only the top third of two nails, then cure for 60 seconds before top coat.
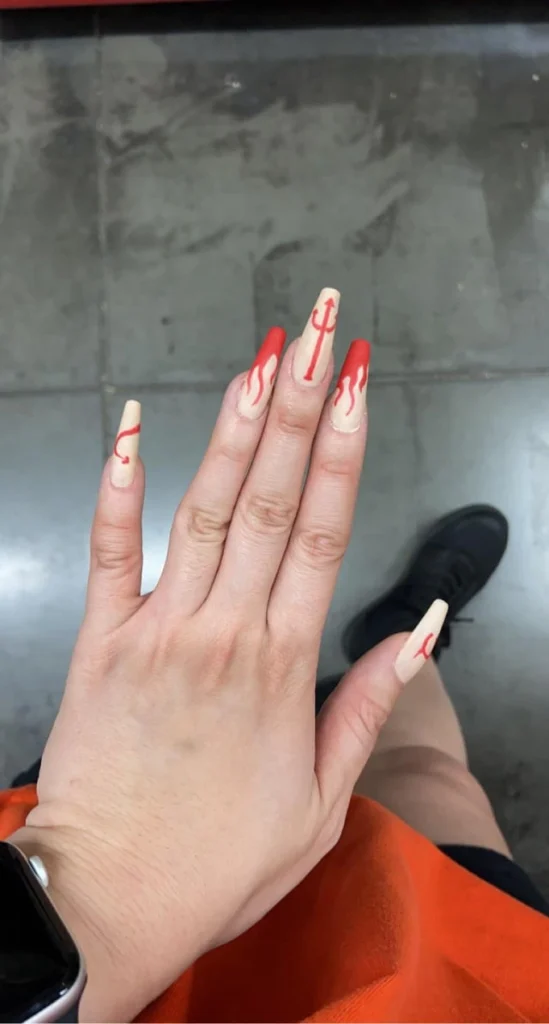
#4. Nude Red Devil Flames
A creamy nude base gives these long coffin nails plenty of breathing room for bright red flames, a trident, and curling devil-inspired line art. The mix of solid red tips and negative space keeps the manicure graphic instead of overly busy.
Try a red nail art liner gel if you want cleaner curves around the flame shapes.
Best For — Bold coffin nails with devil energy
Pro Tip — Sketch the trident with three guide dots first, then connect them using a 5 mm detail liner held near a 45° angle.
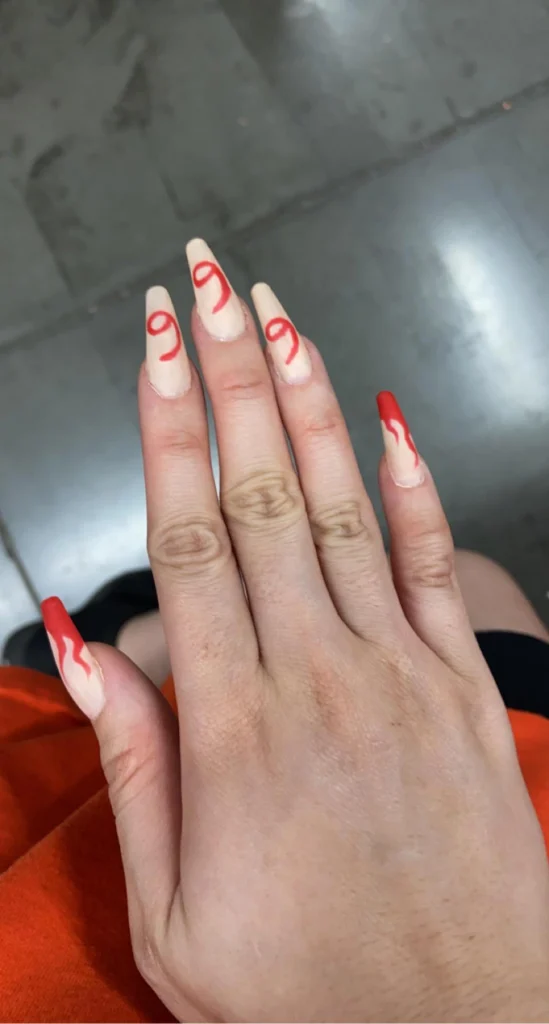
#5. Nude Red Devil Symbols
Seen closer, this nude-and-red manicure shows how simple symbols can carry the whole Halloween theme. Curled red marks sit near the tips while the thumb and pinky carry glossy flame accents, creating a coordinated design without making every nail identical.
The elongated coffin shape gives those tiny symbols enough space to stay readable.
Best For — Detail lovers recreating hand-painted symbols
Pro Tip — Leave at least 3 mm of nude space around each symbol so the red line work doesn’t visually merge from a distance.
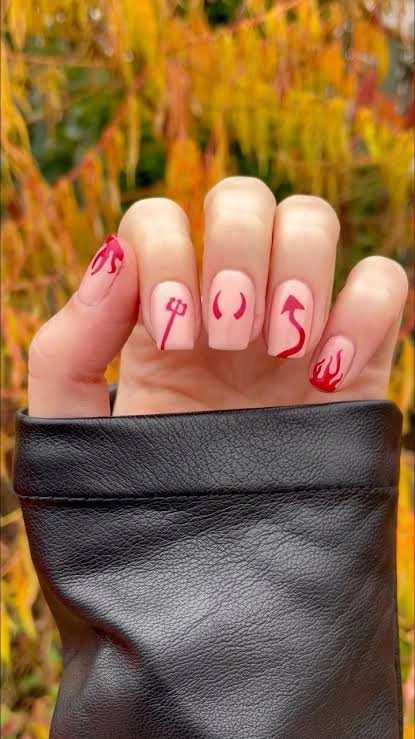
#6. Nude Devil Icon Nails
This shorter nude set turns devil imagery into tiny individual icons: a trident, curved tail, red flame, and horn-like markings all appear on separate nails. Against the warm outdoor background, the matte-looking pale base makes every crimson symbol stand out clearly.
You can recreate the motifs with a fine nail art detail brush set.
Best For — Halloween weekends and easy themed manicures
Pro Tip — Use a 0 or 00 nail-art brush and wipe it clean after every symbol to keep the narrow curves under 2 mm wide.
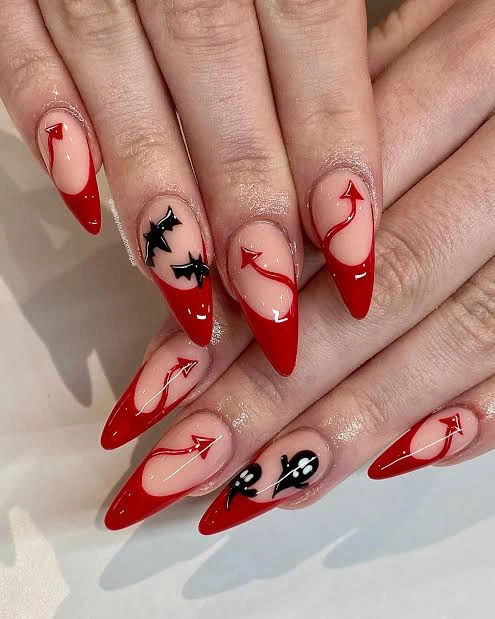
#7. Red Devil French Tips
Unlike the flatter graphic looks, these almond nails combine glossy red French tips with delicate devil tails that curl across a translucent nude base. Small black winged accents on two nails break up the red and add an extra gothic focal point.
The sharply tapered almond shape makes the arrows at the ends of the tails feel even more dramatic.
Best For — Date nights with spooky-season style
Pro Tip — Map each tail with three tiny dots before drawing the curve, then cure the red gel for a full 60 seconds before adding top coat.
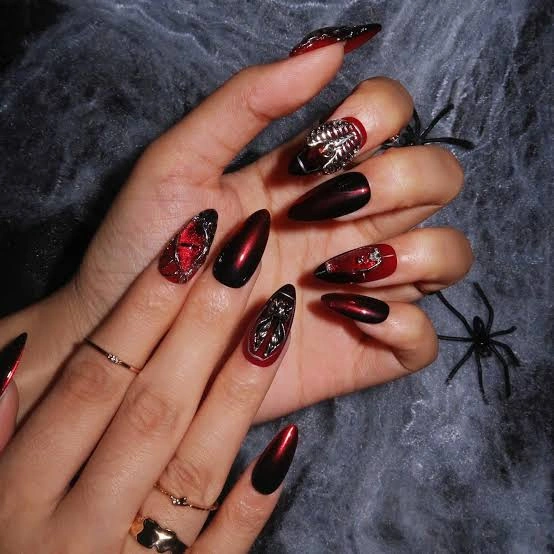
#8. Burgundy Gothic Spider Nails
Deep burgundy, black chrome, silver texture, and jewel-like red accents give this manicure a darker, more luxurious Halloween mood. A small black spider sitting beside the hands reinforces the creepy theme while the metallic raised details keep the nails looking ornate.
A 3D metal nail charm set can help you build similar gothic accents.
Best For — Gothic outfits and late-night Halloween events
Pro Tip — Press metal charms into builder gel for about 10 seconds, flash-cure them, then complete a 60-second full cure for better hold.
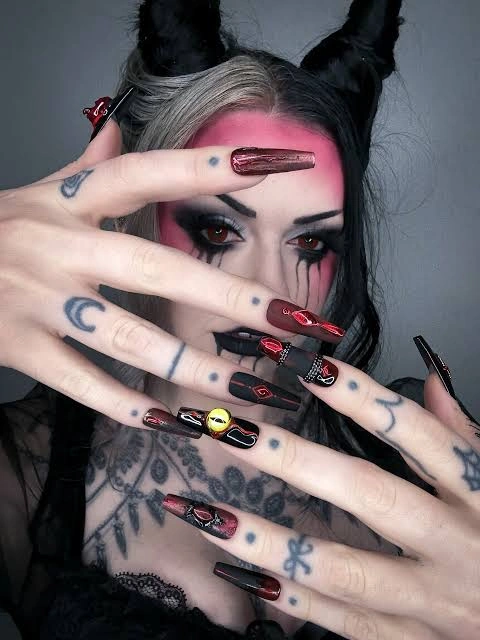
#9. Black Red Gothic Nails
Here, red and black alternate across extra-long nails with glossy details, dark symbols, and multiple accent finishes. The mix of long coffin and pointed shapes visually echoes the horned styling in the photo, giving the whole look a theatrical devil aesthetic.
It’s intentionally dramatic, so keeping the palette limited to black, crimson, and tiny touches of gold prevents the set from becoming chaotic.
Best For — Costume shoots and maximalist gothic styling
Pro Tip — File each sidewall in 8-10 controlled strokes per side, checking the nail from the front so extra-long tips stay symmetrical.
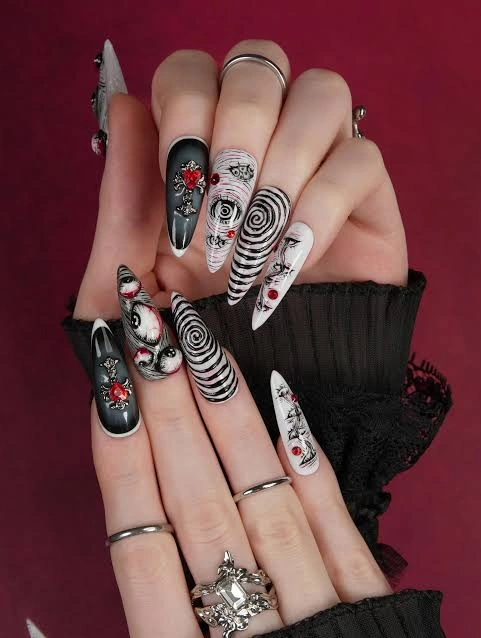
#10. Black White Spiral Nails
Black-and-white spirals instantly grab your eye on this long gothic set, while tiny red roses stop the palette from feeling flat. The combination of tapered tips, illustrated faces, stripes, and lace cuffs creates a wonderfully surreal Halloween manicure.
A black and white liner gel set is useful for building those tight concentric curves.
Best For — Artistic Halloween looks with optical drama
Pro Tip — Start each spiral at the center and rotate the finger instead of your brush, maintaining roughly 1.5-2 mm between each black ring.
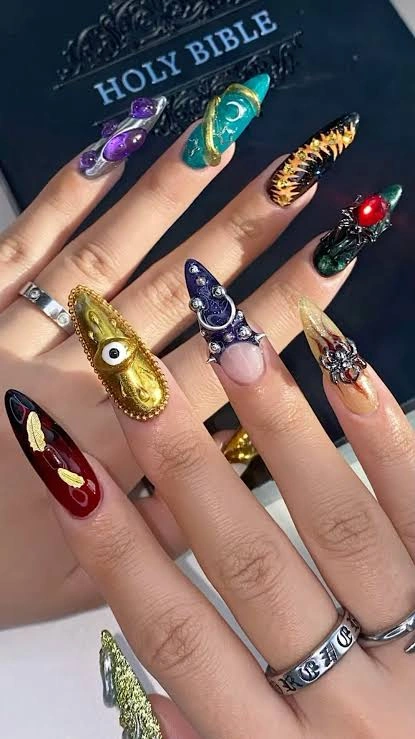
#11. Jeweled Occult Stiletto Nails
These stiletto nails look almost like miniature pieces of jewelry, with raised eyes, moons, crystals, metallic borders, and deep jewel-toned bases. Purple, turquoise, gold, green, and blood red create a mystical palette that feels darker and more ceremonial than a typical Halloween manicure.
The mismatched silver rings echo the dimensional hardware and make every nail feel collectible.
Best For — Statement manicures and elaborate Halloween costumes
Pro Tip — Place larger gems at least 4 mm away from the free edge, then surround their bases with builder gel before a 60-second cure.
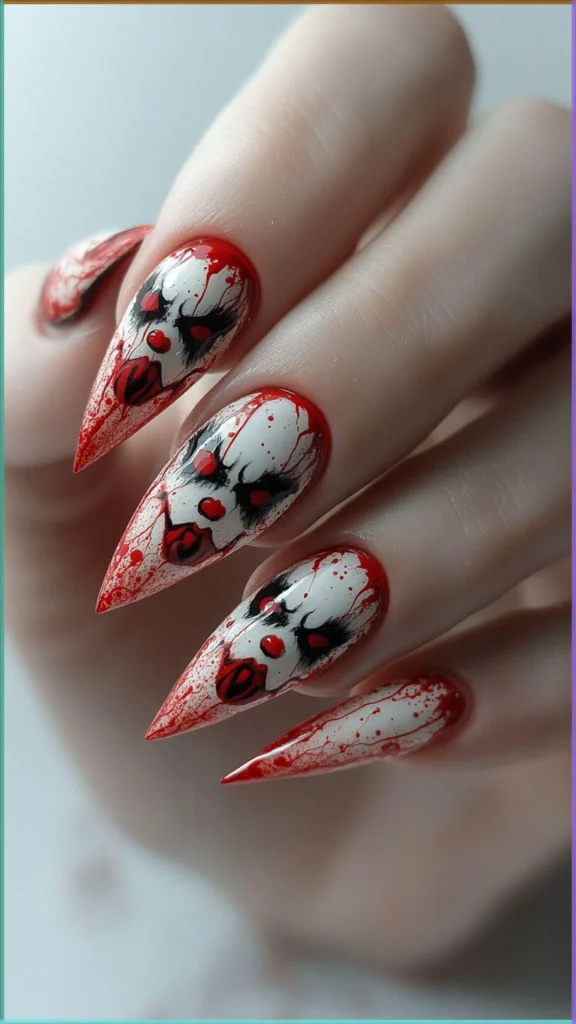
#12. Bloody Clown Stiletto Nails
This set goes straight into horror territory with pale face artwork, black eye details, crimson lips, and red splatter stretching toward razor-sharp stiletto tips. Each illustrated face is slightly different, which makes the manicure feel hand-painted rather than repeated from a decal sheet.
A fine detail nail-art brush set is the easiest way to control those tiny facial features.
Best For — Horror fans wanting intense Halloween nails
Pro Tip — Create splatter with a stiff detail brush held 5-7 cm above the nail, protecting surrounding skin before flicking diluted red gel paint.
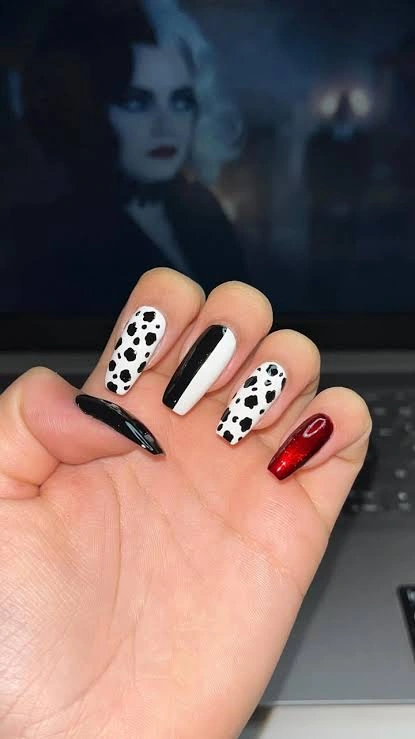
#13. Black White Villain Nails
Graphic black-and-white spots, a clean split-color accent, a glossy black point, and one metallic red nail make this set feel like a polished villain manicure. The blurred monochrome character on the screen behind the hand adds a playful cinematic detail without changing the simple color story.
If full devil artwork feels too literal, this is an easy way to keep the Halloween mood fashionable.
Best For — Movie nights and chic villain costumes
Pro Tip — Make the irregular black spots with a dotting tool in three sizes—about 1 mm, 2 mm, and 3 mm—for a more natural pattern.
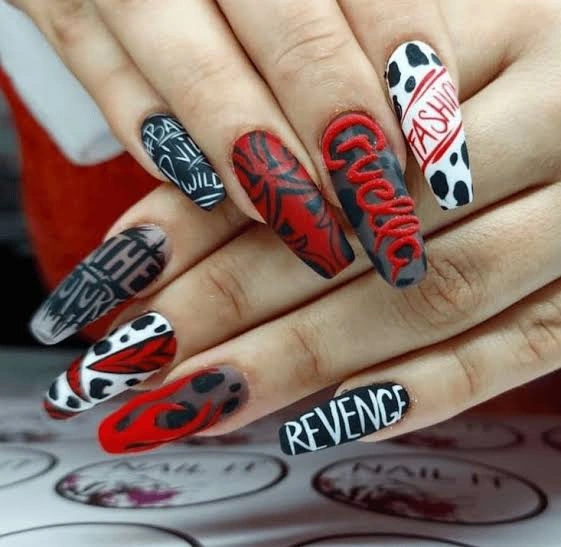
#14. Red Black Revenge Nails
Words, scribbled patterns, red lips, dotted accents, and layered gray backgrounds give these long nails a rebellious collage effect. The raised red “revenge” lettering becomes the standout detail, while black, white, gray, and scarlet keep the whole set visually connected.
Rather than aiming for perfect symmetry, this design looks strongest when every nail contributes a different graphic.
Best For — Edgy outfits and graphic nail lovers
Pro Tip — Build raised lettering in two thin gel passes, flash-curing each pass for 15 seconds before adding the next layer.
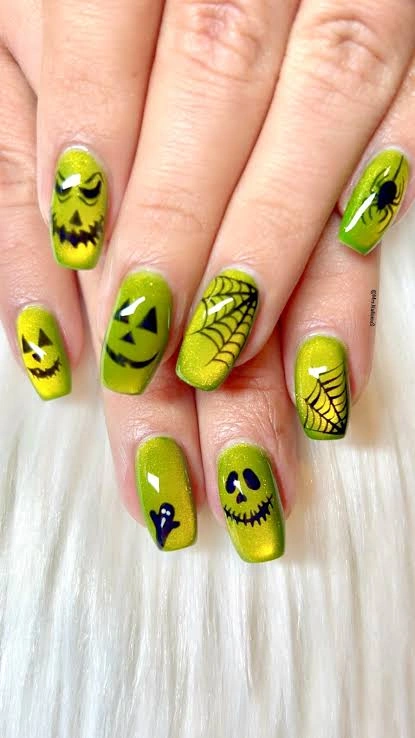
#15. Neon Green Halloween Nails
Bright acid green completely changes the mood after so many red-and-black designs. Black jack-o’-lantern faces, a spider, ghost shapes, and a delicate web turn the sparkling green base into a playful Halloween set that still has plenty of creepy personality.
A neon green gel polish gives you the strongest contrast under black line art.
Best For — Bright Halloween parties and playful costumes
Pro Tip — Cure two thin green coats for 60 seconds each before painting the web, then draw four main spokes before adding curved connecting lines.
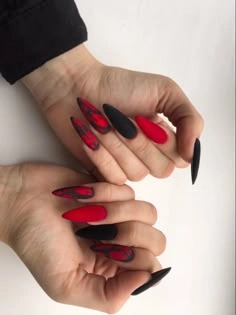
#16. Red Black Flame Nails
Closing the list, matte-looking black and vivid red alternate across long pointed nails, with flame patterns blending the two shades on select fingers. Because most nails stay solid, the flame accents have more impact and the manicure feels sleek rather than overloaded.
This is one of the easiest ways to capture classic devil colors while keeping the overall design clean and wearable.
Best For — Classic devil colors with simple drama
Pro Tip — Draw each flame from the tip upward with three uneven peaks, keeping the tallest point around one-third of the nail length.
How to Choose
The right devil manicure depends on how dramatic you want the final look to feel. Start with the shape and lifestyle needs first, then choose the artwork.
- Nail shape — Short square or rounded nails suit simple eyes, scratches, and small devil icons. Almond, coffin, and stiletto shapes give flames, tails, French tips, and detailed gothic art more room to breathe.
- Skin tone — Clear nude and soft beige bases are flexible because the red artwork stays prominent. If nude shades look too pale against your skin, try a warmer peach, pink-beige, or sheer caramel base instead.
- Occasion — A Halloween workday may call for black polish with tiny red accents, while parties and costume events are perfect for 3D charms, stiletto tips, chrome, and horror-inspired faces.
- Skill level — Beginners can start with flames, dots, or simple tridents. Save tight spirals, detailed faces, raised lettering, and gemstone placement for a nail artist or a day when you have extra practice time.
What You’ll Need
You don’t need every nail-art product at once. A few precise tools and strong base colors will handle most of these devil Halloween nails.
Useful for flames, tridents, devil tails, spirals, and tiny symbols.
Your main shade for flames, tips, symbols, splatter, and devil details.
Creates the dark base needed for dramatic Halloween contrast.
Helps with eyes, spots, guide points, pupils, and small rounded details.
Adds dimension to gothic, occult, and jewel-heavy Halloween manicures.
Needed for fully curing gel layers and detailed gel artwork.
Pro Tips
Prep Before Color
Gently buff away surface shine with a 180-240 grit buffer, then remove dust and wipe the nail plate with alcohol. Proper prep gives your base coat a cleaner surface to grip.
Work in Thin Layers
Two thin color coats usually cure more evenly than one thick layer. Follow the curing time specified by your gel system, which is commonly around 30-60 seconds under an LED lamp.
Flash-Cure Detailed Art
When a flame, symbol, or face looks right, flash-cure it for roughly 10-15 seconds before adding nearby artwork. This stops delicate lines from moving while you work.
Seal the Free Edge
Run top coat across the nail’s free edge before the final cure, especially on coffin and stiletto tips. That small step helps protect artwork near the tip from premature wear.
FAQ
Q: What colors work best for devil Halloween nails?
A: Red and black are the classic combination, but nude, burgundy, white, metallic silver, and acid green can make the look more distinctive. Keep one or two shades dominant so detailed devil symbols stay easy to see.
Q: Can I do simple devil Halloween nails on short nails?
A: Yes. Short nails work especially well with tiny red eyes, scratch marks, small tridents, miniature flames, or one accent nail instead of a complicated full-hand design.
Q: How do you paint devil horns and tails on nails?
A: Use a fine liner brush and map the shape with small guide dots first. For tails, draw one smooth curved line and finish with a tiny triangular arrow point; for horns, use two tapered curved strokes.
Q: Which nail shape looks best with devil Halloween nail art?
A: Almond, coffin, and stiletto shapes give detailed flames and tails the most space. Short square and rounded nails are better when you want smaller icons or a more practical everyday manicure.
Recommended Product
Fine Detail Nail Art Liner Brush Set
★★★★☆ Highly rated on Amazon
A fine liner brush makes it much easier to control the flames, tridents, tails, spirals, and tiny devil details featured throughout these designs.
As an Amazon Associate, we earn from qualifying purchases.
Final Thoughts
Devil Halloween nails can be as subtle as tiny red eyes on black polish or as dramatic as jeweled stiletto tips covered in gothic details. Choose the level of detail that works with your nail length, skill level, and Halloween plans.
The best part is how easily you can personalize these ideas. Swap the shape, change the finish, or combine your favorite flame, trident, French-tip, and gothic elements into a set that feels completely yours.
Which of these nail looks are you trying first? Save this post to Pinterest so you can come back to it whenever you need fresh nail inspo!

Hi, I’m Jessica, the creator behind Unique Lash & Nails Katy.
I created this website for anyone who loves beautiful nails as much as I do. Here, I share trendy nail designs, seasonal manicure ideas, easy nail care tips, honest product recommendations, and step-by-step guides to help you create salon-worthy nails at home. Whether you’re looking for everyday inspiration or your next favorite nail trend, I hope you’ll find something you love.