16 Mummy Halloween Nails: Cute & Spooky Ideas
Mummy nails are the sweet spot between spooky and adorable, and this year they’re everywhere on Pinterest. You get all the Halloween drama without committing to blood drips or full-on gore. Whether you want one accent nail or a full set of wrapped fingertips, there’s a mummy look here for you.
✦ Our Top Picks at a Glance
Best Overall — Classic Peek-a-Boo Mummy Nails
Best for Beginners — Cartoon Eyes Mummy Nails
Most Trendy — Minimalist Nude Crisscross Mummy Nails
Best for Special Occasions — Pink Glitter Mummy Coffin Nails
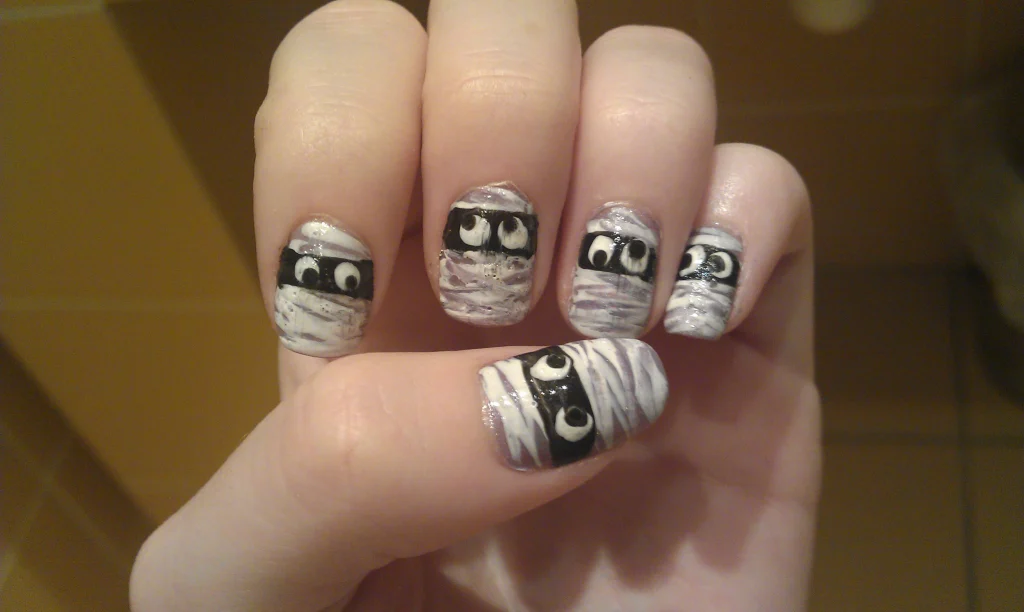
#1. Classic Peek-a-Boo Mummy Nails
Grey and white gauze strokes wrap every nail, with a black eye band and two round googly eyes peeking out. It’s the most iconic mummy look out there, and it reads Halloween from across the room.
Best For — anyone who wants a full, unmistakable Halloween statement set
Pro Tip — use a thin striping brush and drag the polish in short, uneven strokes instead of straight lines. It looks far more like real gauze that way.
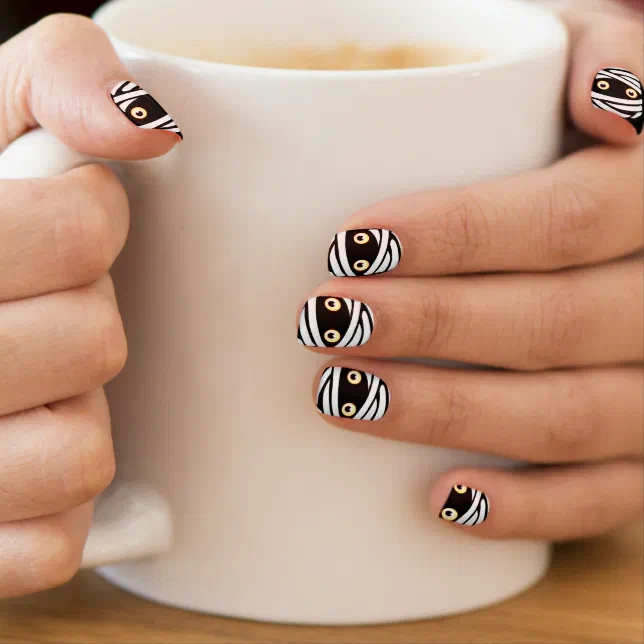
#2. Black and Gold Mummy Wrap Nails
A deep black base gets crossed with clean white wrap lines and tiny gold-rimmed eyes for a moodier, more glam mummy. It’s dramatic without losing that playful Halloween wink.
Best For — nights out or Halloween parties that call for edge
Pro Tip — paint your white wrap lines first over a tacky base, then seal with a glossy top coat like the Fast-Dry Glossy Top Coat so the lines stay crisp against the black.
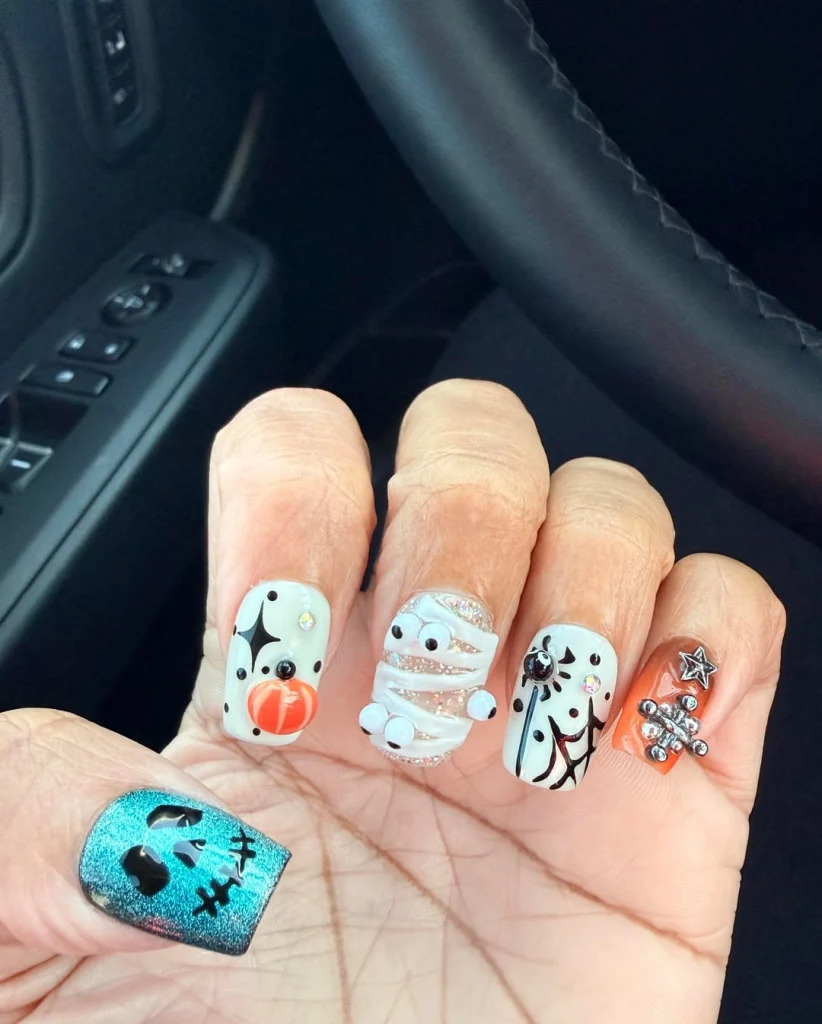
#3. Glitter Mummy Accent Nails
This one keeps the mummy to a single glittery accent nail, surrounded by pumpkins, a starry sky nail, and a spiderweb tip. The 3D puffy eyes give it a fun, almost cartoonish texture.
Best For — people who love mixing several Halloween motifs at once
Pro Tip — dot the eyes on with a dual-ended dotting tool so both circles come out even every single time.
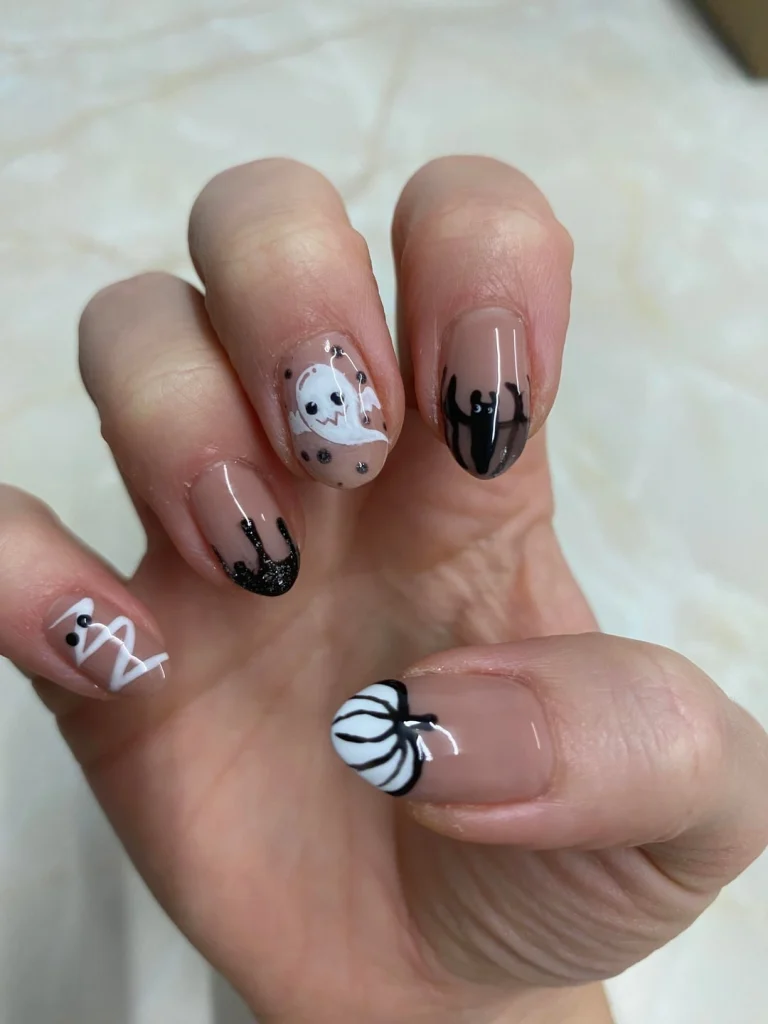
#4. Nude Mani with Mummy Zigzag Accent
A sheer nude base carries most of the set, with one nail wrapped in zigzagging white lines and two shy black dot eyes. Ghosts, bats, and a tiny pumpkin fill out the rest of the fingers.
Best For — office-friendly Halloween nails that still feel festive
Pro Tip — sketch your zigzag lightly with a toothpick first, then go over it with white polish. It keeps the wrap from looking too stiff or symmetrical.
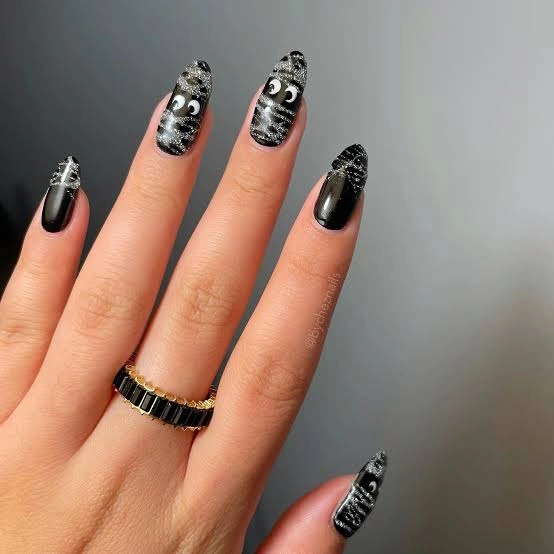
#5. Black Stiletto Mummy Nails
Long, sharp stiletto tips get wrapped in silvery, textured bandage strokes with cartoon eyes peeking through. Paired with glossy solid black nails, the whole set feels bold and a little bit witchy.
Best For — dramatic, long-nail lovers who want maximum impact
Pro Tip — build the silver wrap texture in two thin layers rather than one thick coat, so the metallic shimmer doesn’t clump or streak.
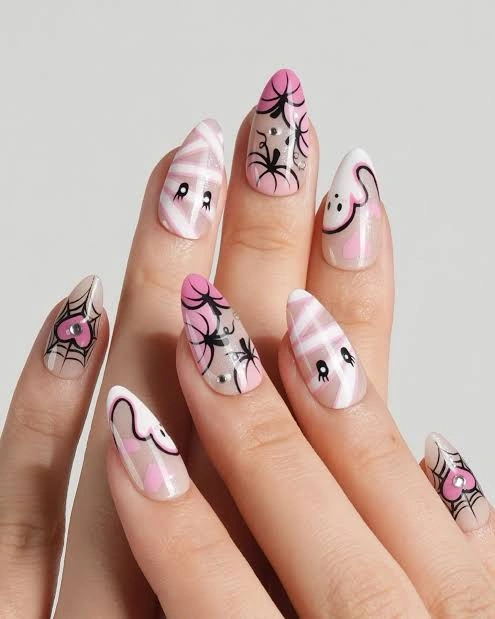
#6. Pink Mummy and Spiderweb Nails
Soft pink and white bandage stripes sit alongside rhinestone-studded spiderwebs and tiny black cat eyes. It’s proof that Halloween nails don’t have to be black and orange to feel spooky.
Best For — girly Halloween fans who love a pastel palette
Pro Tip — press small flatback rhinestones into the spiderweb corners while the top coat is still tacky so they lock in place.
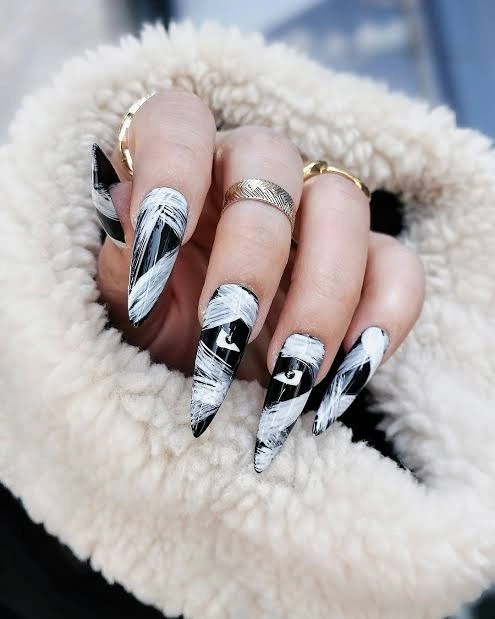
#7. Black and White Brushstroke Mummy Nails
Instead of clean lines, this look uses loose, sweeping white brushstrokes over black stiletto nails for an abstract, almost windswept bandage effect. It reads more editorial than costume-y.
Best For — fashion-forward manicure fans who want something unexpected
Pro Tip — use a dry, slightly stiff brush and drag it in one quick motion so the white streaks fade out naturally instead of pooling.
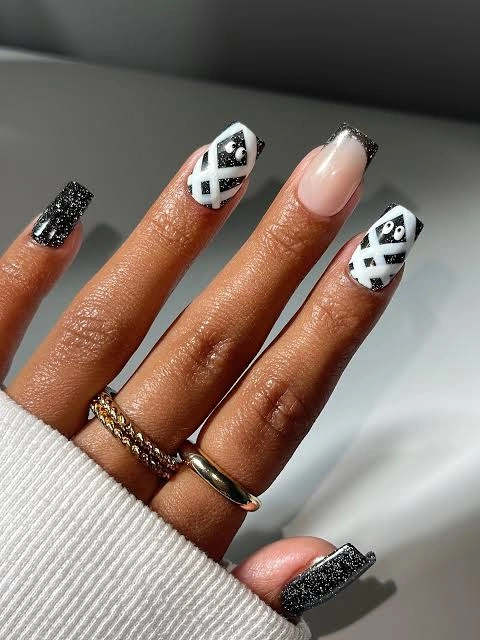
#8. Glitter Criss-Cross Mummy Nails
Chunky black glitter tips balance out crisp white criss-cross wraps with sweet cartoon eyes. One bare nude nail gives your eyes a place to rest between all that sparkle.
Best For — anyone who never says no to glitter
Pro Tip — dab chunky glitter polish on with a makeup sponge instead of the brush for even, streak-free coverage.
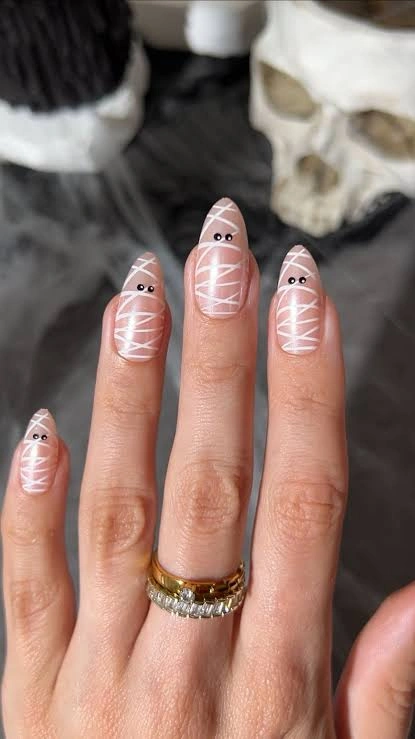
#9. Minimalist Nude Crisscross Mummy Nails
Thin black crisscross lines sit over a bare, glossy nude base with the tiniest black dot eyes tucked into the corner. It’s minimal, wearable, and honestly could pass for everyday nails.
Best For — minimalists who still want to celebrate the season
Pro Tip — use a fine detail liner brush dipped in black gel polish for the thinnest, cleanest lines possible.
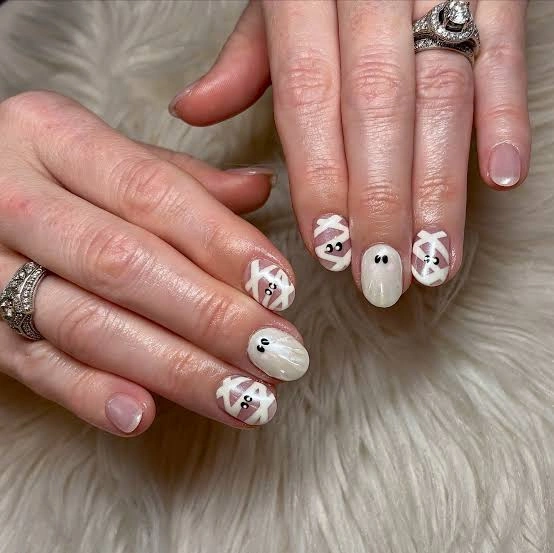
#10. White Wrap Mummy Manicure
Soft nude wrapped nails alternate with solid milky-white accent nails dotted with tiny eyes, giving the set a rounded, cozy feel. It’s a gentler take that still nails the mummy theme.
Best For — short, round nail shapes and everyday wear
Pro Tip — use a milky white polish rather than stark white on the solid accent nails, it keeps the whole look softer and less clinical.
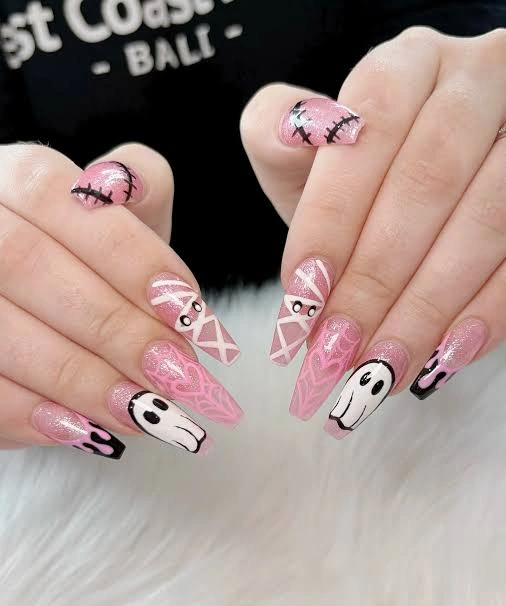
#11. Pink Glitter Mummy Coffin Nails
Long coffin nails in shimmering pink get wrapped in white bandage strokes, paired with dripping ghost faces and a stitched-up pumpkin tip. It’s dramatic, girly, and perfect for a night out.
Best For — Halloween parties, photoshoots, and special events
Pro Tip — apply your glitter polish over a holographic glitter top coat so it catches light from every angle in photos.
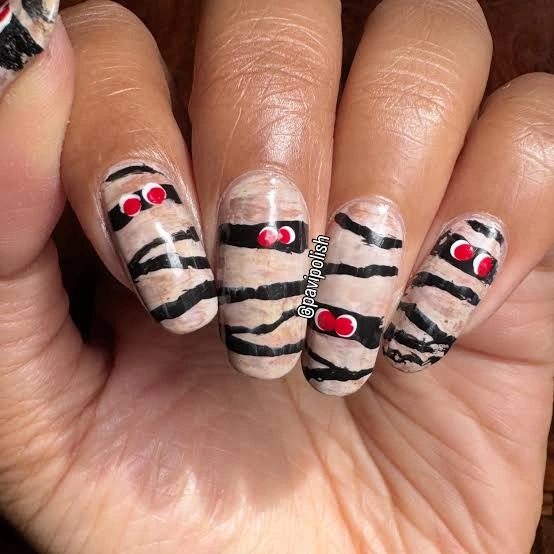
#12. Red-Eyed Mummy Wrap Nails
Thick, uneven black bandage strokes wrap a warm nude base, but instead of the usual black-and-white eyes, glossy red dots peek through. That small swap gives the whole look a creepier edge.
Best For — anyone who wants a mummy look with a horror-movie twist
Pro Tip — add a tiny drop of clear top coat directly over each red dot so it looks like a wet, glossy eye rather than flat polish.
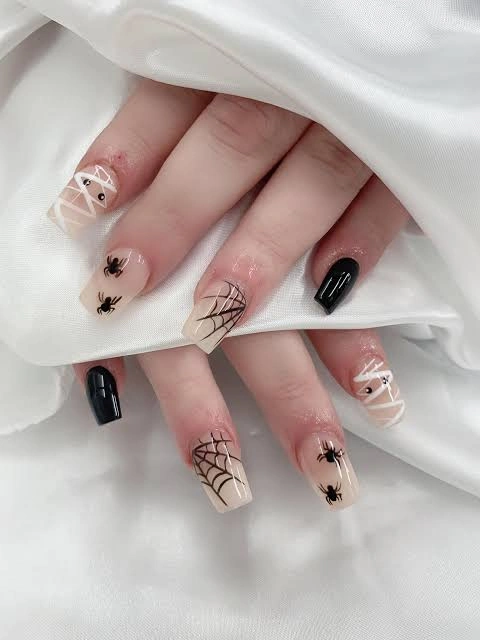
#13. Nude Mummy and Spider Web Nails
One crisscrossed mummy nail sits comfortably next to hand-painted spiders and delicate webs on a warm nude base, with two glossy black tips for contrast. It’s a great pick if you want variety without clutter.
Best For — square-shaped nails and a classic Halloween color story
Pro Tip — paint the web’s spokes first, let them dry fully, then connect the curved lines so they don’t smear into each other.
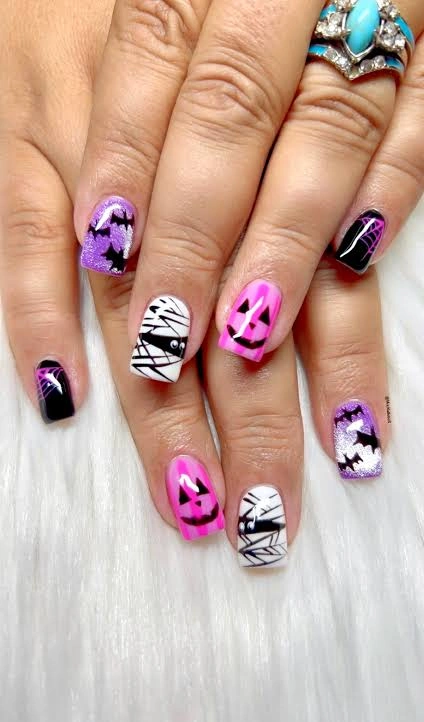
#14. Colorful Mummy and Pumpkin Nails
Hot pink jack-o’-lantern faces, purple bat silhouettes, and black spiderwebs surround one classic white mummy nail in this playful mixed set. It’s bright, bold, and undeniably fun to look at.
Best For — kids’ Halloween parties or anyone who loves color
Pro Tip — pick one neutral nail, like the mummy design, to break up all the bright colors so the set doesn’t feel too busy.
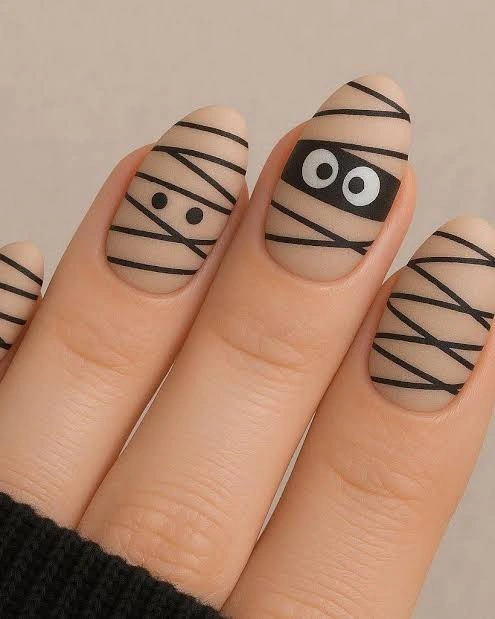
#15. Cartoon Eyes Mummy Nails
Simple black wrap lines crisscross a bare nude base, with one accent nail featuring a solid black band and big cartoon eyes. It’s clean, quick to recreate, and endlessly cute.
Best For — first-time nail artists trying mummy nails at home
Pro Tip — use a nail art striping pen instead of a brush for your first try, the built-in tip makes straight lines much easier to control.
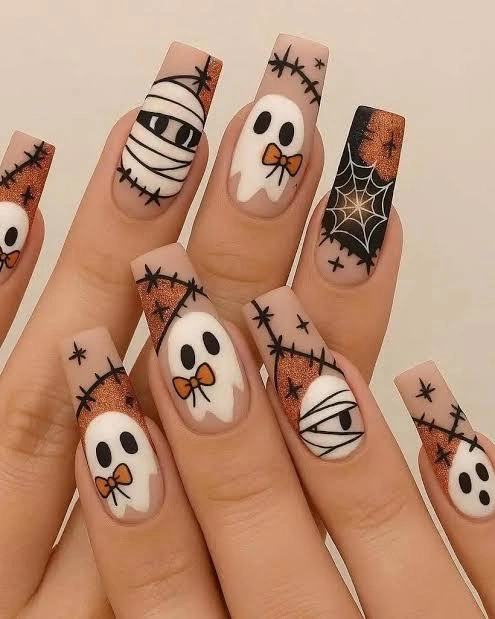
#16. Barbed Wire Mummy and Ghost Nails
Long coffin nails mix a classic mummy wrap with sweet bow-tied ghosts and orange glitter barbed wire tips, all on a warm nude base. It’s the most detailed set on this list, and it makes a serious style statement.
Best For — long nail lovers who want a full, coordinated Halloween set
Pro Tip — paint the barbed wire spikes with a fine liner brush and add tiny orange glitter dots at the joints for texture instead of using loose glitter.
How to Choose the Right Nail Design
With sixteen mummy looks to pick from, it helps to know what actually matters before you sit down at the salon or your kitchen table. Here’s what to think through first.
- Nail shape — wrap designs stretch beautifully across almond and stiletto shapes, since the curve gives the bandage lines somewhere to travel. Shorter, rounder nails work best with simpler crisscross patterns like the minimalist or cartoon-eyes looks.
- Skin tone — warm nude bases tend to look most natural on medium to deep skin tones, while pale pink or white bandage colors show up crisply on fair skin. If you’re not sure, a sheer nude base works well across most tones.
- Occasion — save the glitter coffin nails and full character sets for parties, and lean toward the subtle nude or single-accent mummy looks for work or school. Halloween shouldn’t get you in trouble with the office dress code.
- Skill level — thin, straight crisscross lines are the easiest mummy style to DIY. Textured, uneven bandage wraps and 3D eyes take more practice, so save those for when you have a little extra time.
What You’ll Need
None of these looks require a professional setup. Here’s what actually gets used to create that wrapped, bandaged effect.
For clean, thin bandage lines and crisscross wraps
The two core colors every mummy design needs
For even, round mummy eyes every time
Adds sparkle to spiderweb and glitter accent nails
Locks in glitter accents and adds shine that lasts
Seals the design and keeps wrap lines crisp
Pro Tips for a Long-Lasting Manicure
Start with a clean, dehydrated nail
Wipe each nail with rubbing alcohol before you paint anything. It removes oil residue so your base coat and design actually grip the nail instead of lifting within a day.
Let each layer dry completely
Rushing between your base, design lines, and top coat is the number one reason wrap lines smudge. Give each layer a full minute before moving to the next.
Seal the edges, not just the center
Swipe your top coat over the free edge of the nail too. This one habit alone can add several days of wear before chipping starts.
Keep cuticle oil close by
Hand-painted designs can look a little dry after a day or two. A daily swipe of cuticle oil keeps the surrounding skin soft and the polish looking freshly done.
Frequently Asked Questions
Q: How do you paint mummy wrap lines without a stencil?
A: Use a thin detail brush and drag short, slightly uneven strokes at different angles across the nail. Real gauze isn’t perfectly straight, so a little unevenness actually makes the design look more realistic.
Q: What nail shape works best for mummy Halloween nails?
A: Almond and coffin shapes give wrap lines the most room to curve naturally, but round and square shapes work fine for simpler crisscross styles. Pick the shape you already feel comfortable wearing.
Q: Can I do mummy nails with just black and white polish?
A: Absolutely. Several of the designs on this list, including the minimalist crisscross and cartoon eyes looks, use nothing more than black, white, and a nude base.
Q: How long do hand-painted mummy nails last?
A: With a proper base coat, sealed edges, and a durable top coat, hand-painted designs typically last five to seven days before chipping becomes noticeable.
Recommended Product
Fine Detail Nail Art Brush Set
★★★★☆ Highly rated on Amazon
Every single mummy design on this list starts with clean, controlled wrap lines, and a proper detail brush set makes that far easier than trying to freehand with a regular polish brush.
As an Amazon Associate, we earn from qualifying purchases.
Final Thoughts
Mummy nails prove you don’t need a full costume to get into the Halloween spirit. From a single glittery accent nail to a full wrapped set with red glowing eyes, there’s a version here that fits your style and your skill level.
If you loved this roundup, you might also like these Halloween spooky nail ideas, these ghost Halloween nail designs, or these subtle Halloween nails for something a little more understated.
Which of these nail looks are you trying first? Save this post to Pinterest so you can come back to it whenever you need fresh nail inspo!

Hi, I’m Jessica, the creator behind Unique Lash & Nails Katy.
I created this website for anyone who loves beautiful nails as much as I do. Here, I share trendy nail designs, seasonal manicure ideas, easy nail care tips, honest product recommendations, and step-by-step guides to help you create salon-worthy nails at home. Whether you’re looking for everyday inspiration or your next favorite nail trend, I hope you’ll find something you love.