18 Cat Eye Halloween Nails to Pin Right Now
Halloween nails don’t have to mean the same three pumpkin designs you’ve seen a hundred times. This round-up leans into the cat eye trend specifically — glossy slit pupils, chrome finishes, spiderwebs, and a few genuinely spooky hand-painted details mixed in. Whether you’re after something short and low-key or long, dramatic, and stiletto-sharp, you’ll find a look here worth screenshotting for your nail tech.
✦ Our Top Picks at a Glance
Best Overall — Glossy Green Realistic Cat Eyes
Best for Beginners — Classic Glossy Red Almond
Most Trendy — Oil-Slick Chrome Spiderweb Nails
Best for Special Occasions — Gold Shimmer Pumpkin Smile Nails
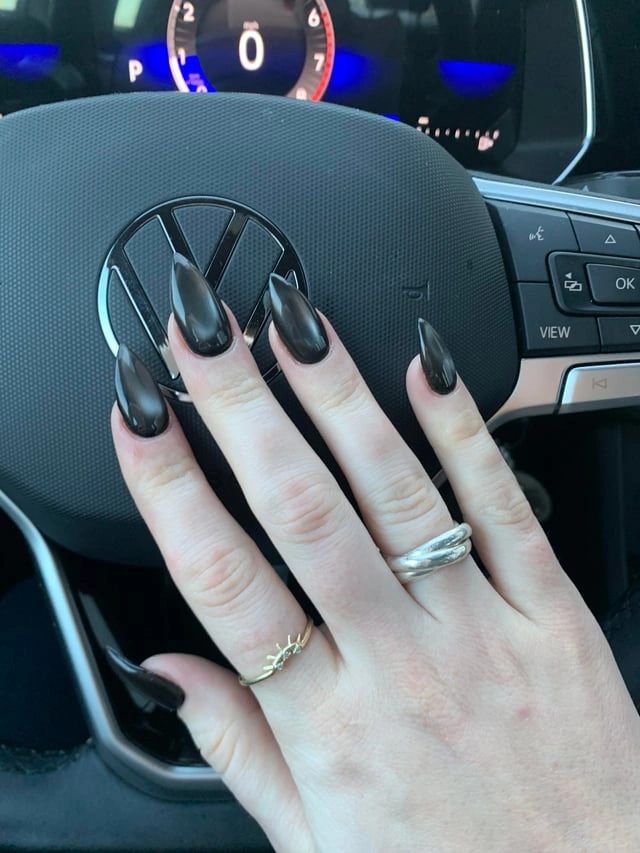


#1. Glossy Black Chrome Stiletto
Picture a deep black base polished to a mirror-like chrome shine, with sharp stiletto tips catching every bit of light. It’s sleek and minimal, the kind of set that works year-round but happens to feel extra witchy in October.
Best For — anyone who wants Halloween without the clutter
Pro Tip — Apply chrome pigment powder while your top coat is still tacky, then buff with a soft applicator for 10-15 seconds per nail to get that true mirror finish.
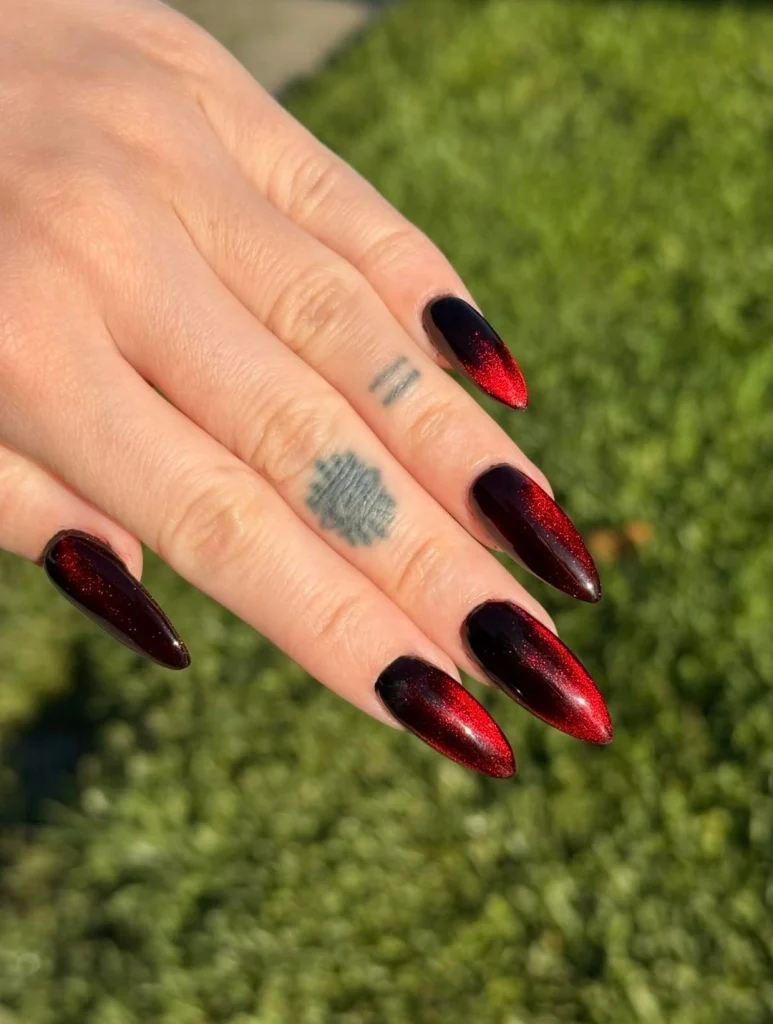
#2. Black to Red Glitter Ombré
This one’s for anyone who wants their nails to look like they’re smoldering from the inside out. A blood-red glitter melts up from the tip into inky black at the cuticle, giving each nail real depth instead of a flat gradient.
Best For — the dramatic dresser who loves a bold reveal
Pro Tip — Dab the glitter gel on with a makeup sponge in small motions, building 2-3 thin layers instead of one thick coat, so the color transition stays smooth.
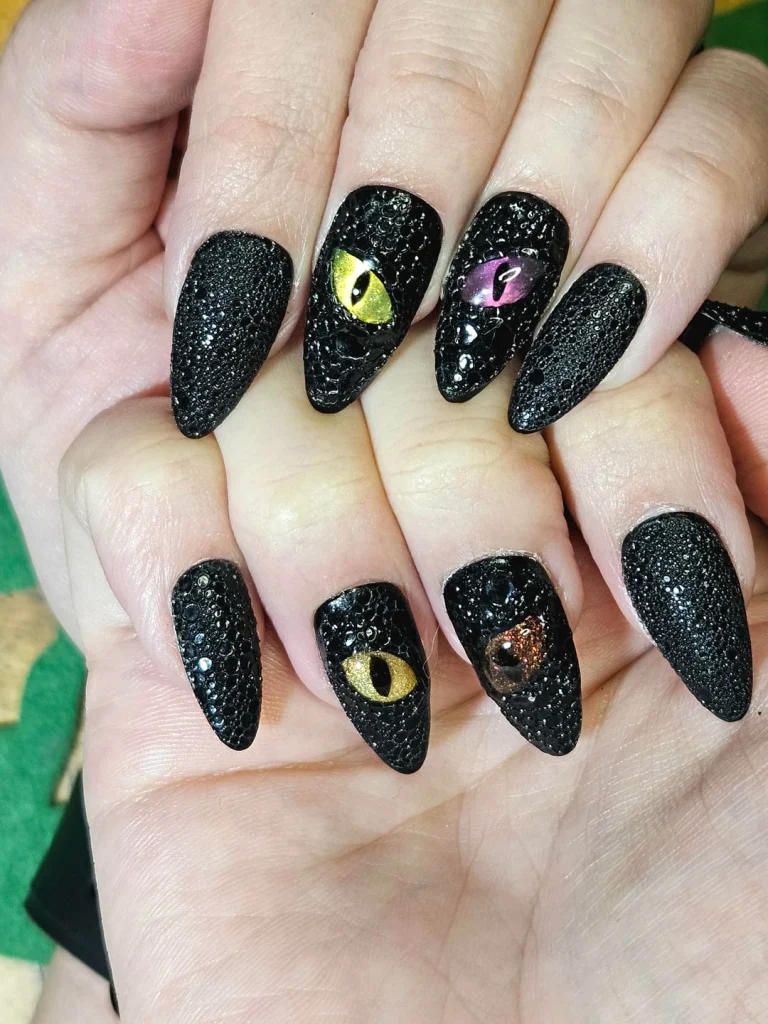
#3. Textured Black with 3D Cat Eyes
Unlike the smoother looks on this list, this one goes tactile with a black snakeskin-textured base and two glossy 3D cat-eye appliqués set right into the design. The mismatched eye colors, one lemon-yellow and one violet, make it feel almost alive.
Best For — fans of statement nails that start conversations
Pro Tip — Press each 3D eye charm onto the nail before the gel base fully cures, holding firm pressure for 20 seconds so it seats flush instead of lifting at the edges.
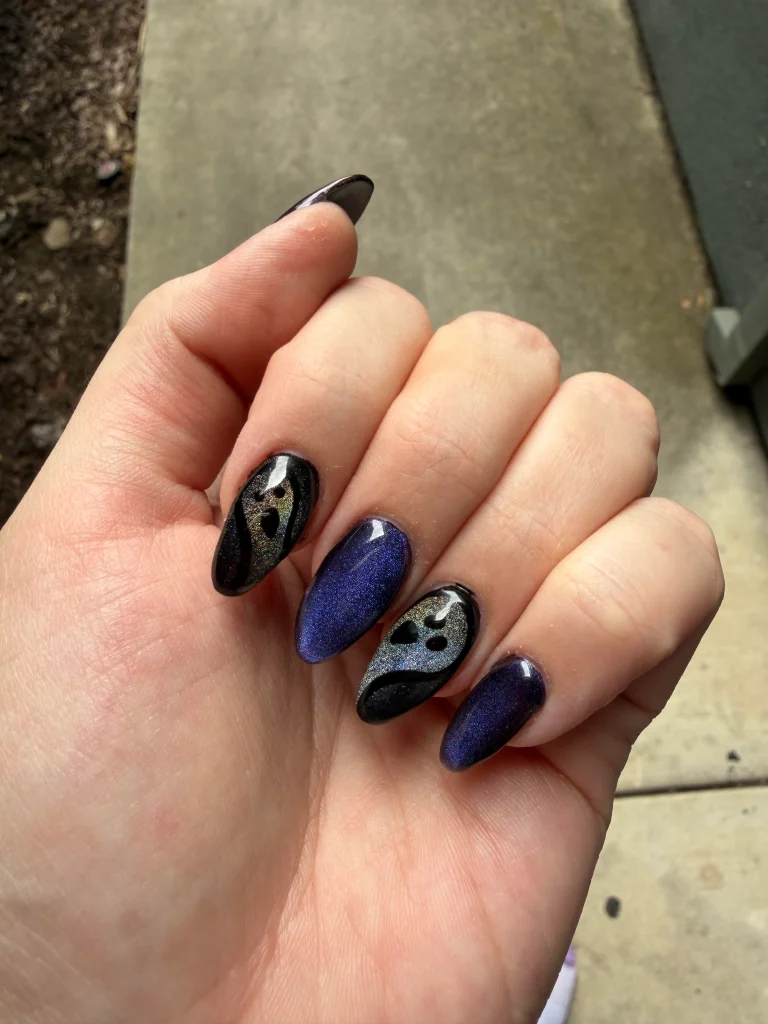
#4. Holographic Purple Ghost Nails
Picture a deep purple-blue holographic polish that shifts color as your hand moves, with two accent nails carrying hand-painted ghost faces in glossy black. It’s the kind of design that photographs beautifully in both daylight and flash.
Best For — whoever wants Halloween spirit that still reads elegant
Pro Tip — Paint the ghost outline with a thin liner brush dipped in black gel, then seal with one extra top coat layer cured for a full 60 seconds to keep the edges crisp.
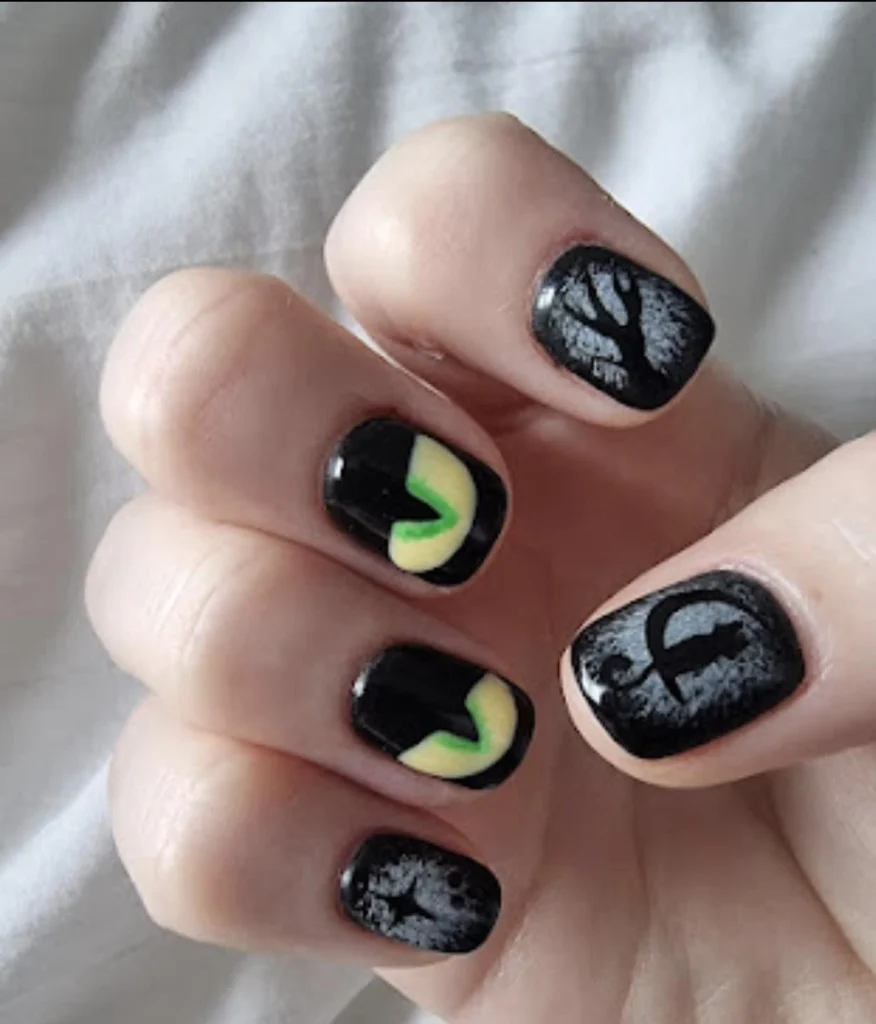
#5. Short Black Spooky Hand-Painted Set
This one’s for the low-maintenance crowd who still wants full Halloween energy on short, practical nails. Each finger tells its own mini story, from a bare tree to a glowing cat eye to a crescent moon, all painted freehand on a matte-glossy black base.
Best For — anyone who prefers shorter, everyday-wearable nails
Pro Tip — Sketch each design lightly with a dotting tool first, then fill in with a size-000 detail brush so the lines stay thin enough to read clearly at short nail length.
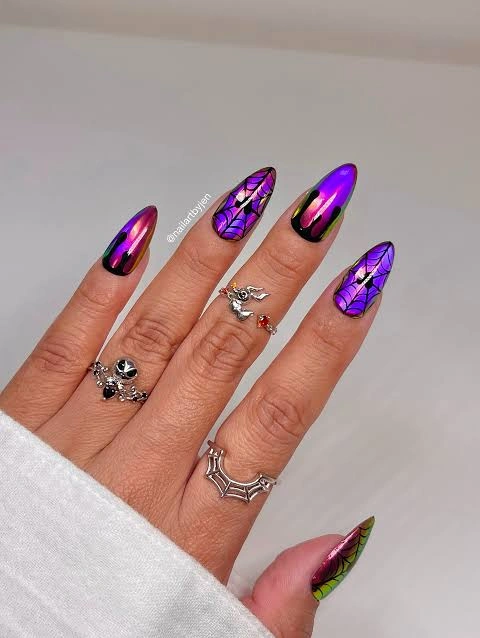
#6. Oil-Slick Chrome Spiderweb Nails
Where most looks on this list stay in one lane, this one blends two trends at once: an oil-slick chrome base shifting through purple, pink, and green under a black stamped spiderweb overlay. It’s bold enough for a night out and detailed enough to hold up in close-up photos.
Best For — the trend-chaser who wants maximum shine
Pro Tip — Apply the chrome pigment over a fully cured black gel base and buff in one direction only; buffing in circles dulls the color-shift effect.
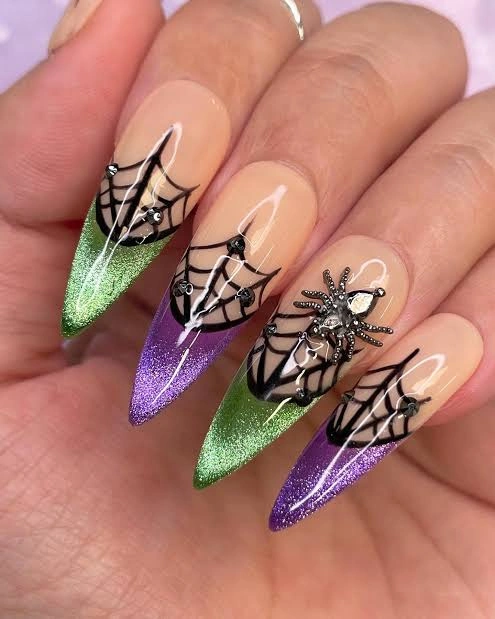
#7. Nude French with Glitter Web Tips
Picture a classic nude french manicure reimagined with green and purple glitter tips instead of plain white, topped with a delicate stamped spiderweb and a tiny 3D spider charm on the ring finger. It keeps one foot in elegant and one foot in spooky.
Best For — brides and guests attending a fall wedding
Pro Tip — Stamp the web design onto clear jelly stamping polish first, then transfer it with light, even pressure so the fine lines don’t smudge on the glossy nude base.
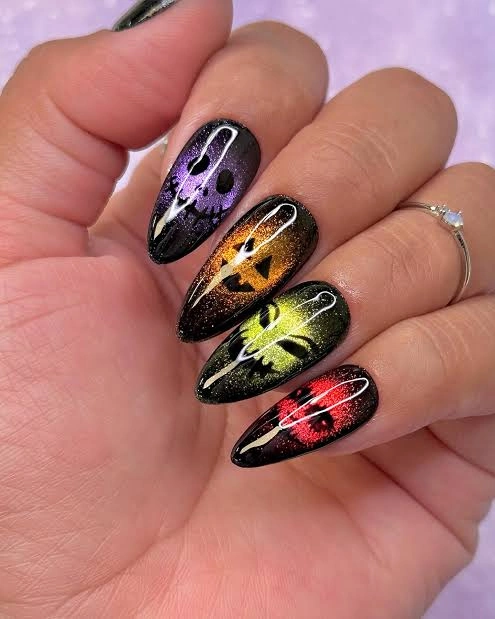
#8. Airbrushed Rainbow Cat Eye Stilettos
This one’s for anyone who wants their nails to feel like a whole costume on their fingertips. Each long stiletto carries an airbrushed cat-eye pupil in a different color, purple, orange, green, and red, with a single white line slicing through each design.
Best For — fans of long, dramatic stiletto shapes
Pro Tip — Mask the white line with vinyl striping tape before airbrushing the color underneath, then peel it away once the base is dry to keep the line perfectly straight.
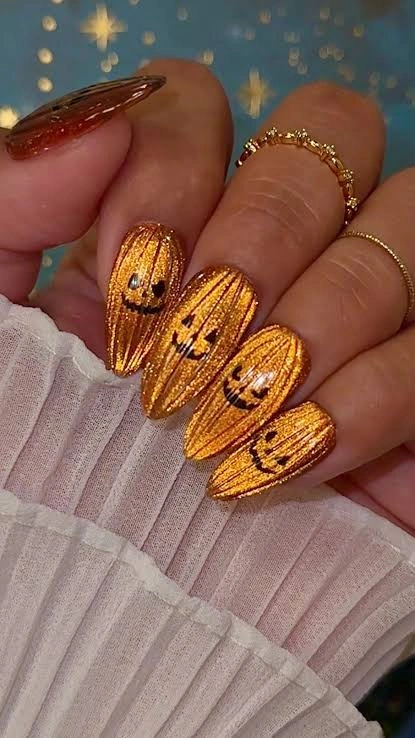
#9. Gold Shimmer Pumpkin Smile Nails
Picture warm gold shimmer polish with fine linear texture, topped with a simple hand-painted jack-o’-lantern smile on each nail. It’s festive without tipping into costume-y, which makes it an easy pick for a party where you still want to look put together.
Best For — Halloween parties and other special occasions
Pro Tip — Apply the shimmer polish in thin north-to-south strokes to keep the particles aligned, then let it dry fully for 5 minutes before painting the pumpkin faces on top.
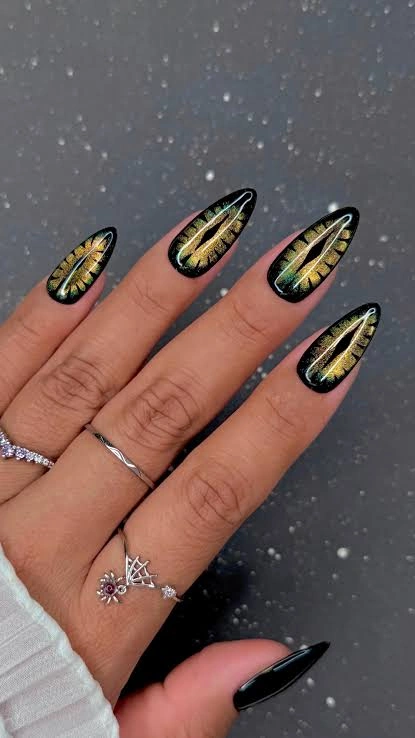
#10. Black and Gold Dragon Eye Almond
Unlike the softer glitter looks earlier on this list, this one goes graphic with a bold gold chevron design outlined in black on an almond shape. The metallic stripes catch light differently depending on the angle, so the design almost seems to shift as you move your hand.
Best For — anyone who wants a striking, editorial-style look
Pro Tip — Load a fine striping brush with gold gel and pull each chevron line in one continuous stroke rather than several short strokes, which keeps the edges from looking choppy.
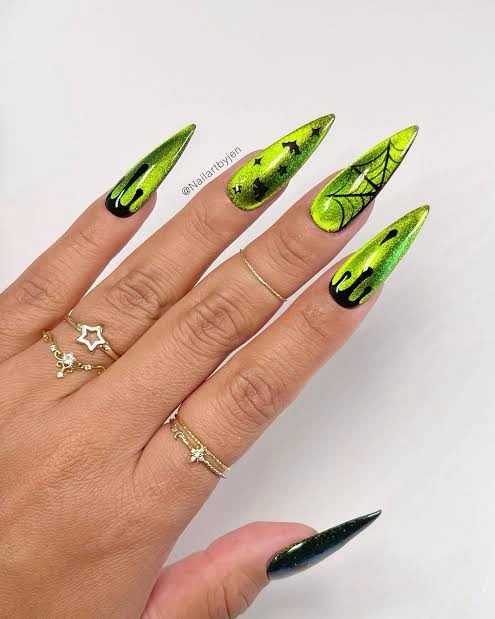
#11. Lime Green Chrome Drip Stilettos
Picture an electric lime-green chrome finish with black drip details running down from the cuticle, plus a stamped spiderweb on one accent nail and tiny black stars on another. It’s loud in the best way and reads as Halloween from across the room.
Best For — the bold dresser who loves neon and glow
Pro Tip — Cure the black drip gel for a full 30 seconds before adding the chrome top layer, or the pigment will drag through the wet gel instead of sitting cleanly on top.
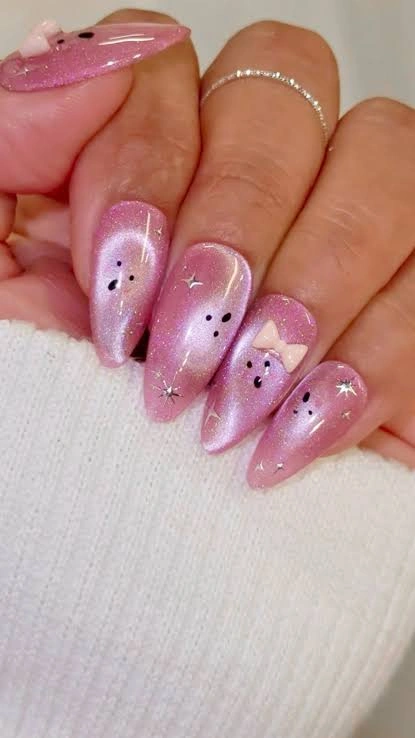
#12. Pink Shimmer Kitty Bow Nails
This one’s for anyone who thinks Halloween nails don’t have to be dark to be cute. A soft pink shimmer base carries tiny black cat-eye dots, silver stars, and a single pale pink 3D bow on the ring finger for a playful twist on the theme.
Best For — fans of cute, pastel-toned nail art
Pro Tip — Place the 3D bow charm with a tiny dot of clear gel and cure it separately for 20 seconds before applying top coat, so it doesn’t shift while the rest of the nail cures.
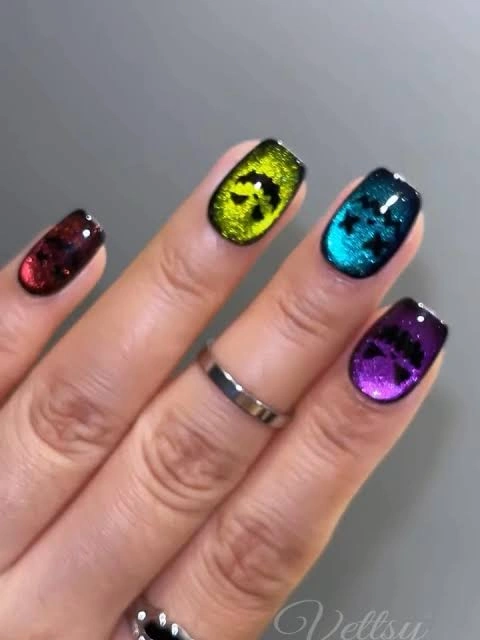
#13. Multicolor Glitter Bat Silhouette Nails
Picture four different jewel-toned glitters, red, yellow-green, teal, and purple, each with a matching black bat silhouette cut into the design like a stencil. The glitter underneath peeks through the negative space, so the bat almost glows against the dark edges.
Best For — anyone who wants one design across multiple colors
Pro Tip — Cut your bat stencil from vinyl before painting, apply it over the fully cured glitter base, then paint the black around it and peel while the polish is still slightly wet.
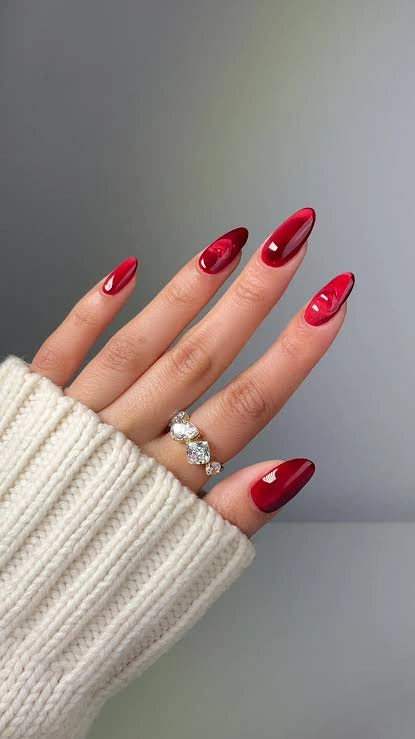
#14. Classic Glossy Red Almond
Where most designs here lean into texture or multiple colors, this one keeps it simple: a rich, glossy red on a clean almond shape with nothing else added. It proves Halloween nails don’t need extra elements to feel seasonal; the color alone does the work.
Best For — first-timers easing into nail art
Pro Tip — Apply two thin coats of red gel rather than one thick coat, curing each for 30 seconds, to avoid the streaky finish thick red polish is known for.
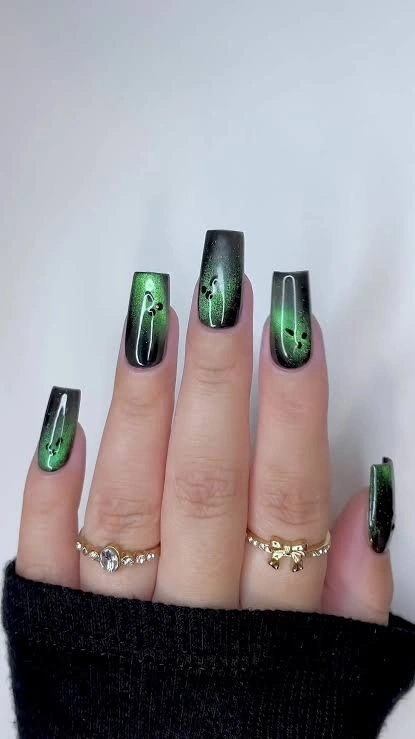
#15. Green Glow Coffin Cat Eyes
This one’s for anyone who wants their nails to look like they’re glowing from within. Long black coffin nails fade into a green shimmer at the tips, with a hand-painted white cat-eye outline traced across two accent fingers.
Best For — long coffin-shape lovers who want extra length
Pro Tip — Blend the black-to-green gradient with a makeup sponge in a single upward dabbing motion per layer, cleaning the sponge between coats so the green stays vibrant.
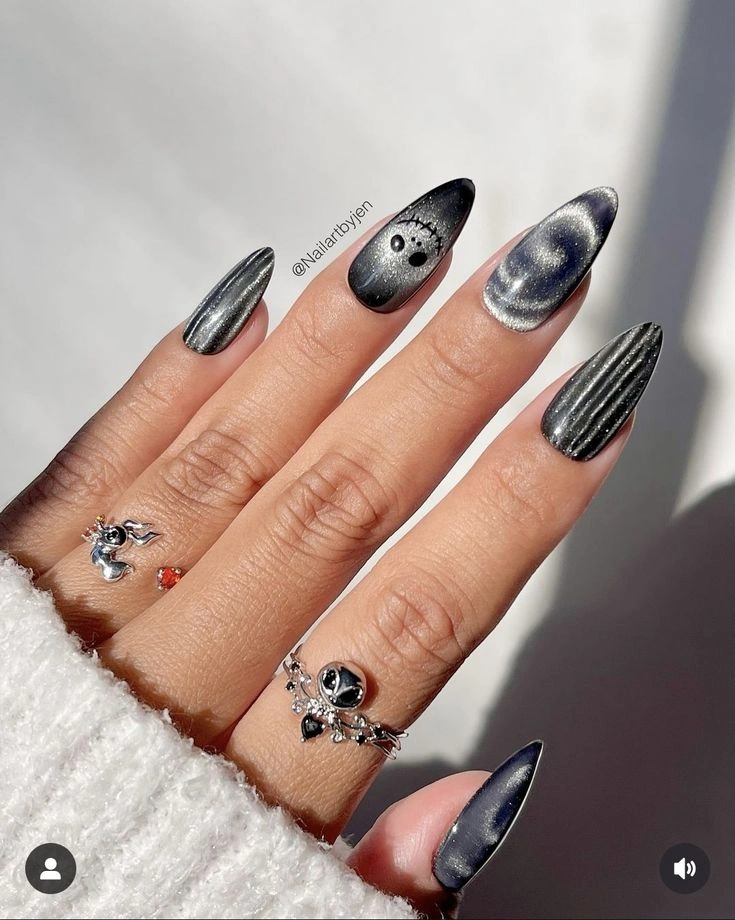
#16. Charcoal Chrome Striped Cat Face
Picture a charcoal-silver chrome finish with fine vertical striping across most nails, interrupted by one accent nail carrying a simple cat face with round button eyes. It has a cool, almost metallic mood without leaning on any orange or black-and-white contrast.
Best For — fans of muted, moody color palettes
Pro Tip — Drag a fan brush lightly through wet chrome polish in one direction to create the striped texture, working one nail at a time so the polish doesn’t dry mid-effect.
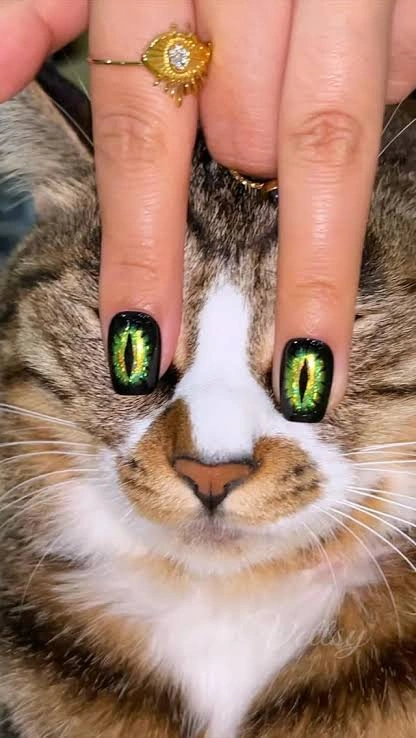
#17. Glossy Green Realistic Cat Eyes
Unlike the cartoon-style cat eyes elsewhere on this list, this design goes for realism: a black base with a glossy, elongated green iris and a vertical slit pupil painted to actually resemble a cat’s eye. It’s the design that best earns the “cat eye” name in this whole roundup.
Best For — anyone who wants the most literal cat-eye look
Pro Tip — Paint the slit pupil last with black gel and a fine liner brush, keeping it slightly off-center rather than dead-center, which is what makes a painted eye look genuinely feline.
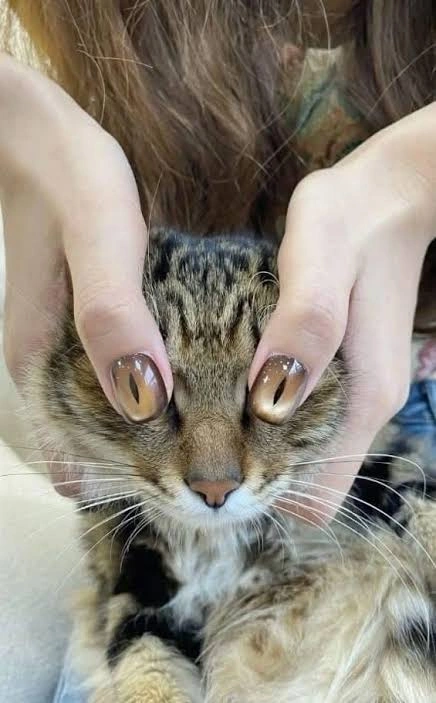
#18. Amber Realistic Cat Eye Short Nails
Picture the same realistic cat-eye concept in warm amber and brown tones instead of green, painted onto shorter, more practical nails. The softer palette makes this version feel a little gentler and more wearable for daily life outside of Halloween itself.
Best For — anyone wanting realistic art on short nails
Pro Tip — Blend the amber-to-brown iris gradient before painting the black slit pupil on top, since painting the pupil first makes it much harder to blend color cleanly around it.
How to Choose the Right Nail Design
With eighteen options in front of you, it helps to narrow things down by what actually fits your life. Here’s what to think about before you screenshot one for your nail tech.
- Nail shape — Almond and stiletto shapes show off elongated designs like the realistic cat eyes and dragon-eye chevrons beautifully. Shorter square or coffin shapes work better for busy hands or first-time nail art.
- Skin tone — Warm golds and ambers tend to pop against deeper skin tones, while cool chromes, purples, and holographic finishes read especially well against lighter or neutral undertones. Either way, black bases work as a universal canvas.
- Occasion — Save the bold airbrushed stilettos and oil-slick chrome for a party night, and lean toward the classic red or short hand-painted set for work weeks or everyday wear.
- Skill level — Simple glossy colors and glitter ombrés are forgiving for at-home application, while 3D charms, freehand eyes, and airbrush work are best left to a nail tech unless you’ve practiced.
What You’ll Need
Most of these looks come together with a handful of tools you’ll reuse well past Halloween season.
Essential for painting slit pupils, ghost outlines, and thin chevron lines.
Needed for the mirror-chrome and oil-slick finishes on this list.
Makes clean spiderweb and bat designs repeatable across all ten nails.
Cures gel layers evenly so 3D charms and chrome finishes don’t lift.
Covers bows, spiders, and eye appliqués for the more decorated looks.
Locks in glitter, chrome, and hand-painted details without dulling them.
Pro Tips for a Long-Lasting Manicure
Wipe with alcohol before top coat
Swipe each nail with a lint-free wipe soaked in 91% isopropyl alcohol right before applying top coat. It removes the tacky layer left by gel polish, which is one of the biggest causes of early chipping.
Cure for the full time, every time
Most gel colors need a full 30-60 seconds under an LED lamp depending on pigment and thickness. Cutting curing time short by even 10 seconds is a common reason 3D charms and chrome layers lift within days.
Cap the free edge on every layer
Run your brush along the very tip of the nail with each coat of gel, including base and top coat. This seals the edge and is one of the simplest ways to add several extra days of wear.
Oil your cuticles nightly
Massage a drop of cuticle oil into each nail bed every night before bed. Hydrated cuticles keep gel adhered longer and help prevent the lifting that eventually causes chipping around week two.
Frequently Asked Questions
Q: How long do cat eye Halloween nails last?
A: With gel polish and proper prep, most of these designs last two to three weeks before you’ll notice regrowth at the cuticle. The 3D charm and chrome details tend to hold up just as long as long as they’re fully cured.
Q: Can I do these designs on natural nails, or do I need extensions?
A: Most of these looks work fine on natural nails, especially the shorter and simpler designs. The longer stiletto and coffin shapes will need extensions or hard gel builds to get the length and durability shown.
Q: What’s the difference between cat eye gel polish and hand-painted cat eye nail art?
A: Cat eye gel polish uses magnetic particles pulled into a line shape with a magnet tool, giving a shimmery slit effect in seconds. Hand-painted cat eye art, like the realistic designs here, is fully drawn with brushes for a more detailed, lifelike result.
Q: What nail shape works best for Halloween cat eye designs?
A: Almond and stiletto shapes give the most room for elongated eye and chevron designs, but square and short coffin shapes work well for simpler hand-painted or glitter looks if you want something more practical.
Recommended Product
Professional UV LED Nail Lamp
★★★★☆ Highly rated on Amazon
A reliable lamp is what actually keeps chrome finishes, 3D charms, and hand-painted details from lifting early, which makes it the single most useful tool for recreating any look on this list.
As an Amazon Associate, we earn from qualifying purchases.
Final Thoughts
From glossy realistic cat eyes to chrome oil-slick spiderwebs, this list proves Halloween nails can be as subtle or as loud as you want them to be. Pick whichever look matches your nail shape, your skill level, and how many hours you’re willing to spend in the chair.
Which of these nail looks are you trying first? Save this post to Pinterest so you can come back to it whenever you need fresh nail inspo!

Hi, I’m Jessica, the creator behind Unique Lash & Nails Katy.
I created this website for anyone who loves beautiful nails as much as I do. Here, I share trendy nail designs, seasonal manicure ideas, easy nail care tips, honest product recommendations, and step-by-step guides to help you create salon-worthy nails at home. Whether you’re looking for everyday inspiration or your next favorite nail trend, I hope you’ll find something you love.