18 Goblin Halloween Nails That Aren’t Basic Pumpkins
If you love your Halloween manicures a little weird, a little wild, and nowhere near “cute pumpkin french tip,” you’re in the right place. Goblin-mode nail art leans into texture, creatures, and unapologetic color — think dripping eyeballs, marbled swamp greens, and mushrooms that look like they crawled out of a fairy ring. Below are 18 designs that’ll give you serious Pinterest-board energy this October.
✦ Our Top Picks at a Glance
Best Overall — Witch’s Curiosities 3D Accents
Best for Beginners — Neon Green Pumpkin Minimalist
Most Trendy — Chrome Holographic Almond Nails
Best for Special Occasions — Hocus Pocus Sister Portraits
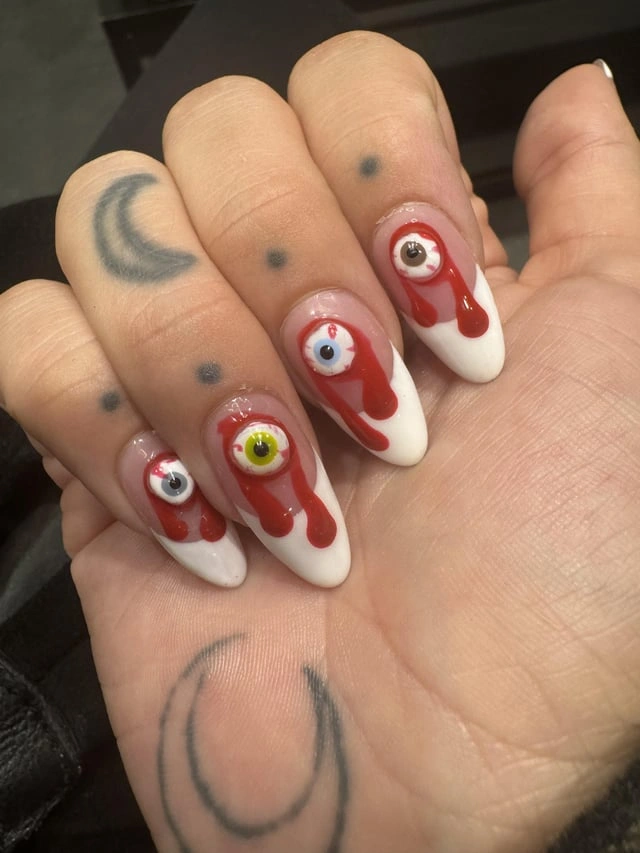
#1. Bloody Drip Eyeball French
Picture a classic white french tip, except the “smile line” has been replaced with slow-dripping streaks of glossy red gel. Each nail hides a different colored eyeball peeking through the drips — blue, green, and brown — so it reads more “creepy specimen jar” than gore.
Best For — Halloween parties where you want a jump scare
Pro Tip — Build the “blood” drips in two thin layers of red gel rather than one thick coat, curing each for a full 30 seconds, so the drip holds its shape instead of pooling at the tip.
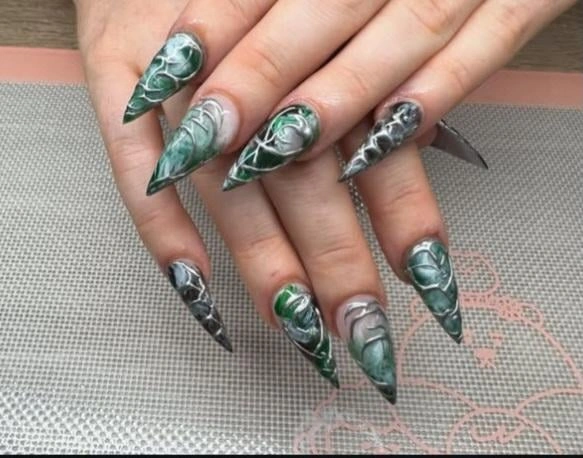
#2. Emerald Marble Spiderweb Stilettos
This one’s for anyone who wants their nails to look like they were carved from stone in a forgotten swamp. Deep emerald and charcoal marbling swirls across long stiletto tips, with faint silver web-like veining running through the smoke.
Best For — Experienced nail art fans craving dramatic length
Pro Tip — Drag a fine detail brush through wet gel polish at a 45° angle to create the marbled veining, then seal immediately with a no-wipe top coat so the lines don’t smear.
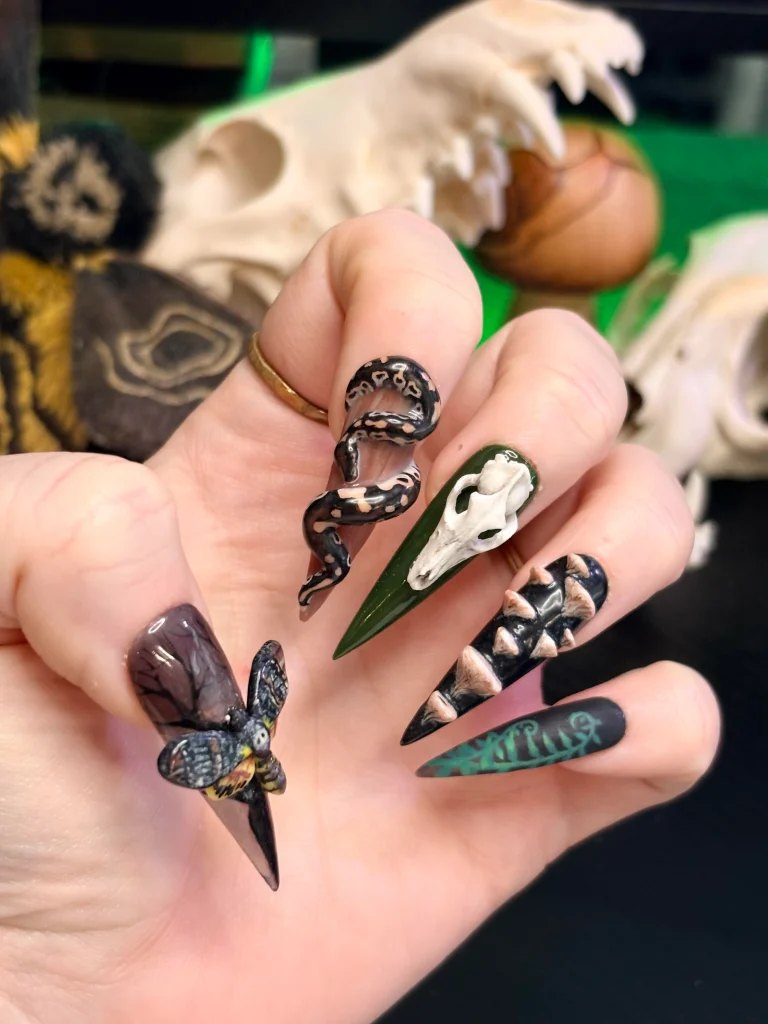
#3. Witch’s Curiosities 3D Accents
Unlike the simpler looks on this list, this set goes all-in on sculpted 3D elements — a coiled snake wraps around one nail, a tiny sculpted animal skull sits on olive green, and a fuzzy 3D moth perches on a smoky purple base. Even the thumb gets in on it, with raised mushroom caps growing straight up the nail.
Best For — A once-a-year showstopper set worth the extra chair time
Pro Tip — Sculpt 3D pieces like the snake or skull separately on foil, cure for 60 seconds, then glue them onto the cured base nail with gel adhesive so they don’t collapse mid-shape.
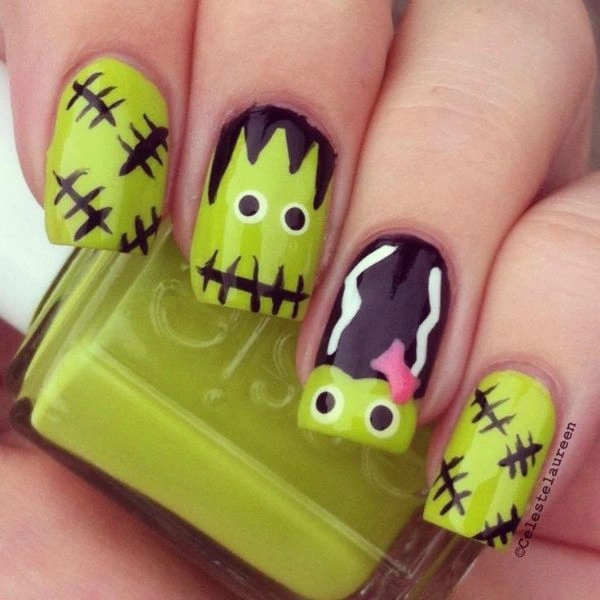
#4. Frankenstein & Bride Cartoon Nails
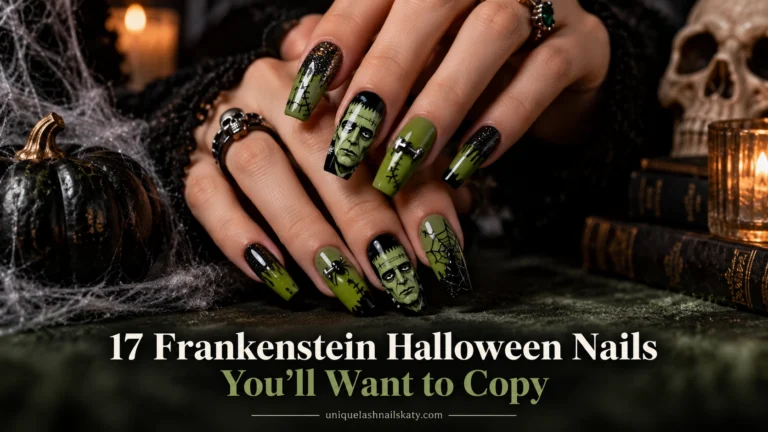
This is for the nostalgic Halloween lovers who grew up loving classic monster movies. A bright lime green base is stitched with hand-drawn black scar lines, while the accent nail features Frankenstein’s monster and his bride sticking their tongues out at each other.
Best For — Costume parties with a classic-horror movie theme
Pro Tip — Use a size 000 detail brush loaded with black gel to draw the stitch marks in short 3–4mm strokes, wiping the brush clean between every two strokes to keep lines crisp.
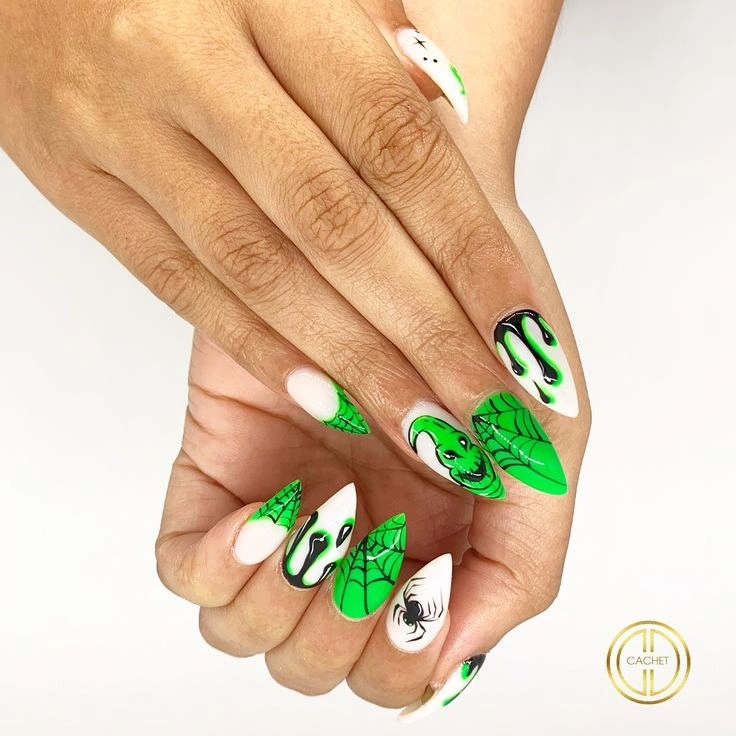
#5. Ghoulish Green Ghost French
Here’s a design that flips the traditional french manicure on its head. Instead of a white tip, you get neon green tips that melt into a screaming ghost face, layered over a white base with delicate black spiderwebs and a tiny spider crawling up one nail.
Best For — Anyone who wants a french manicure with a twist
Pro Tip — Stamp the spiderweb detail using a Halloween Stamping Plate before you add the ghost face, so the web lines stay thin and don’t compete with the freehand paint.
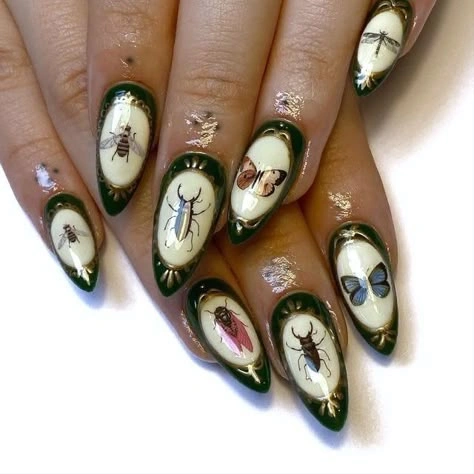
#6. Vintage Insect Specimen Cameos
This set feels like a tiny natural history museum sits on your fingertips. Each nail has a scalloped gold border framing a cream “specimen card” background, with a different bug decal in the center — a bee, a beetle, a moth, even a dragonfly on the pinky.
Best For — Cottagecore and dark academia lovers
Pro Tip — Apply bug decals while the cream gel base is still slightly tacky, then press flat with a silicone tool for 10 seconds before curing so no air bubbles get trapped underneath.
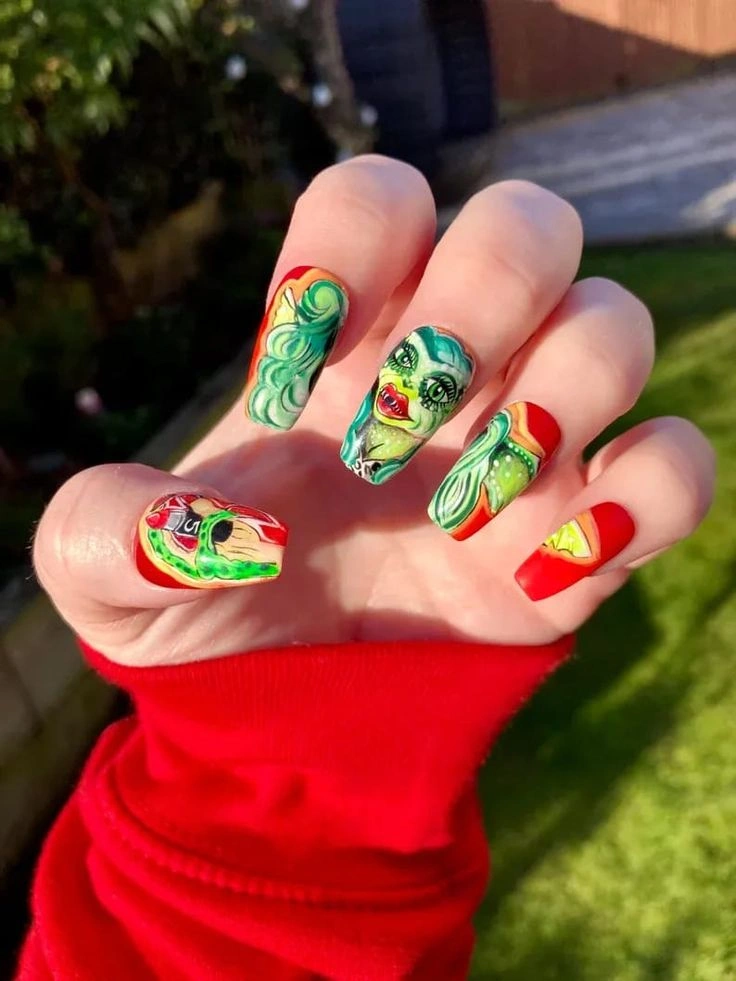
#7. Hand-Painted Witch Portrait Nails
This set is for the free spirits who want their nails to look like actual paintings, not decals. A snarling green witch face takes over the middle finger, framed by fiery orange swirls, while a bold matte red covers the remaining nails for contrast.
Best For — Nail art lovers who want a fully custom, painterly look
Pro Tip — Sketch the witch’s facial features in thin white gel first as a guide layer, cure for 15 seconds to set it lightly, then paint the final green and shadow details directly over the outline.
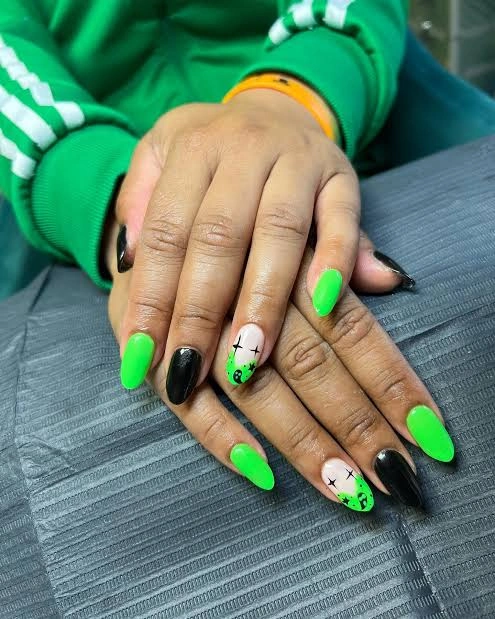
#8. Neon Green Pumpkin Minimalist
Solid neon green and glossy black nails alternate across the hand, with one nude accent nail carrying a tiny hand-drawn jack-o’-lantern face and two small X marks nearby like stitched eyes. It’s proof that goblin nails don’t have to be complicated to make an impact.
Best For — First-timers easing into Halloween nail art
Pro Tip — Use a dotting tool with a 1.5mm tip for the pumpkin’s eyes and mouth so the features stay small and proportional on a single accent nail.
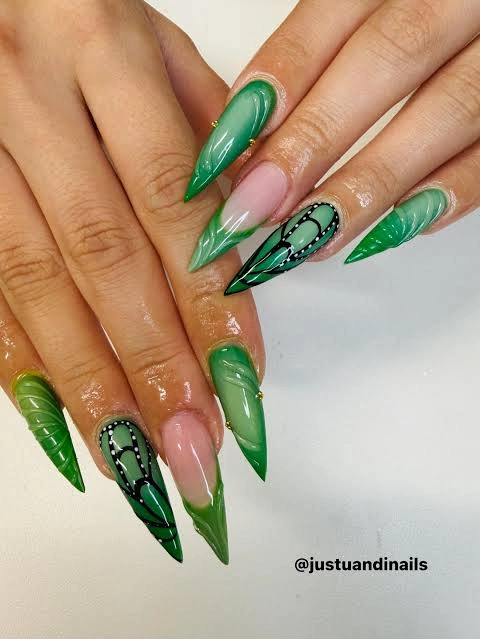
#9. Sage Ombre Vine Stilettos
Soft sage green fades into a glassy nude base near the cuticle, and two accent nails carry delicate outlined vine and leaf linework in black. Tiny gold studs sit near the cuticle line on a couple of nails, catching the light without overpowering the plant-like design.
Best For — A goblincore look that still reads elegant
Pro Tip — Place the gold studs into wet top coat within 20 seconds of application, then flash-cure for just 10 seconds so they set without sinking too deep into the gel.
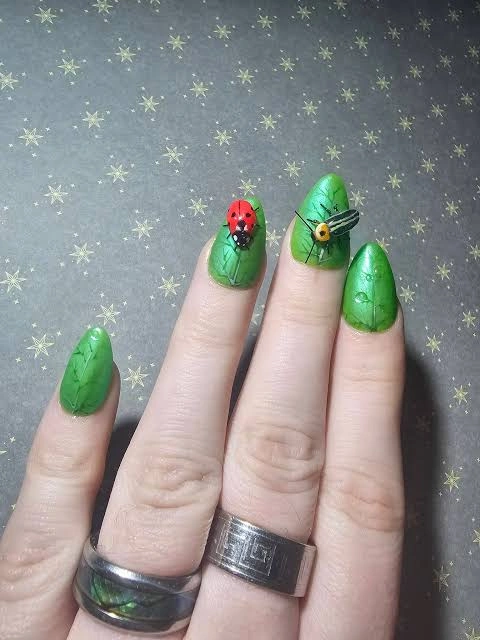
#10. Leafy Green Ladybug Charm
So what does a garden goblin’s manicure look like? Probably this — a mottled green base with faint leaf vein etching, topped with a tiny 3D ladybug charm on one nail and a fuzzy caterpillar-style bug on another.
Best For — Fall garden parties and nature-lovers
Pro Tip — Etch the leaf veins with a fine nail art liner while the green gel is still uncured, using light 2mm strokes, so the lines sink slightly into the color instead of sitting on top.
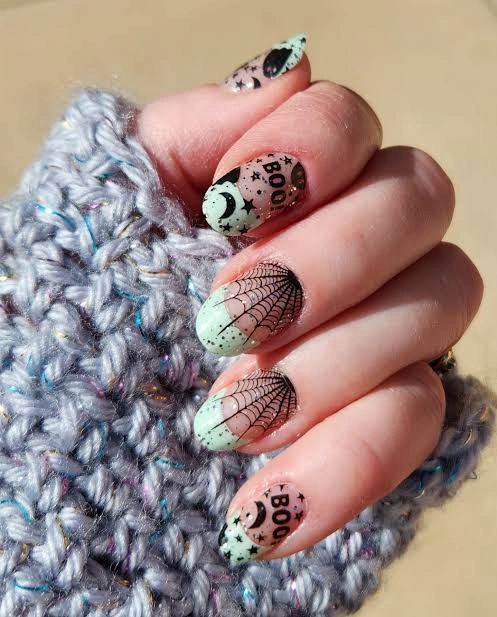
#11. Mint Moon & Spiderweb Stamps
Pale mint green splits into soft nude near the cuticle on a nearly-square nail shape, with crescent moons, tiny stars, delicate spiderwebs, and a playful “BOO” stamped across the set in black. That’s not all — a light gold shimmer runs through the polish, so it catches the light as you move your hand.
Best For — Cozy autumn evenings and pastel-goth fans
Pro Tip — Scrape the stamping plate at a consistent 45° angle in one smooth pass so the moon and web images transfer fully without patchy gaps.
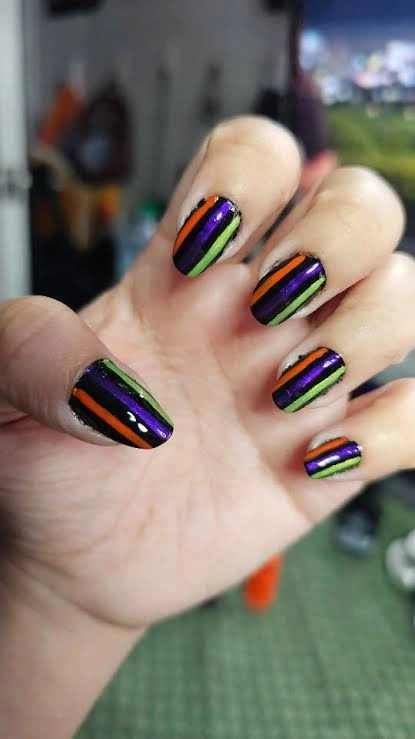
#12. Black Rainbow Stripe Nails
A jet black base gets sliced with diagonal stripes of metallic purple, orange, and lime green, running corner to corner on every nail. It’s bold, graphic, and honestly one of the quickest looks here to recreate at home.
Best For — A last-minute Halloween manicure the night before
Pro Tip — Use Striping Tape to mask each diagonal line before painting, and pull the tape off within 5 minutes of applying polish so it doesn’t peel the color up with it.
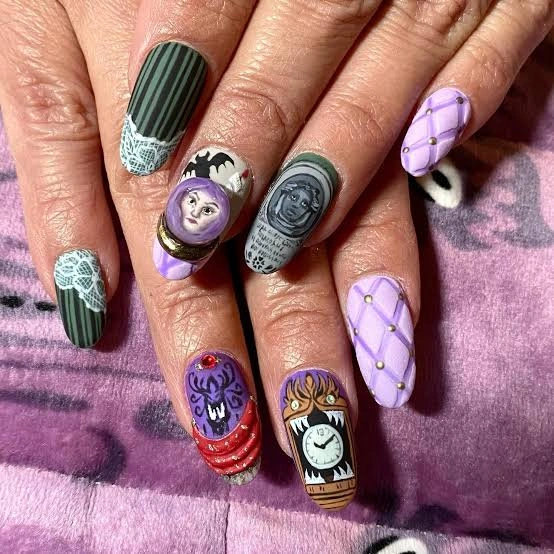
#13. Hocus Pocus Sister Portraits
Comparison-first: where most designs on this list stick to one motif, this set tells a whole story across ten nails. Hand-painted witch sister portraits sit next to a striped nail, a grandfather clock, a spellbook, and quilted lavender nails dotted with tiny gold studs.
Best For — Movie-night themed manicures worth planning ahead for
Pro Tip — Paint the portrait faces first and let them cure fully for 60 seconds before adding surrounding details, so smudges from your brush don’t drag through the finished skin tones.
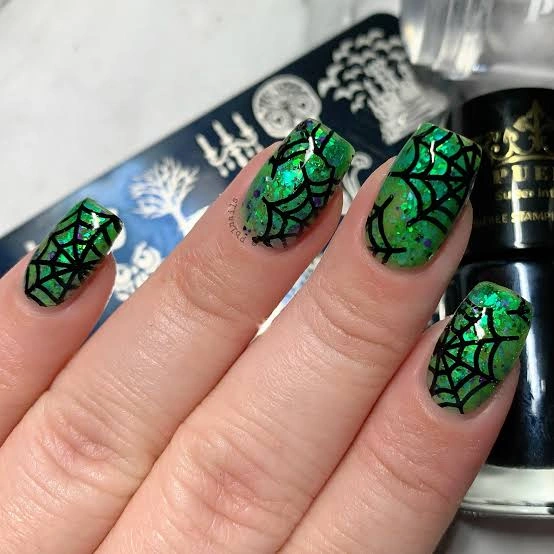
#14. Green Glitter Spiderweb Glow
A jelly-finish green base is packed with chunky iridescent glitter flakes, then topped with a bold black stamped spiderweb over every nail. The glitter catches light from every angle, making the webs almost glow against the sparkle underneath.
Best For — Anyone who wants sparkle without losing the spooky factor
Pro Tip — Apply two thin coats of glitter jelly polish, curing each for 30 seconds, before stamping — a single thick coat traps too much glitter texture for the web stamp to sit flat.
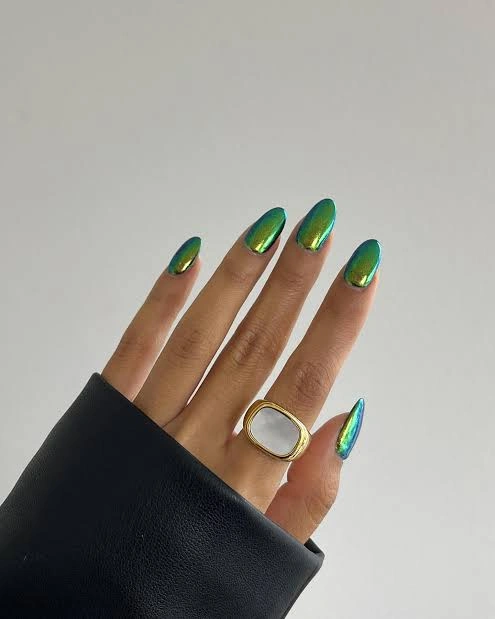
#15. Chrome Holographic Almond Nails
Fans of a more subtle goblin look will love this one — no ghosts, no bugs, just a mirror-like green-to-blue chrome finish that shifts color depending on the light. A chunky gold ring on the same hand plays right into the “swamp treasure” aesthetic.
Best For — Office-appropriate Halloween nails that still feel witchy
Pro Tip — Buff the base coat to a completely smooth, matte finish before applying Chrome Nail Powder, since any ridges will show through the mirror finish.
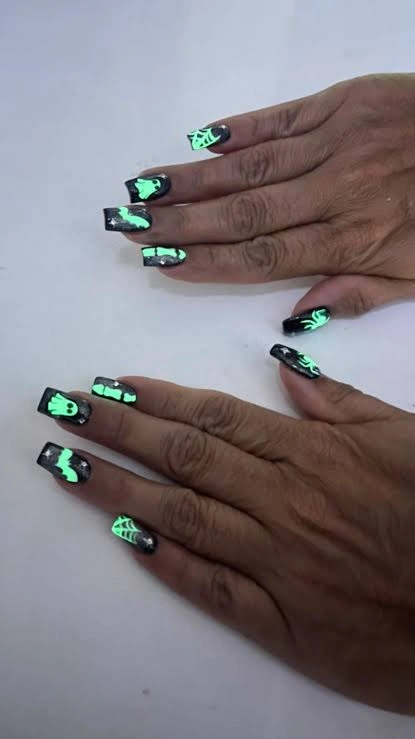
#16. Glow-in-the-Dark Skeleton Web
Under normal light, this set looks like a sleek black-and-silver glitter french with bat and web accents. But here’s the thing — flip off the lights, and the tips glow a bright mint green, revealing hidden skeleton and web details you can’t see in daylight.
Best For — Nighttime Halloween events and haunted house visits
Pro Tip — Charge Glow-in-the-Dark Polish under a direct light source for a full 60 seconds before heading out, since it needs that exposure time to glow at full brightness.
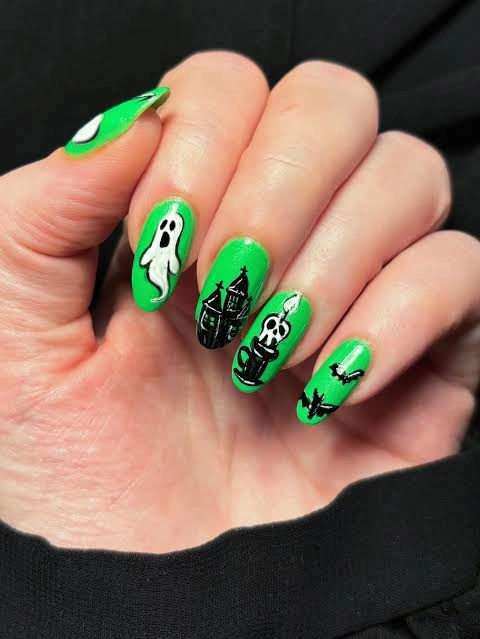
#17. Green Haunted House Ghost
Bright kelly green covers every nail as the base, with each finger telling its own mini Halloween scene — a floating ghost, a haunted house silhouette, a dripping candle, and a row of tiny bats crossing the pinky. It’s colorful, cartoonish, and instantly recognizable as Halloween nail art.
Best For — Trick-or-treating with kids or a costume that needs color
Pro Tip — Outline each character in black gel first with a steady 1mm line, then fill in white and pink details inside the outline so the shapes stay clean at a glance.
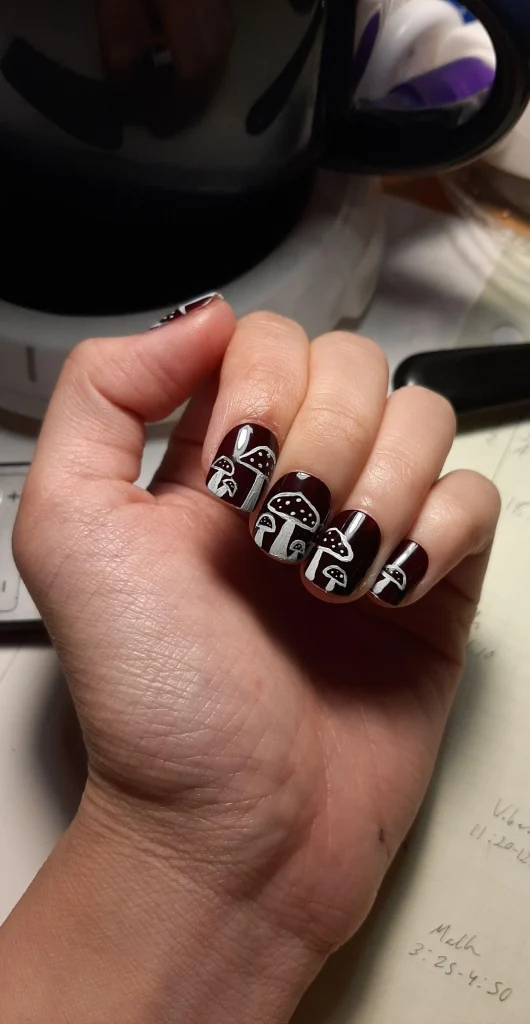
#18. Maroon Toadstool Mushroom Nails
This one’s for the free spirits who lean more “forest witch” than “trick-or-treat.” A deep, glossy maroon base is hand-painted with clusters of white-spotted toadstools in soft white, growing right up the sides of each nail like a tiny mushroom patch.
Best For — Cozy, moody Halloween looks in short or medium lengths
Pro Tip — Paint the mushroom stems first in one continuous stroke, then dot the caps on top once the stem is dry to the touch, about 2 minutes, so the white doesn’t bleed into the maroon.
How to Choose the Right Nail Design
With this many goblin-coded options, narrowing it down comes down to a few practical factors. Here’s what to think about before you book your appointment or pull out your own polish.
- Nail shape — Stiletto and almond shapes give sculpted or hand-painted designs, like the 3D creature nails or vine linework, more surface area to shine. Rounder or squoval shapes suit simpler graphic looks, like the stripe or minimalist pumpkin nails, without feeling crowded.
- Skin tone — Warmer skin tones tend to make earthy greens and maroons look richer, while cooler tones can make the chrome and glow-in-the-dark looks pop even more against the contrast.
- Occasion — Save the fully custom, multi-character sets for a costume party or event where you’ll actually get to show them off up close. Save the subtler chrome or ombre looks for work or everyday wear through the season.
- Skill level — If you’re doing this yourself, start with stamping or dotting tool designs before attempting freehand portraits or sculpted 3D pieces. Confidence builds fast once you’ve nailed the basics.
What You’ll Need
A handful of the right tools will make any of these looks easier to pull off at home. Here’s what shows up again and again across this list.
For fine linework like veins, stitches, and outlines
For quick, even webs, moons, and bats
For eyes, pumpkin faces, and mushroom spots
For mirror-finish looks like the holographic chrome set
For curing gel layers between design steps
For bugs, ladybugs, and 3D accent pieces
Pro Tips for a Long-Lasting Manicure
Cure every layer fully
Rushing the lamp is the number one cause of early chipping. Cure base coat, color, and detail layers for the full 30–60 seconds each layer calls for, not just “until it looks dry.”
Cap the free edge
Every coat you apply — base, color, and top coat — should sweep over the very tip of the nail. This seals the edge and stops lifting from starting at the tip first.
Wipe away tackiness with the right cleanser
After your final cure, the sticky top layer needs to come off with a lint-free wipe and a proper gel cleanser, not water or regular alcohol, or you’ll dull all that hard-earned detail work.
Protect raised or 3D details
Sculpted pieces like the snake or moth accents last longer with an extra glossy top coat swept only over the raised area, since it takes the brunt of daily bumps.
Frequently Asked Questions
Q: What makes a nail design “goblin” style for Halloween?
A: Goblin-style nails usually lean into earthy or swampy colors like moss green and maroon, textured or 3D details, and creature motifs like bugs, mushrooms, and snakes rather than the brighter, cuter side of Halloween nail art.
Q: Can I do 3D nail art like the snake and skull design at home?
A: Yes, with practice. Start by sculpting small 3D shapes separately using acrylic or hard gel, letting them cure fully, then attaching them to your finished nail with gel adhesive rather than trying to build them directly on the nail.
Q: How long do glow-in-the-dark Halloween nails actually glow?
A: Most glow-in-the-dark gel formulas glow brightly for 20–30 minutes after a full charge under light, then fade gradually over the following hour. Re-exposing them to a flashlight or your phone light will recharge the glow.
Q: What nail shape works best for goblin-themed Halloween nails?
A: Stiletto and almond shapes give sculpted and hand-painted designs the most room to work with, but shorter almond or squoval shapes handle stamped or minimalist goblin looks just as well without feeling impractical.
Recommended Product
Halloween Nail Art Stamping Plate Set
★★★★☆ Highly rated on Amazon
If you only pick up one tool from this list, a stamping plate set makes designs like the spiderwebs, moons, and bats look consistent across all ten nails without needing steady freehand skills.
As an Amazon Associate, we earn from qualifying purchases.
Final Thoughts
From dripping bloody eyeballs to quiet little toadstool patches, goblin-mode Halloween nails prove there’s more than one way to get spooky. Whichever design you land on, it’s the little details — a stray ladybug, a glowing bone, a coiled snake — that make these sets feel personal instead of copy-paste.
Which of these nail looks are you trying first? Save this post to Pinterest so you can come back to it whenever you need fresh nail inspo!

Hi, I’m Jessica, the creator behind Unique Lash & Nails Katy.
I created this website for anyone who loves beautiful nails as much as I do. Here, I share trendy nail designs, seasonal manicure ideas, easy nail care tips, honest product recommendations, and step-by-step guides to help you create salon-worthy nails at home. Whether you’re looking for everyday inspiration or your next favorite nail trend, I hope you’ll find something you love.