18 Tombstone Halloween Nails for a Spooky Mani
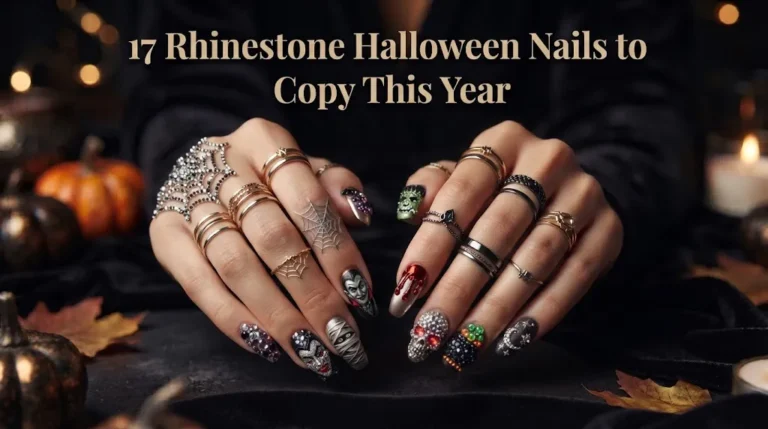
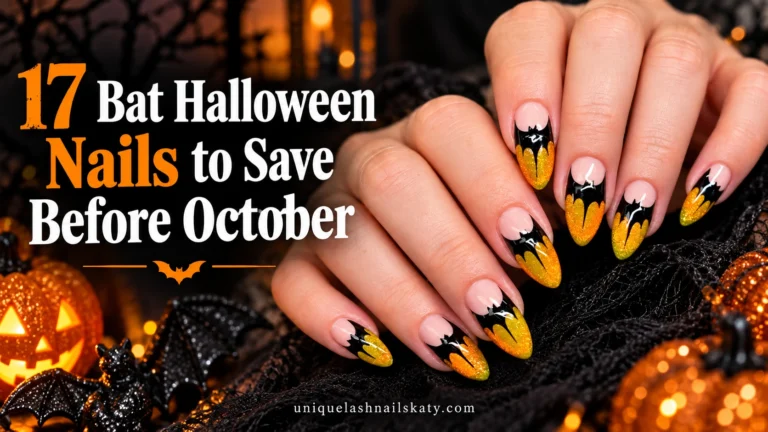
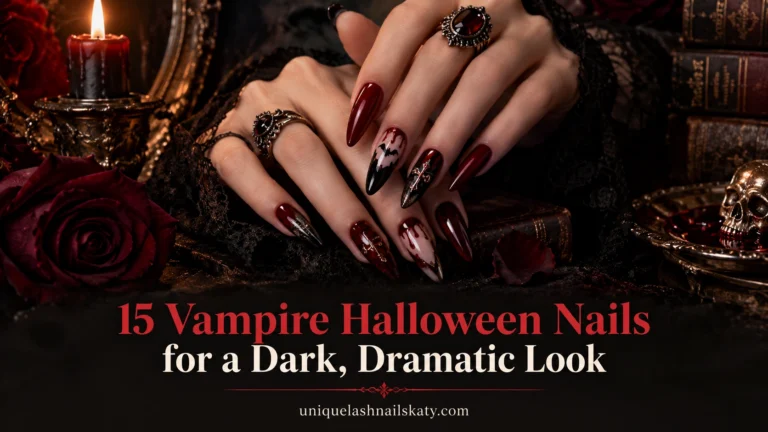
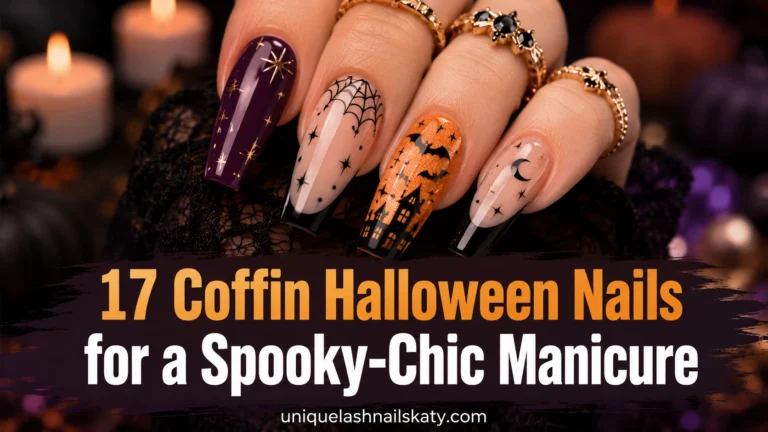
Tombstone Halloween nails are perfect when you want your manicure to feel spooky, creative, and a little mysterious without relying on the same orange-and-black combination every year.
From foggy graveyards and tiny ghosts to coffin art, neon monsters, and dramatic cemetery silhouettes, these 18 ideas give you plenty of ways to make the theme your own.
✦ Our Top Picks at a Glance
Best Overall — Emerald Night Graveyard Nails
Best for Beginners — Pink Pumpkin Ghost Mix
Most Trendy — Purple Haunted House Stilettos
Best for Special Occasions — Black White Graveyard Coffins
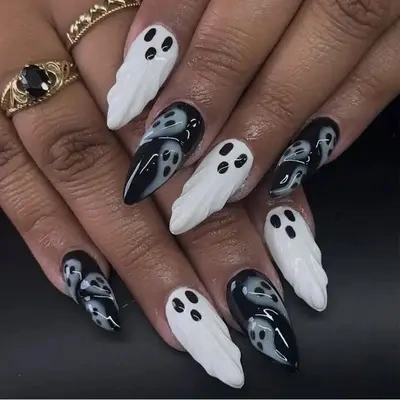


#1. Black and White Ghost Stilettos
Sharp black stilettos alternate with raised white ghost nails, giving this manicure an almost sculpted haunted-house feel. The tiny black ghost faces keep the look playful, while the dramatic pointed shape and gold rings make it feel dressed up rather than childish.
Best For — Dramatic Halloween parties and costume nights
Pro Tip — Build the raised ghost texture with two thin coats of white builder gel, curing each for 60 seconds, then add the faces using a fine nail art liner brush.
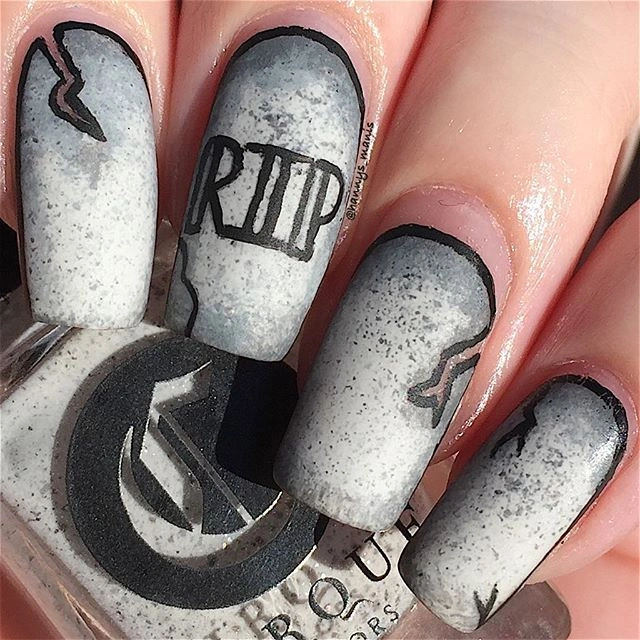
#2. Stone Gray Tombstone Coffins
These squared coffin nails mimic weathered cemetery stones with a cloudy gray base, charcoal outlines, cracks, and a bold RIP inscription. Speckled shading across the surface gives each nail the rough, aged appearance of actual stone.
Best For — Classic graveyard lovers wanting realistic detail
Pro Tip — Dab diluted dark gray polish with a small makeup sponge for 5-10 seconds per nail instead of brushing it on; the uneven texture creates a more believable stone finish.
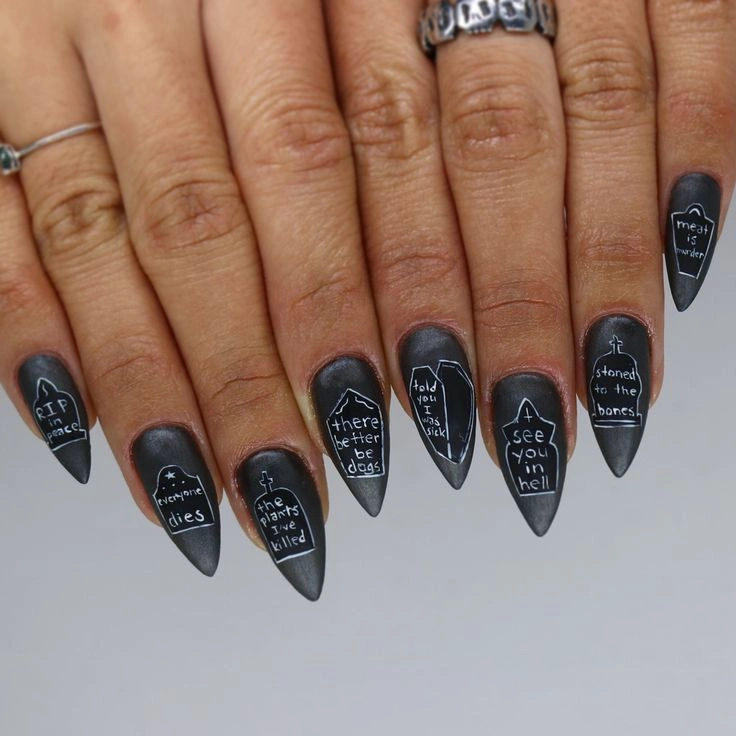
#3. Matte Black Epitaph Stilettos
Unlike brighter Halloween manicures, this set leans fully gothic with charcoal-black stiletto nails and tiny hand-drawn tombstones filled with darkly funny epitaphs. The soft matte surface makes the thin white lettering stand out like chalk marks in a moonlit cemetery.
Best For — Gothic outfits and dark humor fans
Pro Tip — Apply two coats of matte black gel polish, cure fully, then sketch lettering with a 5-7 mm liner brush so the words stay narrow and readable.
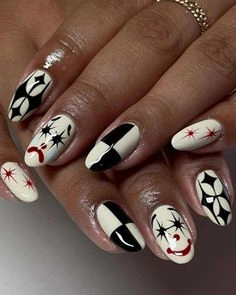
#4. Ivory Gothic Web Almonds
A creamy ivory background softens the black geometric shapes, spiderweb-inspired accents, and fine red starburst details in this almond manicure. That small touch of deep red makes the design feel slightly eerie while still staying polished enough for everyday October wear.
Best For — Subtle spooky looks for everyday wear
Pro Tip — Paint web lines from one center point outward at roughly 45-degree angles, then join them with two or three shallow curved lines for a cleaner web shape.
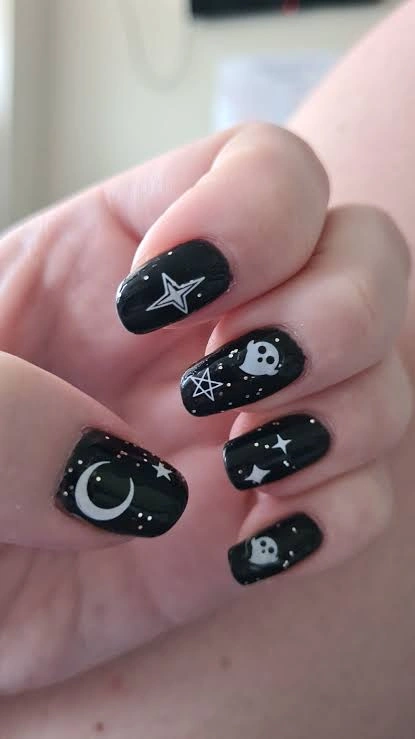
#5. Black Celestial Ghost Shorties
This one’s for anyone who likes Halloween with a dreamy twist: glossy black short nails dotted with moons, stars, tiny white speckles, and sweet little floating ghosts. The oversized crescent moon on the thumb adds a celestial focal point without making the manicure feel crowded.
Best For — Short nails with celestial Halloween vibes
Pro Tip — Use the smallest end of a dotting tool for the star-field speckles, keeping most dots under 1 mm so the ghosts remain the main focus.
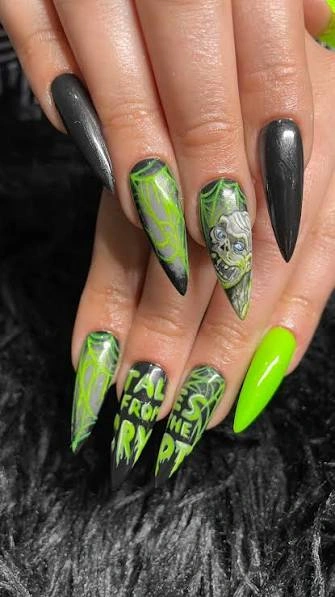
#6. Neon Green Frankenstein Stilettos
Electric green instantly separates this manicure from the softer graveyard looks, especially beside the glossy black stiletto nails. Swirling neon lines, a detailed monster face, and dripping lettering create the kind of high-energy Halloween set that practically glows in photos.
Best For — Bold costumes and neon Halloween parties
Pro Tip — Paint one thin white base layer beneath neon green gel polish; the white backing makes fluorescent pigment appear noticeably brighter after two color coats.
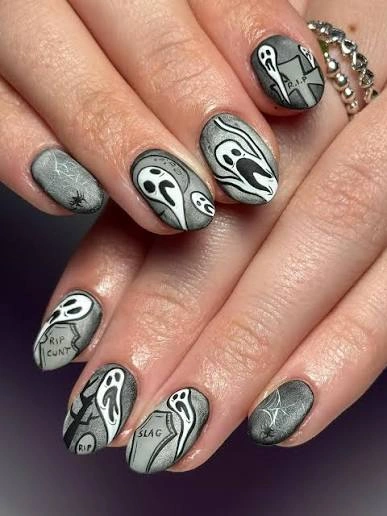
#7. Smoky Gray Scream Tombstones
Soft metallic gray gives these short rounded nails a foggy background for expressive white ghost faces, tiny graves, and hand-drawn cemetery details. The repeated elongated scream faces create movement, while the muted palette keeps the set cohesive.
Best For — Horror fans who prefer short nails
Pro Tip — Outline each white ghost shape with a liner brush no wider than 7 mm, then cure before adding the black facial features to avoid dragging the white gel.
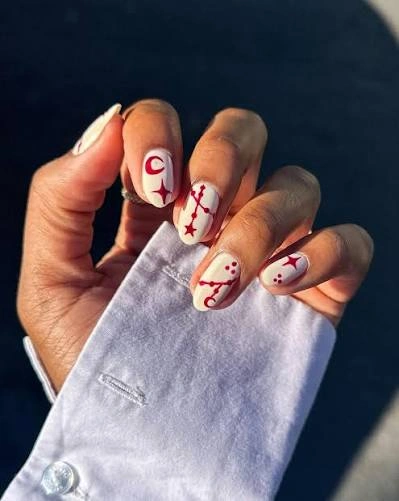
#8. Ivory Red Gothic Symbols
Clean ivory nails become unexpectedly spooky with black curved blocks, red crosses, tiny starbursts, and sharp symbolic details. The rounded length makes those dark motifs feel wearable, while the red accents give the set a slightly supernatural edge.
Best For — Minimalists wanting a darker Halloween accent
Pro Tip — Draw the smallest red details after your black shapes are fully cured, using a 9-12 mm liner brush and wiping it nearly clean before each thin stroke.
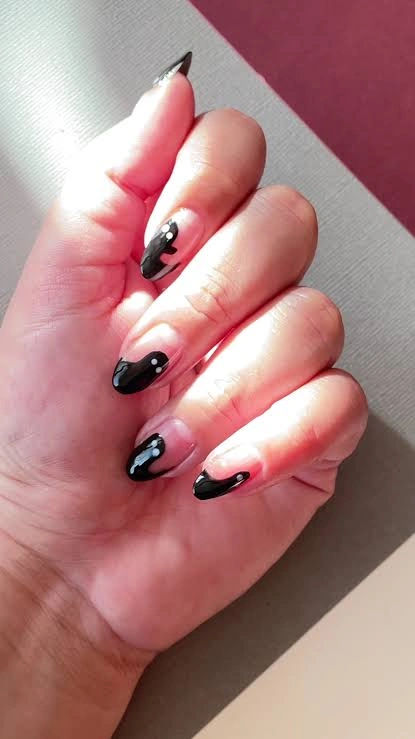
#9. Nude Black Drip Ghost Tips
Picture a sheer nude base disappearing into glossy black pointed tips, with tiny white ghost-like shapes floating inside the darkness. The strong sunlight in the photo highlights the glassy finish and makes the negative-space base feel especially fresh.
Best For — Chic Halloween dates and dinner plans
Pro Tip — Map the black tips first with a nail art striping brush, leaving at least 3-4 mm of nude space above the cuticle for the airy negative-space effect.
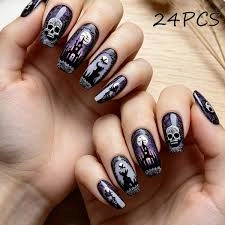
#10. Purple Skull Graveyard Press-Ons
Deep purple and black create a dramatic backdrop for skulls, grave markers, stars, and slender cemetery silhouettes across this coordinated press-on style. Every nail carries a slightly different motif, which gives the finished set a collected, illustrated feel rather than a repeated pattern.
Best For — Quick Halloween manicures with maximum detail
Pro Tip — For press-ons, wipe natural nails with 70% isopropyl alcohol and avoid water for at least 60 minutes after application to help the adhesive grip.
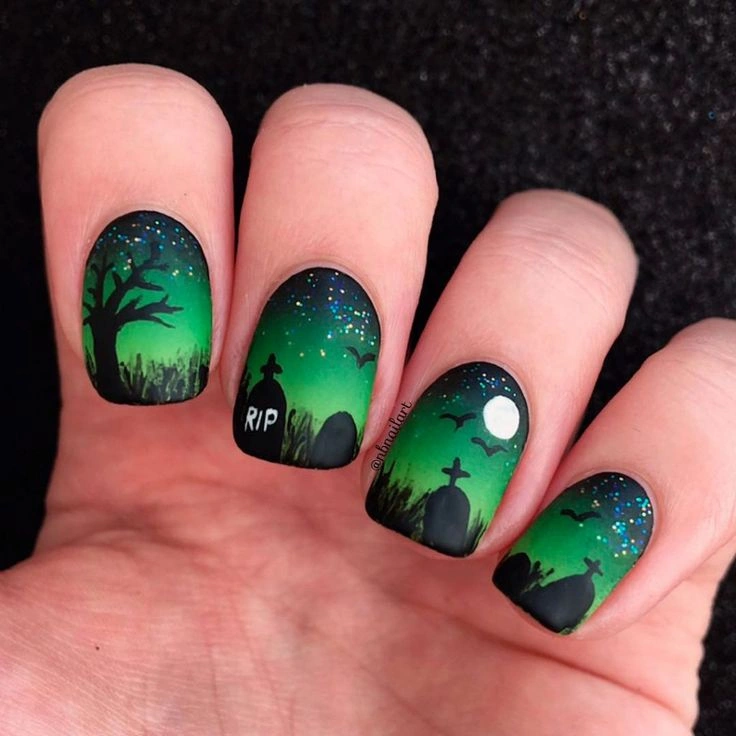
#11. Emerald Night Graveyard Nails
A glowing emerald-to-black gradient turns these short nails into tiny nighttime graveyard scenes, complete with tombstones, crosses, bats, a bare tree, and a bright moon. Fine glitter across the upper background resembles stars, giving the whole manicure surprising depth.
Best For — Scenic nail art with eerie atmosphere
Pro Tip — Sponge the green and black gradient in three thin passes, then tap on a holographic glitter top coat only over the upper third to mimic a starry sky.
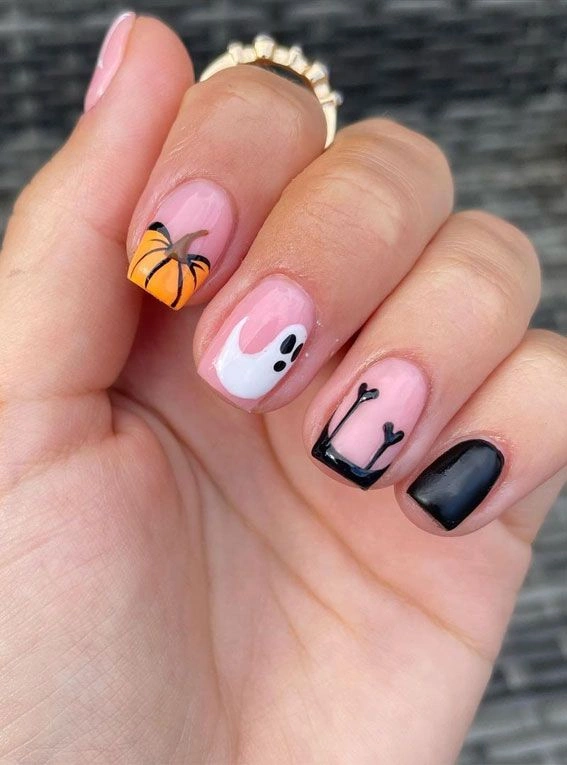
#12. Pink Pumpkin Ghost Mix
Soft pink gives this Halloween manicure a lighter personality, with a pumpkin French tip, a simple white ghost, black accents, and a tiny heart detail. The short square shape makes each design easy to see without requiring extra-long extensions.
Best For — Beginners who love cute spooky nails
Pro Tip — Create the ghost by placing one 4-5 mm white dot near the center, pulling it downward with a liner brush, and adding two smaller black dots after curing.
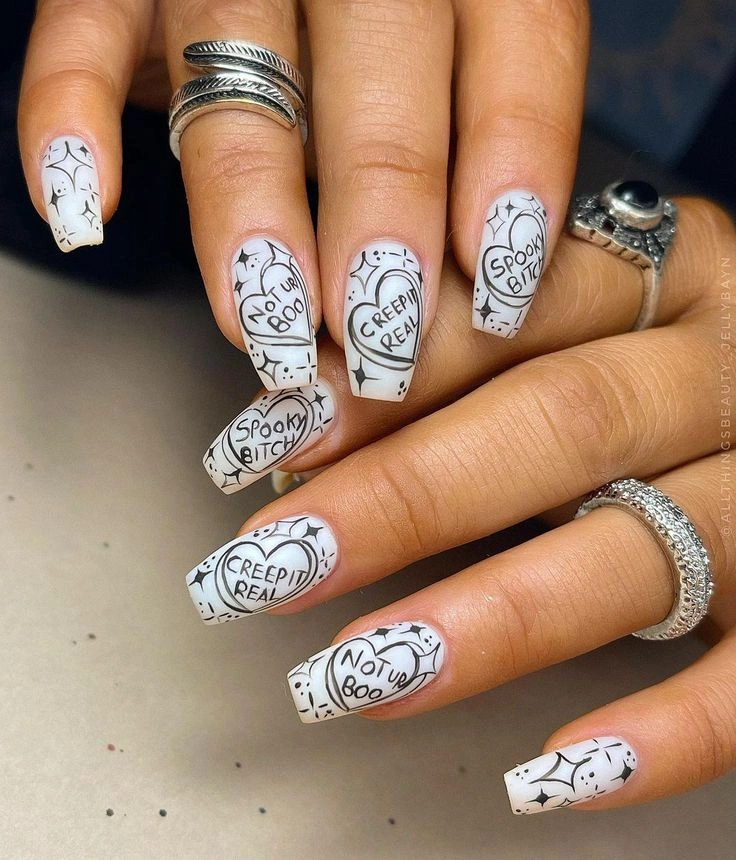
#13. White Spooky Comic Coffins
These long white coffin nails look like pages from a Halloween comic book, thanks to thin black webs, cartoon ghosts, speech bubbles, and hand-lettered spooky phrases. Silver rings around the fingers add extra shine against the crisp monochrome design.
Best For — Playful statement nails for Halloween weekend
Pro Tip — Leave at least 2 mm between lettering and the speech-bubble outline; that tiny margin keeps hand-painted words readable once top coat slightly softens the edges.
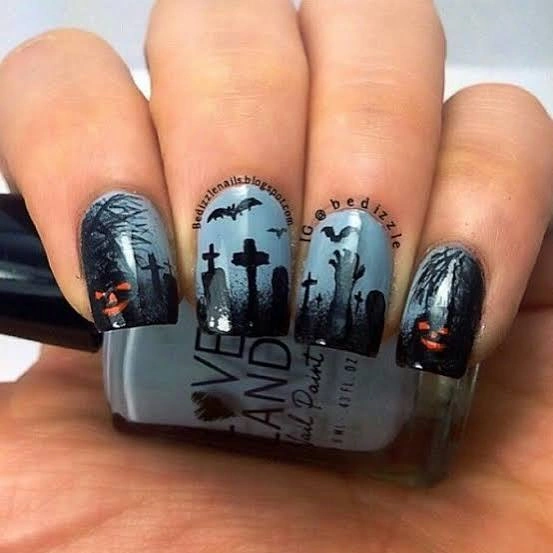
#14. Foggy Gray Graveyard Squares
Misty gray-blue polish becomes the sky behind black cemetery crosses, distant silhouettes, bare trees, and tiny glowing orange windows. The artwork stretches across the nails like one continuous haunted landscape, which makes this set especially striking when your fingers are held together.
Best For — Detailed cemetery scenes on medium nails
Pro Tip — Paint all five nails side by side and mark the horizon at the same height, about one-third up from each tip, before adding trees and crosses.
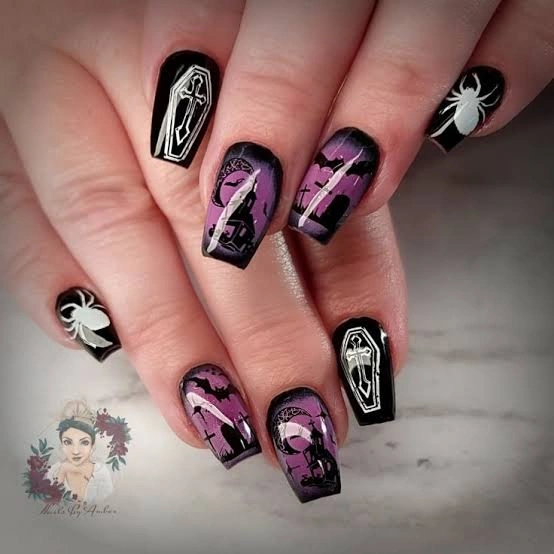
#15. Purple Coffin Cemetery Nails
Black coffin-shaped nails frame a moody purple cemetery scene filled with crosses, bats, coffin outlines, and crisp white spiders. The purple haze concentrated through the center creates a glowing backdrop that keeps the black silhouettes visible.
Best For — Gothic glam and dramatic costume looks
Pro Tip — Blend the purple haze with a sponge before painting black silhouettes, then cure for a full 60 seconds so the liner details don’t bleed into the background.
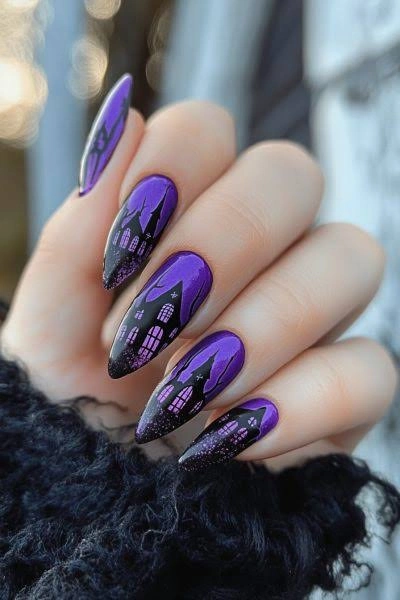
#16. Purple Haunted House Stilettos
Long stiletto nails turn into a miniature haunted skyline with violet skies, black rooftops, pointed towers, and tiny glowing windows. Fine black glitter at the tips deepens the night-sky effect while the tapered shape makes the buildings look even taller.
Best For — Trendy Halloween photos and evening events
Pro Tip — Blend purple gel nail polish from bright near the cuticle to darker at the tip using two sponge passes, then outline buildings with a 9 mm detail brush.
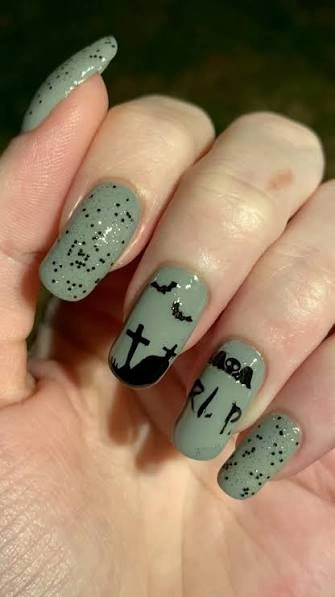
#17. Sage Speckled Graveyard Nails
A muted sage-gray base gives this graveyard manicure an understated, almost vintage Halloween look. Tiny bats, crosses, an RIP stone, scattered black speckles, and a darkened horizon add just enough creepy detail without covering every inch of the nail.
Best For — Casual October outfits and muted palettes
Pro Tip — Flick speckles from about 10 cm away with a stiff detail brush, protecting the surrounding skin first so the dots stay irregular without creating a cleanup mess.
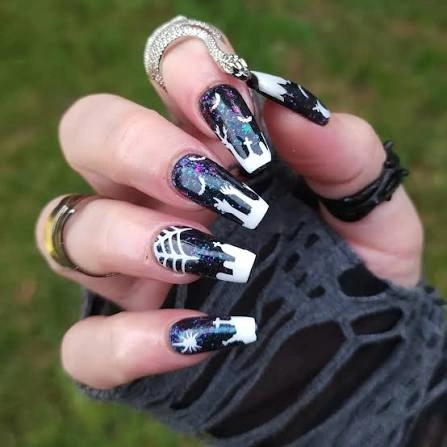
#18. Black White Graveyard Coffins
This graveyard set combines black, white, and cosmic sparkle with churches, crosses, architectural silhouettes, and crisp graphic details. Metallic trim around a few nails adds a jewelry-like finish, especially next to the black statement rings shown with the manicure.
Best For — Special occasions needing dramatic gothic detail
Pro Tip — Seal architectural details with two thin top-coat layers rather than one thick coat, curing each for 60 seconds to keep raised lines from blurring.
How to Choose the Right Nail Design
The best tombstone Halloween nails aren’t necessarily the most complicated. Choose a design that works with your nail length, wardrobe, and how much time you want to spend creating or maintaining the manicure.
- Match the art to your nail shape — Long coffin and stiletto nails give you more room for tombstones, haunted houses, lettering, and cemetery landscapes. Short round or square nails look especially good with simpler ghosts, bats, crosses, or single-grave motifs.
- Use color to flatter your skin tone — Cool gray, black, violet, and blue-green shades create a classic haunted look, while creamy ivory, soft pink, and sage can make spooky art feel softer. Test your base shade against your hand before committing to the full set.
- Think about the occasion — Detailed graveyards and sculpted ghosts are fun for parties, photos, and costume events. For work or everyday October outfits, a neutral base with one or two tombstone accent nails may feel easier to wear.
- Choose art that matches your skill level — Beginners can start with decals, dots, simple ghosts, or press-ons. If you’re comfortable with fine brushes, gradients, and gel, try layered cemetery scenes or tiny hand-painted lettering.
What You’ll Need
You don’t need an enormous nail kit for Halloween art, but a few precise tools make tombstones, ghosts, and cemetery silhouettes much easier to control.
Useful for tombstone outlines, lettering, spiderwebs, crosses, and tiny ghost faces.
A staple shade for grave silhouettes, coffin shapes, borders, bats, and backgrounds.
Creates crisp ghosts, lettering, moons, outlines, and high-contrast cemetery details.
Ideal for eyes, moon dots, stars, speckles, and small rounded ghost shapes.
Helpful for foggy backgrounds, night-sky gradients, stone textures, and smoky transitions.
Needed for curing gel layers before you add fine Halloween details on top.
Pro Tips for a Long-Lasting Manicure
Prep Before You Paint
Push back the cuticles, lightly buff away surface shine with a 180-240 grit buffer, and wipe each nail with 70% isopropyl alcohol. Removing oil before base coat gives gel and regular polish a cleaner surface to grip.
Work in Thin Layers
Two thin color coats usually cure more evenly than one thick coat, especially with black, white, and heavily pigmented Halloween shades. For gel, follow your lamp and polish manufacturer’s curing time rather than guessing.
Seal the Free Edge
Run your top-coat brush lightly across the free edge of each nail before curing or drying. This takes only a few seconds per nail and helps protect detailed tips from early wear.
Protect Tiny Artwork
Let hand-painted details cure or dry completely before top coat, then float the brush over the art instead of pressing down. Keeping the brush nearly parallel to the nail reduces the chance of smearing fine lettering or cemetery lines.
Frequently Asked Questions
Q: What colors work best for tombstone Halloween nails?
A: Black, gray, charcoal, white, deep purple, and muted green create a classic graveyard palette. You can also use pink, ivory, or neon green if you want your Halloween manicure to feel more playful.
Q: Can I do tombstone Halloween nails on short nails?
A: Absolutely. Keep the tombstone shape simple and use one main detail per nail, such as RIP lettering, a cross, a ghost, or a moon, so the design stays clear on a smaller surface.
Q: How do beginners create easy graveyard nail art?
A: Start with a solid gray or black base, then add simple silhouettes using a thin liner brush or nail decals. A few crosses, dots, and one curved tombstone outline can suggest a complete cemetery scene without advanced painting skills.
Q: How can I make Halloween nail art last longer?
A: Prep away surface oils, apply thin polish layers, seal the free edge, and protect your artwork with top coat. Wearing gloves for dishes and cleaning also helps prevent premature lifting and chipping.
Recommended Product
Fine Detail Nail Art Liner Brush Set
★★★★☆ Highly rated on Amazon
A fine liner brush makes it easier to paint narrow tombstone outlines, crosses, lettering, spiderwebs, and tiny ghost details.
As an Amazon Associate, we earn from qualifying purchases.
Final Thoughts
These tombstone Halloween nails show just how many directions you can take a graveyard theme, from sweet little ghosts and soft pink details to foggy cemeteries, gothic coffin shapes, and glowing haunted skylines.
Pick the look that fits your nail length and comfort level, then adjust the colors or details to make it feel like your own Halloween manicure.
Which of these nail looks are you trying first? Save this post to Pinterest so you can come back to it whenever you need fresh nail inspo!

Hi, I’m Jessica, the creator behind Unique Lash & Nails Katy.
I created this website for anyone who loves beautiful nails as much as I do. Here, I share trendy nail designs, seasonal manicure ideas, easy nail care tips, honest product recommendations, and step-by-step guides to help you create salon-worthy nails at home. Whether you’re looking for everyday inspiration or your next favorite nail trend, I hope you’ll find something you love.