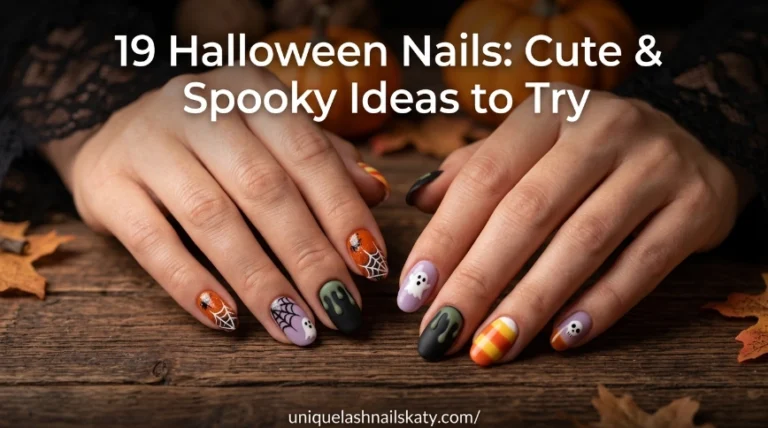
17 3D Halloween Nails That’ll Steal the Show This Year
If you’ve been scrolling nail inspo for weeks trying to find something that isn’t just another orange-and-black French tip, you’re in the right place. 3D Halloween nails take things up a notch with sculpted charms, textured details, and tiny pieces of art you can actually feel under your fingertip. Here are 17 designs that prove Halloween nails can be spooky, sweet, or downright gory — your pick.
✦ Our Top Picks at a Glance
Best Overall — Nude French with 3D Skeleton Hand
Best for Beginners — Black French Tip Pumpkin Studs
Most Trendy — Pink Chrome Ghost & Mummy Stiletto
Best for Special Occasions — Black & Nude with 3D Lace Pearls
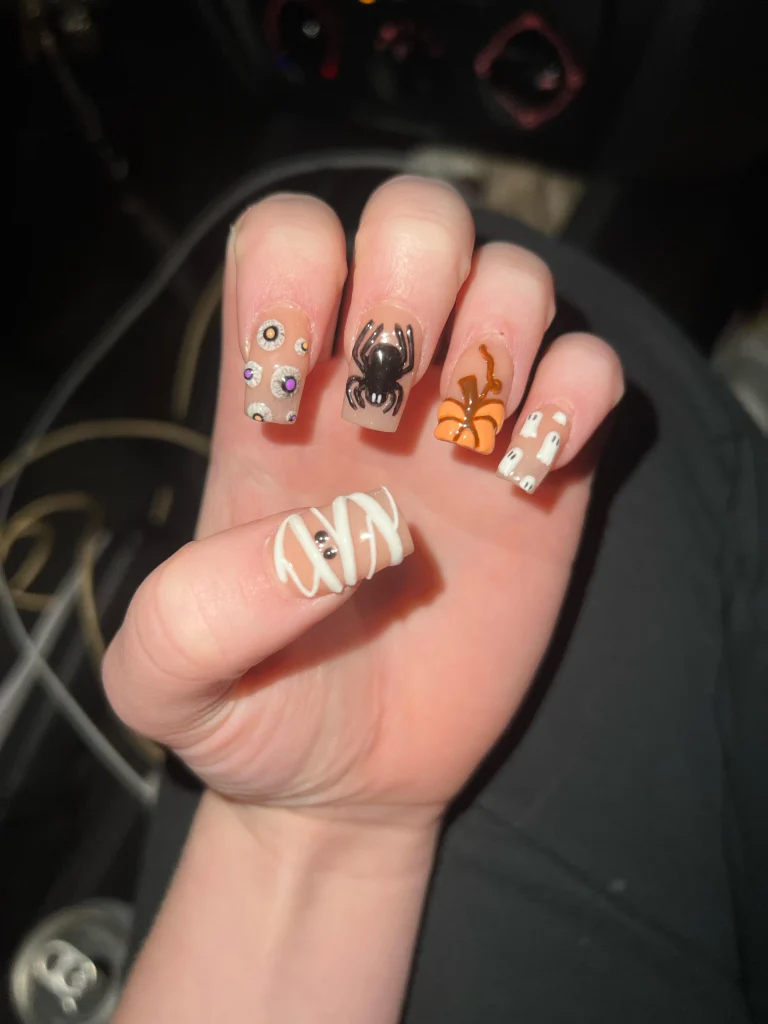


#1. Nude Base Spooky Icon Mashup
Picture a soft nude base carrying five totally different mini scenes: googly eyeballs, a glossy 3D spider, a raised pumpkin, a painted ghost, and a mummy-wrapped thumb finished with tiny gems. It’s the set to pick if you can’t choose just one Halloween icon.
Best For — Indecisive Halloween lovers who want it all
Pro Tip — Sculpt the 3D spider body in two layers of hard gel, curing each layer for a full 30 seconds before adding the legs.
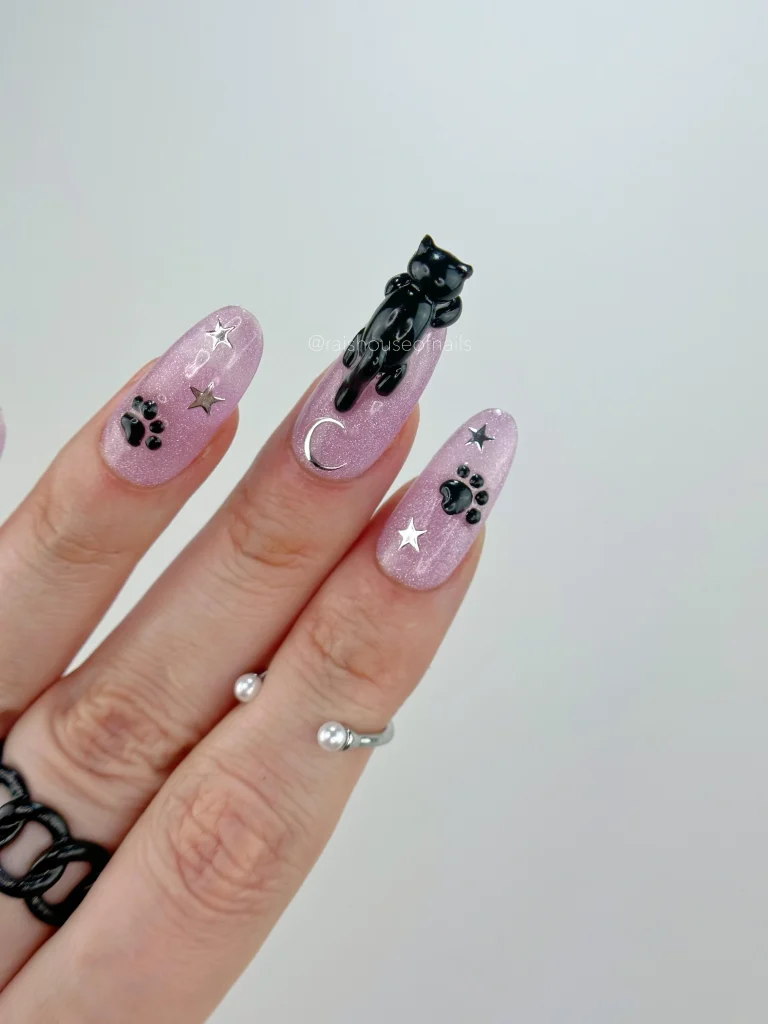
#2. Lilac Glitter with 3D Black Cat
This one’s for the girls who want Halloween nails that still feel soft and wearable past October 31st. A shimmery lilac base is topped with silver stars, a crescent moon charm, tiny paw prints, and a fully sculpted 3D cat perched right on the middle finger.
Best For — Anyone who wants spooky without going dark
Pro Tip — Mix your glitter gel with a 1:3 ratio of chunky-to-fine glitter so the sparkle catches light from every angle.
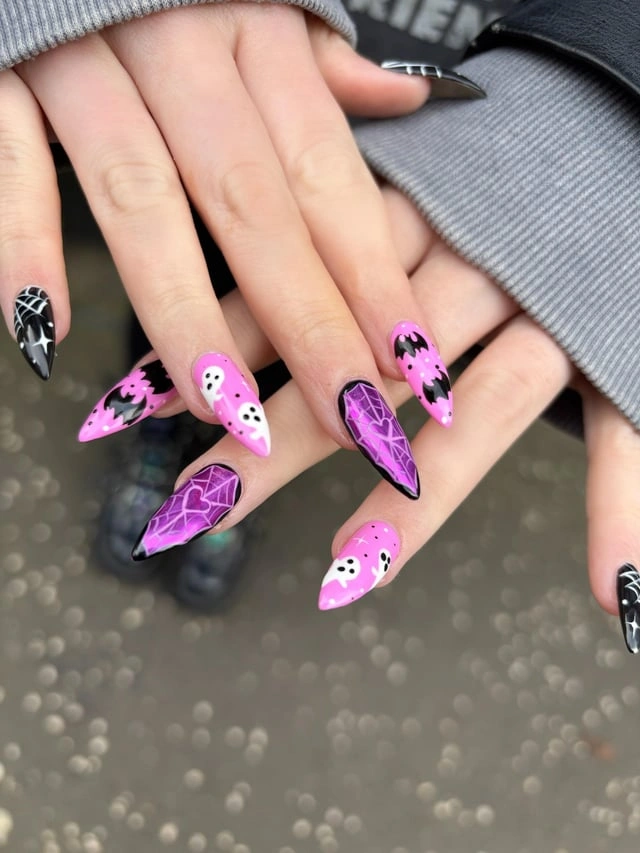
#3. Pink & Black Stiletto Spiderweb Ghosts
Unlike the softer looks on this list, this one goes bold with sharp stiletto tips, a purple ombre spiderweb nail, and hand-painted bats and ghosts scattered across bubblegum pink. It’s loud, it’s long, and it’s not trying to be subtle about it.
Best For — A Halloween party where you want to be noticed
Pro Tip — Use a size 000 detail brush held at a 45° angle to keep spiderweb lines thin and even.
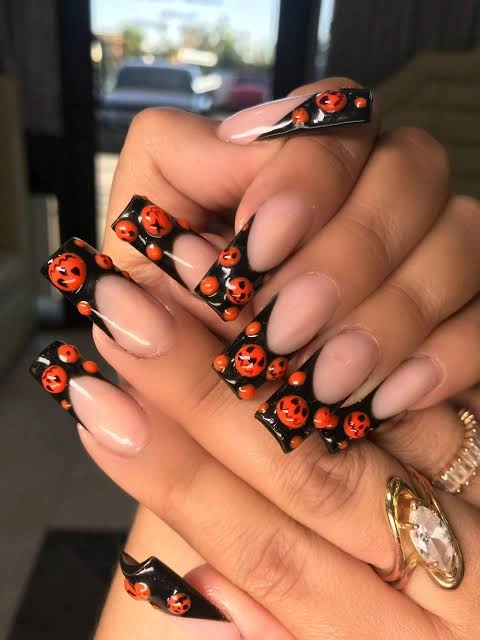
#4. Black French Tip Pumpkin Studs
A sheer nude base gets a dramatic makeover with an angled black French tip lined in tiny jack-o’-lantern faces and glossy orange studs. It reads sophisticated at a glance, then rewards a closer look with all that pumpkin detail.
Best For — Office Halloween that still needs to look polished
Pro Tip — Press studs into the gel while it’s still slightly tacky, then flash-cure for 10 seconds before a full cure so they don’t shift.
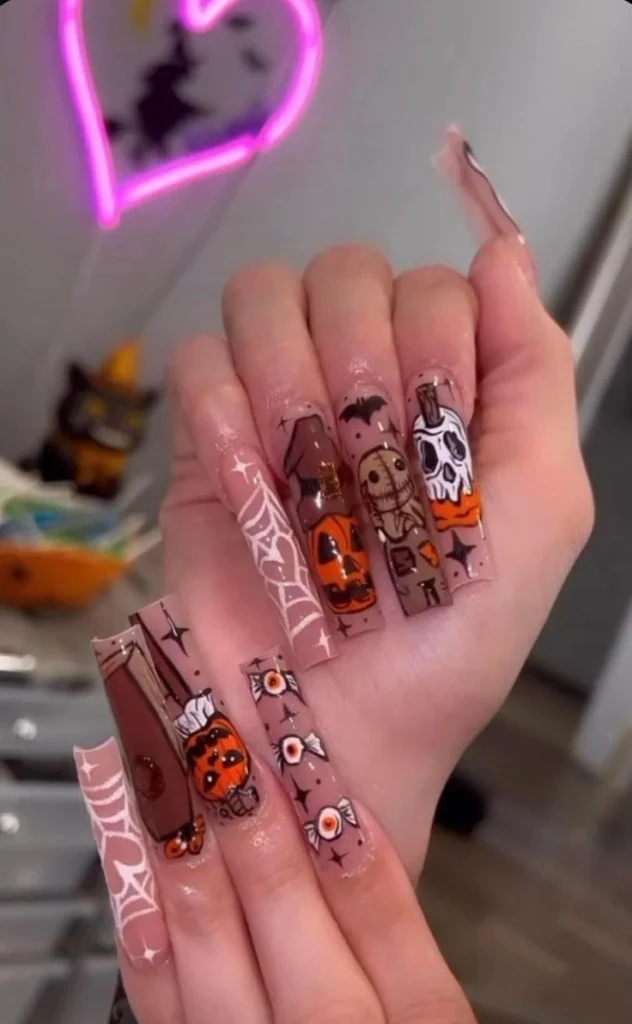
#5. Nude Coffin Nails with Skull Decals
Here’s why this set stands out: it tells a whole story across ten nails, mixing a burlap-sack character, a coffin, a striped skull, and rows of tiny cartoon eyeballs. Long coffin shapes give each hand-painted scene room to breathe.
Best For — Illustration lovers who want a themed set, not just icons
Pro Tip — Seal painted decal-style art under two thin coats of top coat, curing 60 seconds each, to keep edges from lifting.
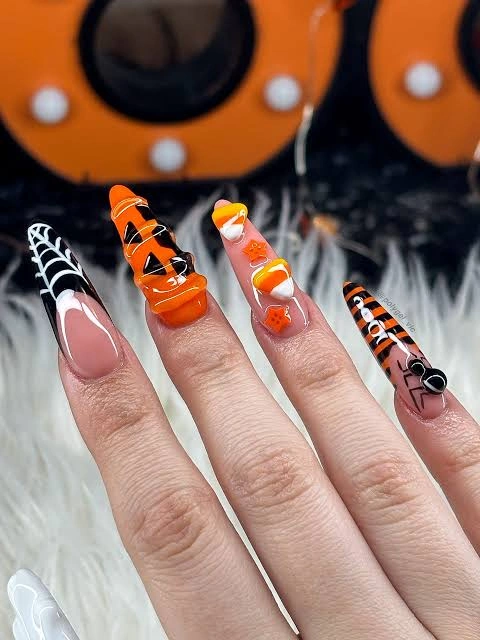
#6. 3D Pumpkin and Candy Corn Coffin
This set leans into texture, with a fully sculpted 3D jack-o’-lantern rising off the nail bed next to little raised candy corn pieces. One tip stays classic with a black-and-nude spiderweb French, balancing out all that dimension.
Best For — Trick-or-treating with nails that hold up to candy grabbing
Pro Tip — Build the pumpkin shape with three thin layers of 3D acrylic powder rather than one thick one to avoid air bubbles.
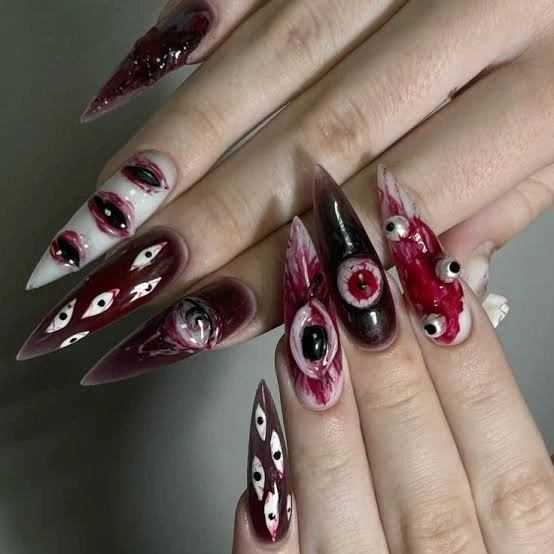
#7. Burgundy Stiletto with 3D Eyeballs
Deep wine polish sets the mood for this one, dotted with rows of tiny painted eyes and finished with a fully domed 3D eyeball charm on the ring finger. A smeared “bloody lip” accent nail pushes it firmly into horror territory.
Best For — Horror movie fans hosting a scary movie night
Pro Tip — Paint the iris first, then add a single tiny white highlight dot off-center to make the 3D eyeball look wet and alive.
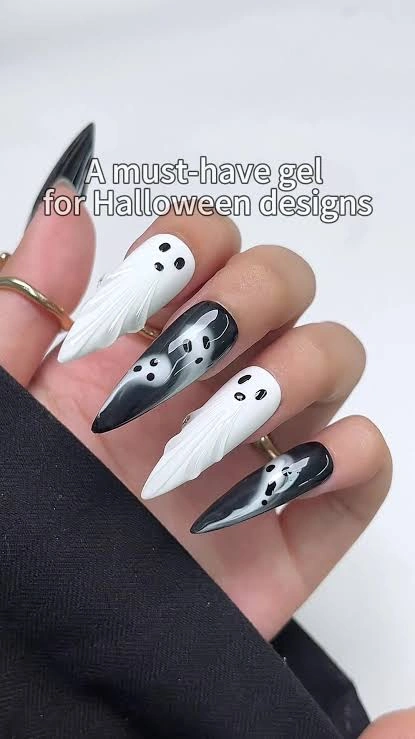
#8. White & Grey Ombre Ghost Stiletto
Fans of a more atmospheric look will appreciate this pairing of a solid white sculpted ghost nail against a smoky grey-to-black ombre ghost on the next finger. The raised, wing-like ridges on the white nail add real dimension you can feel.
Best For — A moody, editorial-style Halloween look
Pro Tip — Blend the grey-to-black ombre with a damp makeup sponge, dabbing in one direction only for a smoother gradient.
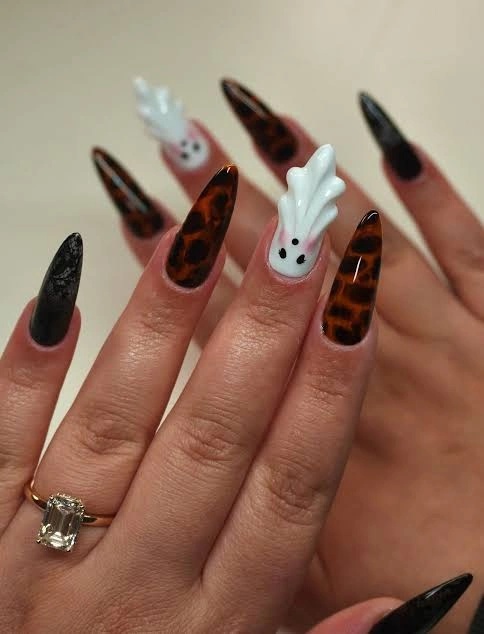
#9. Tortoiseshell Print with White Ghost Accent
A warm tortoiseshell print covers most of this set, giving it an autumnal feel that works even outside costume season. Two accent nails break the pattern with a soft, rounded 3D ghost shape in bright white.
Best For — Fall lovers who want subtle Halloween nods
Pro Tip — Stamp the tortoiseshell pattern with a marbling tool while the base color is still wet so the edges blend naturally.
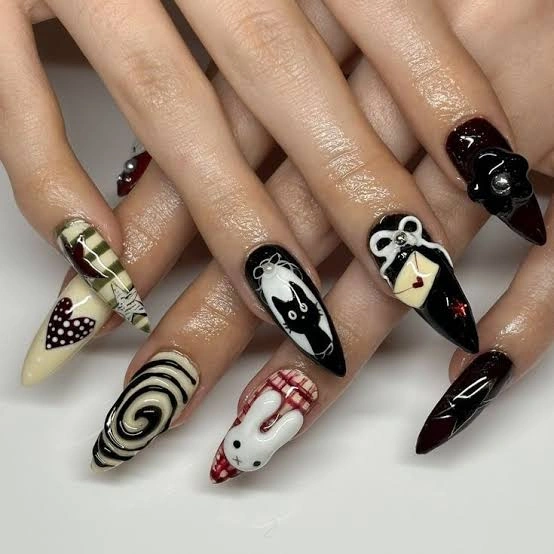
#10. Vintage Cream & Black Mixed Motifs
So what does this look bring that others don’t? A gothic-romance feel, mixing a black cat silhouette, a lace-trimmed envelope, a polka-dot heart, and a plaid bunny across a cream and burgundy palette. Every nail feels like its own tiny greeting card.
Best For — Vintage aesthetic fans who love a storytelling manicure
Pro Tip — Sketch each motif in pencil on paper first, then trace with a fine liner brush directly onto the nail for cleaner lines.
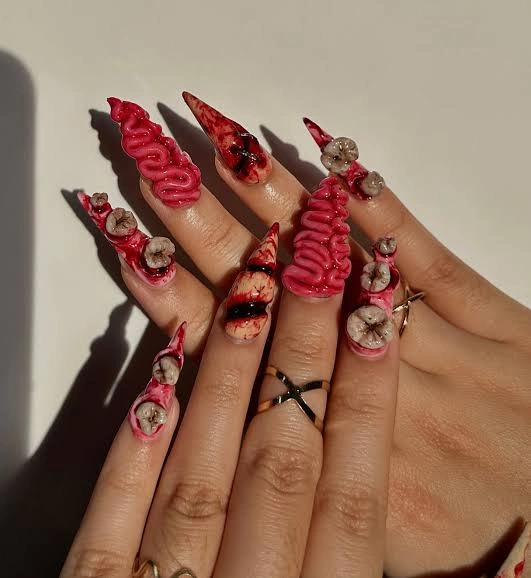
#11. Pink 3D Brain Texture with Eyeballs
This design isn’t for the faint of heart, with a fully sculpted pink brain-textured ridge running the length of each stiletto nail. Grey 3D eyeball charms and painted black stitching finish off the surgical-horror effect.
Best For — Extreme nail art lovers chasing something unforgettable
Pro Tip — Pipe the brain texture with a fine nozzle tip, working in a continuous S-shape rather than dots to keep the folds looking organic.
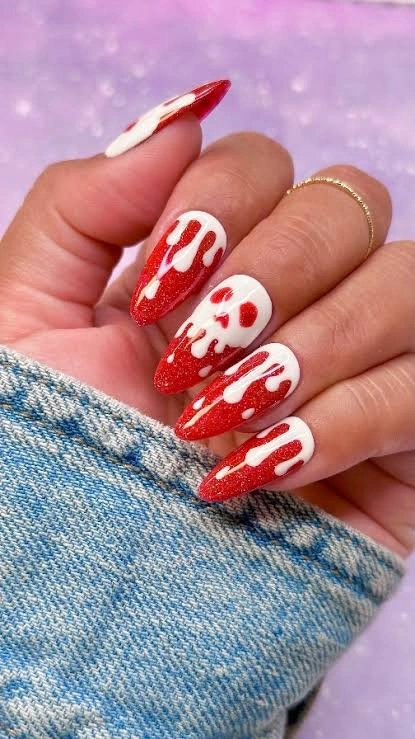
#12. Red Glitter with White Drip Paint
Bold and graphic, this set uses shimmering red as a base with thick white drips running down each nail like melted paint. One inverted white nail with a red skull cutout keeps the eye guessing which way the pattern flows.
Best For — A statement look for a costume party entrance
Pro Tip — Use a thick gel art pen and let gravity help the drips settle for 5-10 seconds before curing.
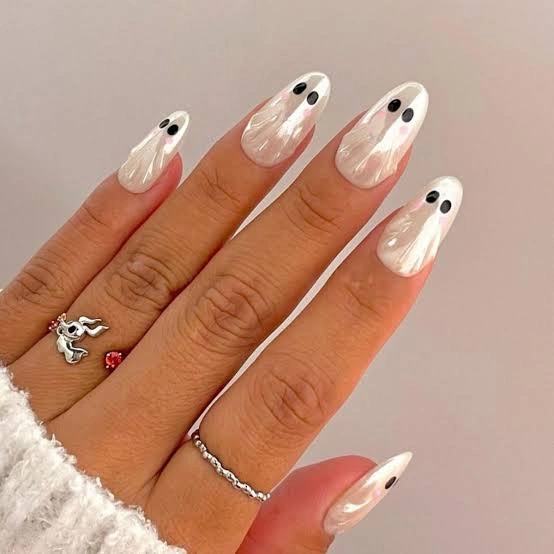
#13. Pearl White Ghost Shape Almond
Minimalists, this one’s for you. A pearly white base is shaped subtly into a ghost silhouette on each almond nail, with two tiny black dots standing in for eyes and nothing else competing for attention.
Best For — First-timers easing into Halloween nail art
Pro Tip — Apply a pearl chrome powder with a soft applicator using small circular motions for even shine with no streaks.
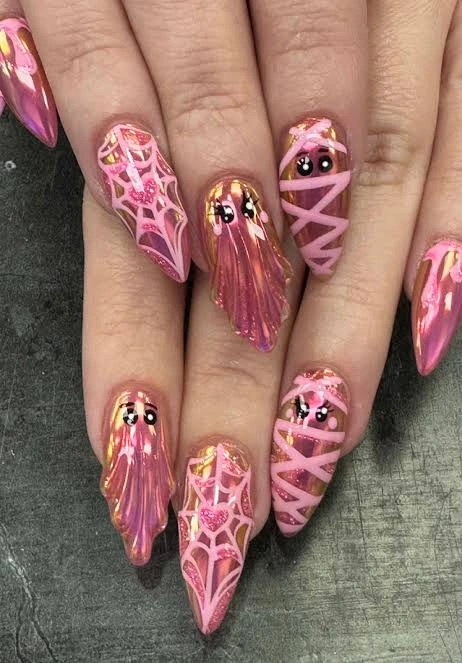
#14. Pink Chrome Ghost & Mummy Stiletto
A rose-gold chrome finish makes this whole set glow, with cute cartoon ghosts, a delicate spiderweb, and pink mummy wraps replacing the usual black-and-orange palette. It’s proof Halloween nails can look expensive and playful at once.
Best For — Chrome-nail fans who want a girly Halloween twist
Pro Tip — Buff the base coat with a 240-grit file before applying chrome powder so it grips evenly across the whole nail.
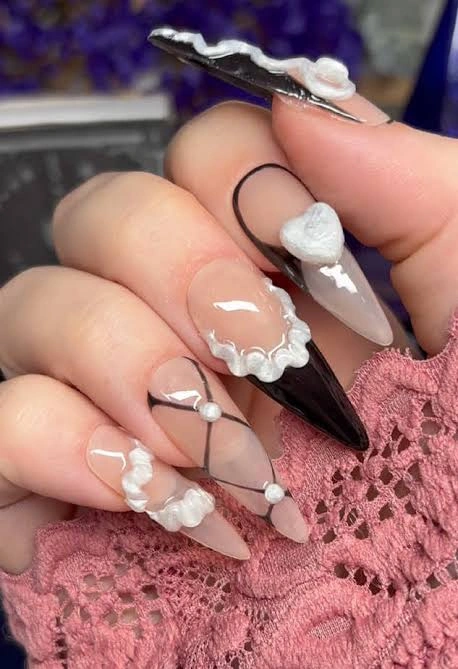
#15. Black & Nude with 3D Lace Pearls
Unlike the cartoonish designs earlier on this list, this set feels almost bridal, with sheer nude nails wrapped in delicate 3D lace trim and tiny pearl beads. A single sharp black stiletto tip keeps it from tipping into “too sweet.”
Best For — A gothic-glam Halloween wedding or formal event
Pro Tip — Attach pearls with a tiny dab of clear builder gel and cure for 30 seconds before adding the next one so they don’t slide.
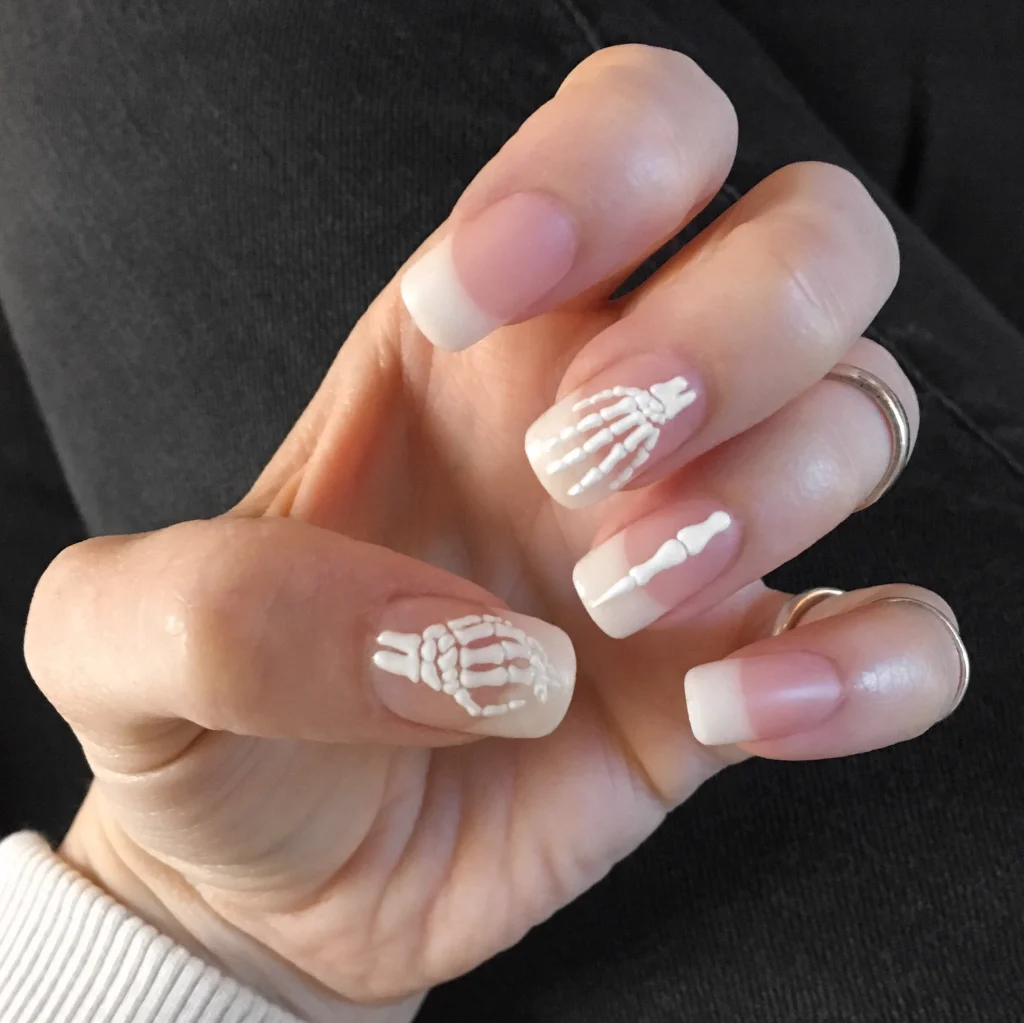
#16. Nude French with 3D Skeleton Hand
Here’s the set that proves Halloween nails don’t need color to make a statement. A soft milky French base carries one fully raised 3D skeleton hand and a single sculpted finger bone, both left in crisp white against sheer nude.
Best For — Anyone who wants Halloween nails that work at the office too
Pro Tip — Sculpt the finger bones one joint at a time with a size 4 sculpting brush, curing each joint for 20 seconds before adding the next.
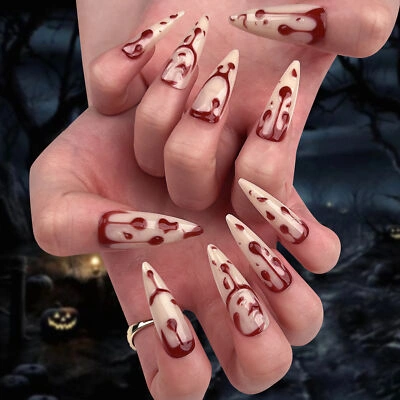
#17. Nude Stiletto with 3D Blood Drips
To close out the list, this one keeps the base simple with sheer nude stilettos, then adds raised, glossy 3D blood drips running from the tip down toward the cuticle. The contrast between the clean base and the gruesome detail is what sells the whole look.
Best For — A last-minute costume that still needs impact
Pro Tip — Add a drop of red gel polish into clear gel at a 1:4 ratio for translucent “blood” that holds its 3D shape without spreading.
How to Choose the Right Nail Design
With 17 options in front of you, narrowing it down comes down to a few practical factors.
- Nail Shape — 3D charms and sculpted details show off best on almond, coffin, or stiletto shapes since there’s more surface area to work with. Rounder shapes suit simpler designs like the pearl ghost look.
- Skin Tone — Warm tortoiseshell and orange tones pop against deeper skin, while pastel pinks and lilacs read softer on fair skin. Nude and cream bases flatter almost everyone.
- Occasion — Save the brain-textured or bloody designs for costume parties, and keep skeleton hands or French pumpkin tips for work-friendly Halloween spirit.
- Skill Level — If this is your first time trying 3D nail art, start with a single accent nail rather than a full set of ten sculpted charms.
What You’ll Need
A few core tools make all the difference when you’re building 3D details at home.
For sculpting pumpkins, brains, and raised charms
For spiderwebs, eyeballs, and thin linework
For curing gel layers between each sculpted detail
For pearl, rose gold, or metallic finishes
For pre-made bats, spiders, and ghost embellishments
To seal painted details and protect against chipping
Pro Tips for a Long-Lasting Manicure
Cure in Thin Layers
Thick gel layers trap heat and can crack under 3D charms. Build sculpted details in layers no thicker than 2mm, curing each for 30-60 seconds.
Cap the Free Edge
Always run your top coat over the very tip of the nail. This one habit alone can add several days of extra wear time.
Wipe With Isopropyl Alcohol
Between every gel layer, wipe away tackiness with 90% isopropyl alcohol on a lint-free wipe. Skipping this step is the top reason gel art peels early.
Protect Heavy 3D Charms
Nails with large sculpted pieces, like the brain texture or skeleton hand, benefit from wearing gloves during dishwashing. Even durable gel can snag a heavy charm.
Frequently Asked Questions
Q: How long do 3D Halloween nails typically last?
A: With proper gel curing and a capped free edge, 3D Halloween nails usually last 2-3 weeks. Heavier sculpted charms may need reinforcement sooner if they take daily impact.
Q: Can I do 3D Halloween nail art at home without acrylic?
A: Yes, thick builder gel can be sculpted into raised shapes like pumpkins or bones, just like acrylic. It cures faster and skips the liquid monomer step entirely.
Q: What’s the easiest 3D Halloween nail design for beginners?
A: A single 3D charm on one accent nail, like a small pumpkin or spider, is the easiest entry point. Save full hand-sculpted sets for once you’re comfortable with basic shaping.
Q: Do 3D nail charms fall off easily?
A: They shouldn’t, as long as they’re attached with builder gel and cured properly rather than glued on top of polish. Curing each charm for at least 30 seconds makes a big difference.
Recommended Product
Professional UV LED Nail Lamp
★★★★☆ Highly rated on Amazon
If you’re building 3D details layer by layer like several of these designs require, a reliable lamp with a timer setting saves you from over- or under-curing.
As an Amazon Associate, we earn from qualifying purchases.
Final Thoughts
Whichever of these 17 looks caught your eye, the beauty of 3D Halloween nails is how much personality they pack into ten tiny canvases.
Start simple if you’re new to sculpting, or go all-in with a full themed set if you’re ready for the challenge.
Which of these nail looks are you trying first? Save this post to Pinterest so you can come back to it whenever you need fresh nail inspo!

Hi, I’m Jessica, the creator behind Unique Lash & Nails Katy.
I created this website for anyone who loves beautiful nails as much as I do. Here, I share trendy nail designs, seasonal manicure ideas, easy nail care tips, honest product recommendations, and step-by-step guides to help you create salon-worthy nails at home. Whether you’re looking for everyday inspiration or your next favorite nail trend, I hope you’ll find something you love.