18 Halloween Nails with Gems: Spooky Sparkle Ideas
If your Pinterest board is already flooded with spooky season inspiration, you know gems take Halloween nails from cute to absolutely unforgettable. We rounded up 18 halloween nails with gems that mix rhinestones, crystals, and 3D charms into every kind of design, from beginner-friendly to full-on nail art masterpiece. Grab your gem kit, because you’re about to bookmark this whole list.
✦ Our Top Picks at a Glance
Best Overall — Pastel Witch Ghost Nails with Spiderweb Gems
Best for Beginners — Crystal-Edged Red Ombre Almond Nails
Most Trendy — Rainbow Gemstone Stiletto Nails
Best for Special Occasions — Blood Rose Gem Stiletto Nails with 3D Snake Charm
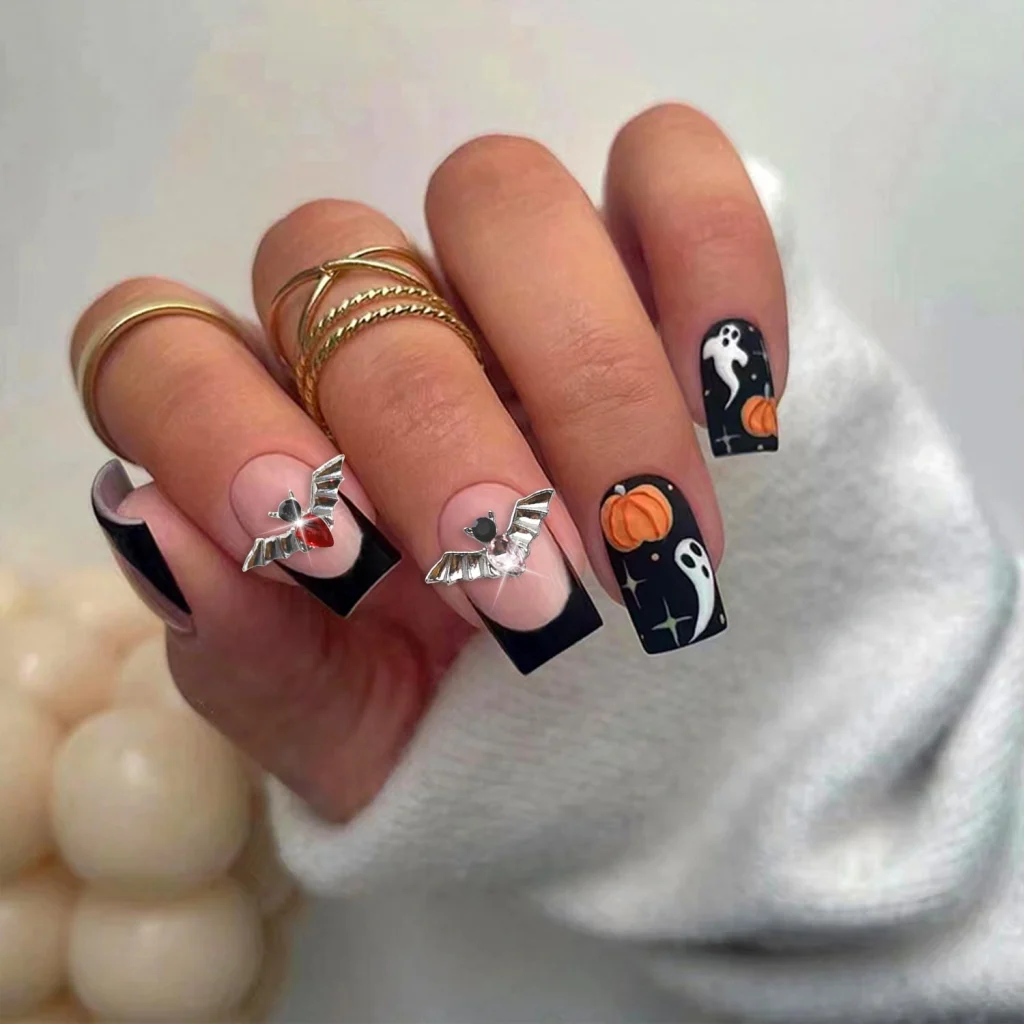
#1. Gothic Bat Charm French Tips with Ruby Gem Accents
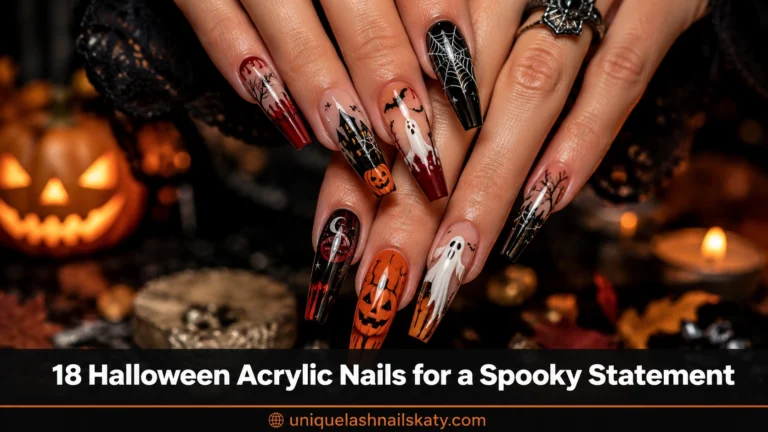
Sleek black French tips get a dramatic upgrade with oversized 3D bat charms studded with ruby-red gems, paired with a hand-painted ghost and pumpkin accent nail. It’s edgy without losing that polished, salon-fresh look.
Best For — fans of gothic glamour and statement charms
Pro Tip — Press the bat charm into wet gel before curing so it sits flush instead of floating above the nail.
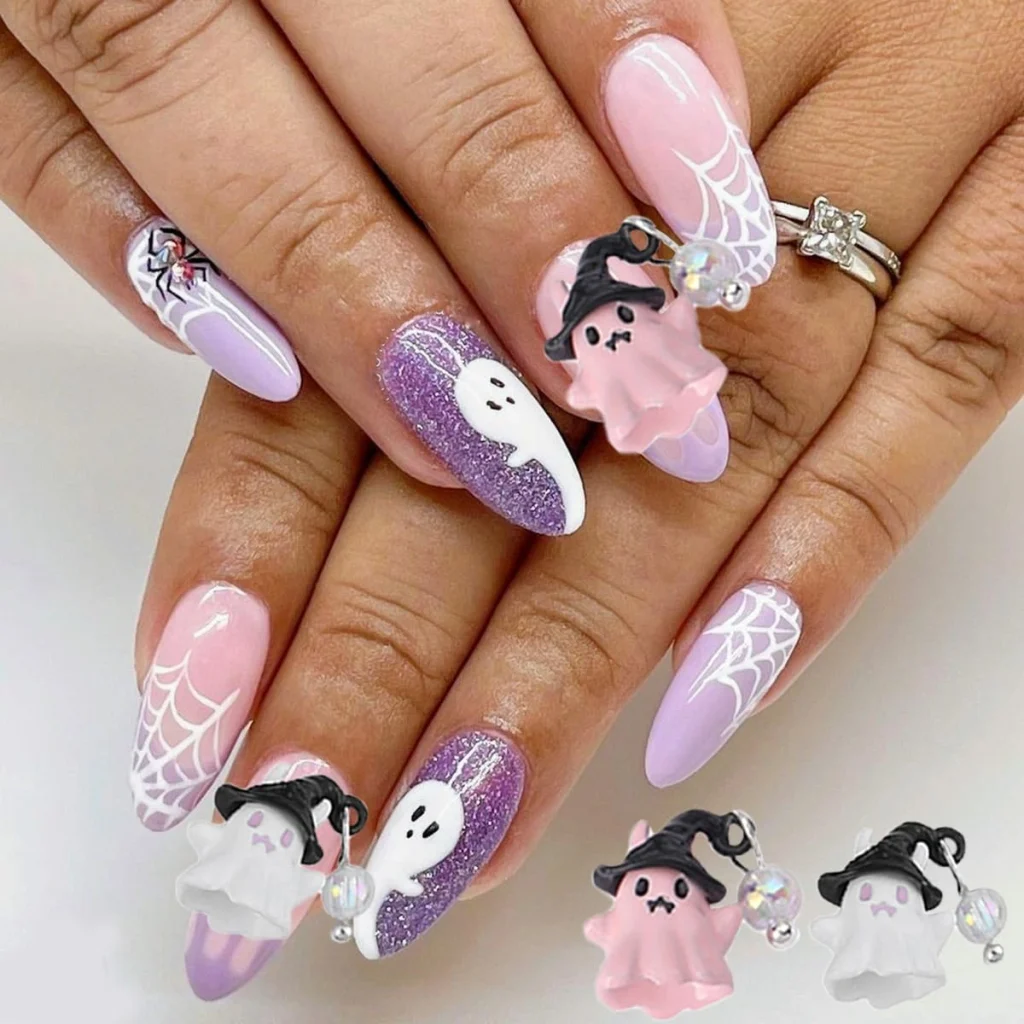
#2. Pastel Witch Ghost Nails with Spiderweb Gems
Soft lilac and pink bases carry delicate white spiderwebs, a single crystal-flecked purple glitter ghost nail, and dangling 3D witch-hat ghost charms dripping with iridescent beads. It’s spooky season for anyone who still wants their nails to look sweet.
Best For — pastel lovers who want cute over creepy
Pro Tip — Use a striping brush thinned with a drop of gel cleanser to get crisp, thin spiderweb lines instead of thick blobby ones.
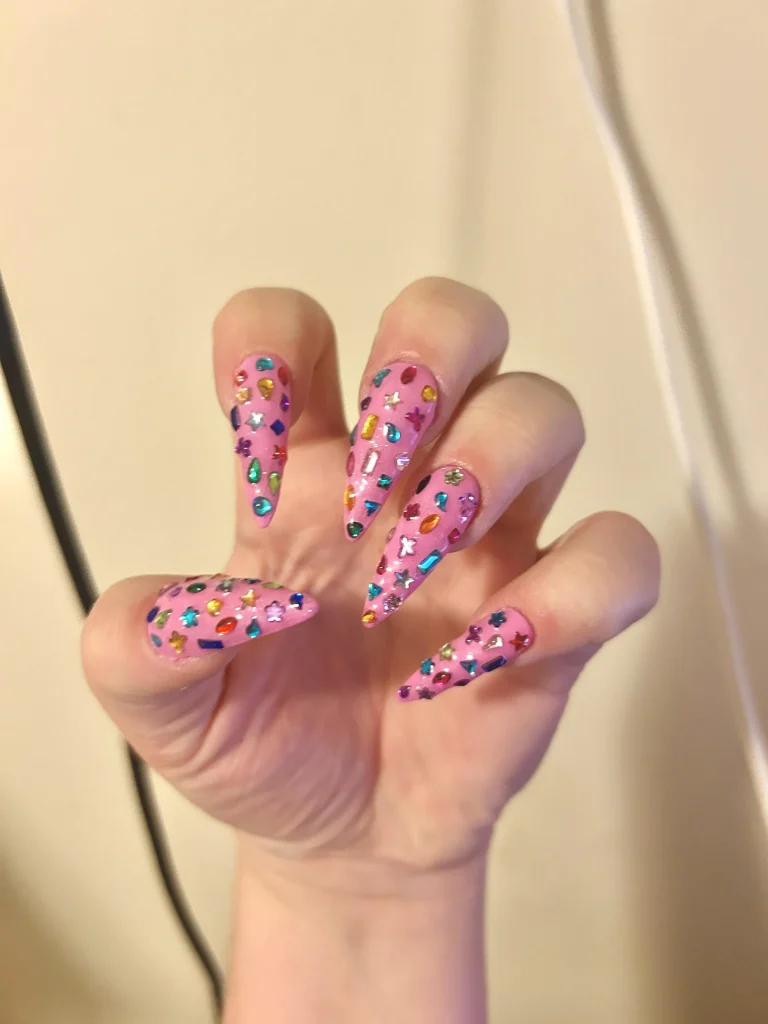
#3. Rainbow Gemstone Stiletto Nails
Every inch of these long pink stilettos is packed edge-to-edge with multicolored flat-back rhinestones in stars, hearts, and gem shapes. It’s maximalist Halloween glam that doesn’t even need a spooky motif to make a statement.
Best For — bold personalities who love maximalist nail art
Pro Tip — Sort your gems by size before you start; placing the largest stones first keeps the coverage even as you fill in gaps.
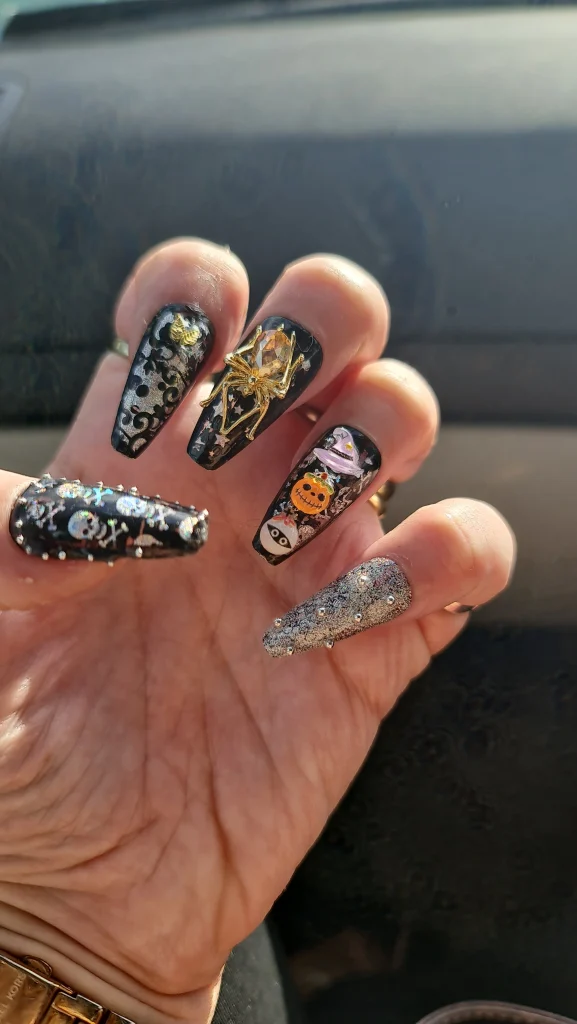
#4. Golden Spider Gem Nails with Skeleton Charm Print
A show-stopping gold gem spider perches on a starry black background, joined by damask-print nails, silver-studded skeleton foil, and a hand-painted pumpkin-and-witch-hat accent. Every finger tells a different piece of the Halloween story.
Best For — nail art lovers who want each finger to feel unique
Pro Tip — Add studs around the cuticle line last, once polish is tacky but not fully cured, so they don’t slide during application.
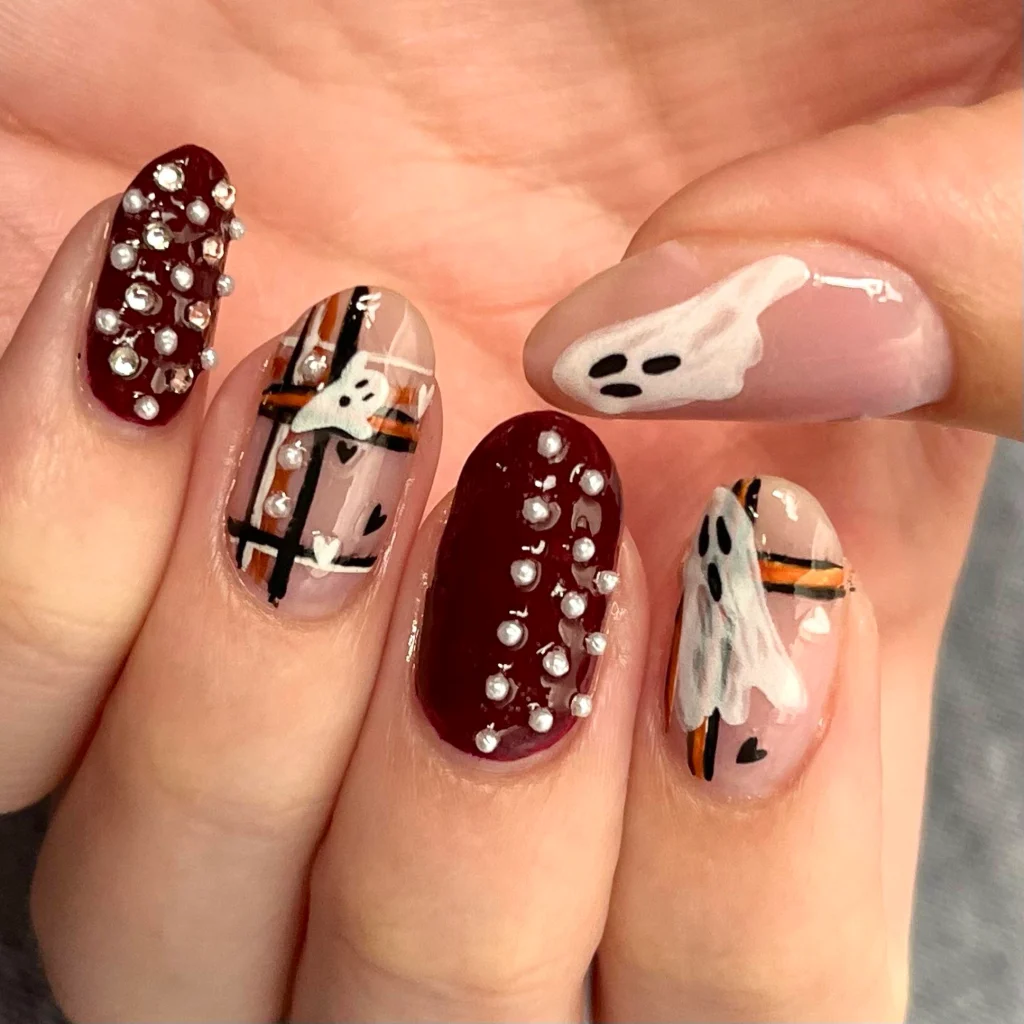
#5. Burgundy Pearl Gem Nails with Hand-Painted Ghost
Deep burgundy nails scattered with tiny pearl charms pair beautifully with nude nails featuring a hand-painted plaid pattern and a friendly little ghost. It’s moody and elegant, perfect for fall dates and dinner parties.
Best For — anyone who wants Halloween nails that also work for autumn
Pro Tip — Place pearls in a loose diagonal line rather than a grid — it reads more organic and less like a template.
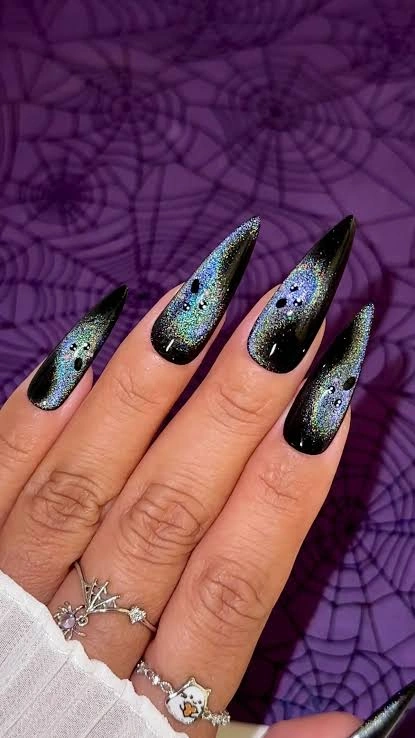
#6. Holographic Gem Dust Ombre Stiletto Nails
Glossy black tips fade into a swirl of holographic glitter dust dotted with tiny black gems, creating an almost galaxy-like effect on long, sharp stiletto nails. It photographs beautifully under any lighting.
Best For — glam nights out and Halloween parties
Pro Tip — Apply holographic glitter with a damp silicone dotting tool instead of your fingertip for a smoother, less streaky blend.
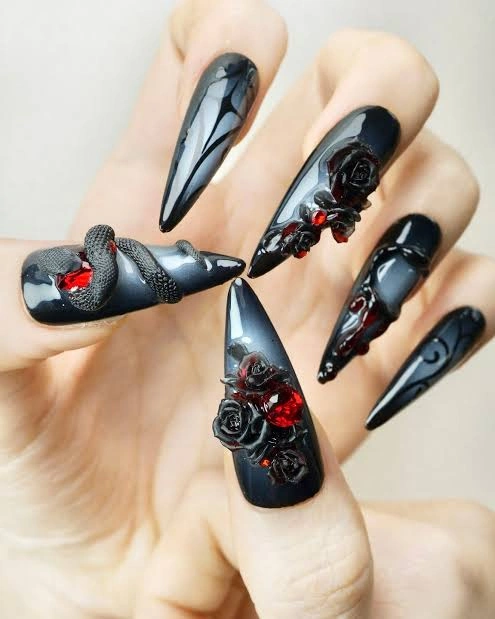
#7. Blood Rose Gem Stiletto Nails with 3D Snake Charm
Matte charcoal stilettos become the backdrop for a coiled 3D snake charm and clusters of black roses dripping with deep red gems. This one is pure Halloween drama, made for anyone who wants their nails to be the whole costume.
Best For — special events, parties, and costume nights
Pro Tip — Build the 3D roses in acrylic on a separate surface first, then attach with gel — it’s far easier than sculpting directly on the nail.
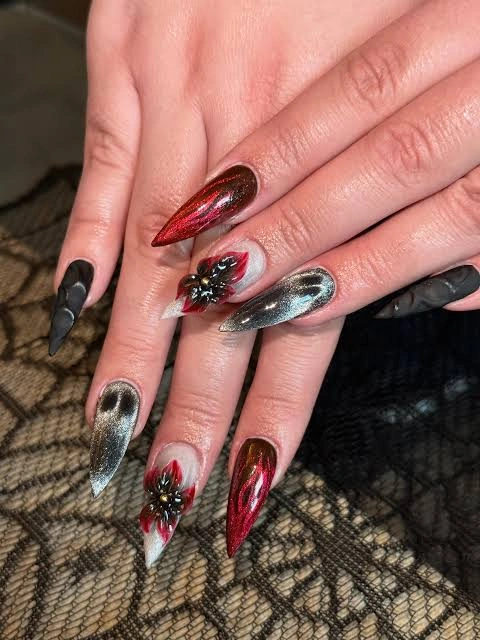
#8. Red and Silver Gem Ombre Stiletto Nails
Metallic silver chrome blends into deep red flame-like streaks, finished with clustered crystal gem flowers at the cuticle. It’s fierce, fiery, and unmistakably Halloween.
Best For — anyone who loves fire and vampire-inspired looks
Pro Tip — Chrome powder needs a tacky, unfinished gel base — buff too much and the pigment won’t grab properly.
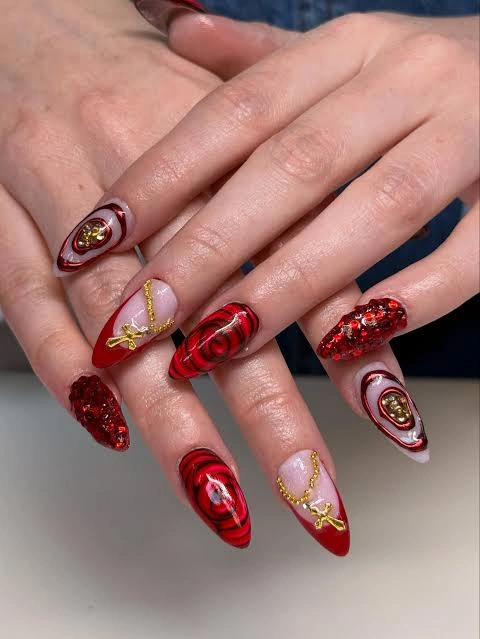
#9. Ruby Red Gold Cross Gem Nails
Deep red swirls and marbled rose patterns meet sparkling ruby glitter and delicate gold cross charms for a look that’s part vampire, part high fashion. It’s proof that Halloween nails can still feel luxe.
Best For — a bold red manicure with a gothic-glam edge
Pro Tip — Seal gold chain charms under a thick top coat layer so the metal doesn’t tarnish or catch on fabric.
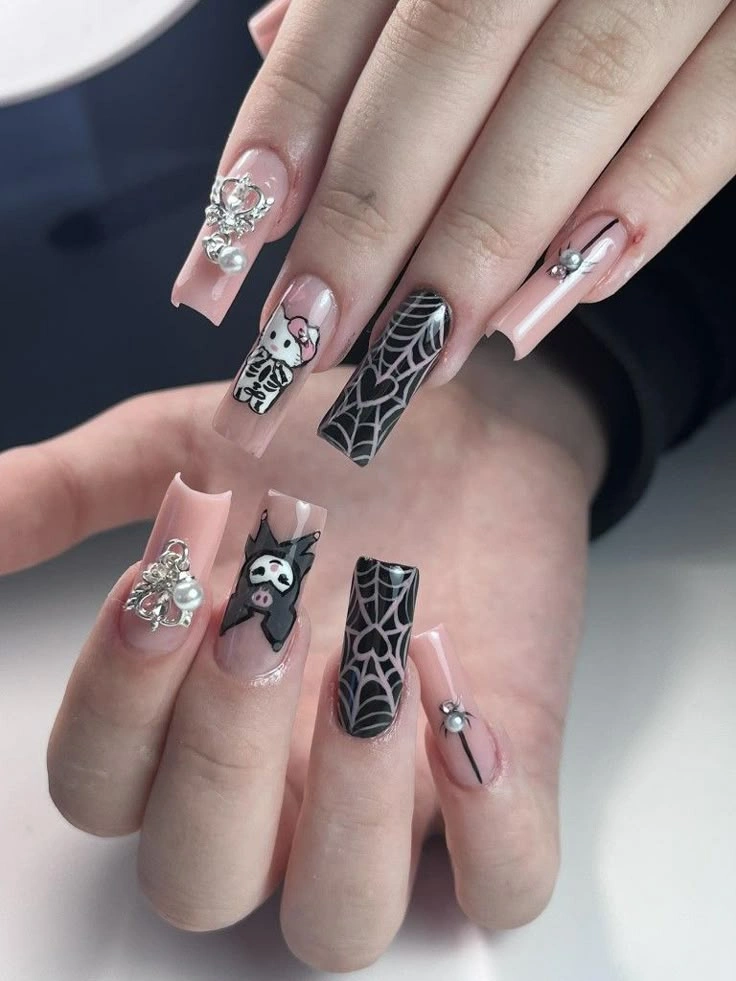
#10. Spiderweb Gem Nails with Skeleton Hello Kitty Charm
Long nude square nails feature crisp black spiderwebs and a playful skeleton-print character nail, finished off with dainty spider charms dangling from pearl accents. It’s a fun, character-driven take on classic Halloween nail art.
Best For — fans of kawaii and character nail art
Pro Tip — Outline character designs in black gel pen before filling in color — it keeps the linework crisp even on longer nails.
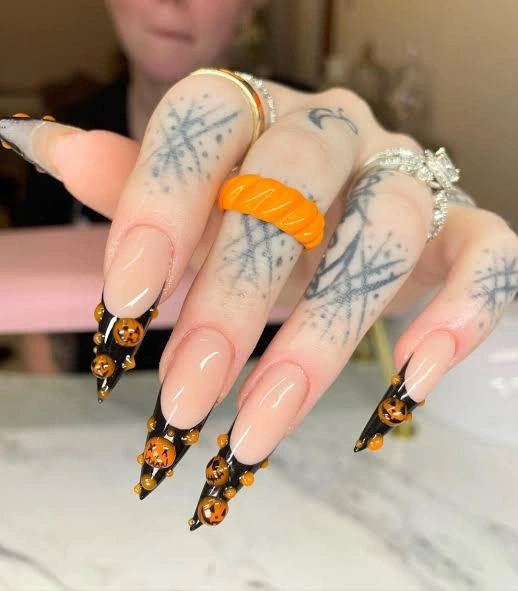
#11. Pumpkin Gem French Tip Nails
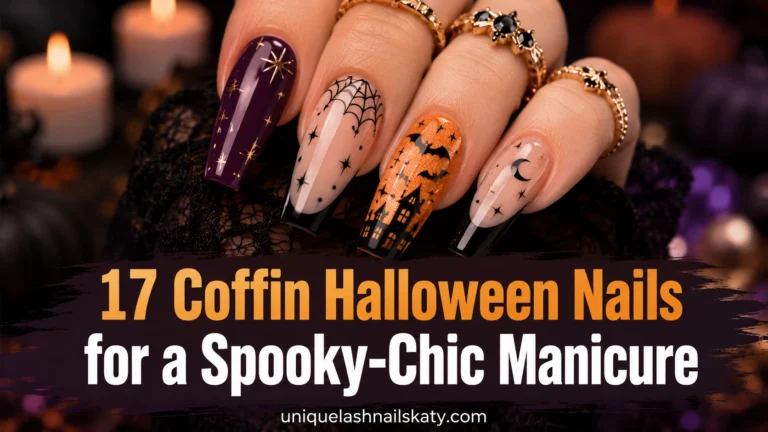
A clean nude base gets a sharp black French tip lined with tiny 3D pumpkin gems in warm orange tones. It’s a subtle way to wear Halloween nail art without going full costume.
Best For — office-friendly Halloween nails
Pro Tip — Space pumpkin charms evenly using a toothpick as a placement guide before committing them to gel.
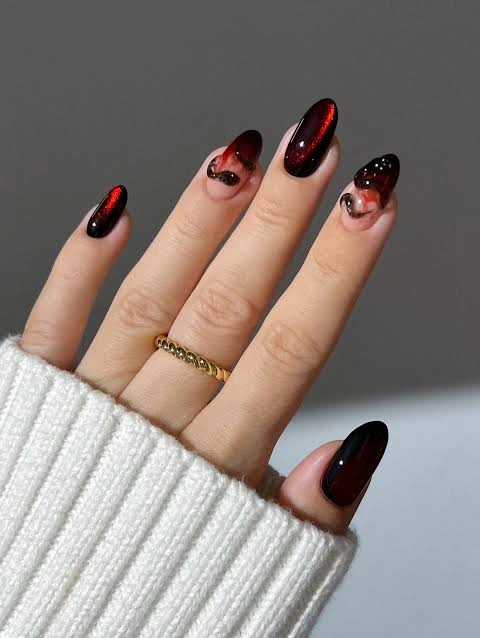
#12. Gold Glitter Gem Swirl Ombre Nails
Deep oxblood polish fades into black with swirling gold glitter accents that catch the light beautifully on a soft almond shape. It’s understated but still unmistakably fall.
Best For — everyday wear that still feels seasonal
Pro Tip — Drag glitter into swirls with a fine detail brush while the gel is still liquid, then cure to lock the motion in place.
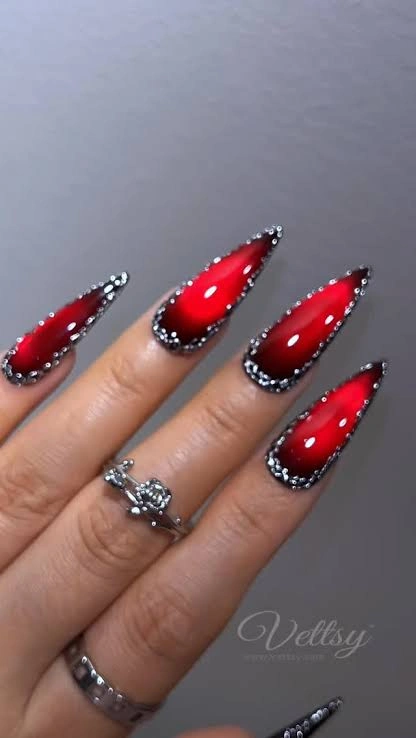
#13. Crystal-Edged Red Ombre Almond Nails
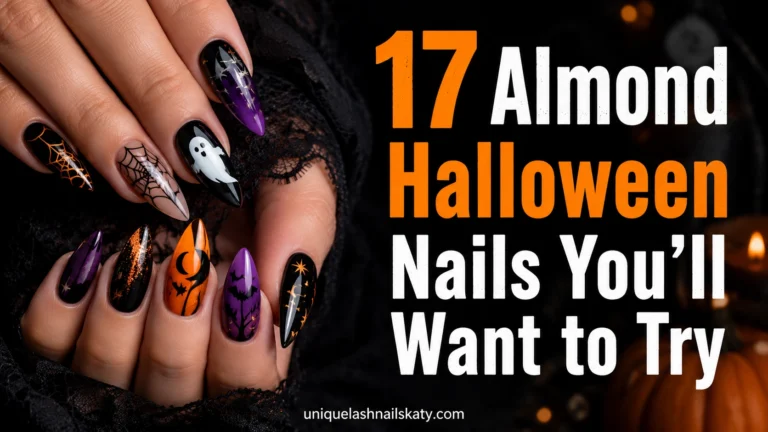
A rich red-to-black ombre glazes each almond nail, framed with a border of tiny micro rhinestones. The technique is simple, which makes this one of the easiest looks on the list to recreate.
Best For — beginners trying ombre and gem placement for the first time
Pro Tip — Pick up rhinestones with a wax pencil, not tweezers — it’s far easier to control placement along a curved edge.
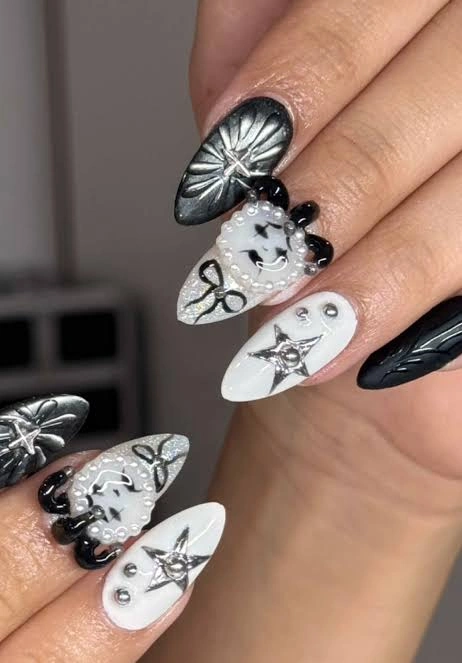
#14. Jack-O-Lantern Gem Charm Nails
Black and white nails come together with a hand-painted jack-o-lantern face, silver star gems, and a bold sculpted leaf accent. The high contrast makes every tiny detail pop.
Best For — classic jack-o-lantern lovers who want it done elegantly
Pro Tip — Paint the jack-o-lantern face in white first, let it cure, then add black features on top for cleaner edges.
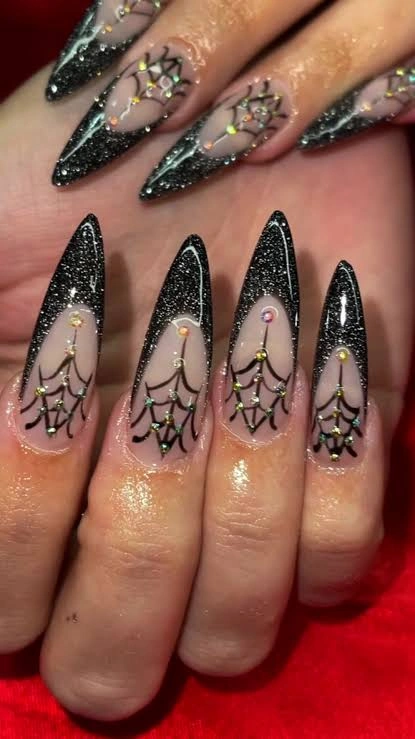
#15. Iridescent Gem Spiderweb French Tips
Glittery black French tips shimmer with iridescent shine, while sheer nude bases carry hand-drawn spiderwebs dotted with tiny rainbow crystal gems. It’s a shimmery twist on a Halloween staple.
Best For — a glam spiderweb look that still feels wearable
Pro Tip — Place one gem at each spiderweb intersection point — it draws the eye along the design instead of scattering it randomly.
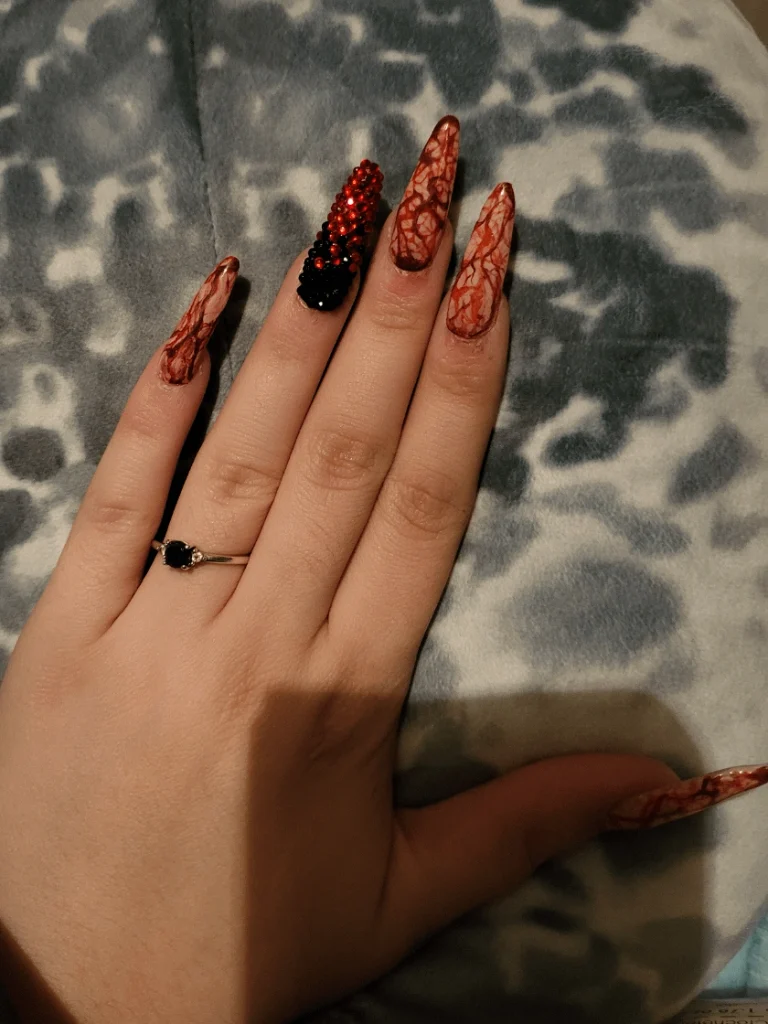
#16. Blood Splatter Marble Gem Accent Nails
Marbled rust-red veining spreads across nude nails like cracked blood, offset by one dramatic accent nail fully covered in red and black rhinestones. It’s a horror-movie-inspired look that’s easier to achieve than it seems.
Best For — horror fans who want a genuinely creepy manicure
Pro Tip — Drop red polish into wet white gel and drag with a needle for realistic veining instead of painting lines by hand.
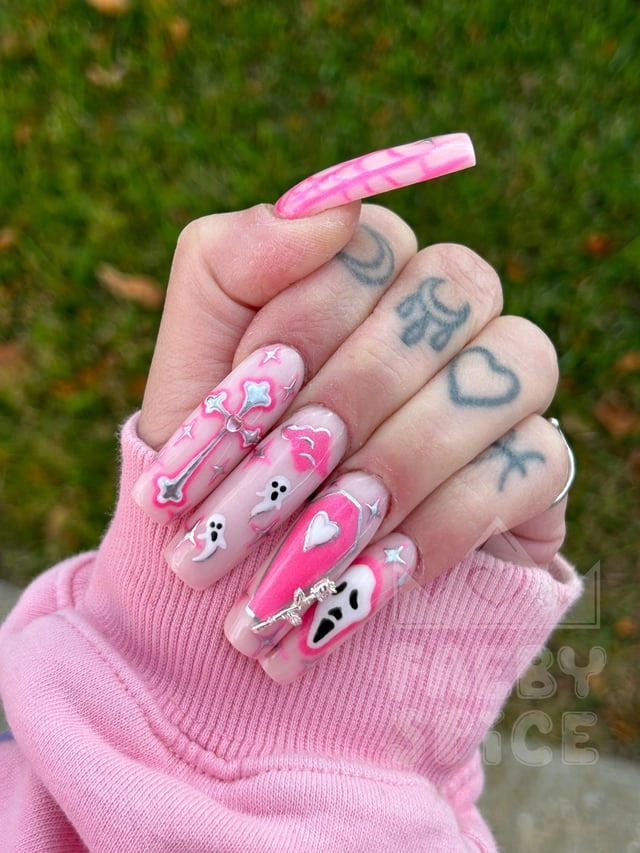
#17. Pink Star Gem Ghost Nails
Long coffin nails in soft pink feature hand-painted ghosts, clouds, and hearts, dotted with silver star gems and a dangling charm. It’s playful, girly Halloween nail art that still has plenty of sparkle.
Best For — anyone who wants cute over spooky this year
Pro Tip — Use star-shaped charms in varying sizes across the set for a more dynamic, less repetitive layout.
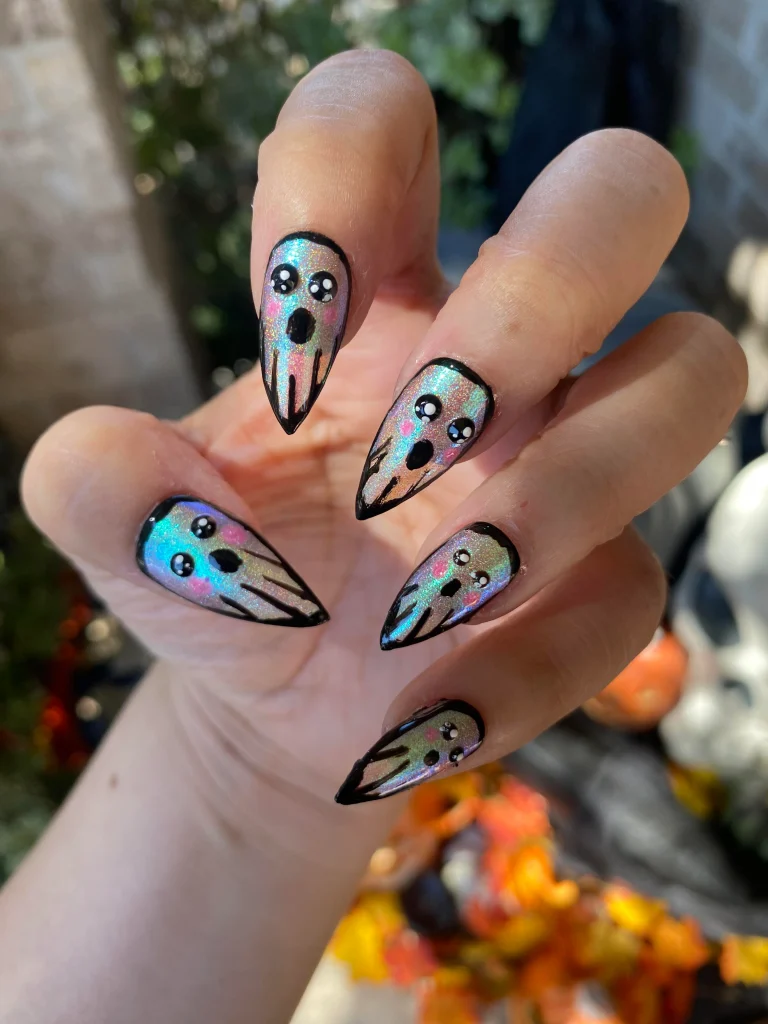
#18. Holographic Gem-Eyed Ghost Face Nails
Full holographic ghost faces stretch across each stiletto nail, complete with tiny gem eyes and blush-pink cheeks for an adorable-meets-eerie effect. It’s a showstopper design that’s fully custom hand-painted, gems and all.
Best For — advanced nail artists ready for a full character design
Pro Tip — Set tiny gem “eyes” into wet gel with a dotting tool before the ghost’s holographic base fully cures for a seamless finish.
How to Choose the Right Nail Design
With 18 options to pick from, narrowing it down comes down to a few simple factors.
- Nail Shape — Stiletto and almond shapes show off gem placement and ombre blending best. Square or coffin nails give more surface area for hand-painted characters like ghosts and jack-o-lanterns.
- Skin Tone — Warmer skin tones tend to pop against gold charms and orange-toned gems, while cooler tones lean beautifully into silver, holographic, and jewel-toned reds.
- Occasion — Save the full 3D charm looks for parties and costume nights. Save the subtle French tips and ombre designs for work or everyday wear.
- Skill Level — Gem placement on a solid base color is the easiest entry point. Hand-painted faces, marbling, and sculpted 3D charms take more practice, so work up to them.
What You’ll Need
Here’s the core kit that shows up again and again across these looks.
The backbone of nearly every gem look on this list
Makes picking up and placing tiny gems far easier
Needed for spiderwebs, ghost faces, and marbling
Seals gems and charms so they don’t lift or snag
Covers bats, spiders, ghosts, and pumpkin charms in one kit
Gets you the shimmer effect seen in the ombre and ghost designs
Pro Tips for a Long-Lasting Manicure
Prep Your Nail Bed First
Push back cuticles and lightly buff the nail surface before polish. This gives gems and charms a stronger, longer-lasting bond.
Seal Charms Under Gel, Not On Top
Heavier 3D charms like bats and spiders last far longer when partially embedded in gel rather than glued on top of a cured surface.
Cap the Free Edge Every Time
Running your top coat over the very tip of the nail seals the edge and prevents chipping, especially on longer stiletto and almond shapes.
Wear Gloves for Cleaning and Chores
Hot water and cleaning chemicals are the fastest way to loosen gems and dull glitter finishes. Gloves protect the whole design.
Frequently Asked Questions
Q: How do I keep gems from falling off my Halloween nails?
A: Apply gems while your gel or polish is still slightly tacky, then seal them under a thick layer of gel top coat. Avoid soaking your hands right after application.
Q: What’s the easiest halloween nails with gems design for beginners?
A: An ombre base with rhinestones lined along the tip, like the crystal-edged almond design, is one of the simplest to recreate at home with minimal tools.
Q: Can I do gem nail art with press-ons instead of gel polish?
A: Yes. Press-on nails hold gems just as well as gel when you use a strong nail glue and seal everything with a clear top coat before wearing.
Q: How long do 3D charm nails typically last?
A: With proper gel sealing, 3D charms usually last the full two to three week wear cycle of a gel manicure without lifting or falling off.
Recommended Product
Mixed Nail Rhinestone Gem Set
★★★★☆ Highly rated on Amazon
A varied mix of shapes and colors covers nearly every look in this list, so it’s the single most useful buy if you’re trying gem nail art for the first time.
As an Amazon Associate, we earn from qualifying purchases.
Final Thoughts
Halloween nails with gems give you so much room to play, whether you’re drawn to delicate pastel ghosts or full-on jeweled stilettos. Start with whichever design matches your skill level, then build up from there as you get more comfortable with placement and 3D charms.
Which of these nail looks are you trying first? Save this post to Pinterest so you can come back to it whenever you need fresh nail inspo!

Hi, I’m Jessica, the creator behind Unique Lash & Nails Katy.
I created this website for anyone who loves beautiful nails as much as I do. Here, I share trendy nail designs, seasonal manicure ideas, easy nail care tips, honest product recommendations, and step-by-step guides to help you create salon-worthy nails at home. Whether you’re looking for everyday inspiration or your next favorite nail trend, I hope you’ll find something you love.