17 Oval Halloween Nails You’ll Want to Copy
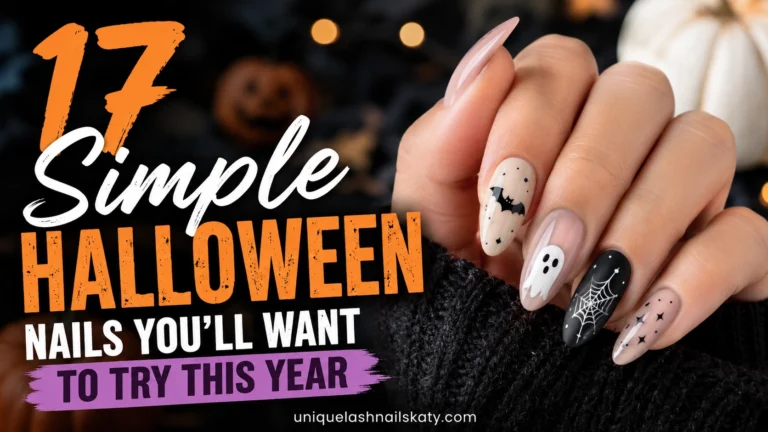
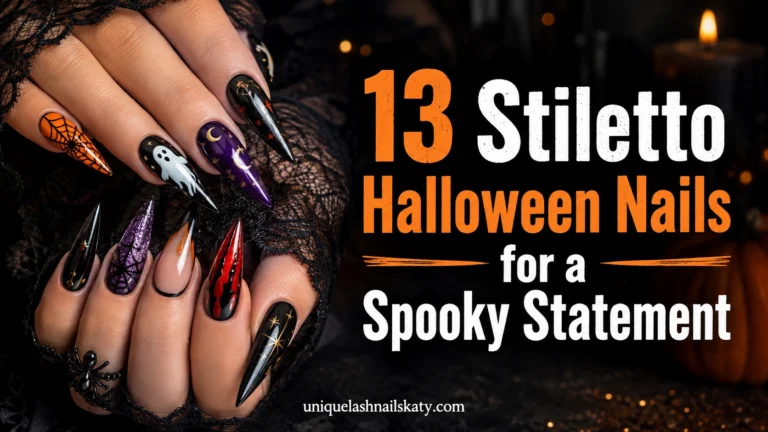
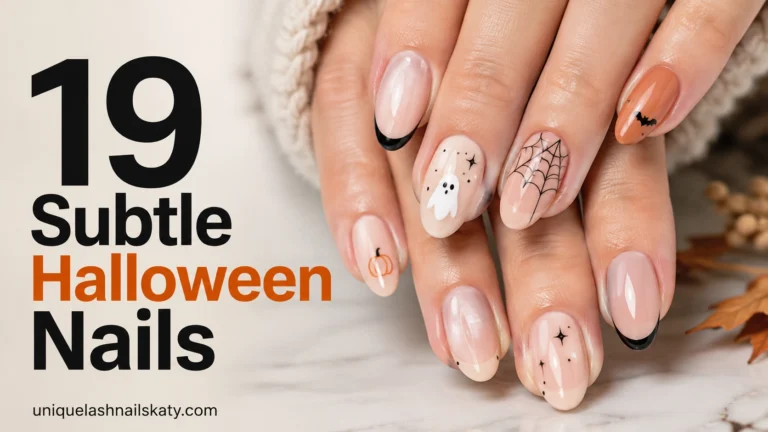
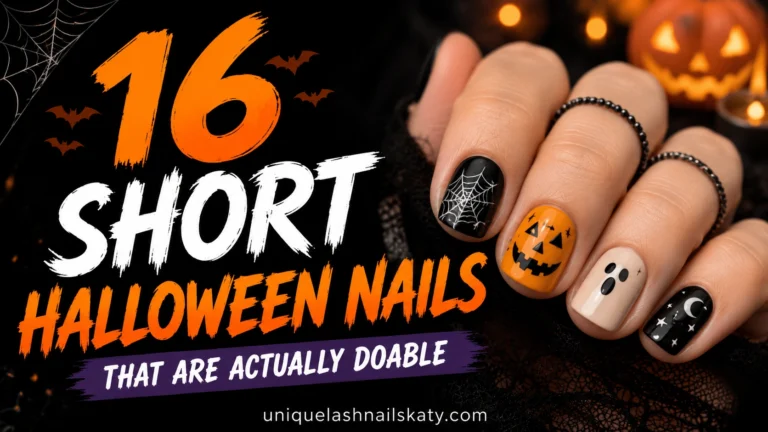
Halloween nails don’t have to mean tiny plastic charms and glow-in-the-dark polish you’ll never wear again. Oval nails are the perfect canvas for spooky season — soft enough for everyday life, sharp enough to show off real nail art. From peekaboo ghosts to holographic chrome, here are 17 designs worth screenshotting before your next appointment.
✦ Our Top Picks at a Glance
Best Overall — Peekaboo Ghost Stiletto Nails
Best for Beginners — Classic Nude Oval Base Nails
Most Trendy — Black Chrome French Tip Spiderweb Nails
Best for Special Occasions — Purple Glitter Witchy Ombré Nails
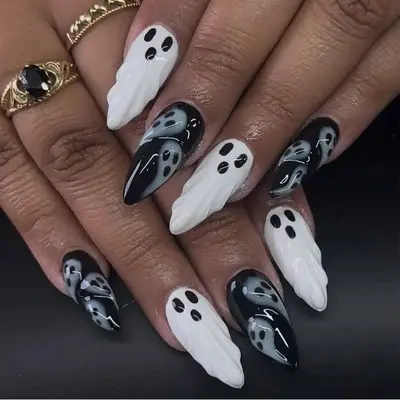
#1. Peekaboo Ghost Stiletto Nails
Sweeping white ghost silhouettes glide across a jet-black base, with two tiny dots for eyes peeking out on every other nail. It’s graphic, glossy, and genuinely eerie in the best way.
Best For — Halloween parties and bold nail art lovers
Pro Tip — Sketch the ghost shape in white gel first, then fill it in. Freehanding the outline last makes the edges way cleaner.
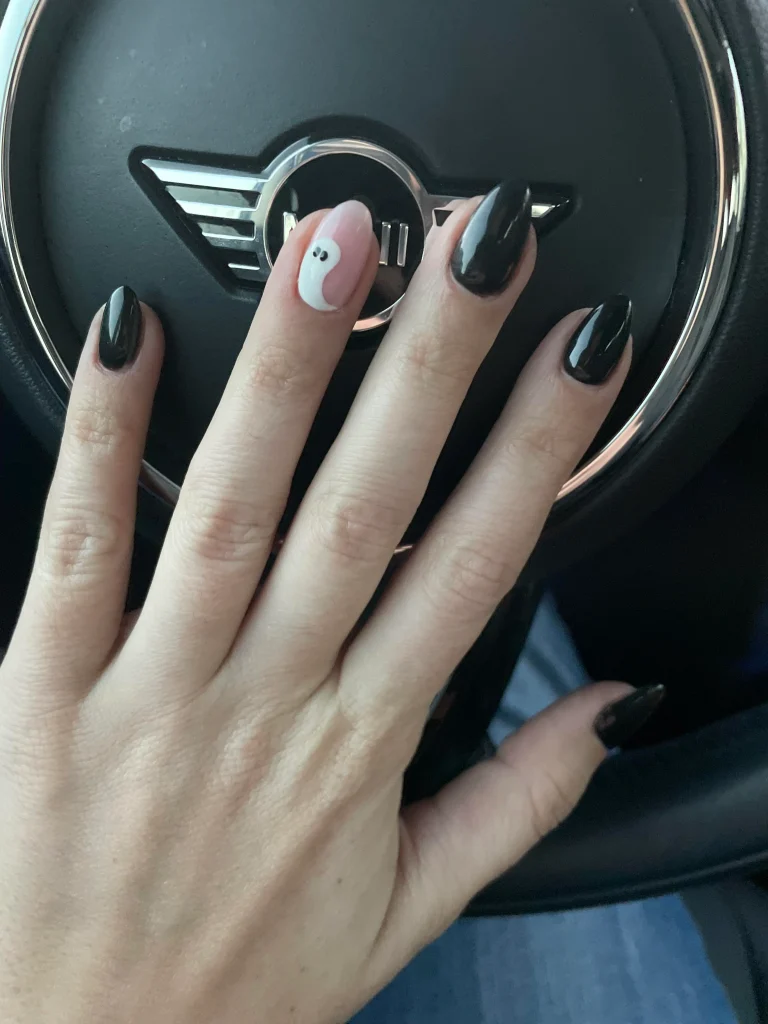
#2. Glossy Black Yin-Yang Ghost Accent Nail
Four nails go full glossy black while one accent nail stays bare with a swirling white ghost shape wrapped like a yin-yang symbol. The contrast is what makes this one so satisfying to look at.
Best For — Anyone who wants drama with minimal effort
Pro Tip — Use a high-shine black gel polish on the solid nails so they mirror light and don’t compete with the matte-white accent.
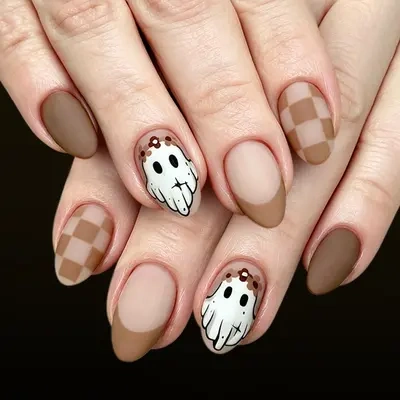
#3. Nude Matte Ghost Hand & Checkerboard Nails
Warm cocoa and beige matte polish sets the mood, then a dripping ghost hand and a mini checkerboard nail sneak in the spooky factor. It reads more “cozy October” than “haunted house.”
Best For — Fans of neutral, fall-forward color palettes
Pro Tip — A matte topcoat pulls this whole look together. Skip it and the browns can read a little flat and yellow-toned.
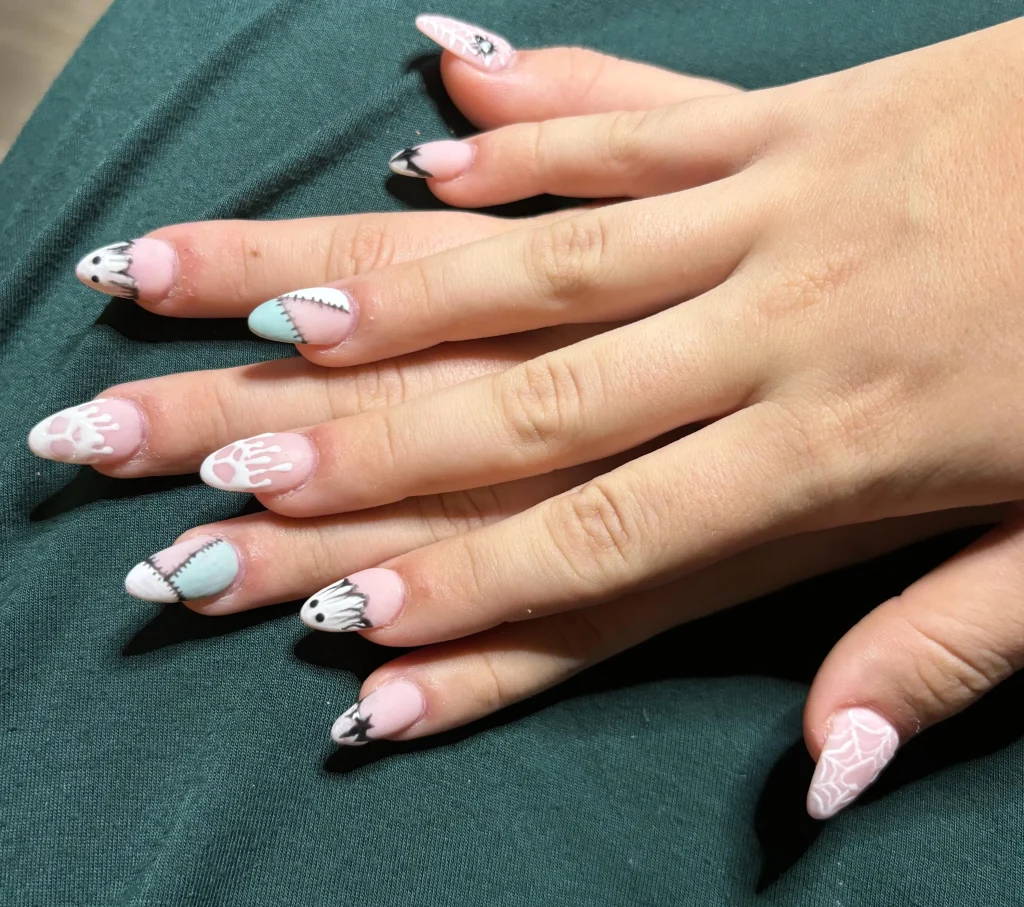
#4. Pastel Frankenstein Stitch & Ghost Nails
Soft pink, mint, and white nails get stitched Frankenstein seams, tiny spiders, ghost faces, and a delicate spiderweb — all without a single dark color in sight. Pastel Halloween has never looked this good.
Best For — Anyone who wants Halloween nails that still feel “cute”
Pro Tip — Use a super-fine nail art detail brush for the stitch lines. A regular polish brush will make them look thick and blobby.
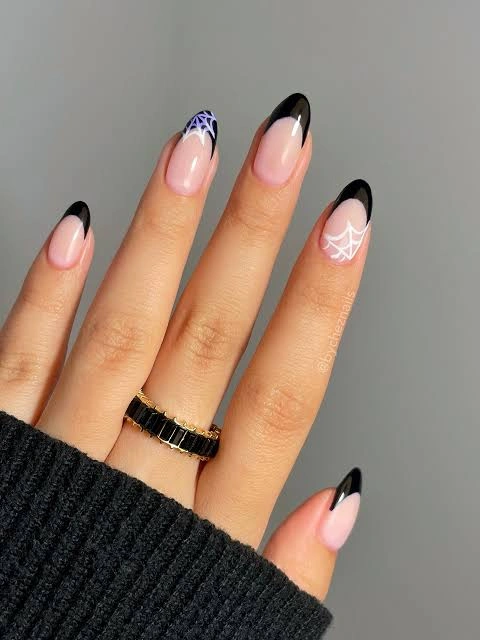
#5. Black Chrome French Tip Spiderweb Nails
A sheer nude base keeps things elegant while glossy black chrome tips add just enough edge. One accent nail gets a hand-painted spiderweb so delicate it almost looks like lace.
Best For — Office-friendly Halloween nails with a little edge
Pro Tip — French tip guide stickers keep the black tip line perfectly curved. Freehanding a smile line on an oval nail is trickier than it looks.
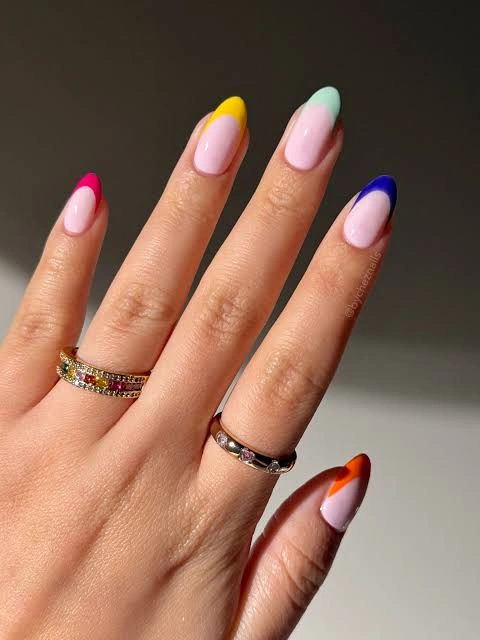
#6. Rainbow Color-Block French Tip Nails
Every nail gets its own colored tip — hot pink, yellow, mint, blue, orange — over a soft nude base. It’s a playful trick-or-treat-candy energy that works just as well past October.
Best For — Nail girlies who want color without full-hand commitment
Pro Tip — Pick colors that share the same undertone (all warm or all cool) so the rainbow reads intentional instead of random.
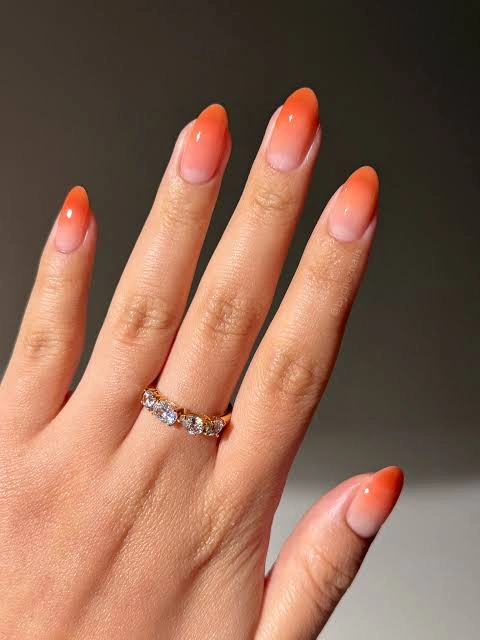
#7. Orange Ombré Halloween French Nails
A soft nude-to-orange ombré fades from the cuticle to a sunset-orange tip, giving off major pumpkin-spice energy without a single pumpkin decal in sight. It’s warm, wearable, and unmistakably fall.
Best For — Low-maintenance fans of seasonal color
Pro Tip — Dab the gradient with a makeup sponge instead of a brush. It blends the two colors far more smoothly at the edges.
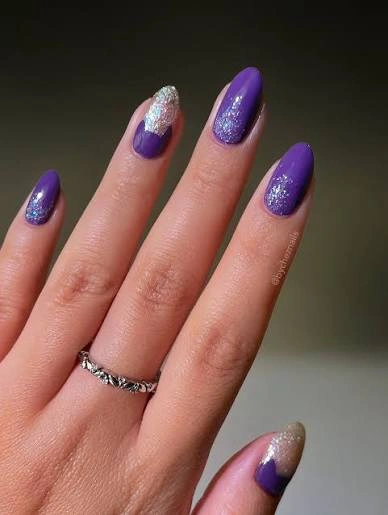
#8. Purple Glitter Witchy Ombré Nails
Deep purple polish gets swept into a shimmering silver glitter fade on the tip and cuticle of the accent nail, giving off major “friendly witch” energy. It catches every bit of light when you move your hand.
Best For — Halloween parties, date nights, and photos
Pro Tip — Pat glitter on with a damp sponge rather than brushing it from the bottle. You’ll get way more even, dense sparkle coverage.
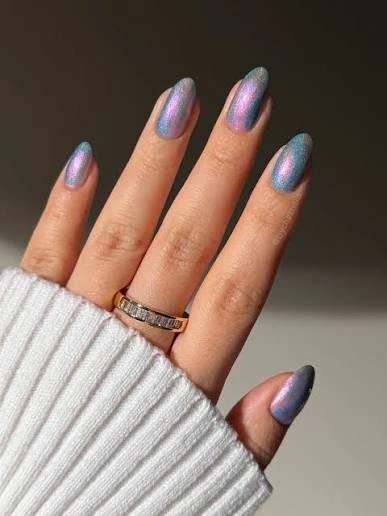
#9. Iridescent Holographic Chrome Nails
No hand-painted art here — just a mirror-like holographic chrome finish that shifts between blue, pink, and silver depending on the light. It’s giving “shapeshifting spirit” more than any decal could.
Best For — People who want maximum wow with zero freehand art
Pro Tip — Buff your base coat until it’s glass-smooth before applying holographic chrome powder — any texture underneath shows through the mirror finish.
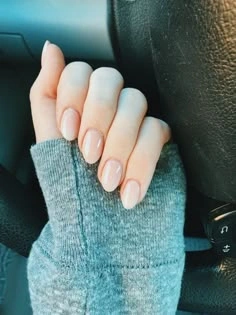
#10. Classic Nude Oval Base Nails
Sometimes the best Halloween nail is a perfectly shaped, glossy nude oval waiting for stickers, decals, or a costume ring to do the talking. It’s the blank canvas every design on this list starts from.
Best For — Nail art beginners and low-effort spooky season
Pro Tip — Get the oval shape right before you polish anything. File from the sides toward the center in one direction to avoid weak, splitting edges.
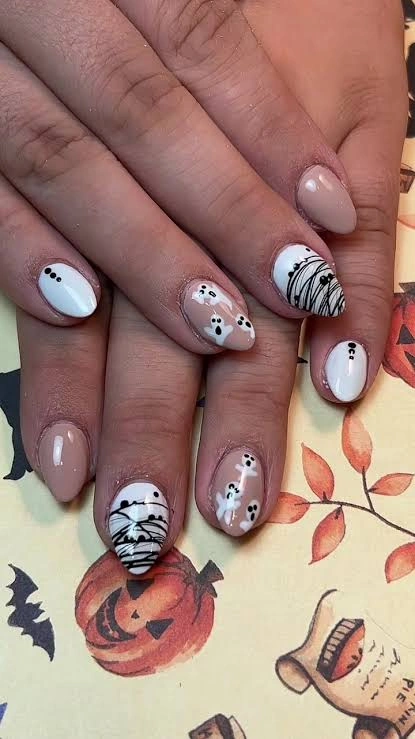
#11. Nude & White Cartoon Ghost Nails
Chubby cartoon ghosts with little arms and rounded heads float across a warm nude base, mixed in with a scribbly “mummy wrap” accent nail. It’s playful, a little clumsy on purpose, and impossible not to smile at.
Best For — Fans of cute, cartoon-style nail art
Pro Tip — Use a small dotting tool for the ghost eyes so they stay round and consistent across all ten nails.
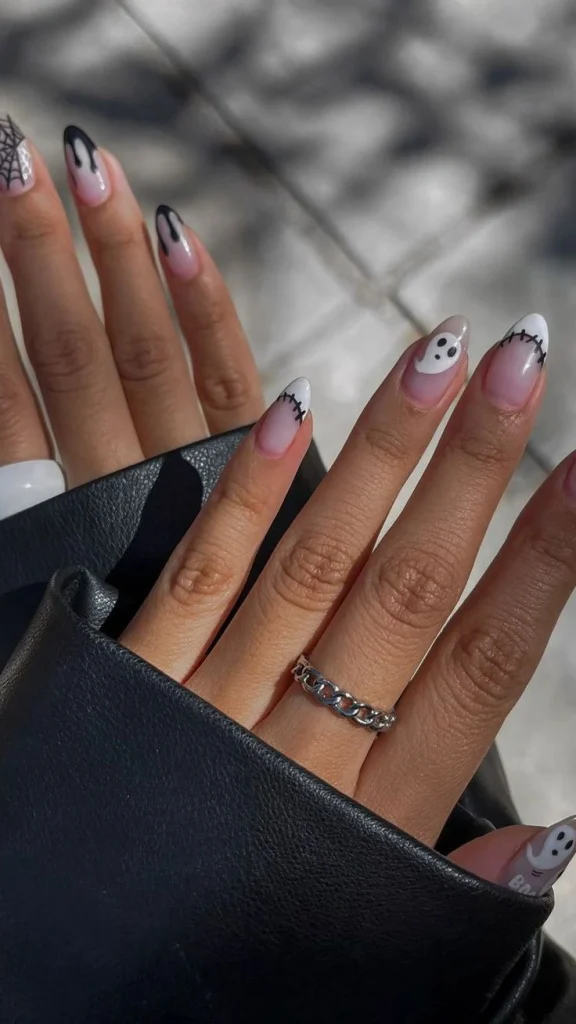
#12. Black Drip French Tip Stitched Ghost Nails
Melty black drip tips run down a sheer nude base, while one accent nail swaps in a white Frankenstein-stitched ghost with a sweet little smile. It balances “creepy” and “cute” almost perfectly.
Best For — Fans of the drip-nail trend with a Halloween twist
Pro Tip — Drag the drip shapes downward while the polish is still slightly wet for a natural, uneven melt instead of stiff, cartoonish icicles.
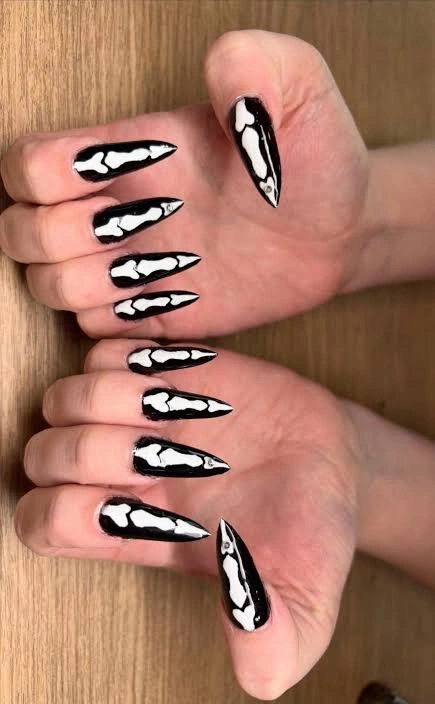
#13. Black and White Skeleton Bone Stiletto Nails
Every nail becomes its own finger bone, with a solid black base and a hand-painted white bone shape running down the center. Long and dramatic, this is the design for anyone who wants Halloween nails you can’t miss.
Best For — Longer nails and go-big-or-go-home costumes
Pro Tip — Outline the bone shape in thin pencil-like strokes first, then fill it in. Trying to freehand the whole bone in one pass usually looks lumpy.
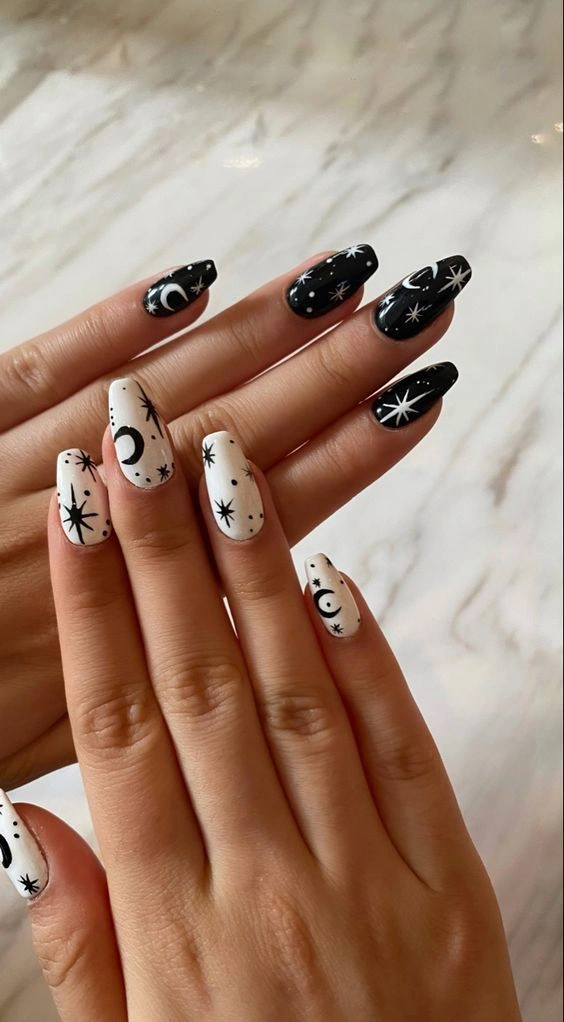
#14. Black and White Celestial Moon & Star Nails
Half the nails go inky black, half go crisp white, and both sides get scattered crescent moons and starbursts. It feels more “midnight sky” than “haunted house,” which makes it wearable well past October 31st.
Best For — Anyone who loves celestial or witchy aesthetics
Pro Tip — Vary the size and spacing of the stars. Perfectly even dots make the sky look mechanical instead of natural.
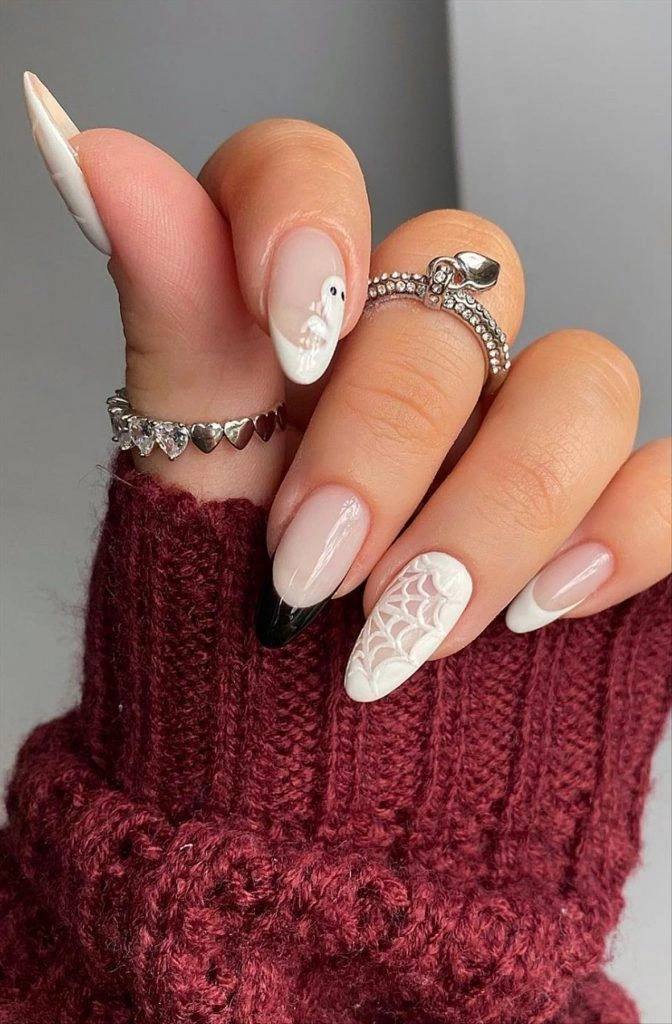
#15. Black French Tip Spiderweb Ghost Swirl Nails
A sheer French base gets a moody upgrade with a glossy black tip on some nails, a lace-fine spiderweb on another, and a soft swirling ghost face tucked onto the ring finger. Every nail tells a slightly different story.
Best For — Mix-and-match nail art fans
Pro Tip — Pick one accent detail (web, ghost, or drip) per nail instead of layering all three. It keeps the whole set looking cohesive, not busy.
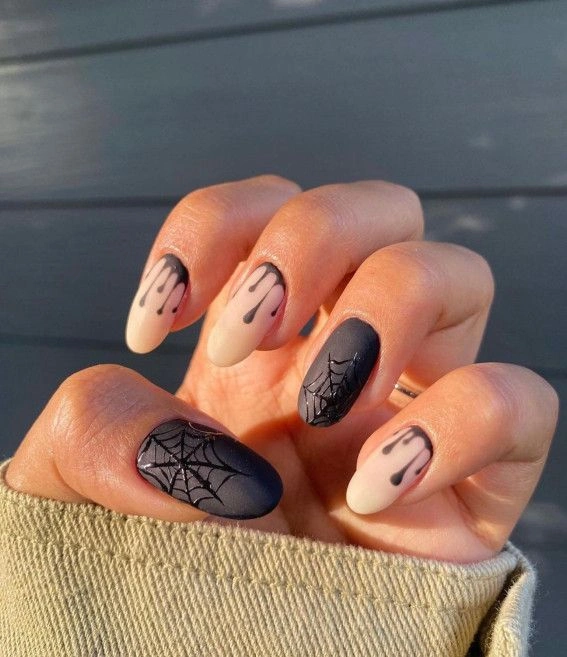
#16. Matte Black Drip & Spiderweb Nails
Matte black polish covers most of the nails, with a couple of nude nails left for a dripping black hem and a delicate spiderweb accent. The matte finish makes it feel moodier and more grown-up than a glossy version would.
Best For — Fans of dark, minimal Halloween looks
Pro Tip — Apply matte topcoat only after all your black art is fully cured. Matte topcoat over wet art tends to smear black polish everywhere.
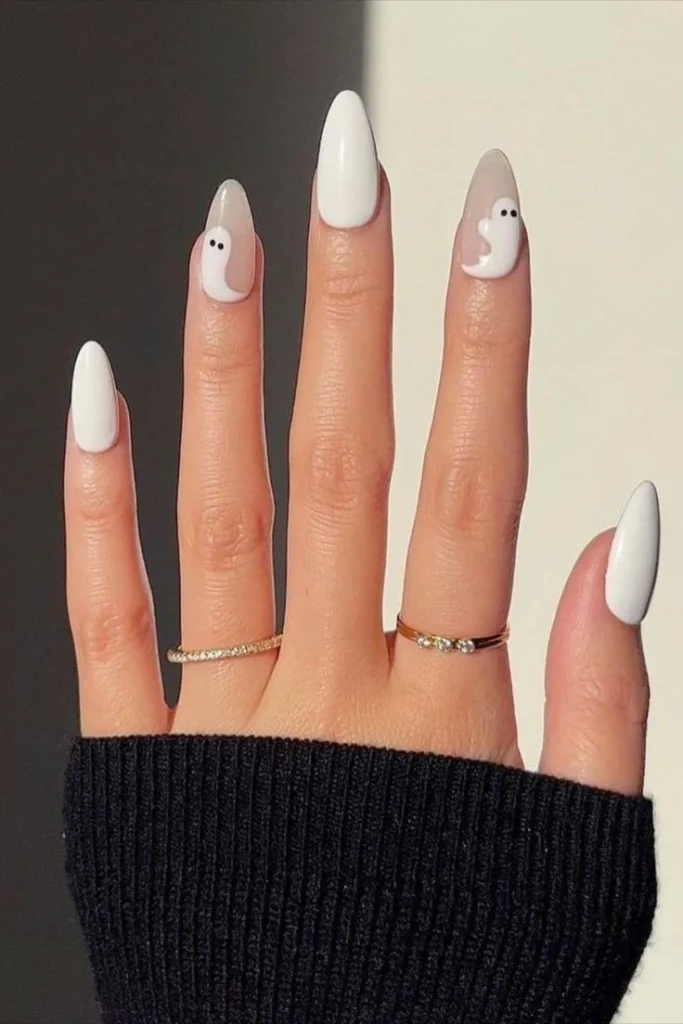
#17. White Glossy Peekaboo Ghost Nails
Solid glossy white nails are broken up by two nude accent nails, each hiding a tiny ghost peeking out from the side. It’s bright, clean, and proof that Halloween nails don’t have to be dark to feel spooky.
Best For — Bright, high-contrast nail lovers
Pro Tip — White polish usually needs three thin coats for full, streak-free opacity. Rushing to two coats is the most common reason white manicures look patchy.
How to Choose the Right Nail Design
With 17 designs to pick from, narrowing it down comes down to a few honest questions about your nails and your life.
- Nail shape — Oval nails handle almost every design here, but drippy and skeleton looks (like #12 and #13) show off best on slightly longer lengths.
- Skin tone — Warm nudes and oranges (like #3 and #7) tend to glow on warm undertones, while icy chrome and holographic finishes (like #9) look striking on cool undertones.
- Occasion — Save the bold, high-drama looks for parties and photos, and lean on softer neutrals or a classic base (#10) for work weeks.
- Skill level — French tips, ombré, and chrome finishes are the easiest to pull off at home. Freehand ghosts, skeletons, and celestial art take more practice — check out our ghost Halloween nails and simple Halloween nails guides for more beginner-friendly ideas.
What You’ll Need
Most of these looks come together with a handful of everyday nail art supplies. Here’s what to have on hand before you start.
Keeps every design glossy and chip-resistant through spooky season.
Essential for ghost faces, stitches, and spiderwebs.
Makes ghost eyes and star accents perfectly round every time.
Gives you sharp, symmetrical tip lines without the wobble.
The secret behind that mirror-like iridescent finish.
Keeps skin around your nail art hydrated and healthy-looking.
Pro Tips for a Long-Lasting Manicure
Thin Coats Win
Two or three thin coats of polish cure and wear better than one thick coat. Thick layers are more likely to chip, peel, or stay tacky underneath.
Cap the Free Edge
Swipe your topcoat over the very tip of the nail, not just the top. This seals the edge and is one of the biggest reasons gel manicures last longer than regular ones.
Let Art Fully Cure Before Layering
Rushing to add a topcoat or a second color over wet nail art almost always drags or smudges the design underneath. Patience saves the details.
Moisturize Around, Not On
Apply cuticle oil around the nail bed daily, but keep it off the polished surface itself. Oil on top of polish can make it slippery and prone to lifting.
Frequently Asked Questions
Q: How long do oval Halloween nails last?
A: With gel polish and proper edge-sealing, oval Halloween nail art typically lasts two to three weeks before you’ll notice regrowth or chipping at the tips.
Q: What nail shape is best for Halloween nail art?
A: Oval nails are a favorite because their rounded edges are gentle on daily life while still giving you enough surface area for detailed designs like ghosts, drips, and spiderwebs.
Q: Can I recreate these designs with press-on nails?
A: Absolutely. Oval press-ons are widely available and give you a shortcut to any look on this list without freehanding a single line yourself.
Q: How do I make ghost nail designs look neat instead of messy?
A: Sketch the ghost outline lightly before filling it in, use a fine detail brush for the edges, and always let the white base dry fully before adding the black dot eyes.
Recommended Product
Fine Detail Nail Art Brush Set
★★★★☆ Highly rated on Amazon
A good detail brush set is what actually makes ghost faces, spiderwebs, and skeleton bones look clean instead of shaky.
As an Amazon Associate, we earn from qualifying purchases.
Final Thoughts
From glossy peekaboo ghosts to holographic chrome, oval Halloween nails have room for every mood this spooky season. Whichever one you pick, it’ll photograph beautifully and feel just as good in real life.
Which of these nail looks are you trying first? Save this post to Pinterest so you can come back to it whenever you need fresh nail inspo!

Hi, I’m Jessica, the creator behind Unique Lash & Nails Katy.
I created this website for anyone who loves beautiful nails as much as I do. Here, I share trendy nail designs, seasonal manicure ideas, easy nail care tips, honest product recommendations, and step-by-step guides to help you create salon-worthy nails at home. Whether you’re looking for everyday inspiration or your next favorite nail trend, I hope you’ll find something you love.