19 Ghost Halloween Nails: Cute & Spooky Ideas
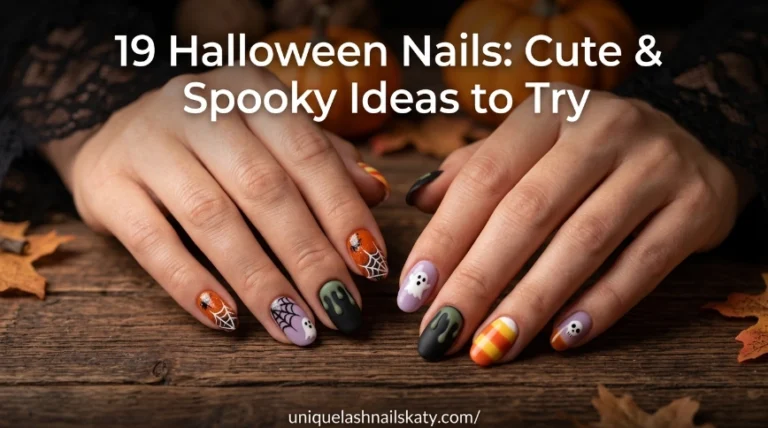
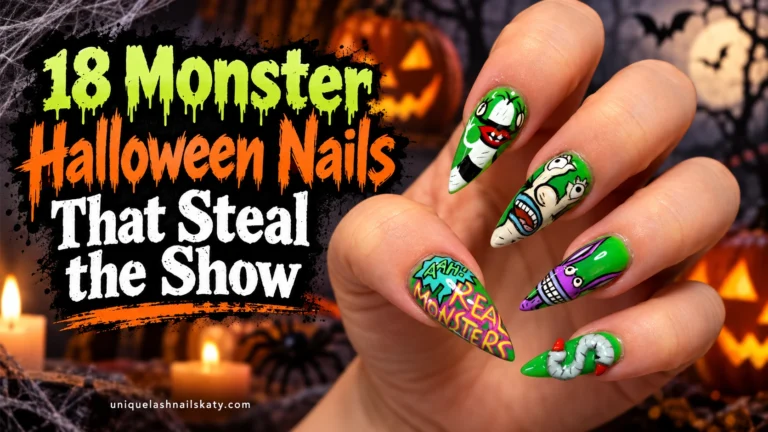
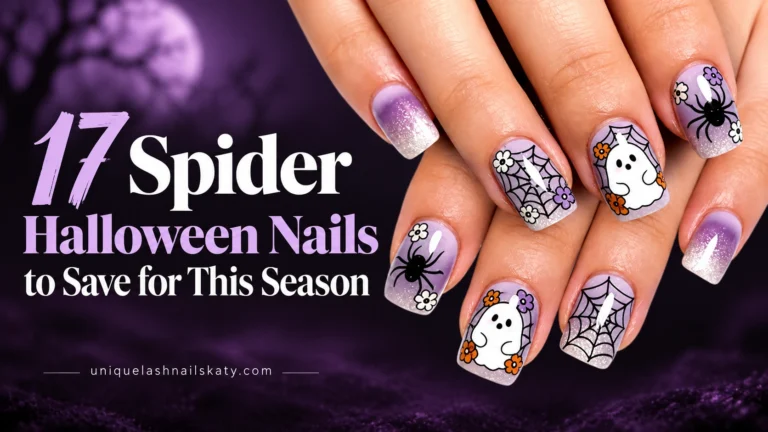
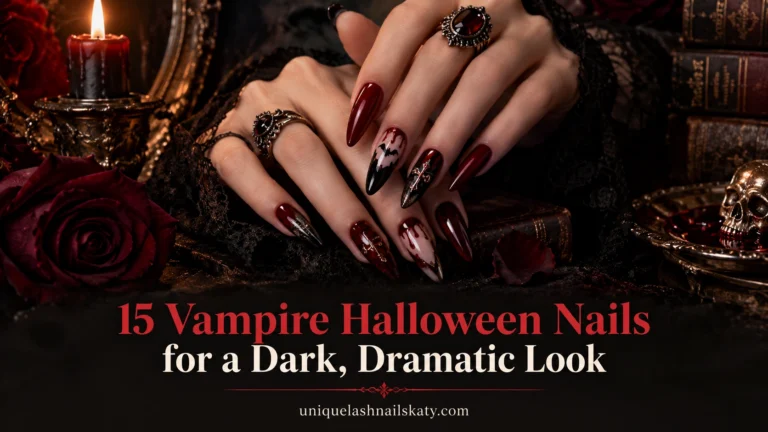
Ghost Halloween nails are one of those spooky-season trends you can make as cute, creepy, glamorous, or minimal as you want. A tiny white ghost can completely change a simple nude manicure, while black polish, spiderwebs, glitter, and horror-inspired accents take the same theme in a much bolder direction.
Below, you’ll find 19 ghost Halloween nails based on the designs shown, with everything from short pink sets to dramatic stiletto tips. If you’re planning something dressier, you can also browse these Halloween wedding guest nail ideas for more polished spooky-season inspiration.
✦ Our Top Picks at a Glance
Best Overall — Yin-Yang Ghost Swirl Almond Nails
Best for Beginners — Minimal White Ghost French Tips
Most Trendy — Iridescent Spiderweb Ghost Stilettos
Best for Special Occasions — Silver Star Ghost Coffin Nails
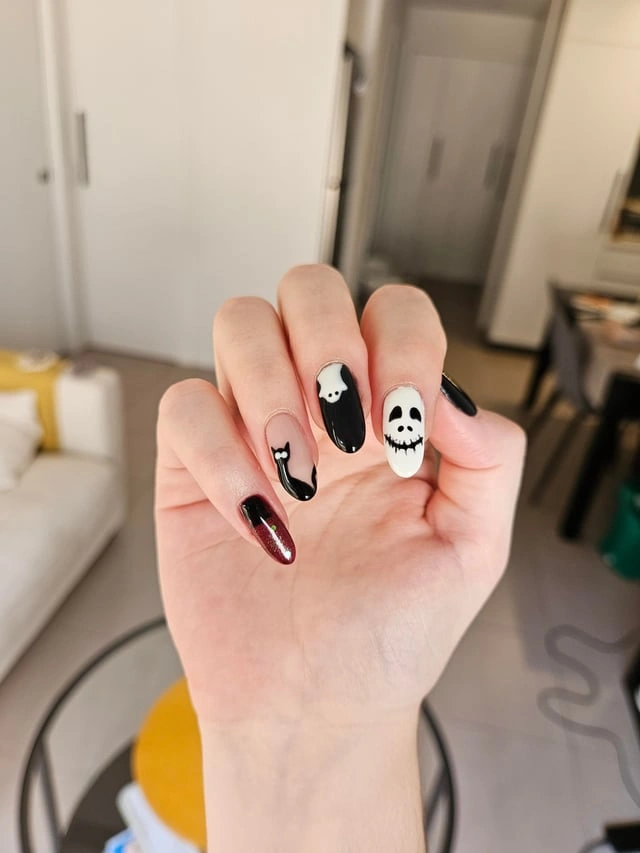


#1. Glossy Black Mini Ghost Nails
Glossy black nails set a dramatic base here, while tiny white ghost faces and a larger white skeleton-style accent break up the darkness. The deep burgundy shimmer on the pinky adds an unexpected flash of color that keeps the manicure from looking completely monochrome.
Best For — minimalists who want playful spooky details
Pro Tip — Use a fine nail art liner brush around 5–7 mm long, then cure each white detail for 60 seconds before adding top coat.
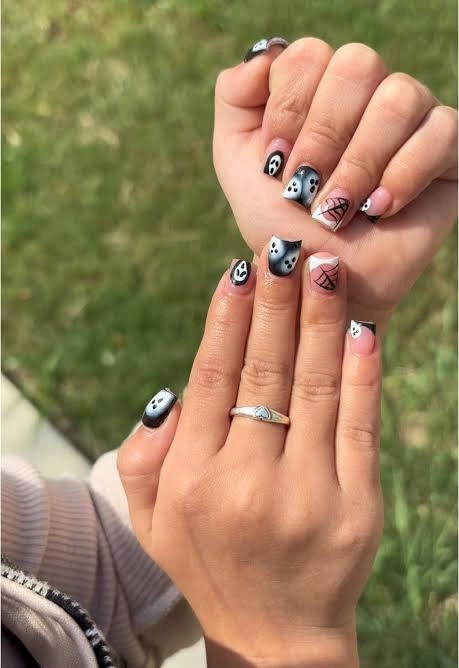
#2. Blush Gray Ghost Web Squares
This mismatched short-square set mixes soft blush pink with smoky gray, black edging, tiny ghost faces, and delicate spiderweb accents. Because each finger carries a slightly different motif, the manicure feels playful and handmade rather than overly matched.
Best For — short-nail lovers mixing soft spooky colors
Pro Tip — Make the ghost eyes with a 1.5–2 mm dotting tool, placing both dots before the black polish starts to set so their size stays even.
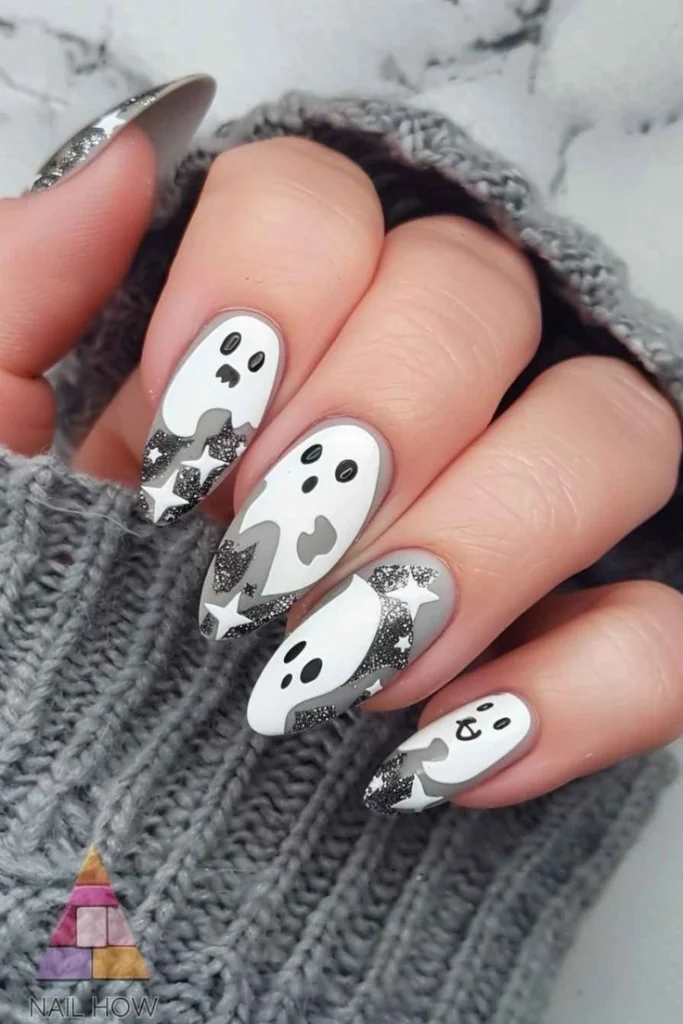
#3. Silver Star Ghost Coffin Nails
Long coffin nails become a full Halloween statement with oversized white ghosts floating over silver-gray tips filled with glittery stars. The chunky sparkle around the lower half of each ghost makes this set feel more party-ready than the softer designs on the list.
Best For — Halloween parties and glamorous statement manicures
Pro Tip — Apply two thin coats of silver glitter gel polish, curing each layer for 60 seconds before painting the white ghosts.
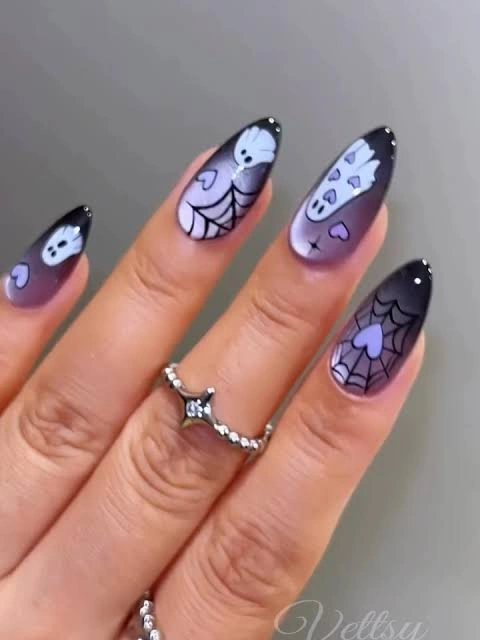
#4. Purple Ombre Ghost Web Stilettos
Unlike classic black-and-orange Halloween nails, this set fades smoky charcoal into lavender-purple across sharp stiletto tips. White ghosts, tiny hearts, and fine black spiderwebs create a dreamy haunted look, while the silver star ring beside the manicure complements the cool-toned palette beautifully.
Best For — purple lovers craving dreamy witchy drama
Pro Tip — Build the purple-to-black fade with a makeup sponge in three light passes rather than one heavy layer to avoid a visible transition line.
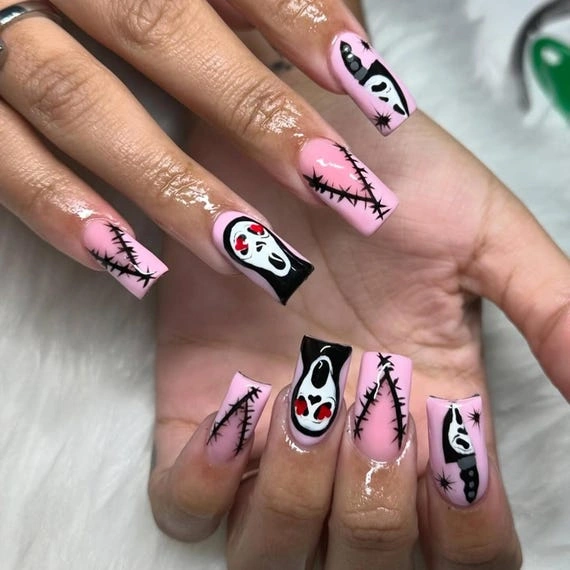
#5. Pink Scream Stitch Coffin Nails
This one goes bold with bubblegum-pink coffin nails covered in black stitched lines and dramatic white screaming-face accents. Tiny red details inside the masks sharpen the horror-movie mood, while the glossy pink background keeps everything surprisingly fun and feminine.
Best For — horror fans who love pink contrast
Pro Tip — Draw one long black stitch line first, then add the short cross-stitches at roughly 3–4 mm intervals for a cleaner sewn effect.
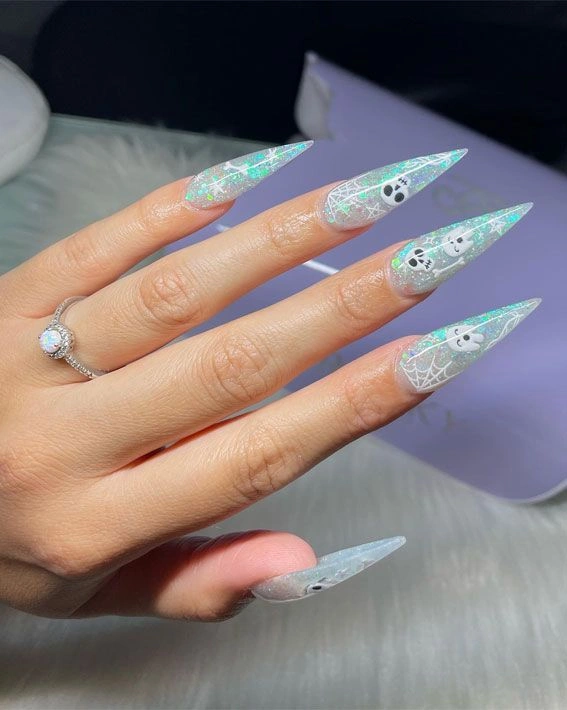
#6. Iridescent Spiderweb Ghost Stilettos
Long translucent stilettos shimmer with icy iridescent flakes, delicate white spiderweb lines, and tiny floating ghost faces. The holographic shine changes with the light, making this design feel almost frosted and celestial instead of traditionally dark or gothic.
Best For — long-nail lovers who want icy sparkle
Pro Tip — Press iridescent nail foil flakes into a tacky clear layer with silicone tweezers, leaving 1–2 mm around the edges so top coat can seal them fully.
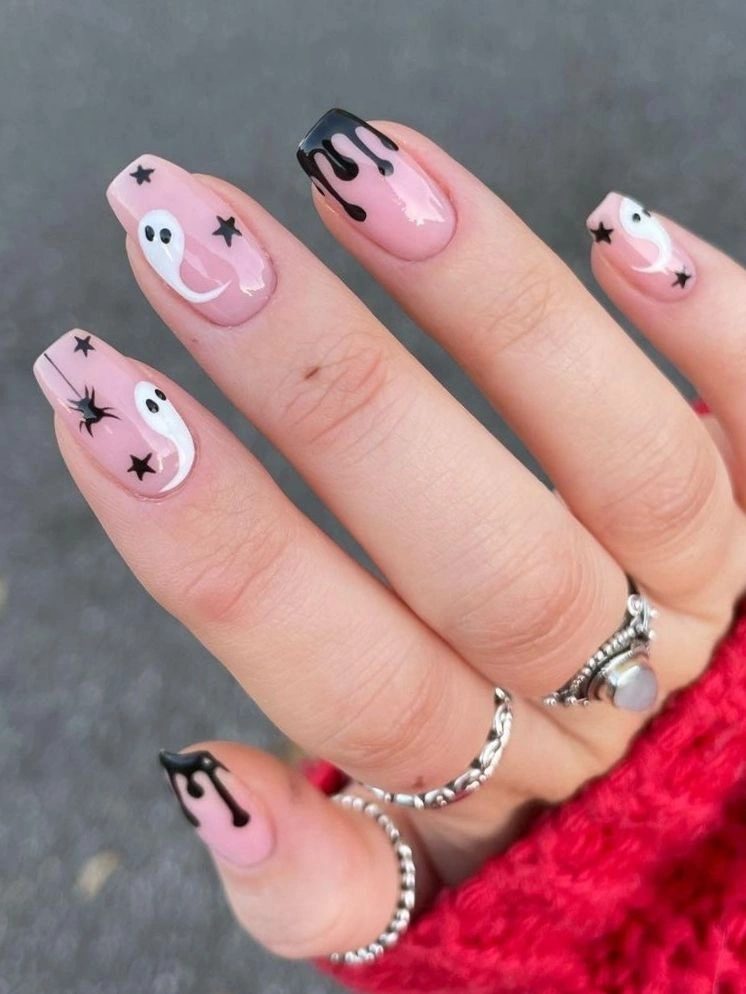
#7. Pink Ghost Drip Square Nails
A sheer pink base keeps these square nails soft, but the black melting tips, tiny stars, and white smiling ghosts instantly push them into Halloween territory. One finger carries the full dripping-black effect, giving the set a strong focal point without covering every nail in heavy detail.
Best For — cute Halloween outfits and casual parties
Pro Tip — Create three drip lengths on the accent nail—about 3 mm, 5 mm, and 7 mm—so the melting edge looks natural instead of perfectly symmetrical.
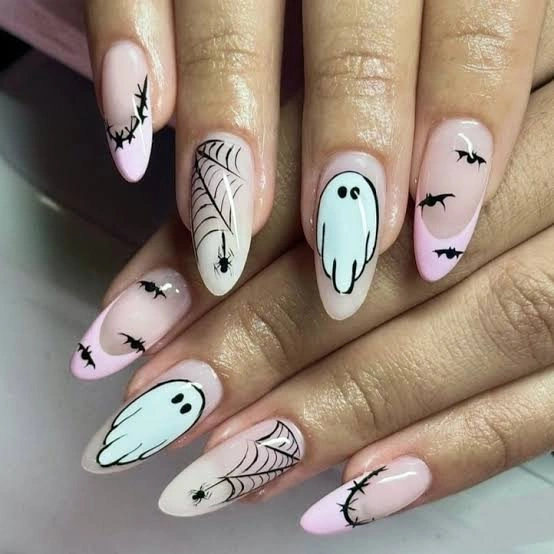
#8. Blush Ghost Web Almond Nails
Soft blush almond nails alternate between simple black bats, white ghosts, and airy spiderwebs for a Halloween manicure that still feels light. The almost-neutral pink background leaves plenty of negative space, so even the larger ghost accents never overwhelm the hand.
Best For — soft-goth fans who prefer almond nails
Pro Tip — A black-and-white nail liner gel gives better control for webs; draw three main spokes first, then connect them with curved lines.
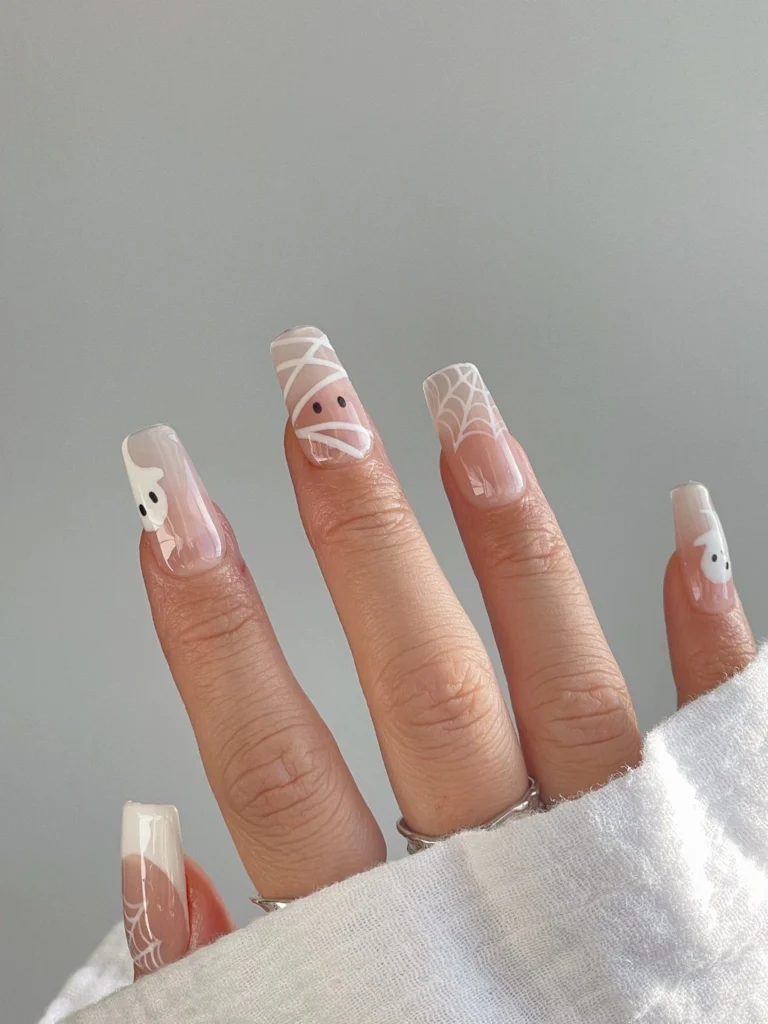
#9. Nude Mummy Ghost Coffin Nails
Picture a glossy nude coffin base decorated with creamy-white mummy wraps, wispy spiderweb tips, and tiny ghost faces peeking from the corners. The white-on-nude palette makes the Halloween artwork surprisingly understated, especially compared with the darker sets above.
Best For — neutral lovers wanting subtle Halloween detail
Pro Tip — Hold your striping brush near a 45-degree angle when painting the mummy bands, and vary each line by 1–2 mm so the wraps don’t look mechanically spaced.
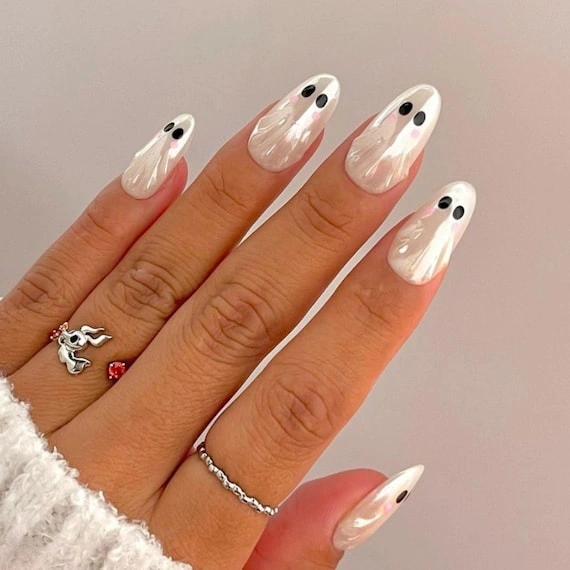
#10. Pearl White Floating Ghost Almonds
This pearly almond manicure turns each nail into a tiny floating ghost using a creamy translucent white finish and two simple black eyes. The barely-there pink undertone gives the ghosts a soft luminous glow, making this one of the sweetest options in the whole roundup.
Best For — minimalists who love cute ghost nails
Pro Tip — Use two thin coats of pearly white rather than one opaque coat, then add the eyes with a 2 mm dotting tool after the base is completely dry.
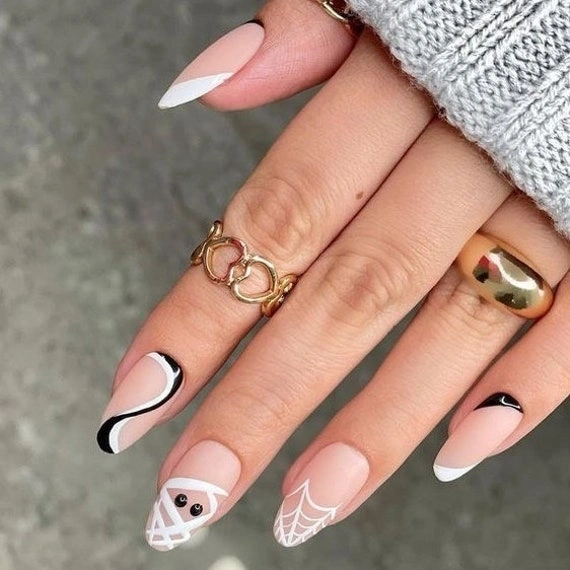
#11. Nude Mummy Web Almond Nails
Soft nude almond nails get graphic black-and-white curved French details, plus one adorable mummy face tucked inside a webbed tip. The metallic rings beside the manicure add warmth, which works especially well against the otherwise clean neutral color story.
Best For — chic Halloween looks with minimal color
Pro Tip — Mark the center of each French curve with one tiny dot first, then sweep outward toward both sides to keep the tips visually balanced.
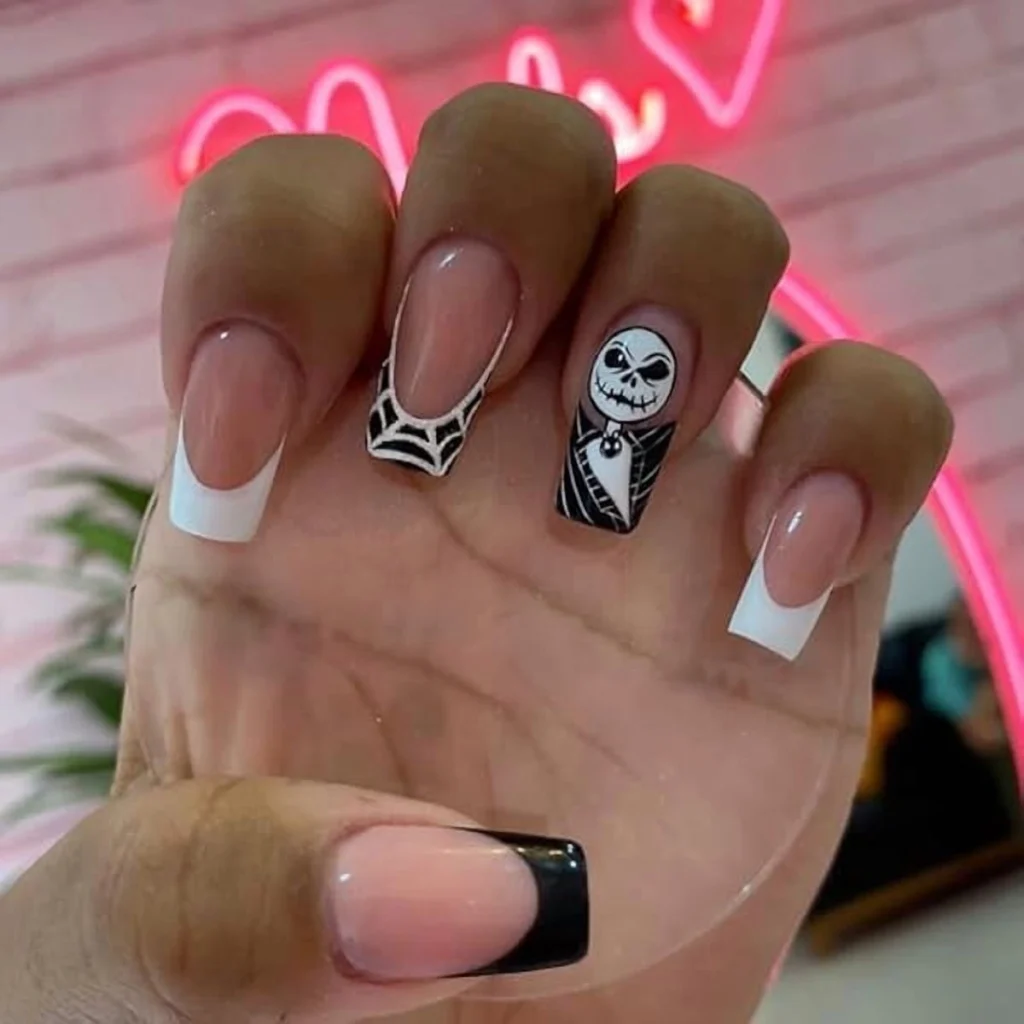
#12. Black French Skeleton Web Squares
Classic nude square nails become instantly spooky with crisp black French framing, a white spiderweb accent, and one detailed skeleton-face feature nail. The neon-pink glow in the background gives the black-and-white manicure a fun party atmosphere without changing the actual nail palette.
Best For — classic French fans wanting spooky drama
Pro Tip — Keep the black French edge about 2–3 mm wide on every finger before adding the accent artwork so the finished set still feels cohesive.
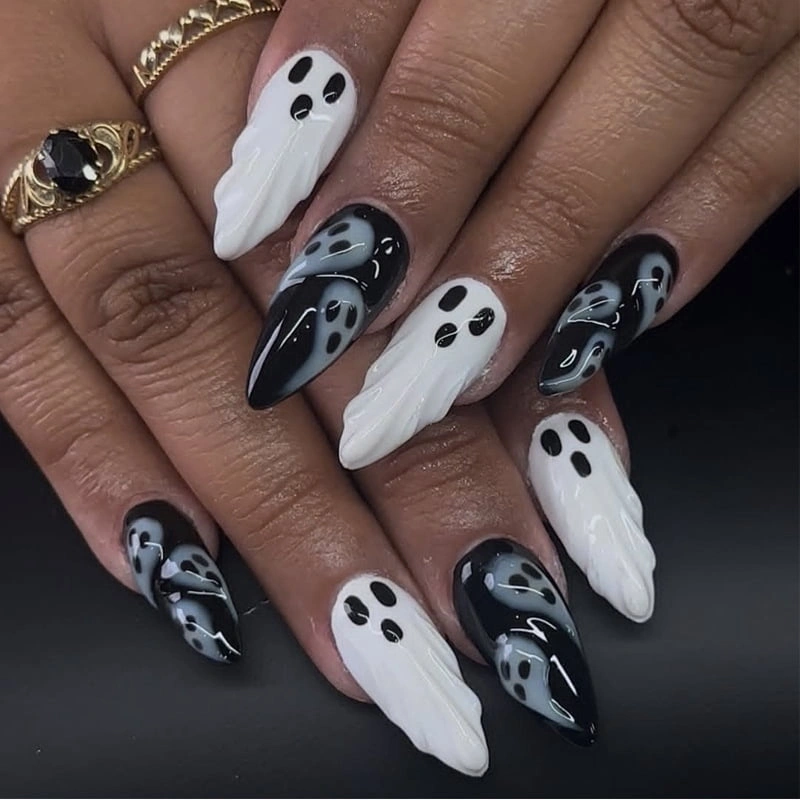
#13. 3D Black White Ghost Almonds
Raised white ghosts alternate with glossy black nails filled with smoky gray spirit shapes, creating a striking mix of dimension and contrast. The sculpted ridges running through the white ghosts are the standout detail, giving them a texture that flat painted nail art can’t copy.
Best For — texture lovers wanting dramatic Halloween nails
Pro Tip — Build each raised ghost with one small bead of clear builder gel, sculpt the ridges with a silicone tool, and cure for a full 60 seconds before painting white.
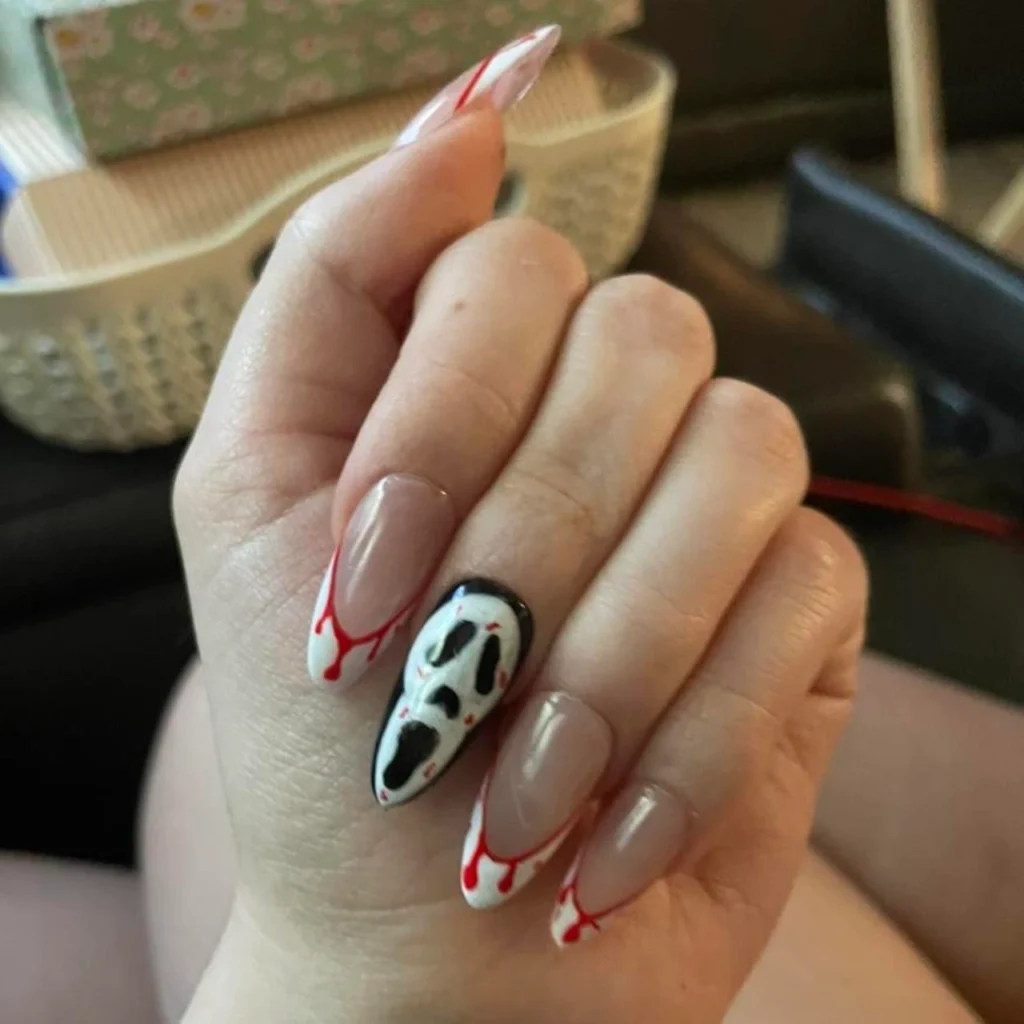
#14. Nude Blood Drip Scream Almonds
A warm nude base keeps most of this almond manicure clean, while sharp white French tips drip with bright red “blood” along their edges. One screaming-mask accent nail brings the horror theme into focus, making the whole set feel instantly recognizable without covering every finger in artwork.
Best For — horror-movie parties and bold costumes
Pro Tip — Use a nail art dotting tool to place the rounded ends of each red drip, then pull the polish upward with a 7 mm liner brush.
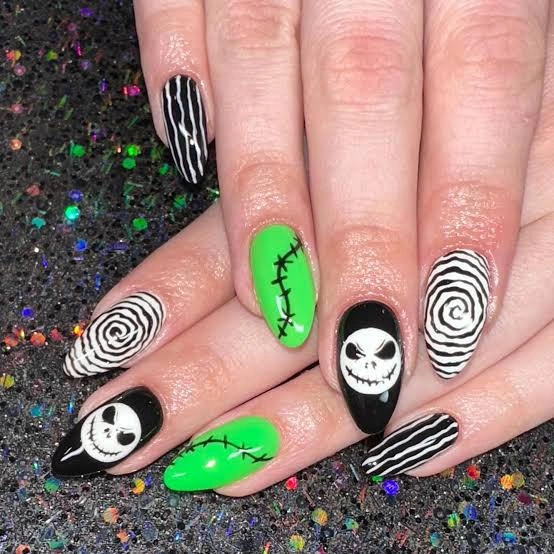
#15. Neon Green Skeleton Stripe Nails
Neon green, glossy black, hypnotic white spirals, stitched lines, and skeleton faces make every nail in this set look completely different. The electric-green accent fingers are especially eye-catching against the surrounding black-and-white artwork, giving the manicure an almost comic-book intensity.
Best For — maximalists who love neon Halloween color
Pro Tip — Paint one thin white coat under neon green and let it dry completely; the pale base makes fluorescent polish appear noticeably brighter in two coats.
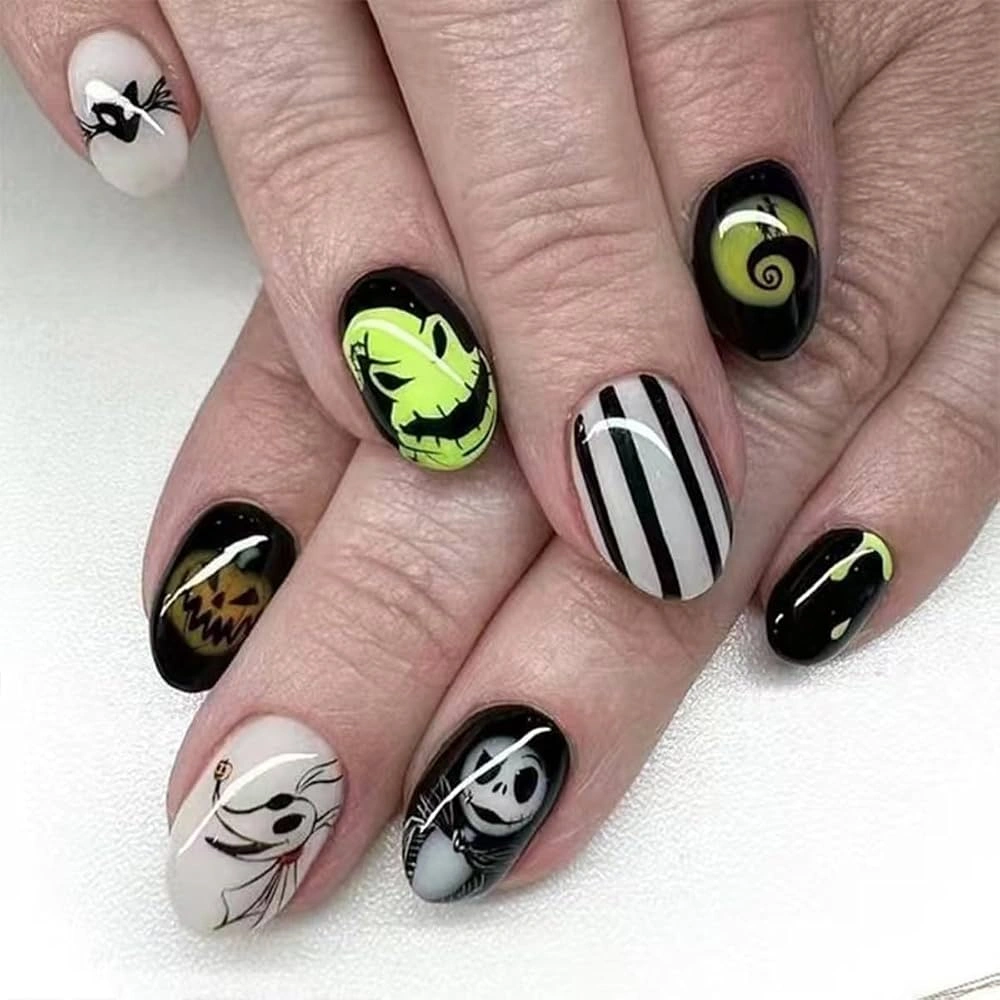
#16. Lime Black Spooky Character Nails
Short rounded nails mix glossy black, radioactive lime green, character-inspired faces, and one bold black-and-white vertical stripe accent. That striped center nail acts like a visual pause between the illustrated characters, keeping the intentionally mismatched manicure from becoming too busy.
Best For — character-art fans with shorter natural nails
Pro Tip — Paint the striped nail with a 1 mm liner brush, starting with the center stripe and working outward so the spacing stays even on both sides.
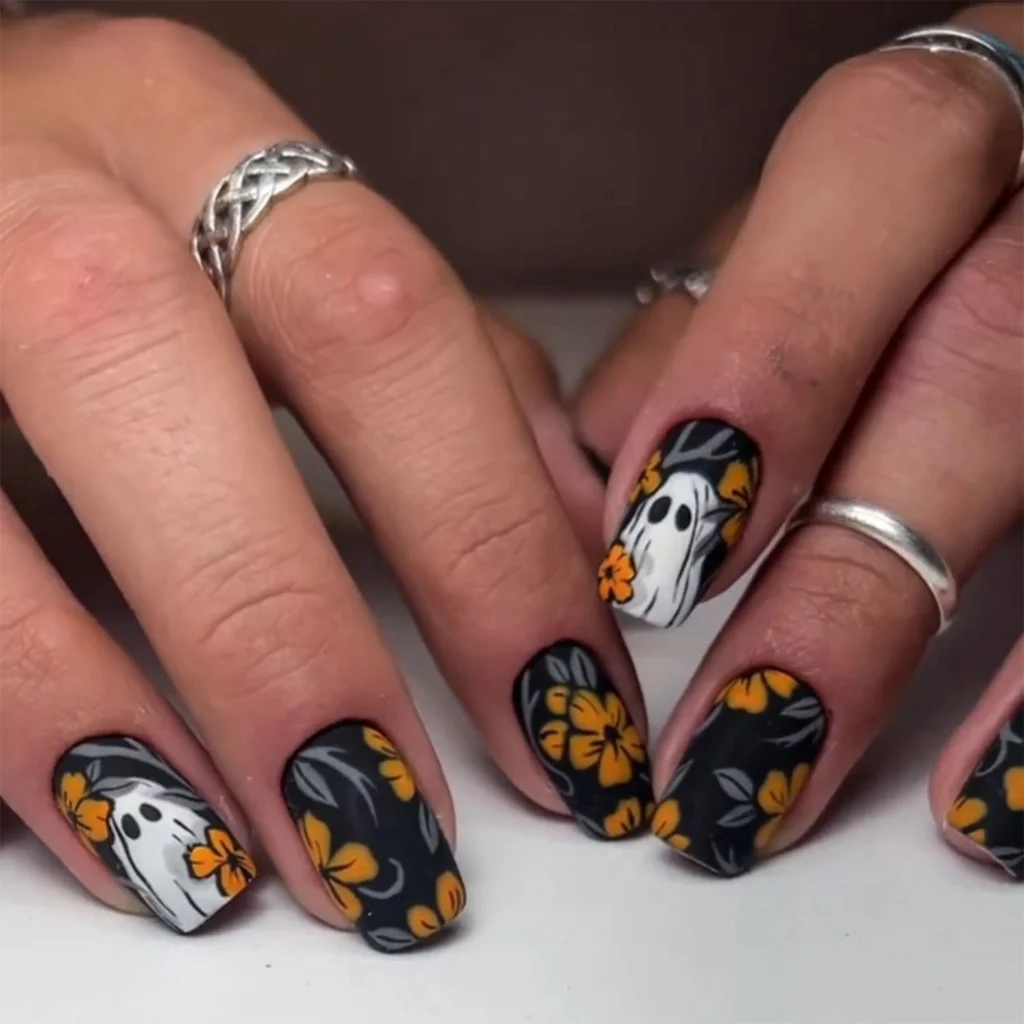
#17. Black Orange Floral Ghost Nails
Deep black nails covered in burnt-orange flowers create an autumnal base, while playful white ghosts peek between the blooms on select fingers. It’s one of the most seasonal designs here because the warm floral palette feels just as appropriate for October foliage as it does for Halloween night.
Best For — autumn lovers wanting floral Halloween nails
Pro Tip — Use a five-dot flower method with a 1.5 mm dotting tool, leaving roughly 1 mm between petals so the orange blooms stay defined over black.
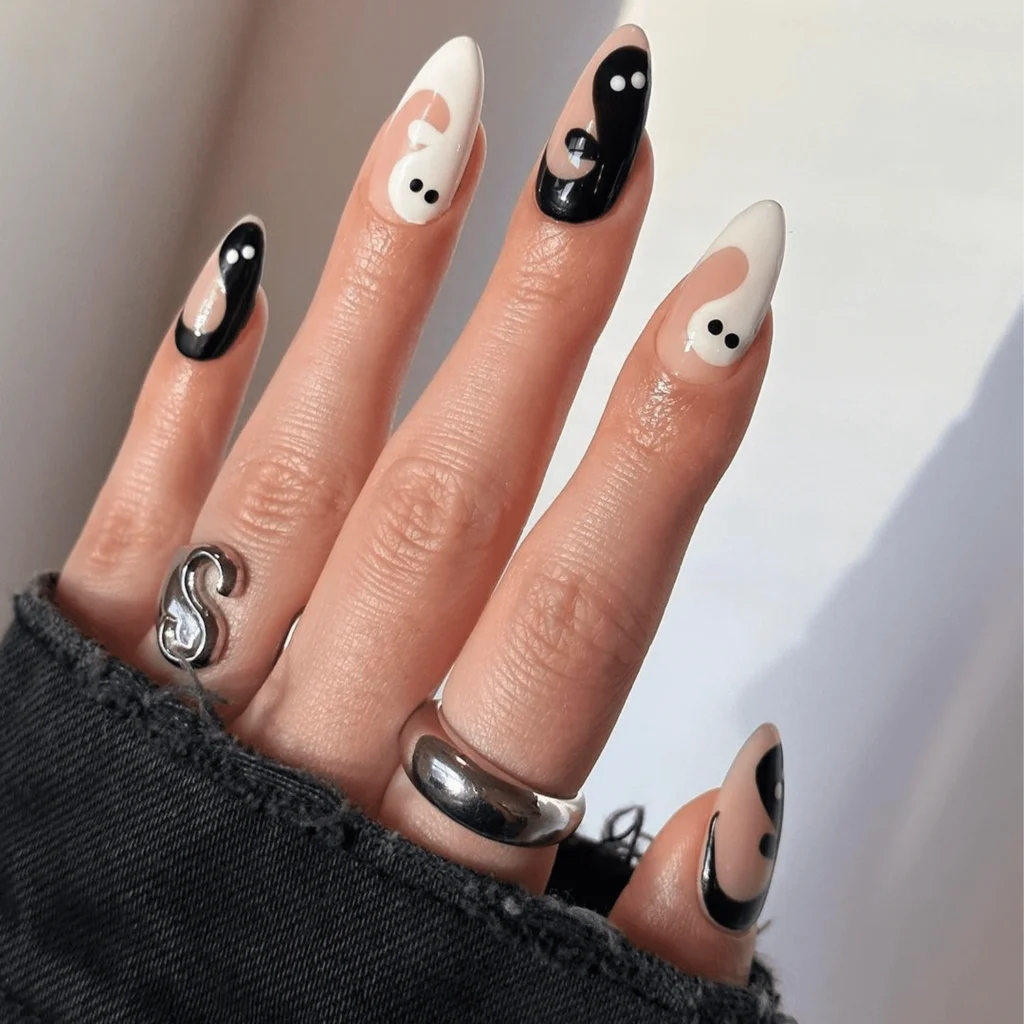
#18. Yin-Yang Ghost Swirl Almond Nails
Black and white shapes curl around a nude almond base like miniature yin-yang symbols, with simple dot eyes turning each curve into a ghost. The generous negative space and chunky silver rings make this manicure look especially modern, graphic, and easy to pair with everyday outfits.
Best For — trend lovers wanting graphic ghost nails
Pro Tip — Paint and cure the white swirl for 60 seconds before adding black beside it; separating the colors prevents their curved edges from bleeding together.
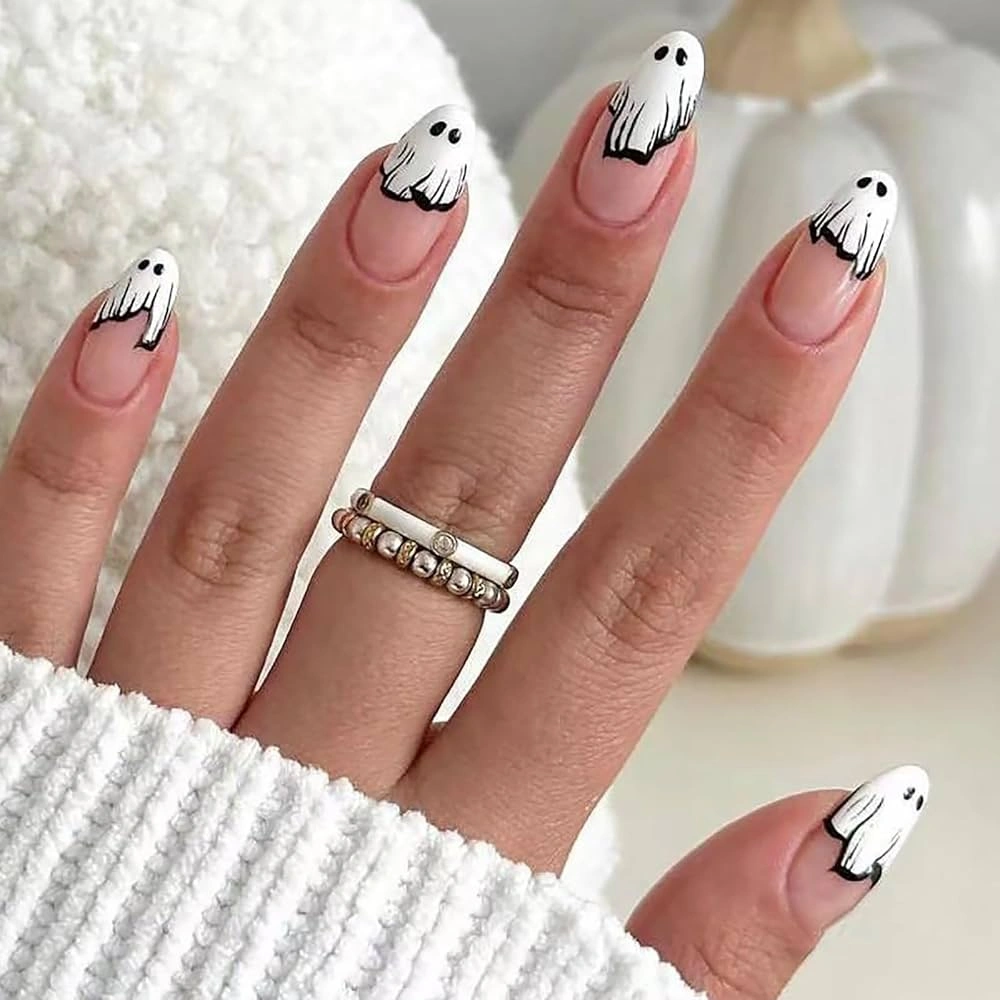
#19. Minimal White Ghost French Tips
These sheer nude almond nails finish with white ghost-shaped French tips, complete with tiny black eyes and loose sketch-like edges. The fluffy white sweater in the photo reinforces the cozy October mood, making this simple manicure feel sweet, seasonal, and very wearable.
Best For — beginners wanting clean, cute Halloween nails
Pro Tip — If freehand painting feels tricky, apply ghost nail art stickers 1–2 mm below the free edge and seal them with two thin top-coat layers.
How to Choose the Right Nail Design
With 19 ghost Halloween nail ideas to choose from, start with the details that affect how the manicure will actually look and feel on your hands.
- Nail shape — Long coffin and stiletto nails give spiderwebs, 3D ghosts, and detailed horror artwork more room. Short almond, oval, and square shapes look especially polished with small ghost accents or French-tip designs.
- Skin tone — Nude, blush, black, and white are easy foundations because you can adjust the base shade to suit your undertone. Warmer skin tones can also look beautiful beside burnt orange and lime accents, while silver, lilac, and icy finishes create a striking contrast on cooler undertones.
- Occasion — A costume party gives you room for blood drips, neon green, and oversized character art. For dinner, work events, or a more formal celebration, try the minimalist ghost French tips or black-and-white swirls; you can also borrow ideas from these elegant black nail designs.
- Skill level — Beginners will have the easiest time with ghost stickers, dot eyes, French tips, and simple drip designs. Detailed faces, symmetrical spiderwebs, 3D gel art, and character illustrations usually require a steady liner brush or a salon appointment.
What You’ll Need
You don’t need every nail-art product available, but a few dependable basics make these tiny ghost details much easier to control.
Useful for ghosts, spiderwebs, stitches, and tiny outlines.
Creates high-contrast tips, eyes, outlines, and backgrounds.
The essential shade for painted ghosts and web details.
Makes evenly sized ghost eyes, flowers, and drip ends.
A beginner-friendly shortcut for ghosts, bats, and webs.
Seals small details and creates a smooth finished surface.
Pro Tips for a Long-Lasting Manicure
Prep Before You Paint
Wipe each nail with isopropyl alcohol after shaping and cuticle prep. Give the surface about 30 seconds to air-dry before base coat so oil and moisture don’t interfere with adhesion.
Work in Thin Art Layers
Tiny ghosts and spiderwebs stay sharper when you use two thin passes instead of one thick blob of polish. With gel, cure the first detail layer for 30–60 seconds before adding another color beside it.
Seal the Free Edge
After covering the nail surface, swipe your top-coat brush once across the very edge of each nail. That small step helps protect detailed French tips from wearing away first.
Protect Raised Details
For decals, glitter flakes, or 3D ghost art, leave about 1 mm of clear space near the cuticle and sidewalls. Seal around the artwork carefully so bulky edges don’t catch on hair or clothing.
If you plan to keep your manicure beyond Halloween weekend, softer black, white, nude, and glitter combinations can transition nicely into the cooler season. These winter nail ideas are useful if you want more cold-weather inspiration afterward.
Frequently Asked Questions
Q: What are the easiest ghost Halloween nails for beginners?
A: Start with a sheer nude base and one simple white ghost on each accent nail. A dotting tool can create the eyes, while stickers or decals let you skip detailed freehand work entirely.
Q: Can ghost Halloween nails look cute instead of scary?
A: Absolutely. Use blush pink, pearl white, nude, or lavender bases and give your ghosts rounded shapes and tiny dot eyes rather than dramatic horror details.
Q: What colors work best with ghost Halloween nail art?
A: Black and white give you the strongest classic contrast, but pink, purple, orange, silver, nude, and neon green can all change the mood. Pick one dominant base color and let the white ghost art act as the repeating element.
Q: How can I make ghost Halloween nail art last longer?
A: Start on clean, oil-free nails, let every painted detail dry or cure fully, and finish with top coat across both the surface and free edge. Avoid picking at raised decals or glitter because once an edge lifts, the surrounding top coat can peel with it.
Recommended Product
Halloween Ghost Nail Art Sticker & Decal Set
★★★★☆ Highly rated on Amazon
A mixed ghost-and-web decal set helps you recreate the tiny motifs shown here without freehanding every detail.
As an Amazon Associate, we earn from qualifying purchases.
Final Thoughts
Ghost Halloween nails can be as subtle as one tiny white spirit on a nude tip or as dramatic as neon color, blood drips, glitter, and 3D artwork. Pick the design that fits your nail length and comfort level, then make the details your own.
Which of these nail looks are you trying first? Save this post to Pinterest so you can come back to it whenever you need fresh nail inspo!

Hi, I’m Jessica, the creator behind Unique Lash & Nails Katy.
I created this website for anyone who loves beautiful nails as much as I do. Here, I share trendy nail designs, seasonal manicure ideas, easy nail care tips, honest product recommendations, and step-by-step guides to help you create salon-worthy nails at home. Whether you’re looking for everyday inspiration or your next favorite nail trend, I hope you’ll find something you love.