17 Frankenstein Halloween Nails You’ll Want to Copy
Frankenstein nails are the one Halloween manicure that’s spooky, cute, and endlessly customizable all at once. Whether you love a moody black-and-green palette or a bright neon monster mash, there’s a stitched-up design here for you.
We rounded up 17 of the best Frankenstein-inspired looks, from beginner-friendly stitch lines to full airbrushed portrait art. Here’s why we’re so excited about these picks.
✦ Our Top Picks at a Glance
Best Overall — Green and Black Ombre Coffin Frankenstein Nails
Best for Beginners — Classic Green Stitched Nails with Gold Glitter Accent
Most Trendy — Classic Horror Movie Monster Nail Art
Best for Special Occasions — Airbrushed Frankenstein and Bride Portrait Nails
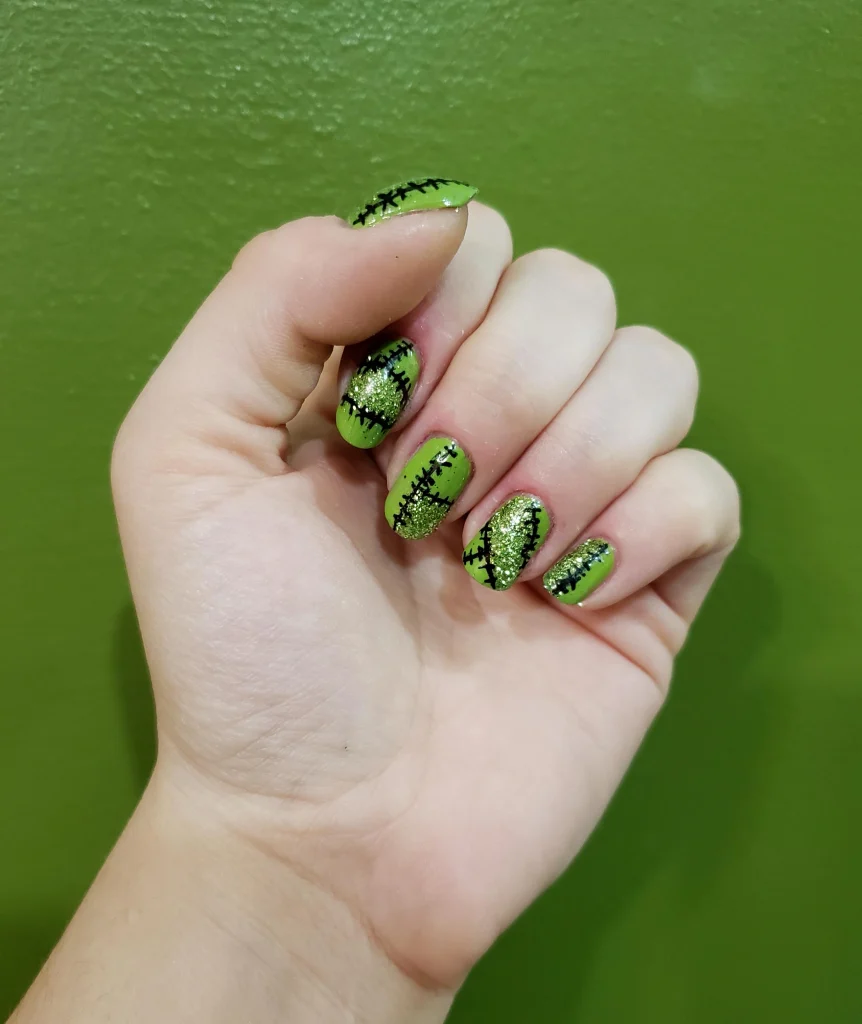


#1. Classic Green Stitched Nails with Gold Glitter Accent
A bright apple-green base gets crisscrossed with thin black stitch lines that curve right along the edge of each nail. One finger gets swapped out for chunky gold glitter, so the whole set still catches the light at a party.
Best For — First-timers wanting an easy Frankenstein look
Pro Tip — Use a thin nail art detail brush and drag the black polish in short strokes rather than dots for cleaner stitch lines.
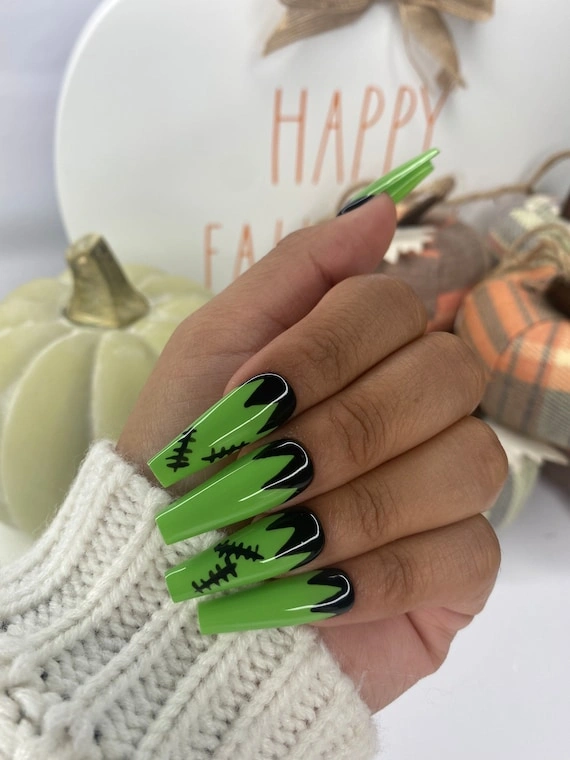
#2. Green and Black Ombre Coffin Frankenstein Nails
Long coffin nails fade from lime green into a deep black tip, with a thin white outline keeping the edge crisp. It’s dramatic without being over-the-top, so it still looks polished at a Halloween party or a night out.
Best For — Anyone who loves long, statement-making nails
Pro Tip — Sponge the black over the green while it’s still slightly tacky for a smooth ombre blend instead of a hard line.
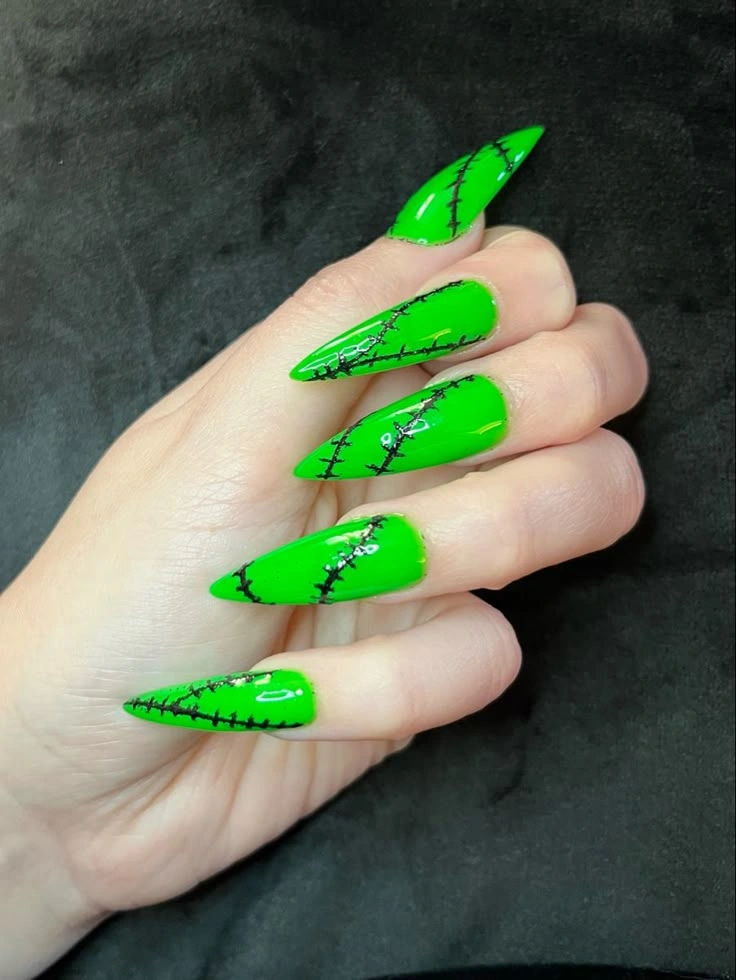
#3. Neon Green Stiletto Frankenstein Stitch Nails
Sharp stiletto tips in electric neon green make this look pop the second you raise your hand. Fine black stitches run diagonally across each nail, giving it that unmistakable stitched-together monster feel.
Best For — Bold nail lovers who want maximum drama
Pro Tip — Neon polish needs a white base coat underneath, or the color can look dull and streaky.
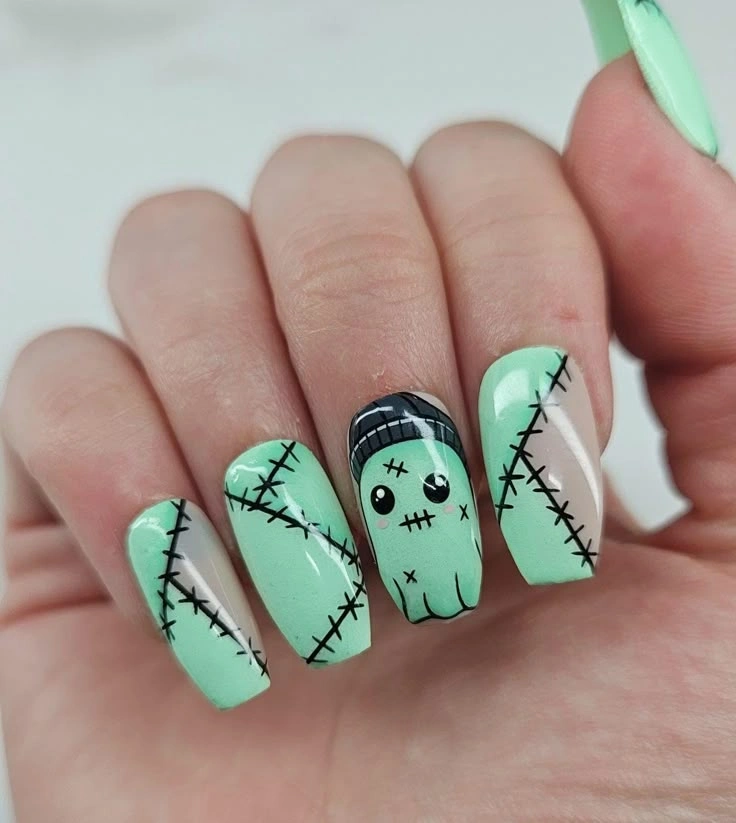
#4. Mint Green Coffin Nails with Kawaii Frankenstein Face
Soft mint replaces the usual neon green, giving this set a much sweeter vibe. One accent nail features an adorable cartoon Frankenstein face with a little bolt hairstyle, while the rest keep it simple with stitch details.
Best For — Fans of cute, kawaii-style Halloween nails
Pro Tip — Sketch the cartoon face lightly in pencil-thin lines first, then go over it with a detail brush so mistakes are easy to fix.
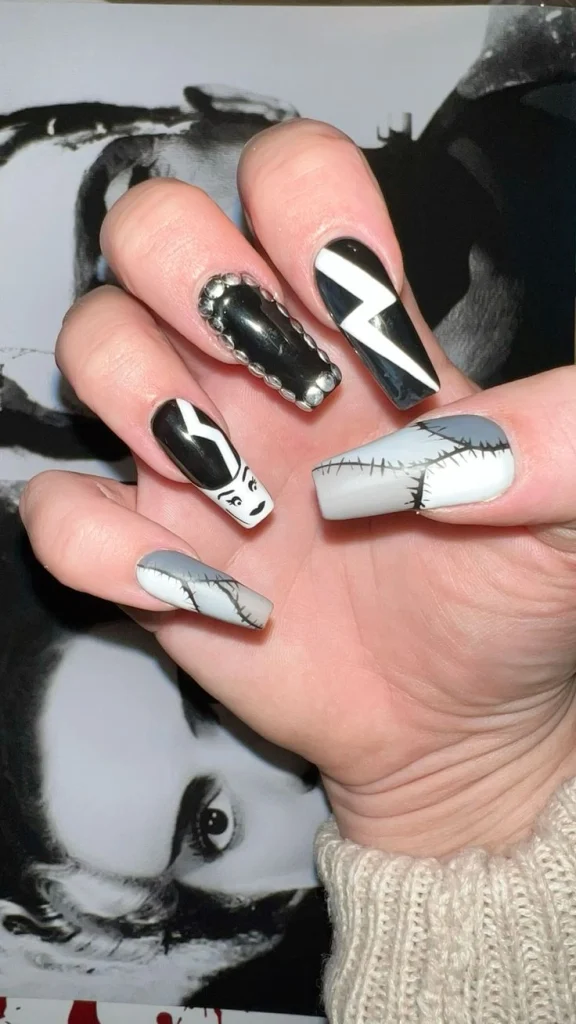
#5. Black and White Bride of Frankenstein Nail Art
This set mixes it up with a lightning bolt nail, a studded 3D accent, a portrait nail, and a grey stitched ombre finger. It’s moodier and more editorial, closer to old horror-movie posters than cutesy cartoon art.
Best For — Gothic and classic-horror nail art fans
Pro Tip — Press small flat-back rhinestones into wet top coat instead of glue so they sit flush against the nail.
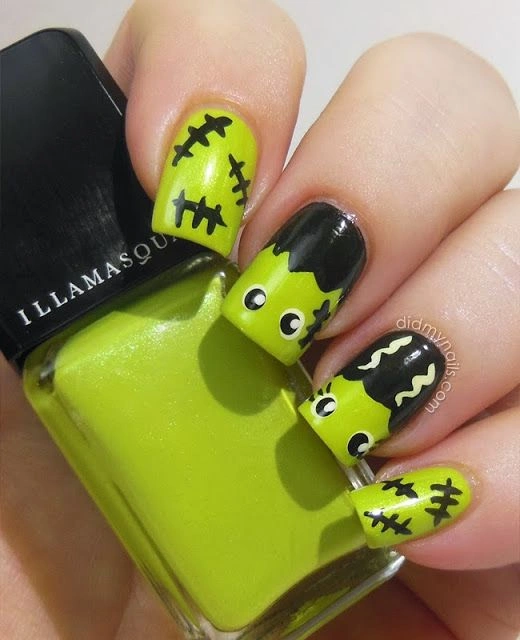
#6. Neon Lime Frankenstein Face Nails
Short, practical square nails in a punchy lime shade get topped with a simple cartoon monster face split across two fingers. The rest of the set sticks to clean stitch marks, keeping the whole look wearable for work or school.
Best For — Anyone who needs Halloween nails that still look office-appropriate
Pro Tip — Split the face design across two adjacent fingers so it only fully “connects” when your hand is closed.
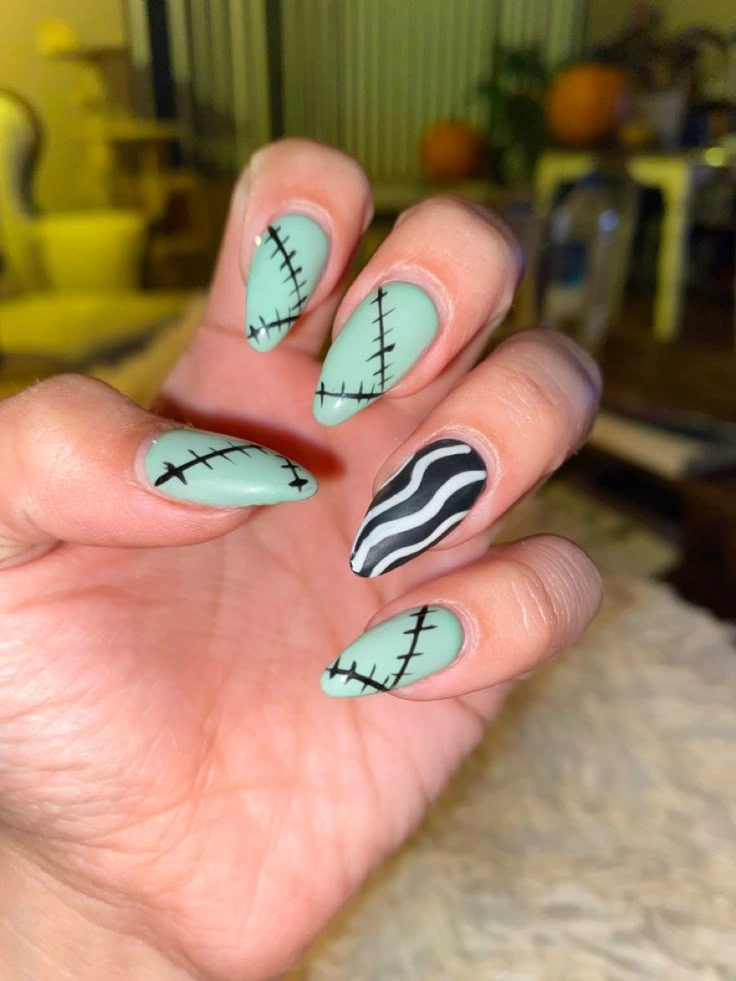
#7. Mint Stitched Nails with Wavy Stripe Accent
Pale mint stitched nails get a fun twist with one black-and-white wavy striped accent nail. It’s a subtle nod to spooky-stripe icons without going full costume, which makes it easy to wear well past October 31st.
Best For — Pastel-goth lovers who want something soft but spooky
Pro Tip — Freehand the wavy lines slowly in one continuous stroke rather than lifting your brush partway through.
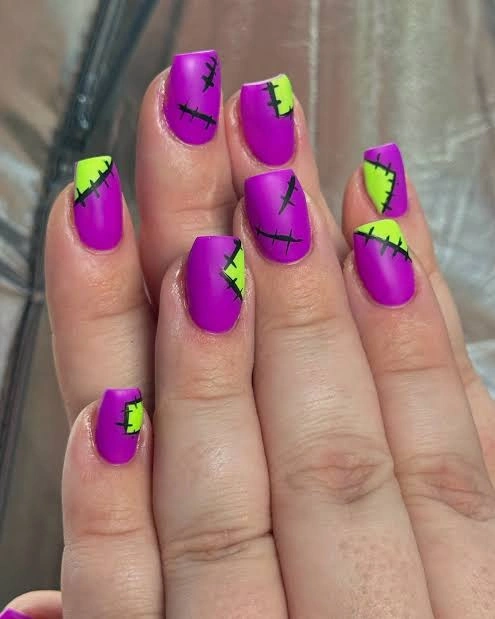
#8. Matte Purple and Neon Green Two-Tone Stitch Nails
Matte purple takes over most of the nail, with a small neon-green corner peeking through and black stitches tying the two colors together. The matte finish makes the whole set feel a little more grown-up and moody.
Best For — Fans of matte finishes and non-traditional color combos
Pro Tip — Apply a matte top coat only after the stitch details are fully dry, or the black can smudge into the finish.
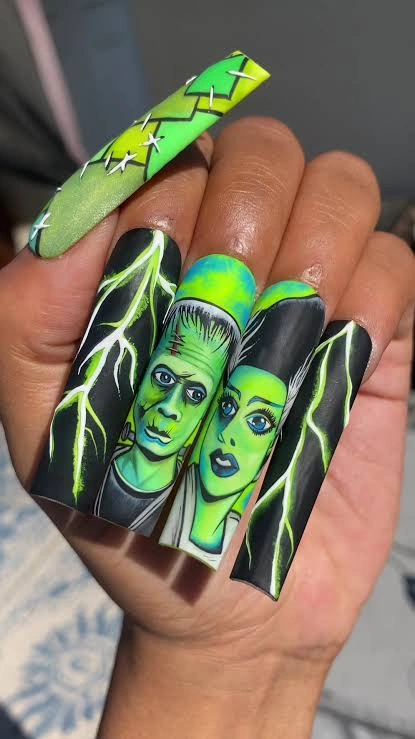
#9. Airbrushed Frankenstein and Bride Portrait Nails
This is Frankenstein nail art at its most advanced, with full airbrushed portraits of the monster and his bride surrounded by jagged lightning bolts. It’s the kind of set you’d book with a nail artist for a Halloween party or photoshoot.
Best For — Special occasions and serious nail art collectors
Pro Tip — If you’re attempting this at home, practice the portraits on nail wheels with a nail airbrush kit before touching real nails.
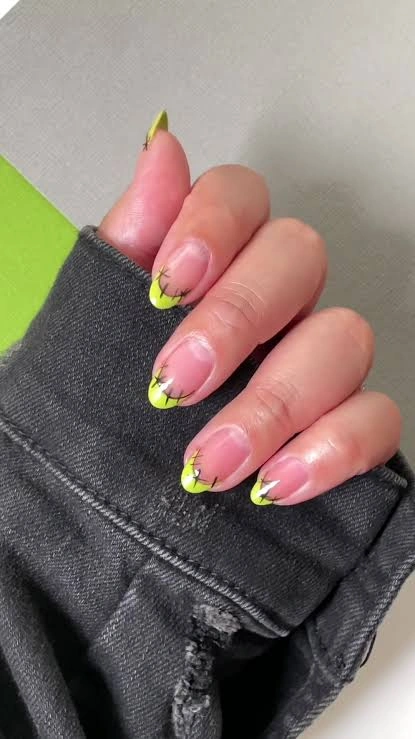
#10. Sheer Nude Nails with Neon Frankenstein Tips
A sheer, natural base keeps most of the nail bare, while a neon-yellow-green French tip carries tiny black stitch marks along the smile line. It’s a great option if you want a hint of Halloween without covering your whole nail.
Best For — Minimalists who still want to celebrate the season
Pro Tip — Use French tip guide stickers to keep the neon smile line even on both hands.
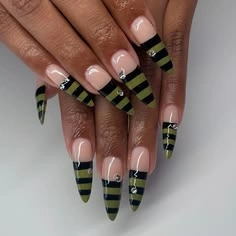
#11. Olive and Black Striped Nails with Rhinestone Accents
Olive-green and black stripes run down a sheer nude base, finished off with tiny rhinestones scattered near the cuticle line. It reads more monster-adjacent than literal stitches, which makes it a nice palette-cleanser in the middle of a stitch-heavy set.
Best For — Anyone who wants Halloween colors without the horror imagery
Pro Tip — Keep stripes thin and evenly spaced by taping off sections with thin striping tape before painting.
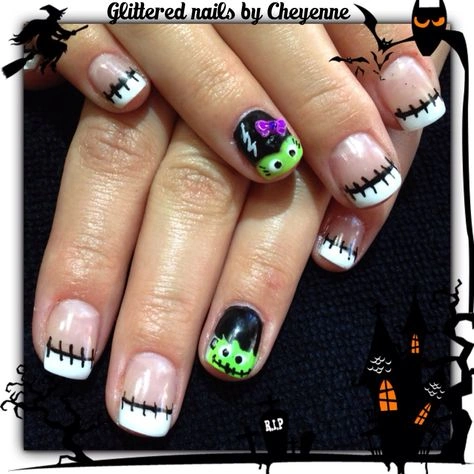
#12. Classic French Tip Nails with Frankenstein Bride Accent
A crisp white French tip gets a jagged, stitched top line instead of the usual smooth curve, giving classic French nails a spooky makeover. One accent nail shows off a sweet cartoon bride of Frankenstein with a little pink bow.
Best For — French tip fans who still want a Halloween twist
Pro Tip — Paint the jagged tip line first in one steady zigzag motion, then fill in stitches after the white is fully dry.
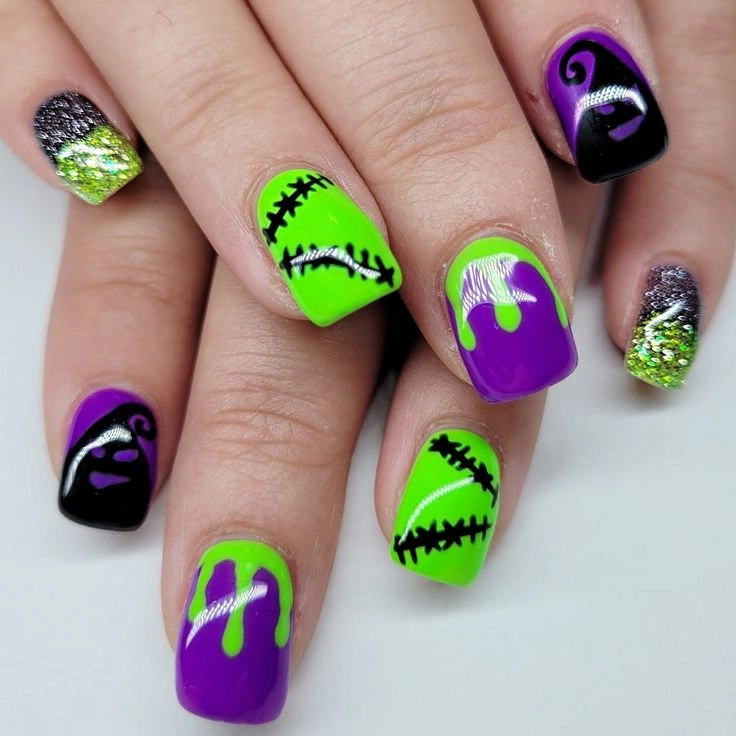
#13. Green and Purple Drip Frankenstein Nails with Glitter
Neon green and deep purple alternate across the set, with dripping “slime” detailing and classic stitch marks layered on top. Two glitter ombre accent nails add extra sparkle so the whole hand feels cohesive instead of busy.
Best For — Anyone who wants a full monster-mash color palette
Pro Tip — Let each drip fully dry before adding the next layer, or the “slime” edges will blur together.
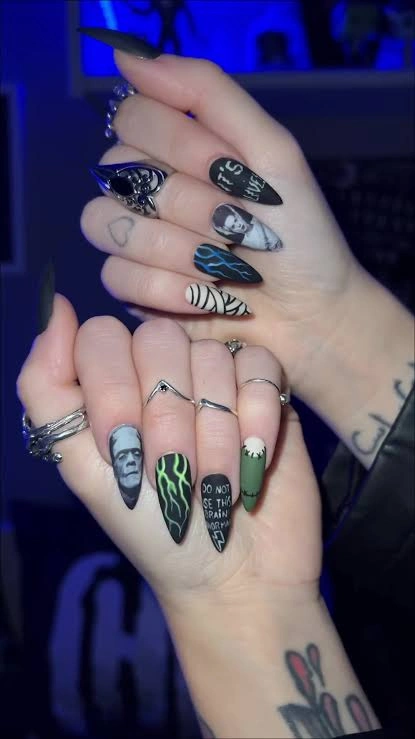
#14. Classic Horror Movie Monster Nail Art
This set turns each nail into its own tiny movie poster, mixing a black-and-white monster portrait, jagged lightning, mummy wrap, and bold “IT’S ALIVE” lettering. It’s the pick for anyone who wants their nails to actually tell a story.
Best For — Classic horror movie fans and detail-oriented nail artists
Pro Tip — Practice lettering on paper first, since text is the hardest part of this design to get proportional on a small nail.
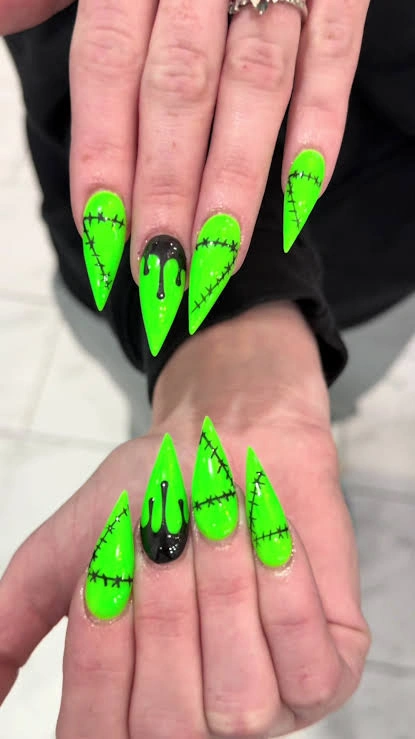
#15. Neon Green Stiletto Nails with Black Drip Accent
Long neon-green stilettos with fine black stitching are broken up by one glossy black accent nail dripping down like melted wax. The contrast between the bright green and the shiny black drip makes this set feel extra polished.
Best For — Long nail lovers who want one standout accent finger
Pro Tip — Finish the drip nail with a high-shine glossy top coat to make the black really stand out against the matte-ish green.
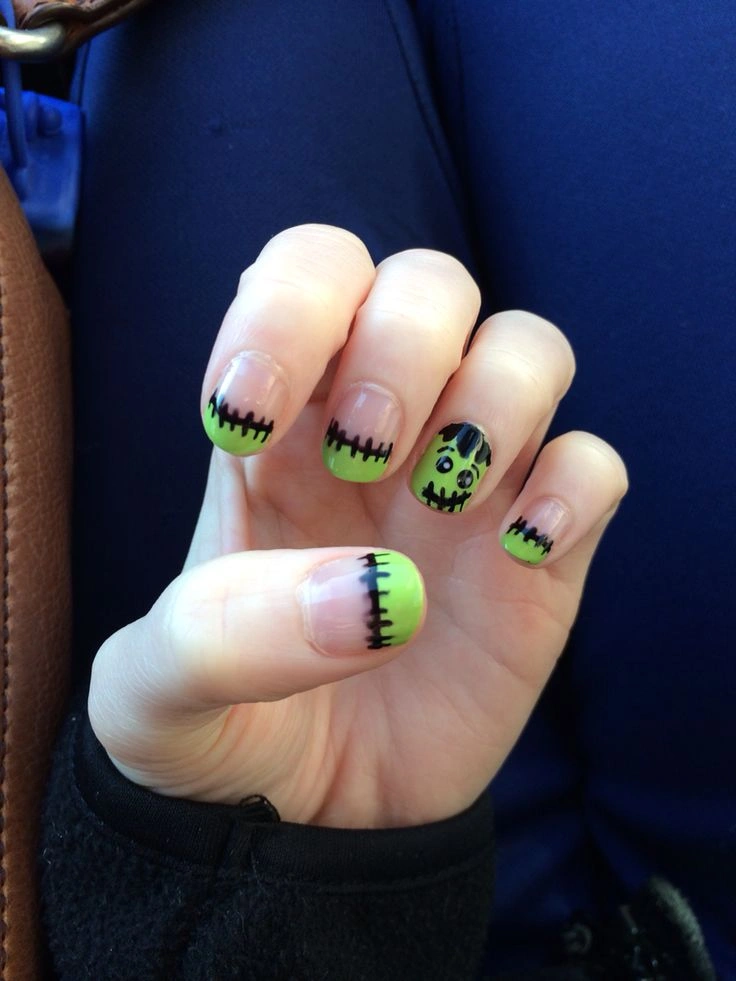
#16. Sheer Nude Nails with Green Stitched French Tips
Short, practical nails keep a bare nude base with just the tips painted green and stitched, plus one accent nail with a simple monster face. It’s an easy design to remove or grow out without an awkward in-between stage.
Best For — Low-maintenance nail wearers and short-nail fans
Pro Tip — Keep the tip line short and close to the free edge so the design grows out gracefully between fills.
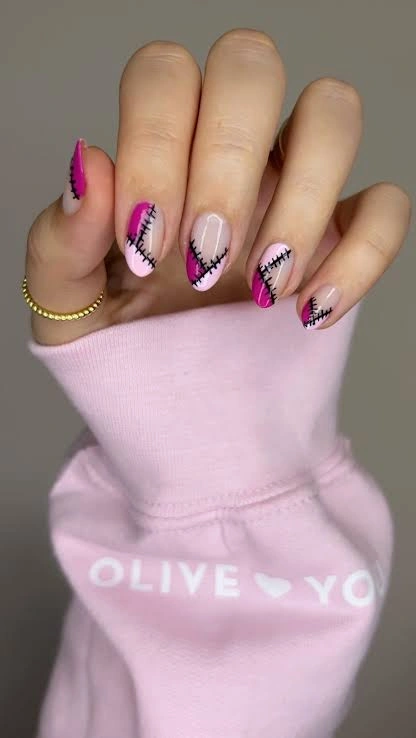
#17. Pink and Nude Color Block Stitched Nails
Hot pink and soft nude sections meet in diagonal color-block shapes, with thin black stitches running along each seam. It’s a girly, unexpected way to bring Frankenstein energy into a set that barely reads as “spooky” at first glance.
Best For — Anyone who wants a subtle, color-forward take on the trend
Pro Tip — Map out the color-block shapes with a pencil on paper first so both hands end up matching.
How to Choose the Right Nail Design
With 17 designs to pick from, narrowing it down comes down to a few simple factors. Here’s what to think about before you commit to a look.
- Nail shape — Stiletto and coffin shapes show off dripping and portrait designs best, since there’s more surface area to work with. Shorter almond or square shapes suit simple stitch lines and French tips much better.
- Skin tone — Neon greens tend to pop hardest against deeper skin tones, while mint and sage greens sit beautifully on lighter tones. If you’re unsure, a nude or French-tip base is the safest starting point for any skin tone.
- Occasion — Save the airbrushed portraits and full monster-movie sets for parties or photos. For work or school, lean toward the short, stitched French tips or the color-block option instead.
- Skill level — Stitch marks and simple color blocking are beginner-friendly with just a striping brush. Portraits, lettering, and airbrush work are best left to a nail tech unless you’ve practiced a lot.
What You’ll Need
Most of these designs use the same handful of tools. Here’s what to stock up on before you start.
Covers both neon and mint bases used across the majority of these looks.
Essential for clean stitch lines, lightning bolts, and any fine linework.
A thinner formula makes stitch marks and outlines easier to control.
Used for the gold and green glitter accent nails throughout this list.
Keeps stitched French tips and color-block edges even on both hands.
Seals in every design and keeps drip and portrait details from chipping.
A quick option if you want the long coffin or stiletto looks without extensions.
Pro Tips for a Long-Lasting Manicure
Seal Every Layer
Cap the free edge of the nail with each coat of polish, including your top coat. This one habit alone can add several extra days of wear before tips start chipping.
Let Details Fully Cure
Stitch marks, drips, and lettering need to dry completely before you add a top coat. Rushing this step is the most common reason fine details smear.
Moisturize Cuticles Daily
Dry cuticles cause polish to lift faster at the base. A drop of cuticle oil each night keeps the whole manicure looking fresh longer.
Wear Gloves for Chores
Dish soap and cleaning products break down top coat quickly. Gloves protect intricate designs like the airbrushed portraits and drip accents especially well.
Frequently Asked Questions
Q: What colors work best for Frankenstein nails?
A: Classic neon or mint green is the go-to base, paired with black stitching. Purple, black-and-white, and even pink color-block versions all work well too.
Q: How do you paint stitch marks on nails?
A: Use a thin detail brush loaded with black polish and drag short diagonal lines crossing a central seam. Practicing on paper first makes the spacing much more even.
Q: Can I do Frankenstein nail art with short nails?
A: Absolutely, simple stitch lines and French tip designs actually work great on short nails. Save the more detailed portrait and drip designs for longer shapes.
Q: How long does Halloween nail art usually last?
A: With regular polish and a solid top coat, expect around five to seven days before chipping starts. Press-ons or gel versions can last closer to two weeks.
Recommended Product
Nail Art Detail Brush Set
★★★★☆ Highly rated on Amazon
A good detail brush set makes stitch lines, lettering, and drip details so much easier to control, no matter which design on this list you try first.
As an Amazon Associate, we earn from qualifying purchases.
Final Thoughts
From simple stitch lines to full airbrushed portraits, there’s a Frankenstein nail design here for every skill level and style. Halloween nail art doesn’t have to be complicated to look impressive.
Which of these nail looks are you trying first? Save this post to Pinterest so you can come back to it whenever you need fresh nail inspo!

Hi, I’m Jessica, the creator behind Unique Lash & Nails Katy.
I created this website for anyone who loves beautiful nails as much as I do. Here, I share trendy nail designs, seasonal manicure ideas, easy nail care tips, honest product recommendations, and step-by-step guides to help you create salon-worthy nails at home. Whether you’re looking for everyday inspiration or your next favorite nail trend, I hope you’ll find something you love.