17 Eyeball Halloween Nails That’ll Give Everyone Chills
If you want Halloween nails that actually stop the scroll, eyeballs are your move. They’re creepy, they’re a little bit funny, and they photograph like nothing else in your Pinterest feed.
Below you’ll find 17 real eyeball nail looks, from tiny hand-painted irises to full 3D bloodshot charms. Whether you’re doing these yourself or bringing screenshots to your nail tech, there’s a design here for every skill level.
✦ Our Top Picks at a Glance
Best Overall — Nude Glass 3D Eyeball Charms
Best for Beginners — Red-Vein White Blue-Dot Eyes
Most Trendy — Cracked Onyx Dragon-Eye Stiletto
Best for Special Occasions — Ruby Gloss Big Blue Eye Duo
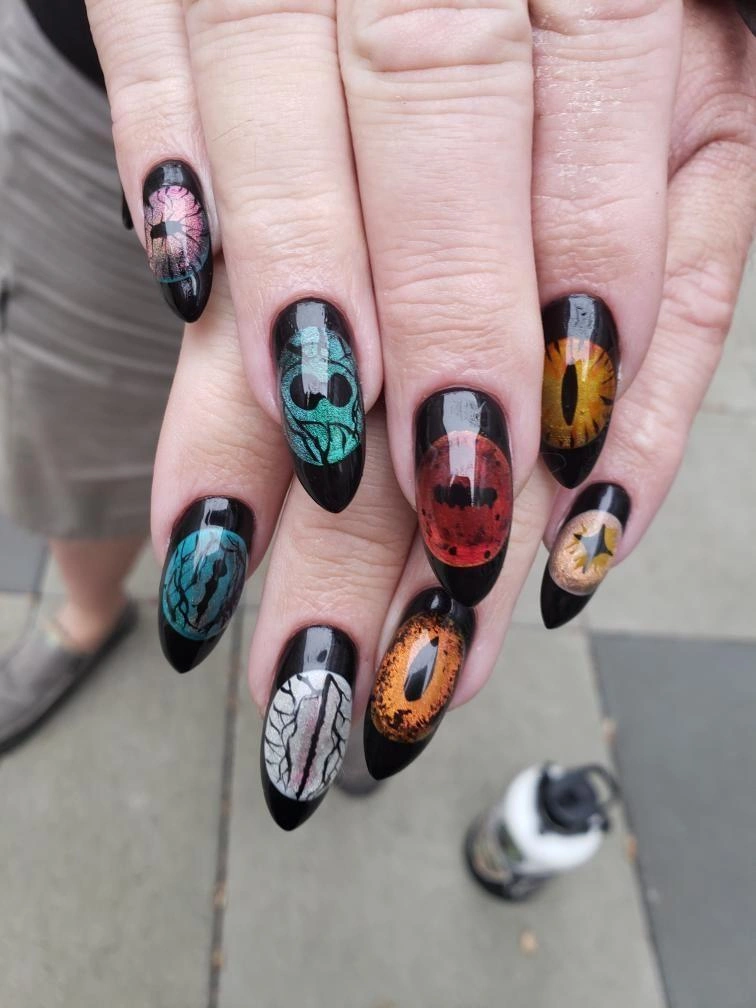


#1. Cracked Onyx Dragon-Eye Stiletto
Picture a full set of glossy black stilettos, each nail hiding a different creature’s eye — teal, amber, deep red, gold. No two nails on this hand match, and that’s exactly the point.
Best For — nail art lovers who want maximum variety on one hand
Pro Tip — sketch each iris in pencil on paper first, then use a fine detail brush at a 45° angle so the color sits in smooth curved strokes instead of choppy lines.
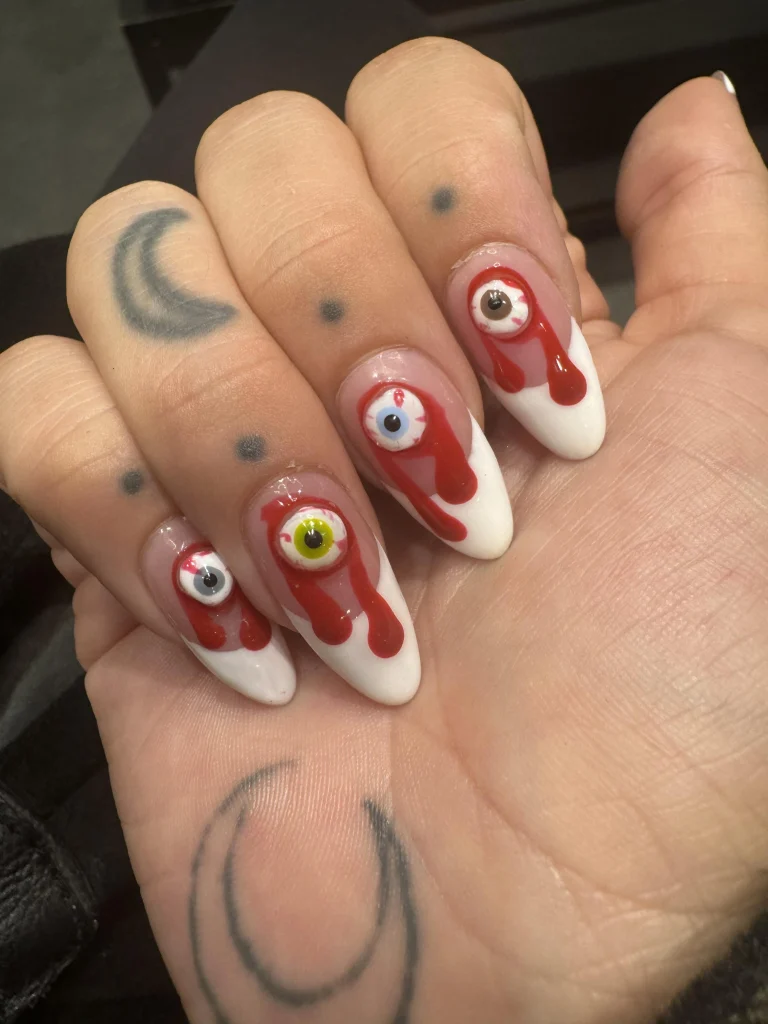
#2. Ombre Drip 3D Bloodshot Eyes
This one’s for anyone who wants their manicure to genuinely startle someone. Each nail fades from clear to white at the tip, with a raised 3D eyeball charm sitting right where the “blood” pools thickest.
Best For — Halloween parties where you want the loudest hands in the room
Pro Tip — set your 3D eyeball charms into wet gel and cure for a full 60 seconds so they don’t pop off when you’re pulling on gloves later.
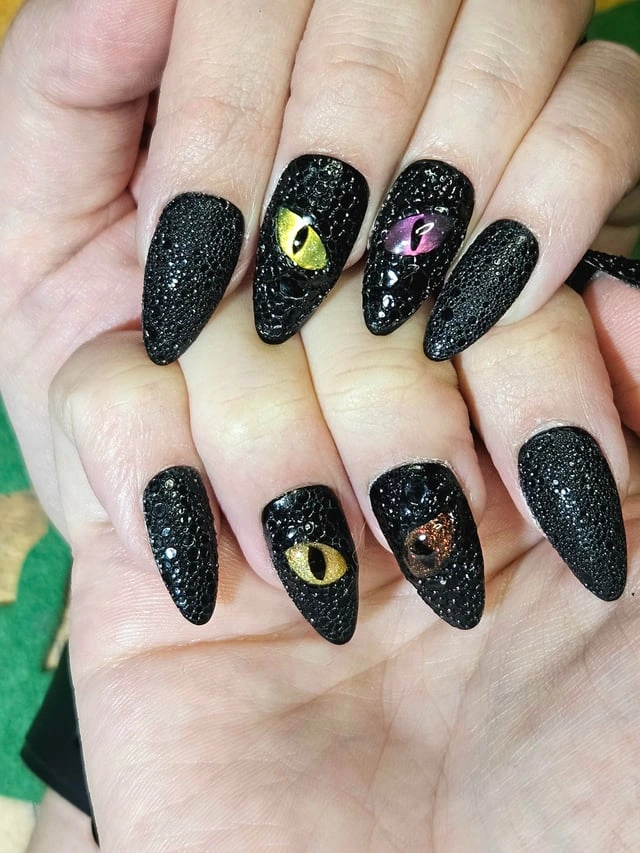
#3. Textured Onyx Cat-Eye Accent
Unlike the smoother finishes on this list, this look leans into texture — the black base has a pebbled, almost reptilian feel under the light. Just two accent nails carry slit-pupil cat eyes in green, purple, and gold.
Best For — a subtler spooky look that still reads as intentional
Pro Tip — apply your caviar beads or texture powder while the base coat is still slightly tacky so they grip without sliding.
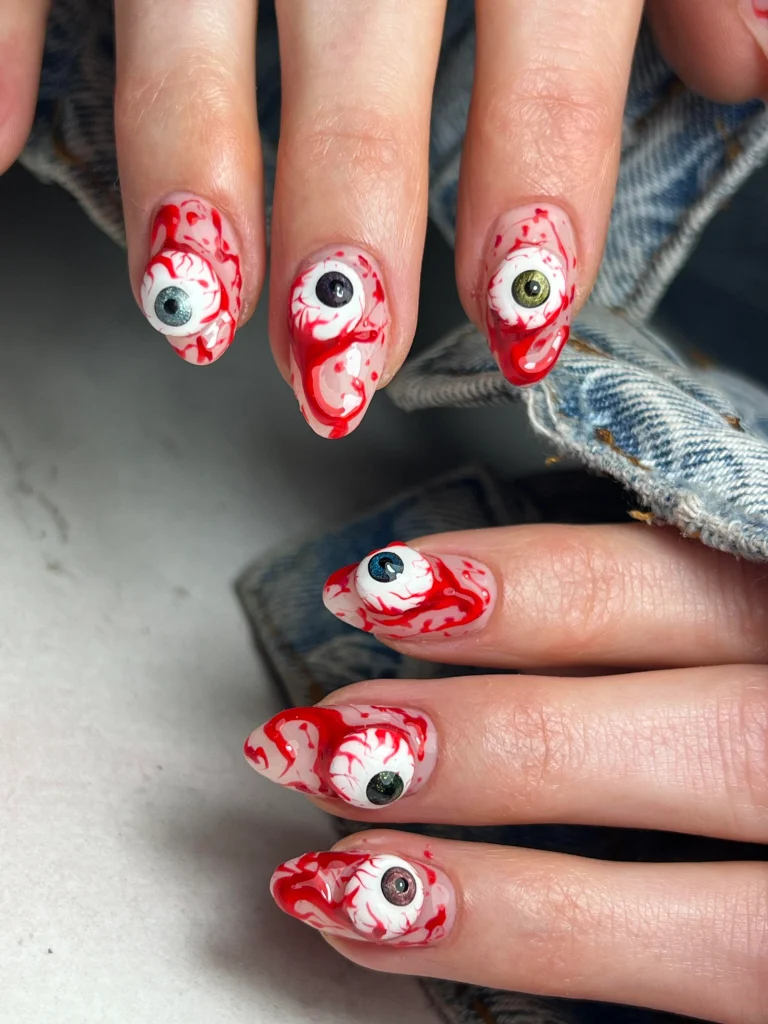
#4. Nude Glass 3D Eyeball Charms
This is the design that convinced us eyeball nails aren’t just for the hardcore horror crowd. A clean nude base lets the raised eyeball charms and thin red streaks do all the talking, no bulky color to distract from the detail.
Best For — people who still want their nails to look “wearable” on November 1st
Pro Tip — mix your red gel with a single drop of black before painting the drip lines; it keeps the “blood” from reading candy-apple bright under flash photos.
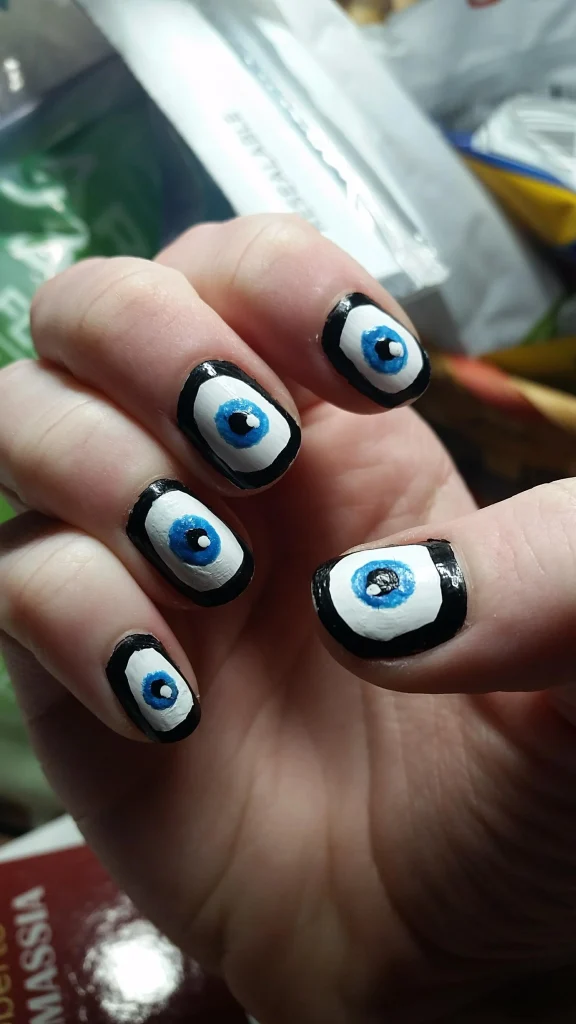
#5. Blocky Black-Rimmed Blue Cat-Eyes
Feeling more cartoon than horror movie? This one’s for you. Short square nails get a thick black outline and a bold blue iris, so each nail looks like a single wide-open cartoon eye staring back.
Best For — short-nail girlies who still want a statement design
Pro Tip — outline the black border first with a size 000 detail brush, let it dry for 2 minutes, then fill the white so your edges stay crisp instead of bleeding together.
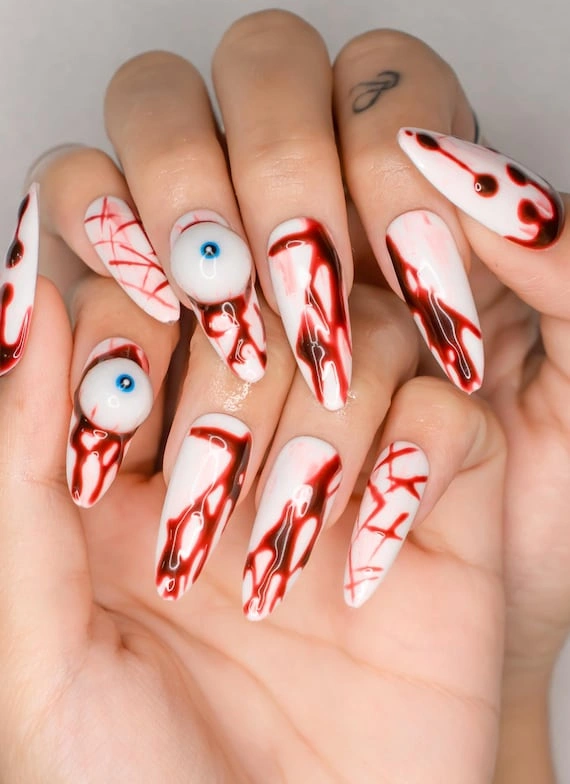
#6. White Base Blood-Web Eyeball
Here’s why this one stands out: instead of drips, the “blood” is painted as thin, spidery lines that crisscross the whole nail like cracked glass. One accent nail keeps it simple with just a solitary blue-eyed iris.
Best For — anyone drawn to a more artistic, less “gross” take on horror nails
Pro Tip — use a striping brush loaded thin and drag it in one continuous motion per line; stopping and restarting is what causes those clumpy, uneven “veins.”
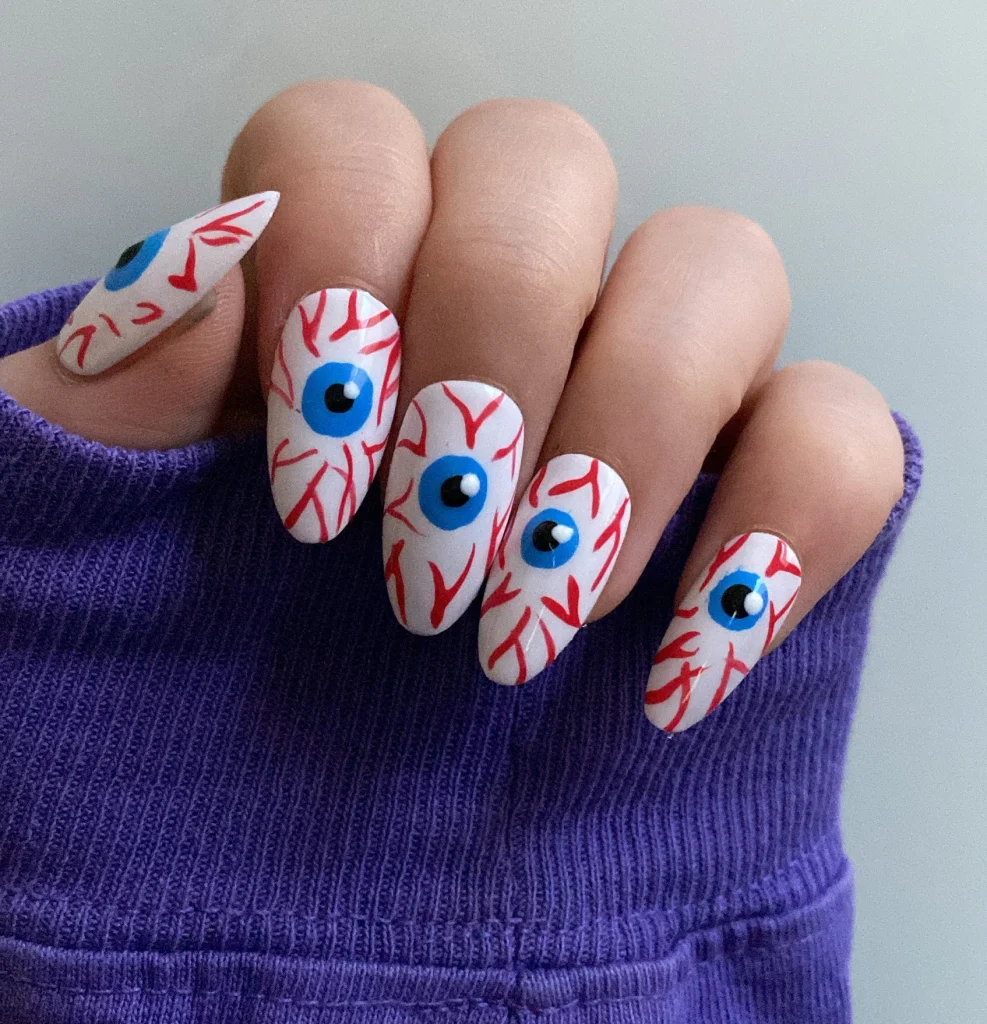
#7. Matte White Bloodshot Blue Iris
This is for the free spirits who want their whole hand to feel like one unified look. Every nail here follows the exact same bloodshot pattern, matte finish and all, with a bright blue iris centered dead-middle.
Best For — a cohesive, full-set look for someone new to nail art
Pro Tip — finish with a matte top coat and let it dry for 5 full minutes before touching anything, matte formulas smudge far easier than gloss.
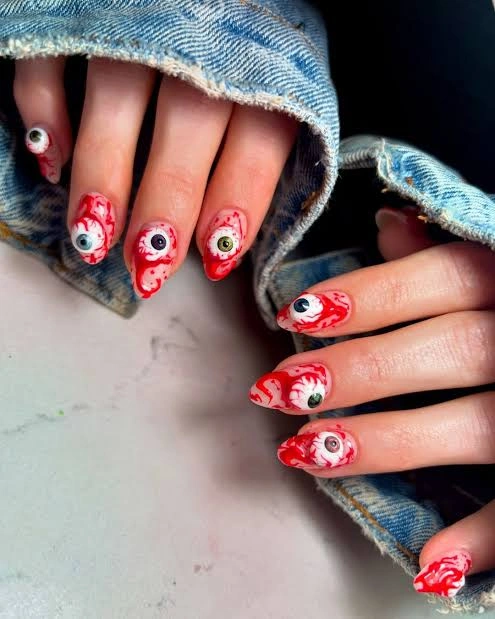
#8. Marbled Crimson Drip Eyeballs
Unlike the flatter blood designs on this list, this one has real dimension. Deep red marbling swirls under raised eyeball charms, giving the whole nail a wet, glossy, almost 3D look.
Best For — fans of high-shine, almost liquid-looking manicures
Pro Tip — drag a thin needle tool through wet red and white polish in a zigzag to get that marbled effect, working fast before the polish starts to skin over at around the 90-second mark.
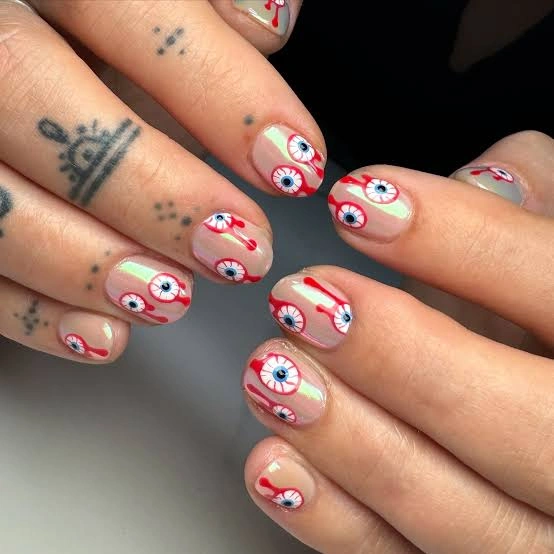
#9. Glazed Nude Dripping Eyeball
Short and round nails prove eyeball art doesn’t need length to work. A shimmery nude glaze sits underneath one simple hand-painted eyeball per nail, each with its own thin red drip trailing down.
Best For — short, round nail shapes that still want in on the trend
Pro Tip — apply your shimmer or chrome base in two thin coats rather than one thick one; thin layers cure evenly under an LED nail lamp without leaving streaks.
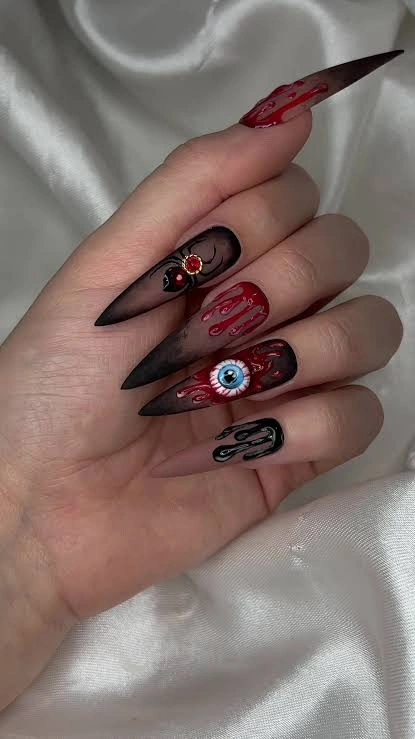
#10. Smoky Ombre Spider & Eyeball
Sharp stiletto tips fade from smoky black into deep red, giving off a moody, gothic energy the rest of this list doesn’t quite have. A tiny black widow charm and a single bloodshot eye keep it from feeling like just another dark manicure.
Best For — a gothic-leaning Halloween look that still feels elegant
Pro Tip — blend your ombre with a makeup sponge, dabbing in the same spot for 8-10 taps per nail so the black-to-red gradient stays smooth instead of blotchy.
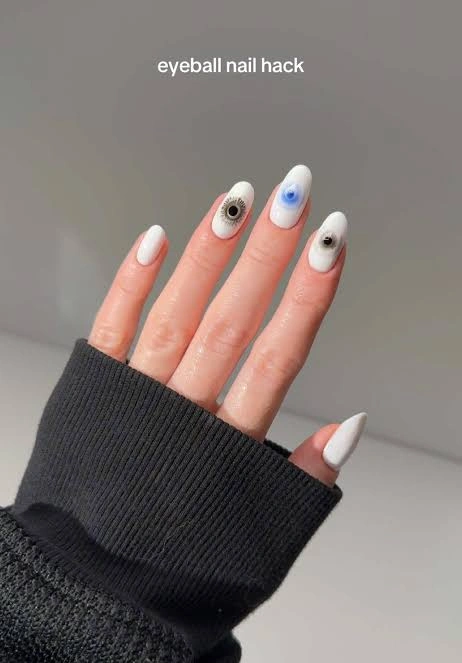
#11. Minimalist White Eye Sketch
So what does this mean if you’re all-thumbs with a detail brush? This look proves you don’t need a full design on every nail. A clean white base carries just one or two tiny sketched eyes, leaving the rest of the hand blank and breezy.
Best For — total beginners doing their first eyeball nail attempt
Pro Tip — practice the eye shape on a nail wheel first; a dotting tool with a 1.5mm tip gives you a clean, round pupil without any wobble.
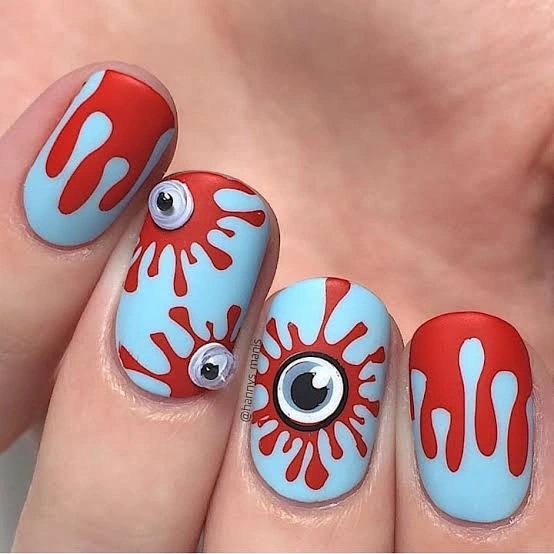
#12. Sky Blue Splatter Googly Eyes
That’s not all this one brings to the table. A soft sky-blue base gets hit with matte red splatter bursts, and two nails feature raised googly-eye charms that genuinely wiggle when you move your hand.
Best For — Halloween with a playful, not-too-scary twist
Pro Tip — flick red polish off a loaded striping brush from about 2 inches above the nail for a natural splatter; too close and you’ll just get one big dot.
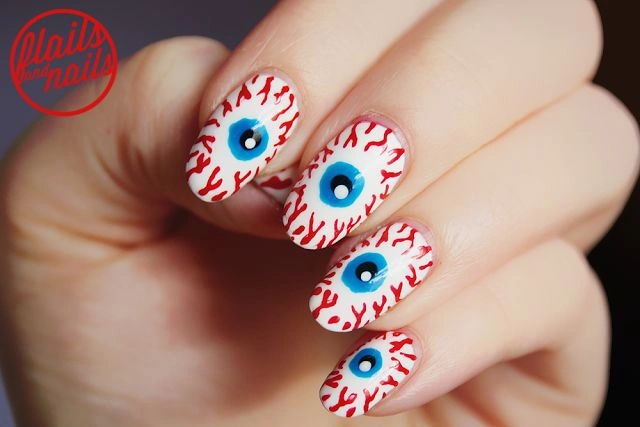
#13. Red-Vein White Blue-Dot Eyes
Here’s why this belongs at the top of any beginner’s list: the whole design is just three steps — a white base, a few red squiggle lines, and one blue dot with a white highlight for the pupil. It reads as eyeball art from three feet away without needing steady hands up close.
Best For — a first-timer’s Halloween mani that still looks polished
Pro Tip — use a dotting tool set for the pupil and highlight, they give you a rounder shape than a brush tip ever will.
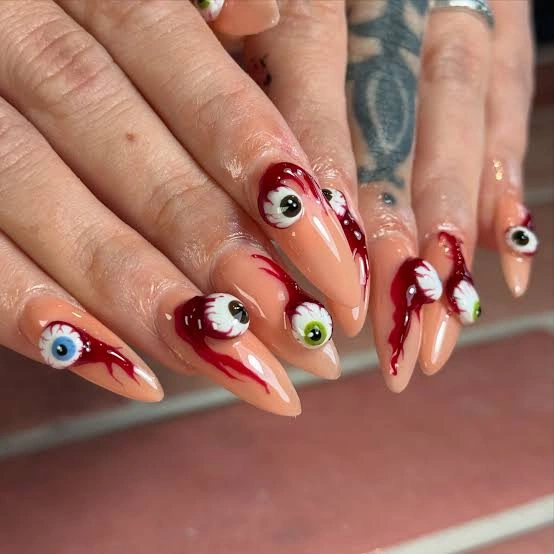
#14. Glossy Nude Dripping Eyeball Charms
This design goes bold with contrast where the softer looks on this list stay subtle: a mirror-glossy nude base against thick, opaque red drips and stacked 3D eyeball charms right at the cuticle line.
Best For — a night-out Halloween look with real glam factor
Pro Tip — seal charms with two coats of high-shine gel top coat, curing 60 seconds between each, so raised details don’t snag or chip within a day.
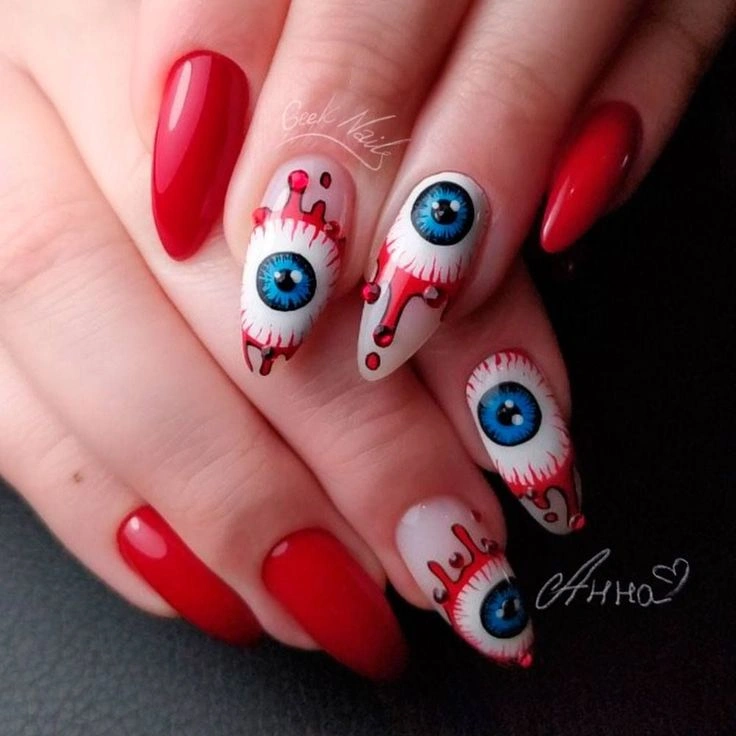
#15. Ruby Gloss Big Blue Eye Duo
This is easily the most glamorous look on the list. Cherry-red gloss nails alternate with white accents featuring oversized, hyper-detailed blue eyes rimmed in red rhinestones and dripping “blood.”
Best For — a Halloween wedding, costume party, or photoshoot moment
Pro Tip — press rhinestones into tacky, uncured gel one at a time with a wax pickup pencil, then cure the whole nail for 60 seconds so nothing shifts out of place.
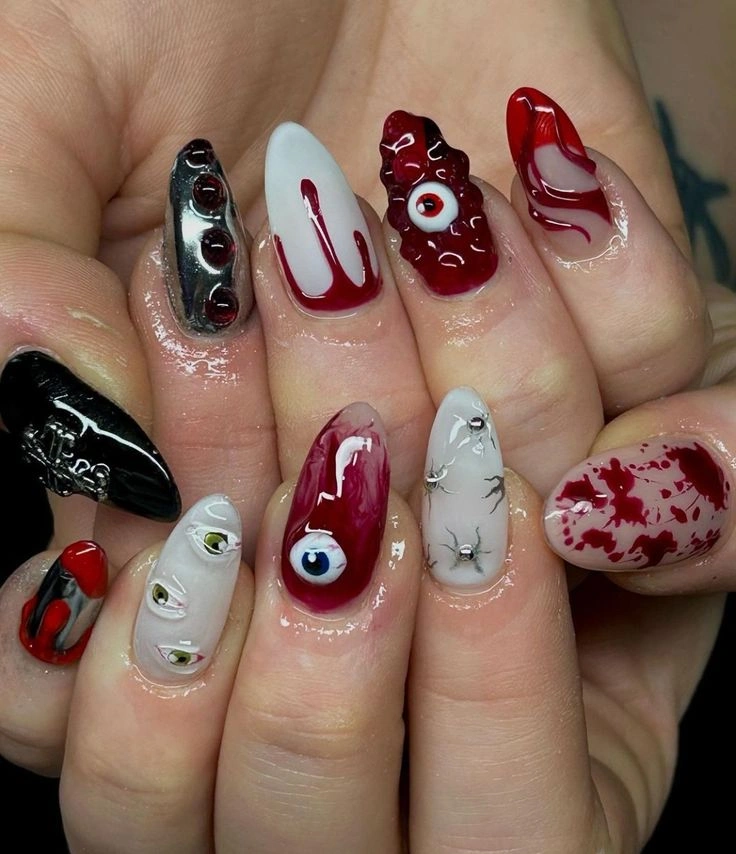
#16. Mixed Gothic Eye & Drip Set
No two nails match here, and that’s the whole appeal. Metallic studs, cat eyes, a raised eyeball charm, and thick wax-like drips all sit side by side across one full set for a genuinely custom, gallery-wall effect.
Best For — advanced nail artists who want to show off range
Pro Tip — plan the full set on paper before you start; map out which 2-3 nails get charms, which get 2D art, and which stay solid so the mix reads as intentional, not random.
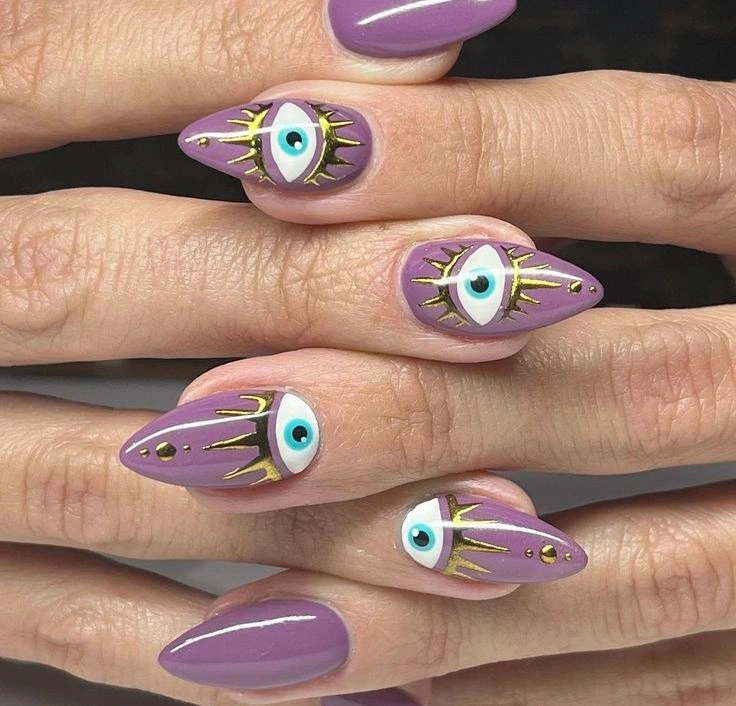
#17. Mauve Evil Eye Gold Rays
Closing out the list on a softer note, this one swaps gore for glamour. A dusty mauve base holds an almond-shaped evil eye in teal and white, with gold metallic rays fanning out like lashes on every nail.
Best For — anyone who wants “spooky season” without full horror
Pro Tip — apply gold striping with a liner brush loaded at a 30° angle, pulling from the outer corner inward in one stroke per ray for crisp, even lashes.
How to Choose
With 17 looks to pick from, here’s how to narrow it down to the one that’s actually right for you.
- Nail shape — long stilettos and almonds give charms more room to sit, while short square or round shapes work best with flatter, hand-painted eyes.
- Skin tone — nude and glossy bases tend to photograph best on warmer skin tones, while bright white or icy blue bases pop hardest against cooler tones.
- Occasion — save the 3D charms and rhinestones for a party or photoshoot; the simpler sketched or vein designs hold up better for everyday wear at work or school.
- Skill level — start with a dotting-tool design like #13 before attempting a full mixed set like #16, the layering and blending take real practice.
What You’ll Need
Most of these looks come together with a handful of repeatable tools. Here’s what to have on hand before you start.
For clean outlines, irises, and veiny blood lines
For round pupils and highlight dots
For raised, realistic eyeball accents
For curing gel layers evenly between steps
For sealing charms and keeping color from chipping
For flattening shine on bloodshot and gothic looks
Pro Tips for a Long-Lasting Manicure
Cap Every Free Edge
Run your top coat over the very tip of the nail, not just the top surface. This one habit alone can add several extra days before you see any chipping start at the edge.
Cure in Thin Layers
Thick gel layers trap uncured product underneath, even after a full cure cycle. Apply gel in two thin coats instead of one thick one, curing 60 seconds between each.
Let Charms Fully Set
If you’re adding 3D eyeball charms, press them in before your final top coat and cure for a full 60 seconds. Charms added after curing tend to lift within a day or two.
Cleanse Before Top Coat
Wipe each nail with a lint-free pad soaked in isopropyl alcohol before your final top coat. Skipping this step is one of the most common reasons gel manicures peel early.
Frequently Asked Questions
Q: How long do eyeball Halloween nails take to do at home?
A: A simple hand-painted design like the red-vein blue-dot look takes about 30-45 minutes for one hand. Full sets with 3D charms and mixed designs can take 2 hours or more.
Q: Do 3D eyeball nail charms fall off easily?
A: They can if they’re not sealed properly. Press them into slightly tacky gel, then cover with two coats of top coat, curing 60 seconds between each, and they should hold through normal daily wear.
Q: What’s the easiest eyeball nail design for a beginner?
A: A white base with a few red squiggle “veins” and a single blue dot for the iris is the most forgiving place to start. It needs no shading or blending to look intentional.
Q: Can I remove blood-drip nail art without damaging my natural nails?
A: Yes, as long as it’s regular gel or acrylic art. Soak cotton in acetone, wrap each nail in foil, and let it sit for 10-12 minutes before gently sliding the product off.
Recommended Product
3D Eyeball Nail Charm Set
★★★★☆ Highly rated on Amazon
This is the single fastest way to get a realistic bloodshot-eye look without needing any freehand painting skill.
As an Amazon Associate, we earn from qualifying purchases.
Final Thoughts
Eyeball nails hit that sweet spot between spooky and genuinely wearable, and with 17 different takes here, there’s no reason to settle for the same french-tip pumpkin every year.
Start with one design, or borrow elements from a few, either way, your Halloween mani just got a whole lot more interesting.
Which of these nail looks are you trying first? Save this post to Pinterest so you can come back to it whenever you need fresh nail inspo!

Hi, I’m Jessica, the creator behind Unique Lash & Nails Katy.
I created this website for anyone who loves beautiful nails as much as I do. Here, I share trendy nail designs, seasonal manicure ideas, easy nail care tips, honest product recommendations, and step-by-step guides to help you create salon-worthy nails at home. Whether you’re looking for everyday inspiration or your next favorite nail trend, I hope you’ll find something you love.