17 Bat Halloween Nails to Save Before October
Bats are the one Halloween motif that works on literally any nail shape, length, or color palette you throw at them. Whether you want a subtle accent nail or a full gothic statement set, there’s a version of this trend that fits your vibe. Here are 17 real bat nail looks to screenshot before your next appointment.
✦ Our Top Picks at a Glance
Best Overall — Holographic Drip Bat French
Best for Beginners — Pink French with Bat Accent
Most Trendy — Nude Negative-Space Bat Tips
Best for Special Occasions — White French Bat Wing Tips
#1. Holographic Drip Bat French
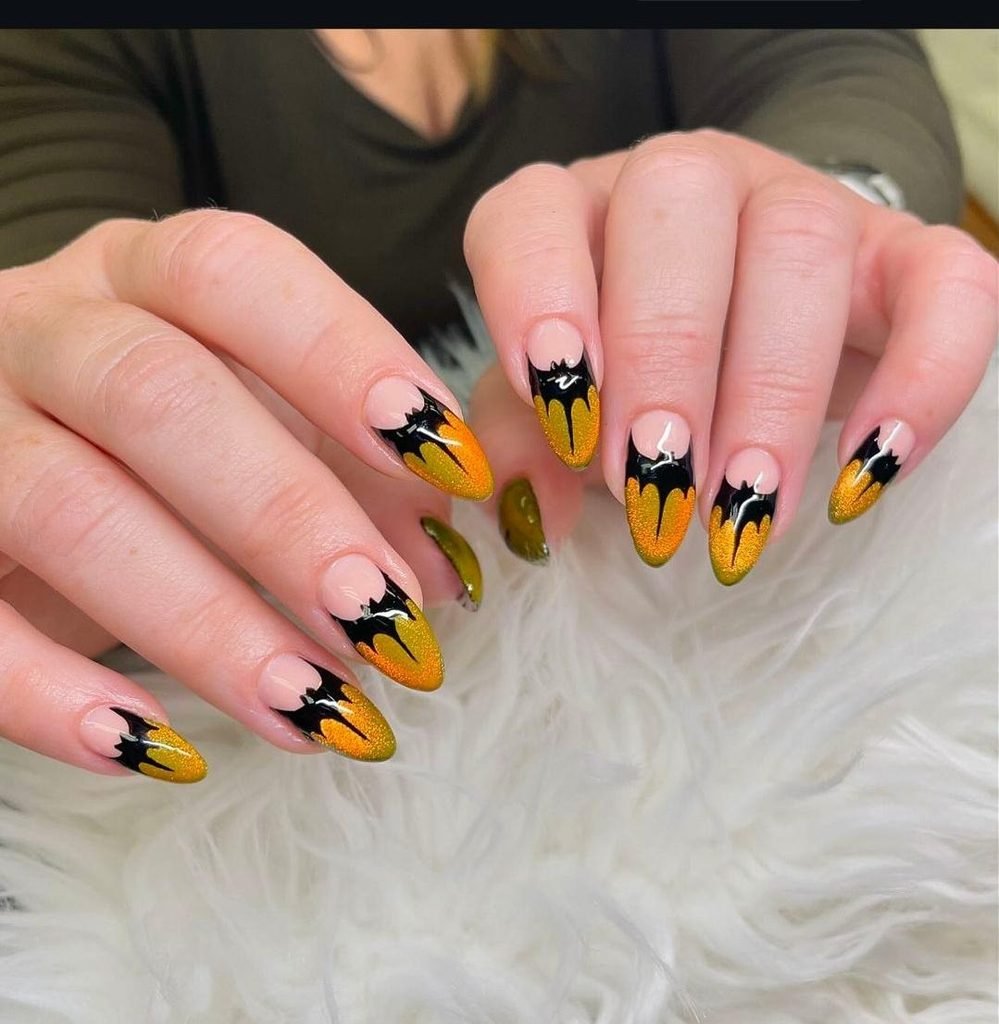
Picture a French manicure that melted straight out of a Halloween dream: glittering black bat-wing tips drip down into a warm orange-to-olive gradient. One ring-finger nail skips the pattern entirely for a solid olive accent, giving your eye a place to rest.
Best For — a Halloween party where your hands do the talking
Pro Tip — Press holographic powder into the topcoat while it’s still tacky, then buff with two light passes so it doesn’t cloud over.
#2. Orange French Tip with Bat Silhouette
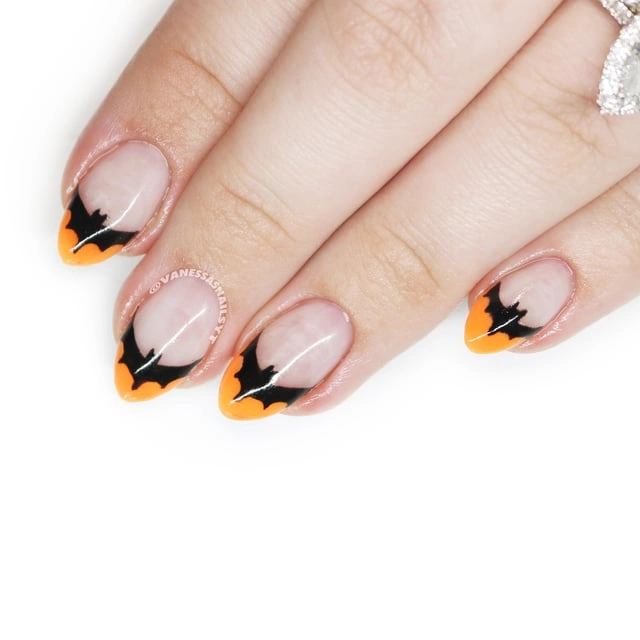
This one’s for anyone who wants Halloween spirit without going full goth. It’s a classic French shape with a candy-corn orange tip and one clean bat silhouette stamped floating just above the smile line.
Best For — nail newbies who want one easy, repeatable design
Pro Tip — Hold your stamping plate at a 90° angle and transfer the image within 10 seconds, before the polish starts to dry.
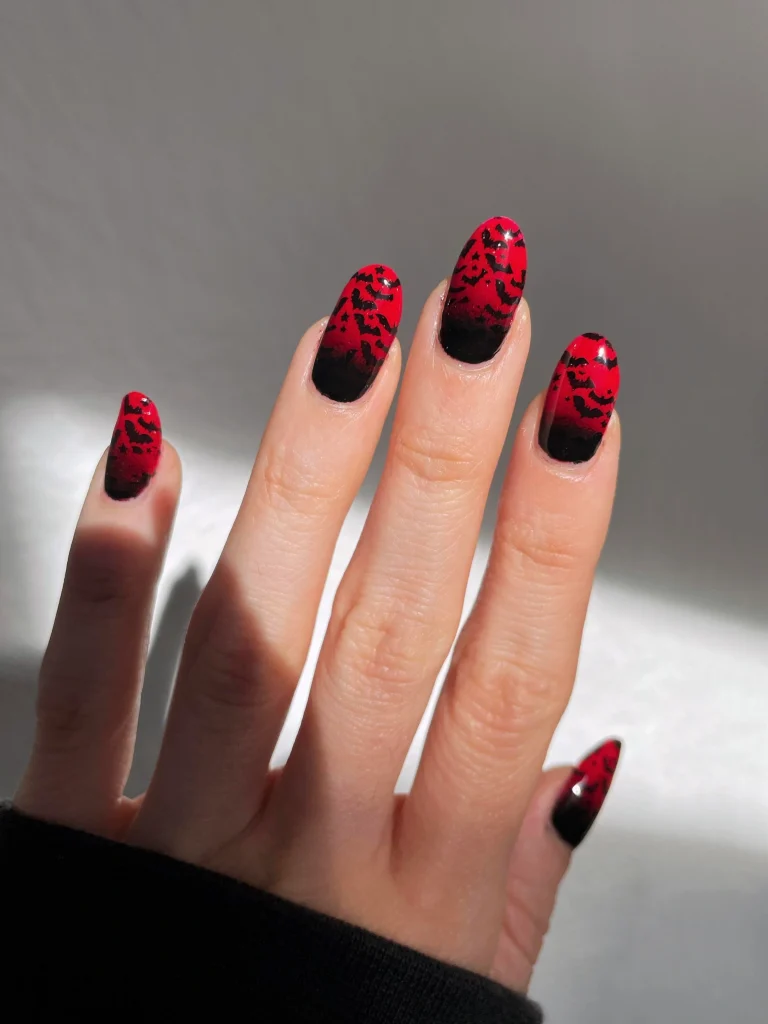
#3. Red Ombre Bat Print
Unlike the softer palettes on this list, this one goes full vampire with a blood-red base that fades into inky black at the cuticle. Tiny stamped bats and stars scatter through the red zone, catching the light in the photo like a glossy stained-glass window.
Best For — a costume that already leans dramatic and needs nails to match
Pro Tip — Build the ombre in three thin layers with a gradient sponge, letting each layer dry for about 60 seconds before the next.
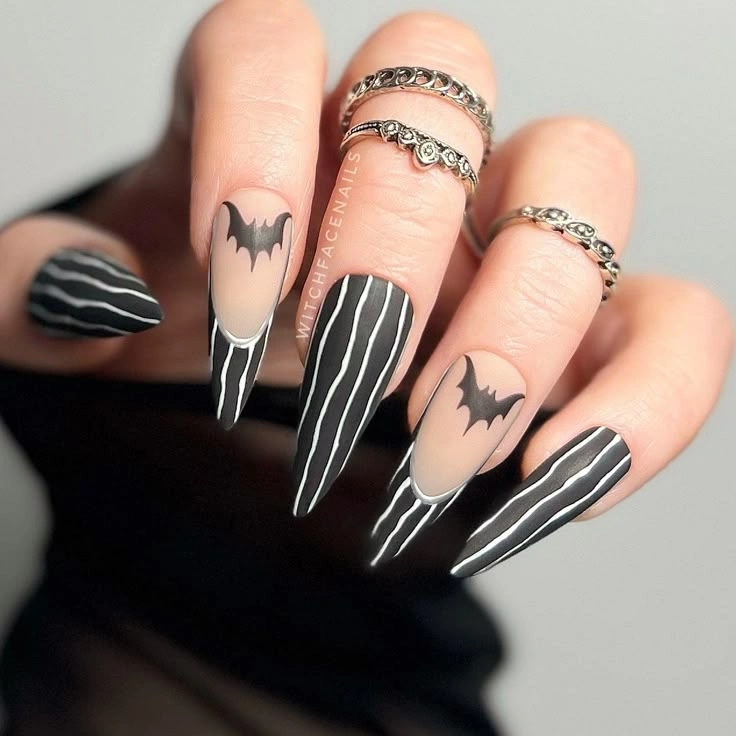
#4. Matte Nude Bats and Stripes
A soft nude base peeks out from under jagged black stripes on most nails, while two fingers wear a single solid bat silhouette instead. The matte finish and dramatic stiletto length give this set serious editorial energy.
Best For — the weeks leading into fall when you want gothic energy without going all-black
Pro Tip — Cure the black design for a full 60 seconds under the lamp before sealing with a matte topcoat, or the stripes can smudge.
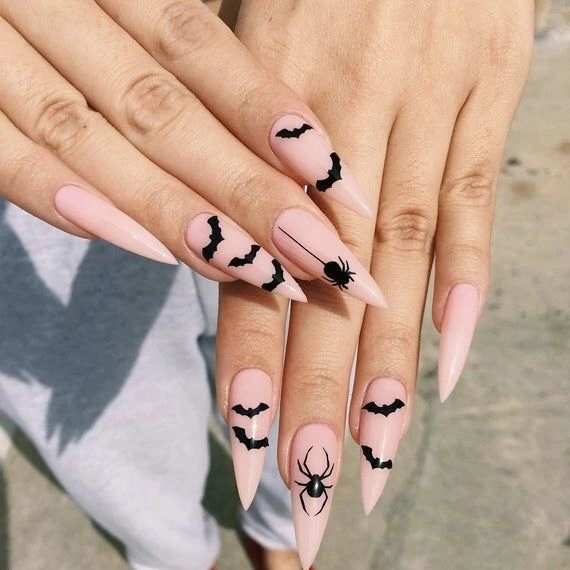
#5. Nude Bats with Spider Accent
This one’s for the minimalists who still want a little creepy-crawly fun. Most nails carry a few tiny trailing bat silhouettes across a bare nude base, while one accent nail gets a raised 3D spider charm for texture.
Best For — an office-friendly Halloween look that won’t raise eyebrows in a meeting
Pro Tip — Attach the 3D spider charm with a small dab of clear gel and cure for 30 seconds before adding topcoat.
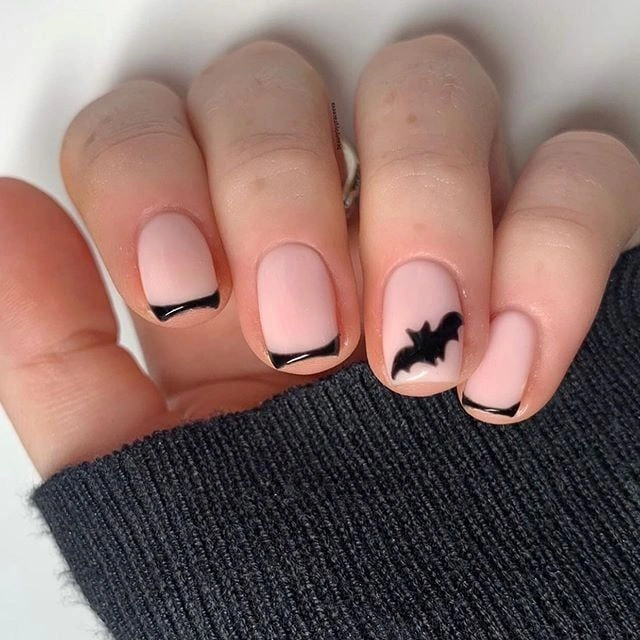
#6. Pink French with Bat Accent
Where some of these looks go dramatic, this one keeps things sweet: a classic pink French with a thin black tip, plus one ring-finger nail wearing a solid bat silhouette. The short, round shape keeps it easy to maintain.
Best For — anyone who wants Halloween nails they can keep on well into November
Pro Tip — Use a size 000 detail brush for the bat shape so the wingtips stay crisp instead of blobby.
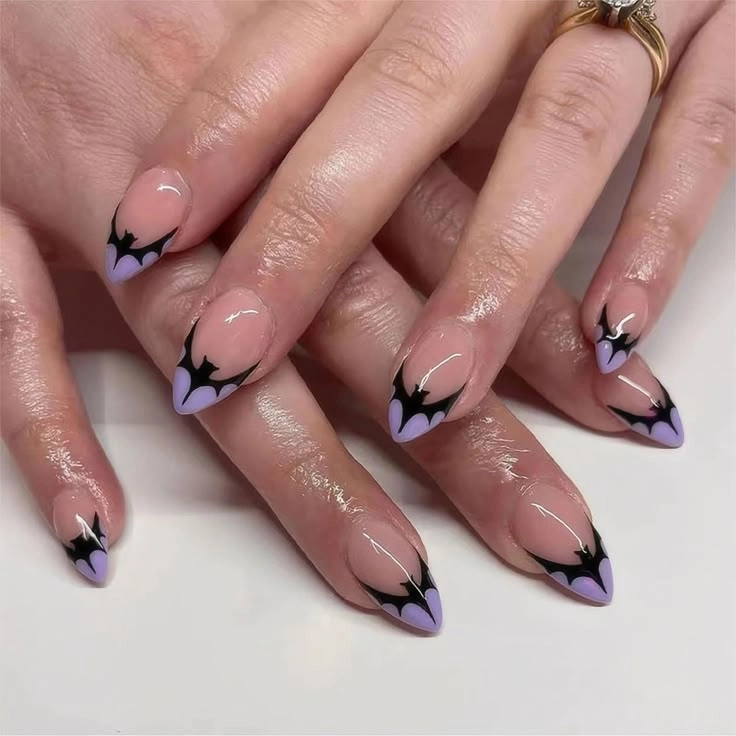
#7. Lavender Bat Wing French Tips
Look closely and you’ll notice the black bat-wing tip isn’t solid — it’s layered right over a pastel lavender base that peeks through at the edges. That two-tone trick is what makes this design feel softer than a typical black French.
Best For — anyone leaning into the pastel-goth trend this fall
Pro Tip — Let the lavender base dry completely first, then freehand the black wing shape on top with a thin liner brush so the two colors stay distinct.
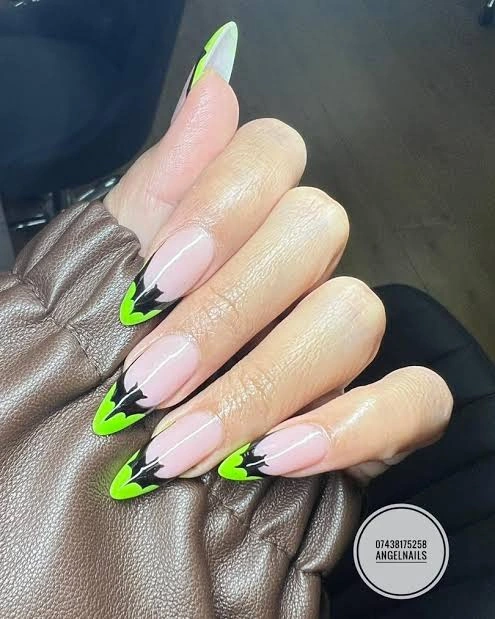
#8. Neon Green Bat Wing French
If lavender felt too soft, this design swings the other way with an electric neon green tip layered under jagged black bat-wing edges. The longer coffin shape gives the black overlay plenty of room to make a statement.
Best For — the person who wants their Halloween nails seen across the room
Pro Tip — Apply two full coats of neon polish before layering the black design, since neon shades usually need extra coats for solid opacity.
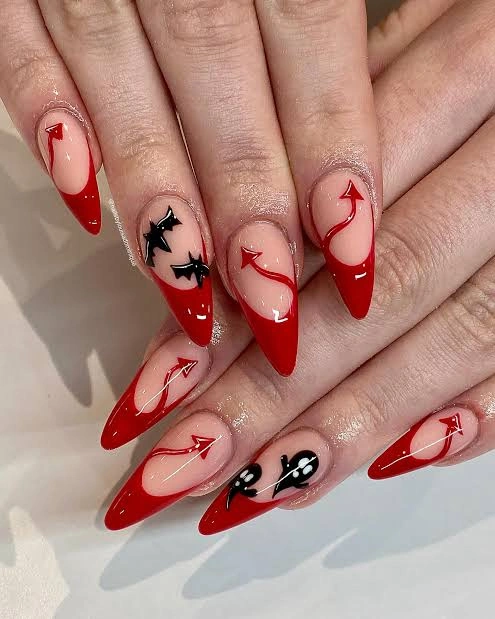
#9. Red Devil Tail with Bats
This one’s for the reader who wants a wink of mischief rather than full spookiness. A red devil-tail line curls around the nail, with tiny bat and cat silhouettes tucked into the open negative space.
Best For — a devil-inspired costume or any look that leans playful-sinister
Pro Tip — Load a striping brush with slightly thinned polish so the curling tail line stays a consistent width from base to tip.
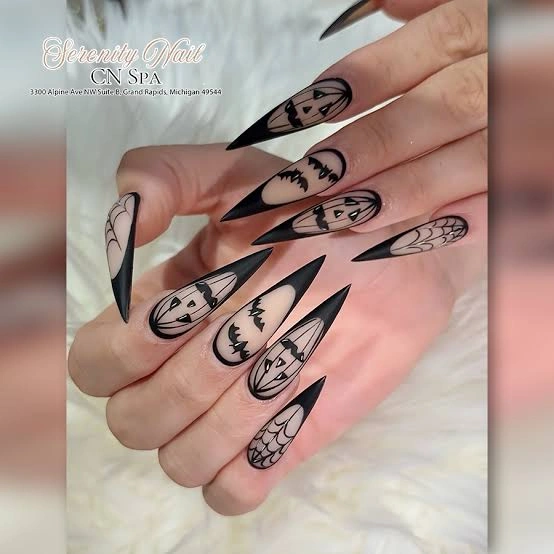
#10. Matte Black Jack-O-Lantern Stiletto
Extremely long matte black stilettos hold carved-looking jack-o’-lantern faces in negative-space nude, finished off with a spiderweb design on the pinky. This is the set that turns nails into an actual art project.
Best For — a Halloween photoshoot or a costume where dramatic length is part of the statement
Pro Tip — Outline the negative-space shapes in pencil first, then fill the surrounding matte black with a size 4 detail brush for clean, carved-looking edges.
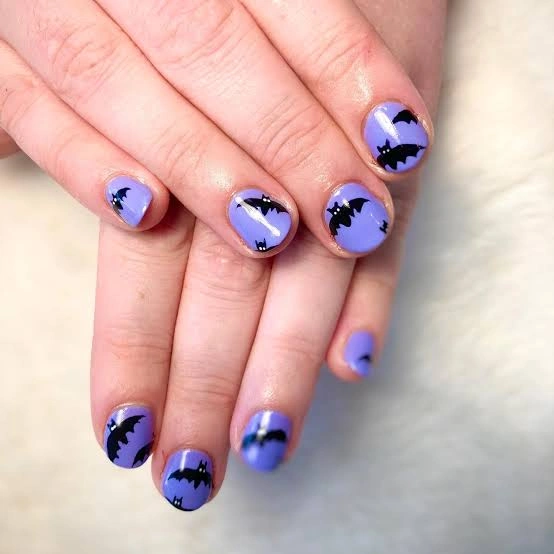
#11. Periwinkle Bat Silhouette Manicure
Instead of leaving bats as an accent, this look puts one on every single nail over a solid periwinkle-purple base. The short, round shape and glossy finish keep it wearable for everyday errands, not just a party.
Best For — anyone who wants full-hand commitment to the bat theme without extra colors competing for attention
Pro Tip — Switch to a fine-tip paint pen instead of a brush so all ten bats come out roughly the same size.
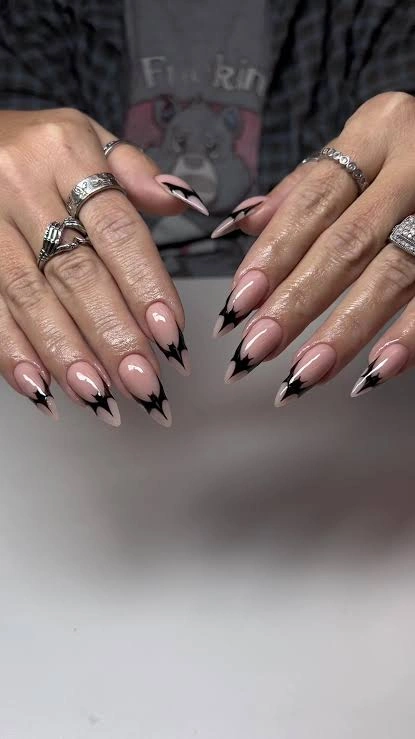
#12. Nude Negative-Space Bat Tips
This one’s for the reader who likes their Halloween nails subtle enough for daily wear. Lightning-bolt-shaped negative-space tips in black outline sit over a glossy nude base, with layered silver rings adding to the edgy styling.
Best For — wearing from Halloween straight through the rest of fall
Pro Tip — Mask the negative-space zone with nail vinyls before painting the black tip so the lines stay razor sharp.
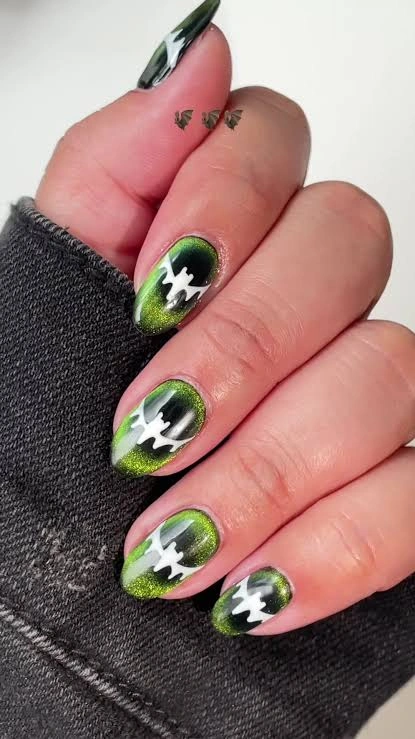
#13. Green Chrome Bat Lightning
A green cat-eye chrome finish shifts from dark to bright as the light hits it, with jagged white and black lightning-bolt bats layered across each tip. It’s one of the few looks here that actually moves when you move your hand.
Best For — a Halloween night out where you want your nails catching the club lighting
Pro Tip — Drag the magnet over the wet cat-eye polish for exactly 5 seconds before curing, or the shimmer line won’t show up.
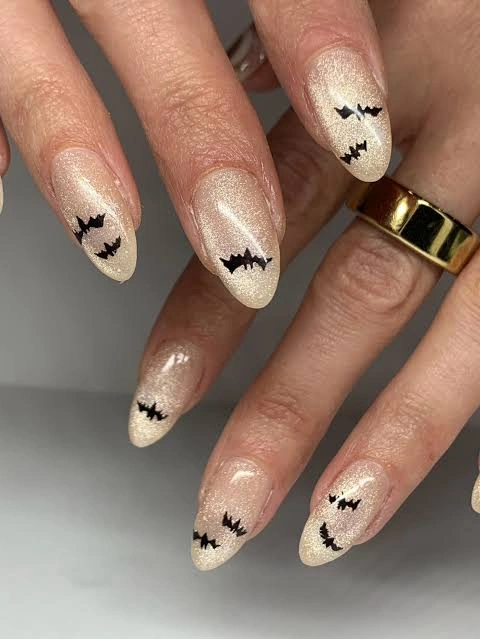
#14. Champagne Glitter Bat Scatter
Where the chrome look above goes bold, this one whispers instead: a sheer, glittery champagne base with tiny black bats scattered loosely across each tip. It’s the kind of design that photographs beautifully but reads understated in person.
Best For — anyone who wants sparkle more than spook this Halloween
Pro Tip — Build the sheer glitter base in two thin coats, letting each cure fully — sheer glitters need layering time to reach full opacity.
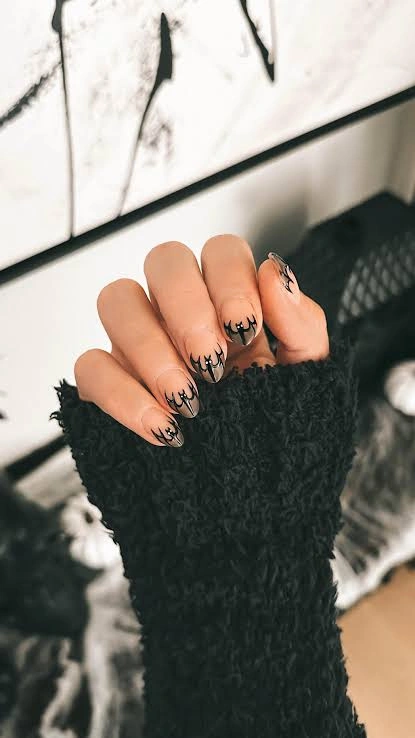
#15. Nude Gothic Bat Vine Nails
This one’s for the reader who wants their nails to look like they belong in a haunted greenhouse. A thorny black vine-and-bat-wing pattern climbs vertically up each nail over a completely bare, natural base.
Best For — cooler months when dark, moody nail art feels right at home
Pro Tip — Sketch the vine’s main line in one continuous stroke first, then go back and add thorn details, so the branch doesn’t end up looking choppy.
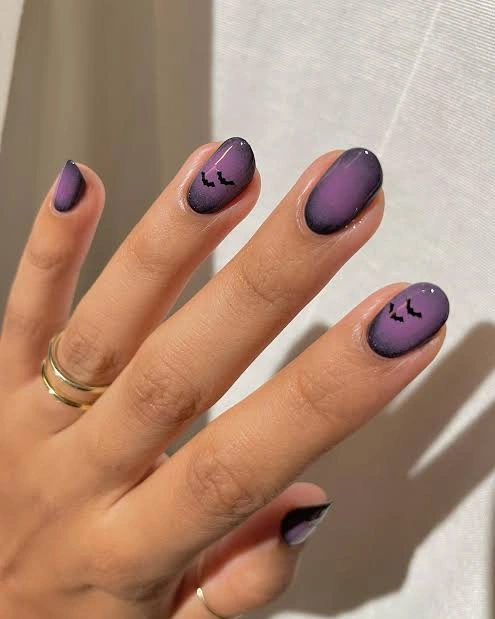
#16. Lavender Ombre Bat Whisper
A soft lavender-to-purple airbrushed gradient sits under two tiny bat silhouettes that look almost like they’re mid-flight across the nail. Layered gold rings in the photo give the whole look a dreamy, dusk-at-a-Halloween-party feel.
Best For — a low-key Halloween gathering where you still want a hint of the holiday
Pro Tip — Mist the airbrush gun from about 4-6 inches away for a soft-edged gradient instead of a harsh line.
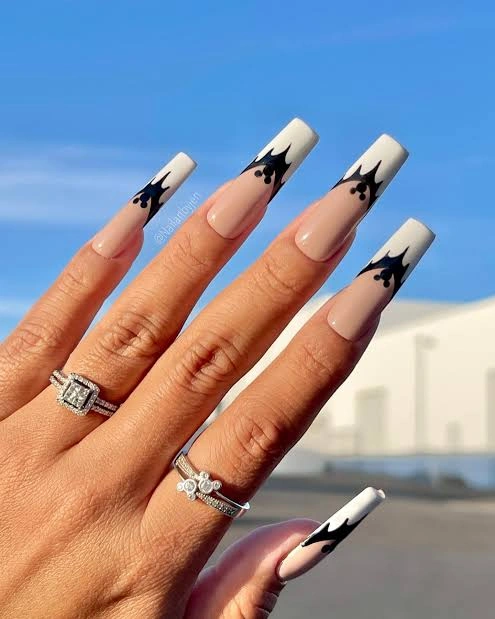
#17. White French Bat Wing Tips
After all the color on this list, this one closes things out in crisp white: a long square French tip with a single black bat-wing shape carved into the smile line. It’s clean, polished, and doesn’t scream “Halloween” from across the room.
Best For — a Halloween wedding or elegant party where you still want a classic French look
Pro Tip — Use French tip guide stickers to keep the white line straight before freehanding the bat wing detail on top.
How to Choose the Right Nail Design
With 17 options in front of you, narrowing it down comes down to a few practical factors.
- Nail shape — Bat-wing French tips and negative-space designs look sharpest on almond or stiletto shapes, since the point echoes the wing shape. Round and short nails work better for scattered bat silhouettes or simple accent designs.
- Skin tone — Warmer skin tones tend to glow next to orange, olive, and champagne bases, while cooler tones pair beautifully with lavender, periwinkle, and icy white. Red and black work on pretty much everyone.
- Occasion — Save the extreme-length stiletto and full glitter looks for a party or photoshoot. For work or school, lean toward the French tips, accent-nail designs, or negative-space styles that read more subtle.
- Skill level — Single accent-nail bats and basic French tips are the easiest place to start. Save the chrome, airbrush, and hand-painted vine designs for once you’re comfortable holding a steady line.
What You’ll Need
Most of the looks above only require a handful of core supplies — here’s what to stock up on before you start.
The base for nearly every bat

Hi, I’m Jessica, the creator behind Unique Lash & Nails Katy.
I created this website for anyone who loves beautiful nails as much as I do. Here, I share trendy nail designs, seasonal manicure ideas, easy nail care tips, honest product recommendations, and step-by-step guides to help you create salon-worthy nails at home. Whether you’re looking for everyday inspiration or your next favorite nail trend, I hope you’ll find something you love.