17 Grim Reaper Halloween Nails for Spooky Season
Grim reaper Halloween nails can go far beyond a basic black manicure. You can make them glittery, colorful, gothic, cute, or wonderfully creepy depending on your style.
These 17 looks range from tiny reaper accents on short nails to dramatic coffin and stiletto designs. You’ll also find softer pinks, smoky grays, silver sparkle, neon color, and plenty of hand-painted inspiration.
✦ Our Top Picks at a Glance
Best Overall — Blush Gothic Silver Tips
Best for Beginners — Hot Pink Reaper Accent
Most Trendy — Neon Cartoon Reaper Coffins
Best for Special Occasions — Nude Glitter Skull Almonds
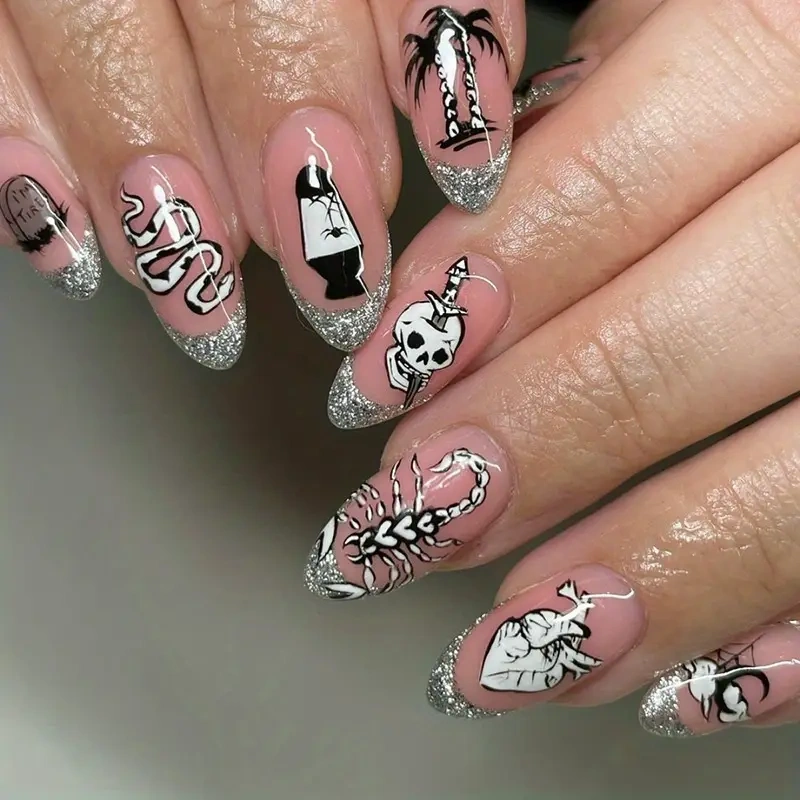
#1. Blush Gothic Silver Tips
Picture glossy blush-pink almond nails edged with dense silver glitter, then add tiny black-and-white gothic illustrations across each finger. The skeletal scorpion, anatomical heart, snake, skull, and miniature grave-inspired details make this manicure feel like a full Halloween story rather than one repeated motif.
Best For — Detailed Halloween parties and gothic events
Pro Tip — Paint the silver French edge with a 7 mm liner brush, then cure each glitter layer for a full 60 seconds before adding the illustrations.
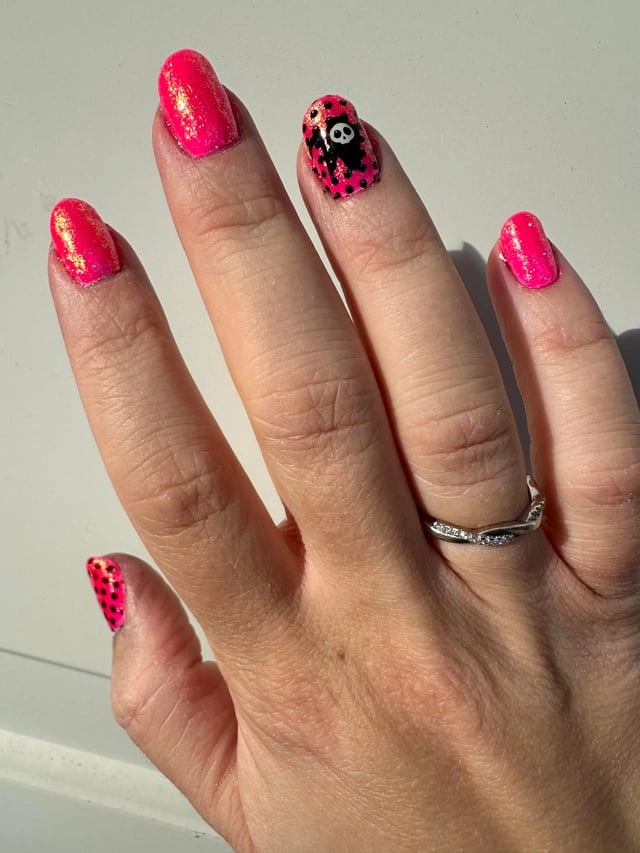
#2. Hot Pink Reaper Accent
This one’s wonderfully simple: vivid hot-pink short nails do most of the work while one accent nail carries a tiny black character with a white skull face. Scattered black dots around that miniature reaper keep the playful Halloween theme connected without making every nail complicated.
Best For — Beginners wanting bright spooky nail art
Pro Tip — Make the surrounding dots with a 1 mm dotting tool, cleaning it after every 3 to 4 dots so their size stays consistent.
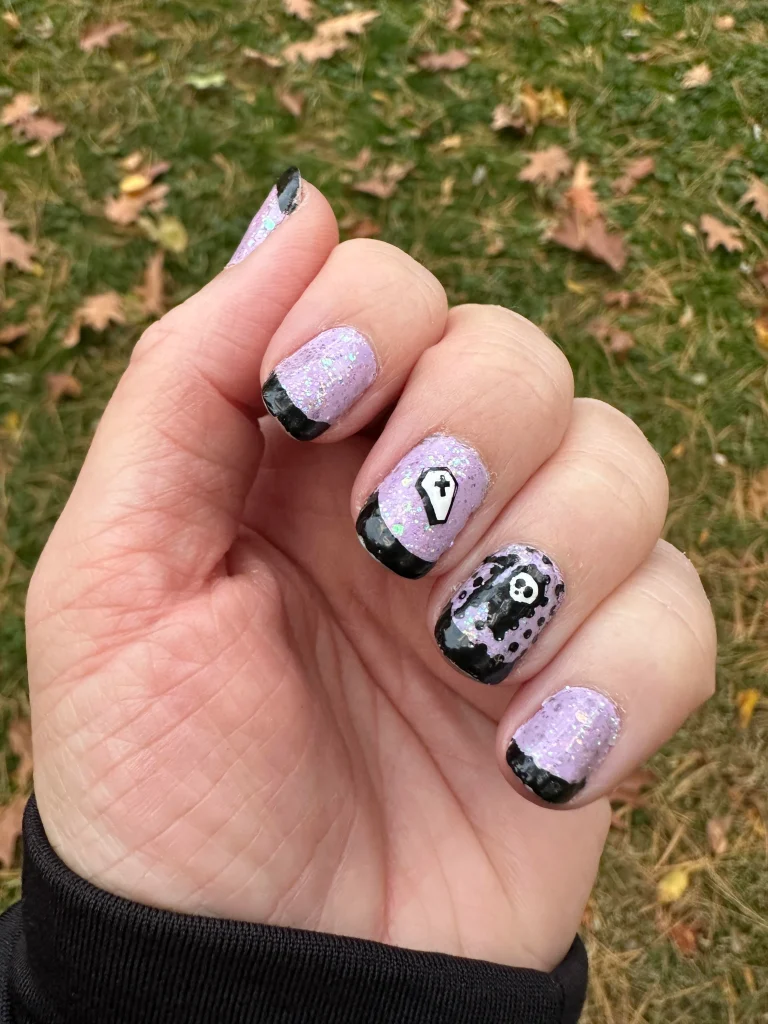
#3. Lavender Glitter Reaper Tips
Unlike the brighter pink look above, this manicure starts with icy lavender glitter and chunky black French tips. A tiny white coffin with a cross and a cartoon-style black reaper create two unmistakable focal points against the short rounded-square shape.
Best For — Cute Halloween weekends and casual outfits
Pro Tip — Angle your French-tip brush about 45 degrees at each sidewall, then connect both strokes across the center for a cleaner curved black edge.
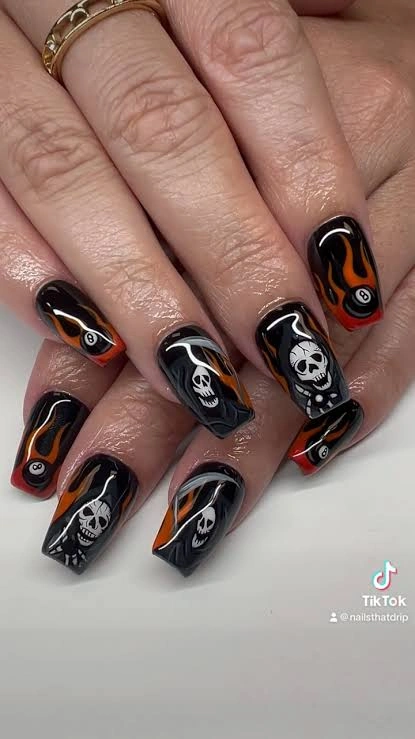
#4. Black Flame Reaper Coffins
For maximum drama, glossy black coffin nails are layered with orange-red flames, gray highlights, skull figures, and tiny eight-ball accents. The extra-long shape gives each illustrated panel enough space to read clearly, especially the hooded skeletal faces framed by fiery color.
Best For — Bold costumes and statement manicures
Pro Tip — Draw flame points with a size 5/0 detail brush, keeping each curved stroke under about 8 mm so the design doesn’t overwhelm the coffin shape.
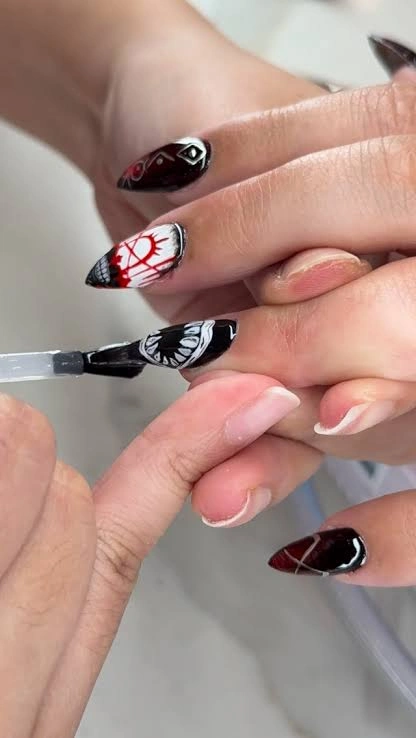
#5. Crimson Gothic Stiletto Art
A sharp stiletto shape instantly makes this black, white, and deep-red manicure feel darker. Fine web lines, graphic faces, and illustrated gothic accents sit over pointed tips, while the visible detail-brush work gives the whole set an unmistakably hand-painted feel.
Best For — Nail-art lovers who enjoy precision
Pro Tip — Use a fine liner nail art brush with bristles around 7–9 mm long, and wipe off excess gel before tracing the thin web lines.
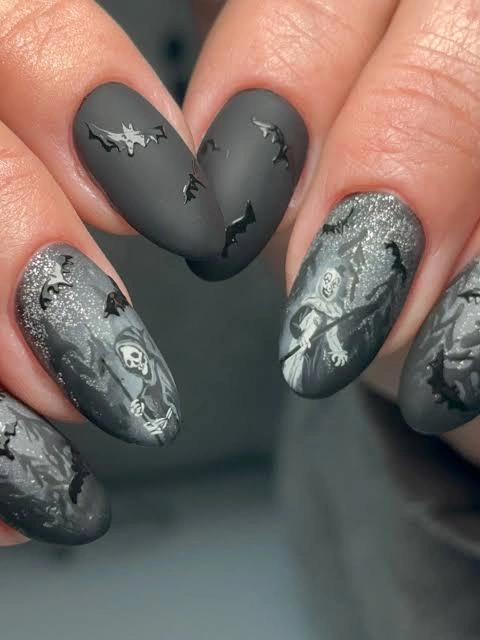
#6. Matte Gray Reaper Bats
Moody charcoal matte nails meet shimmering silver accent nails in this atmospheric set. Flying black bats and smoky gray skeletal figures add depth without relying on bright Halloween colors, and the rounded almond shape keeps the elaborate artwork surprisingly wearable.
Best For — Sophisticated gothic dinners and parties
Pro Tip — Apply matte top coat only after your art is completely cured, then give the final coat 60 seconds under an LED lamp to prevent shiny patches.
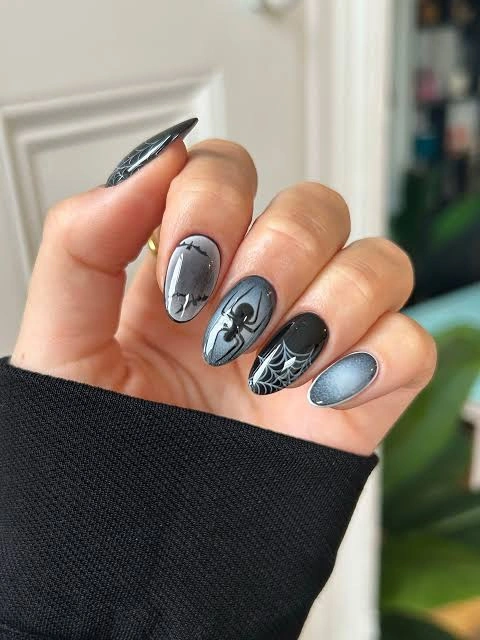
#7. Smoky Spiderweb Reaper Nails
Soft smoke-gray polish creates a misty background for black spiders, fine cobwebs, and shadowy Halloween details. One web stretches neatly across a near-black accent nail, while the reflective gray surfaces give the manicure an eerie moonlit finish.
Best For — Minimalists wanting a darker Halloween mood
Pro Tip — Start each web with 3 or 4 straight radial lines, then join them using curved strokes spaced roughly 2 mm apart.
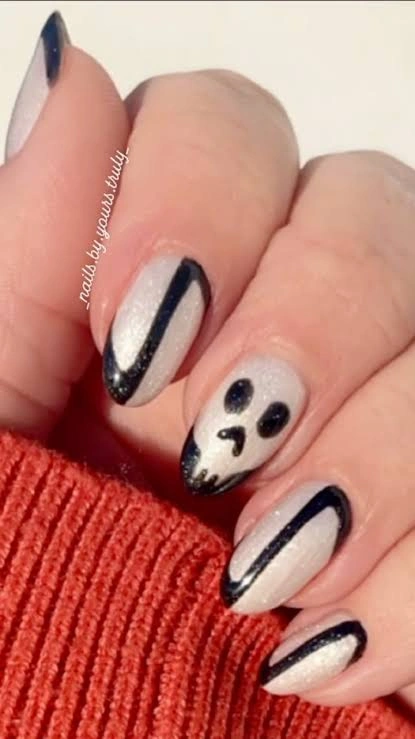
#8. Ivory Ghostface Black Tips
If you like Halloween art without a fully dark manicure, this creamy ivory set is an easy direction to borrow. Thin black asymmetrical borders frame the almond nails, while one central elongated ghostly face creates a spooky accent against the pearly base.
Best For — Light manicures with spooky contrast
Pro Tip — Leave about a 1 mm gap between your black outline and the cuticle so the border stays crisp instead of making the nail look crowded.
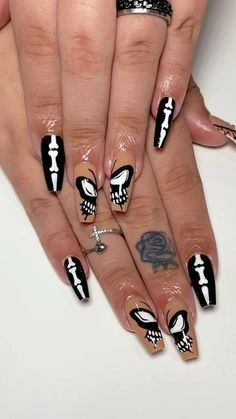
#9. Black Skeleton Coffin Nails
Long coffin nails give these stark black-and-white skeleton graphics a bold poster-like quality. White bone shapes run vertically down several glossy black nails, while larger skull illustrations across the center fingers turn the manicure into an unmistakable Halloween statement.
Best For — Costume nights needing graphic impact
Pro Tip — If hand-painting bones feels difficult, position skull and skeleton nail decals with pointed tweezers, then seal them under 2 thin top-coat layers.
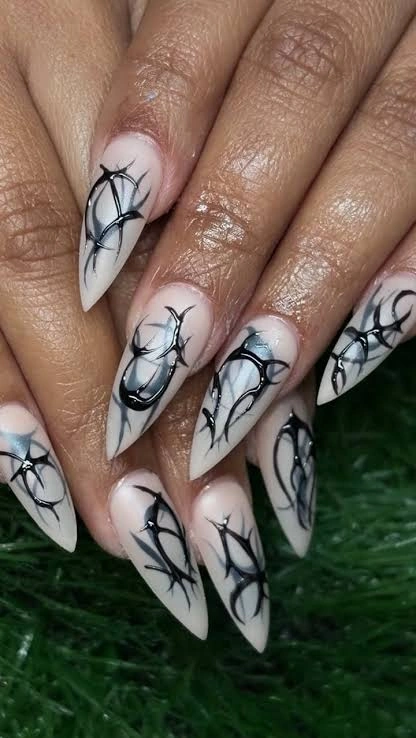
#10. Ivory Thorned Stiletto Art
Here the spooky effect comes from shape and linework rather than obvious Halloween characters. Milky ivory stiletto nails are crossed with looping black thorn-like curves, tiny pointed branches, and glossy raised-looking lines that give the set an eerie organic quality.
Best For — Abstract gothic and minimalist nail fans
Pro Tip — Sketch the longest curved line first with a 9 mm liner brush, then add the small thorns at roughly 30- to 45-degree angles.
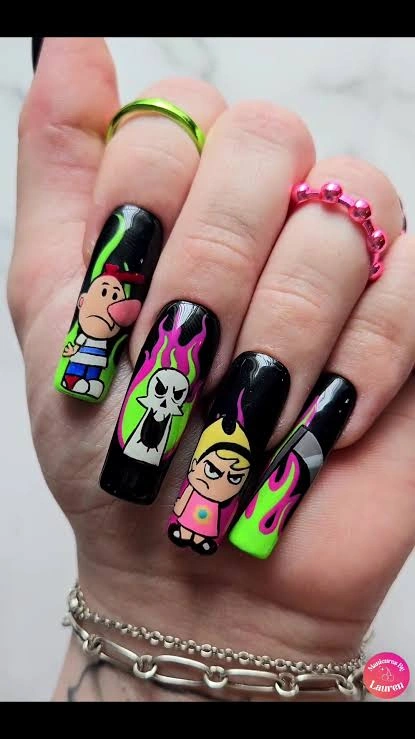
#11. Neon Cartoon Reaper Coffins
Halloween doesn’t have to stay orange and gray. These extra-long black coffin nails combine neon lime, hot pink, purple flames, cartoon faces, and a white skull-headed figure, with colorful rings adding even more playful energy around the manicure.
Best For — Color lovers and playful Halloween looks
Pro Tip — Put a thin white gel layer beneath neon shades and cure it for 60 seconds first; the lighter base makes green, pink, and yellow appear noticeably brighter.
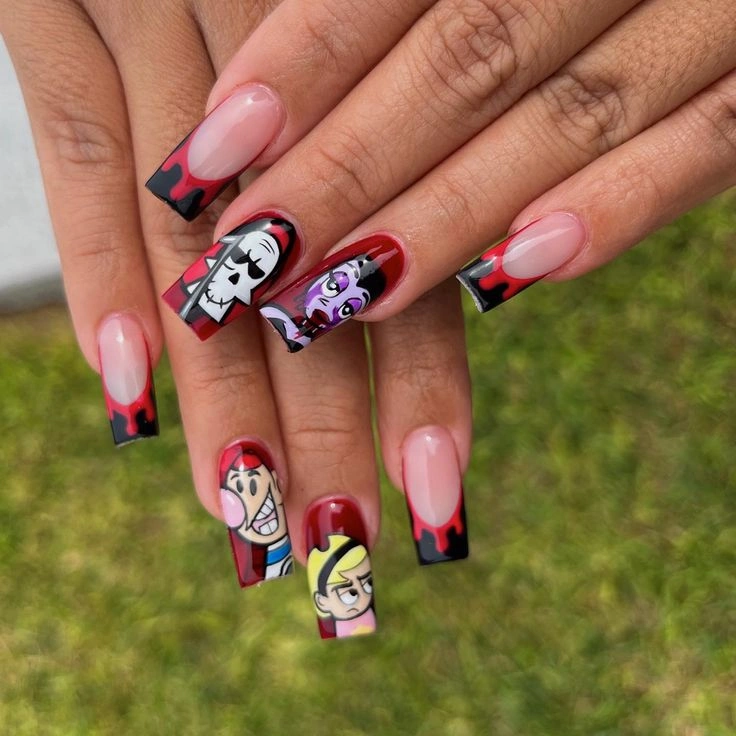
#12. Red Drip Reaper Squares
A glossy nude base keeps these long square nails light enough for the red-and-black artwork to stand out. Dripping French tips frame individual cartoon characters across the accent nails, including a hooded skull figure placed against rich crimson details.
Best For — Cartoon-inspired Halloween costume styling
Pro Tip — Build each drip using a 1.5 mm dot at its lowest point, then pull that wet gel upward with a fine brush before curing for 60 seconds.
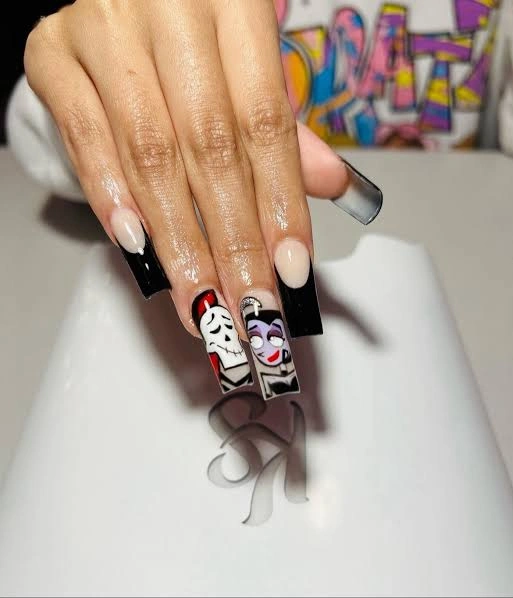
#13. Black French Reaper Portraits
Most of this manicure stays clean with nude bases and straight glossy black French tips, which makes the two illustrated portrait nails even more noticeable. The tiny skull-faced character and neighboring expressive figure create a fun storytelling detail without covering the whole set in artwork.
Best For — Character art with cleaner French styling
Pro Tip — Mark the top edge of each square French tip about one-third down the nail, then fill toward the free edge using a flat brush for straighter lines.
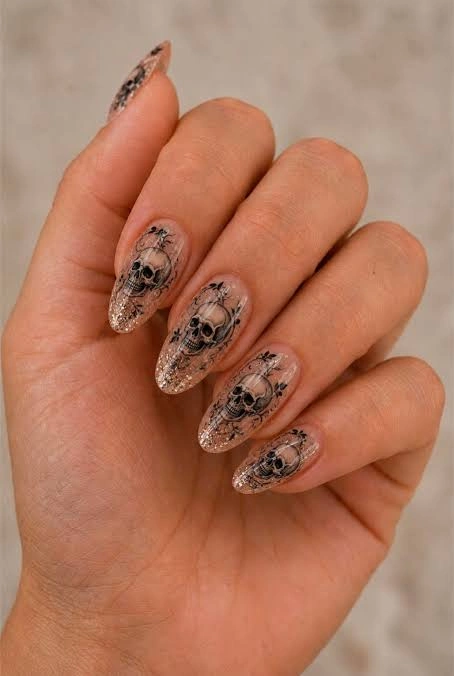
#14. Nude Glitter Skull Almonds
For a softer gothic manicure, transparent nude almond nails are dusted with fine champagne sparkle and layered with intricate charcoal skull illustrations. The delicate black ornamental lines surrounding each skull give the design a vintage, almost tattoo-inspired finish.
Best For — Elegant Halloween parties and evening outfits
Pro Tip — Apply fine champagne nail glitter in one very thin layer so the skull details remain crisp instead of sinking into heavy sparkle.
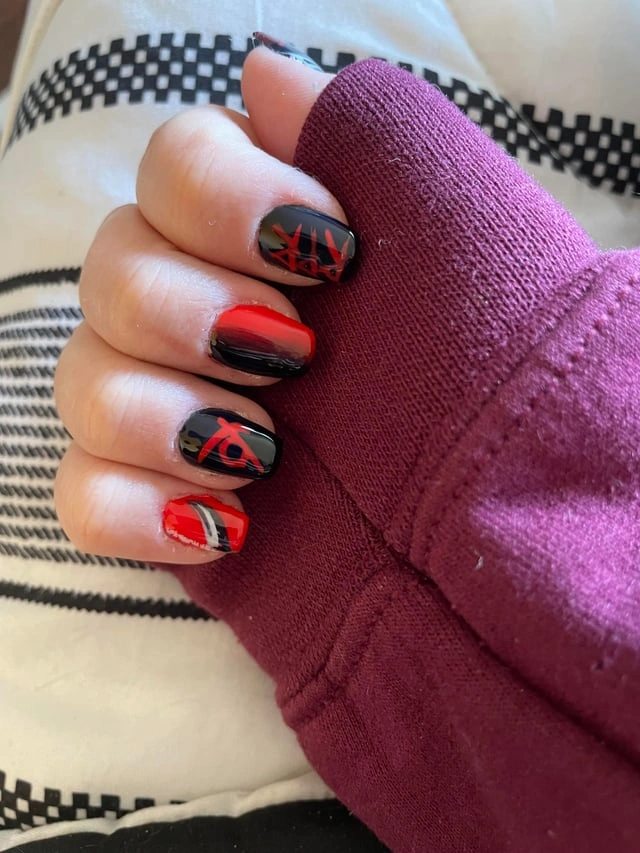
#15. Red Black Reaper Symbols
Short square nails get a darker personality through glossy black, vivid crimson, and hand-drawn angular symbols. One nail fades smoothly from black into red, while neighboring nails use sharp linear markings that feel graphic and slightly mysterious.
Best For — Short nails with dramatic color contrast
Pro Tip — For the red-to-black fade, tap both colors together with a small makeup sponge in 2 or 3 thin passes, curing each pass for 45–60 seconds.
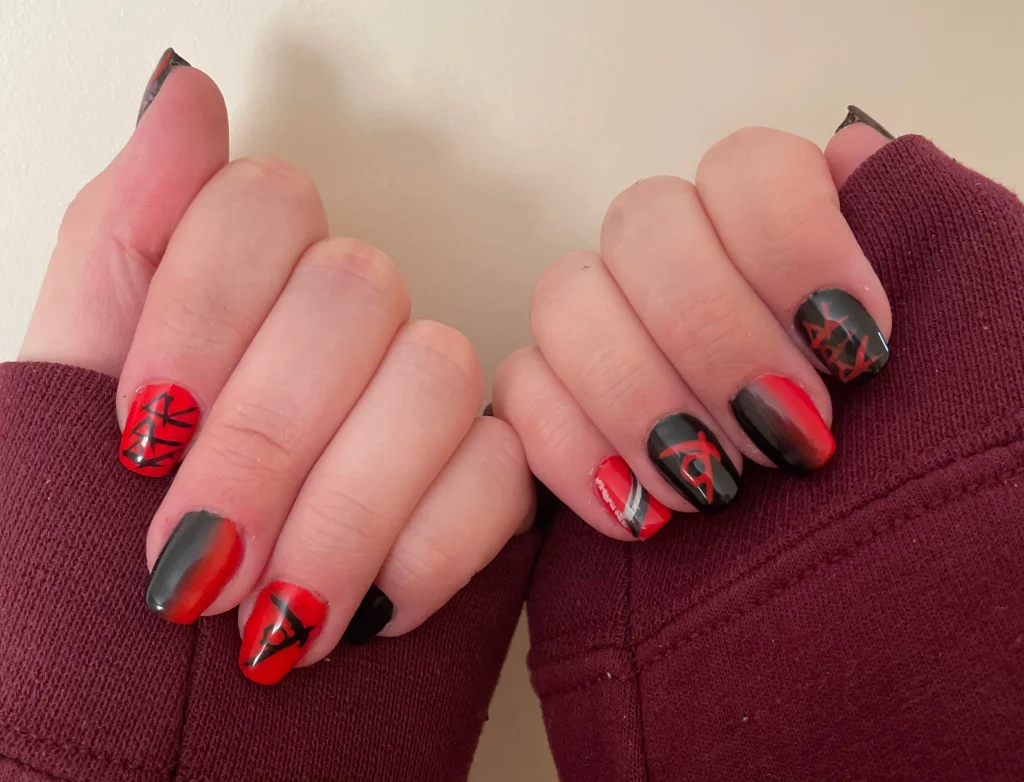
#16. Crimson Fade Symbol Nails
Shown across both hands, this compact manicure mixes glossy red nails, charcoal-black sections, smoky gradients, and sharp graphic symbols. The burgundy sweatshirt surrounding the hands adds an extra autumn mood and makes those crimson tones look even deeper.
Best For — Everyday October outfits and short nails
Pro Tip — Keep graphic lines around 1 mm wide using a short detail brush, and cure each symbol individually for 30 seconds before moving to the next nail.
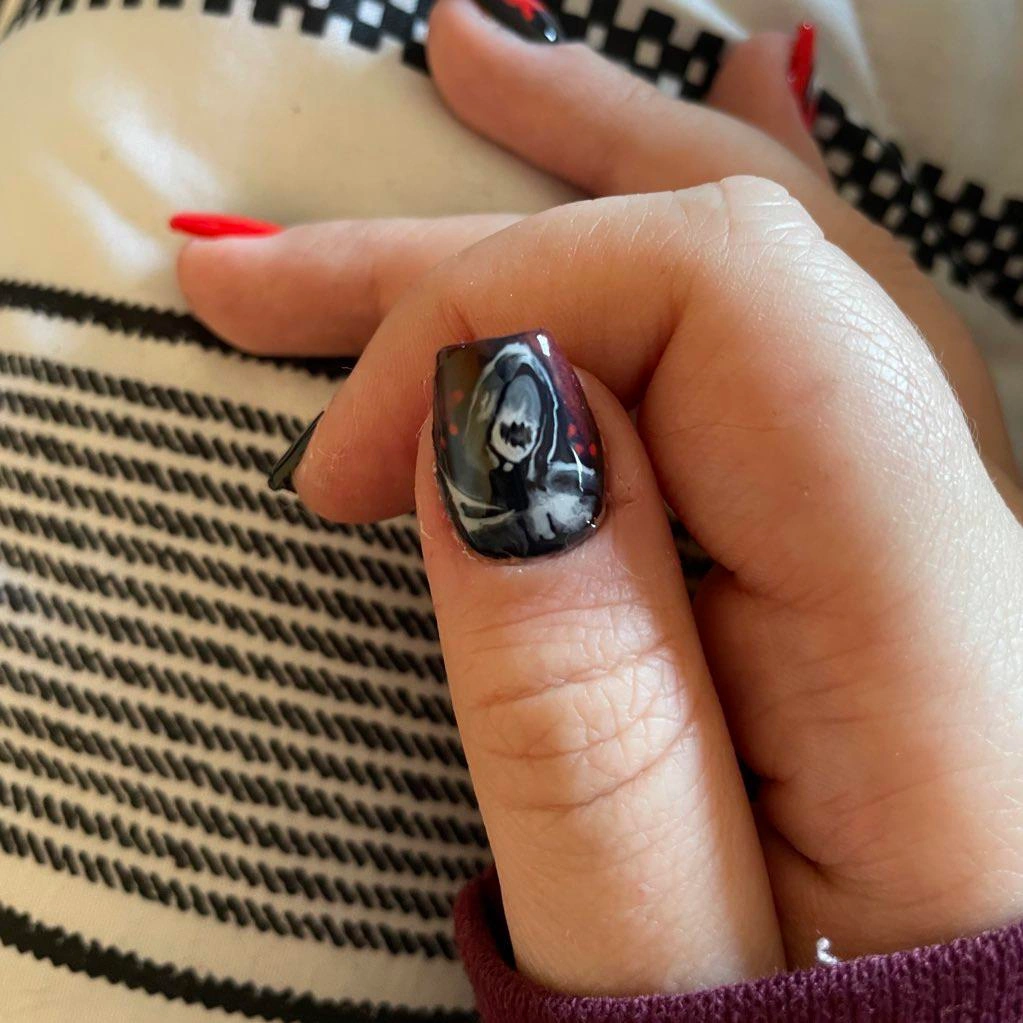
#17. Smoky Grim Reaper Thumb
Sometimes one detailed nail is enough. This close-up thumb uses a glossy charcoal-black base beneath a smoky gray hooded reaper illustration, with pale highlights around the face and surrounding shadows creating a miniature painted-scene effect.
Best For — Single-accent nail art and beginners
Pro Tip — Paint the hood first, then add the pale face with a 3/0 detail brush; wait or cure for 30 seconds between tones so the gray highlights don’t muddy together.
How to Choose
The right grim reaper Halloween nails depend on more than which picture looks coolest. Think about how the shape, colors, occasion, and amount of detail will work with your own nails and routine.
- Choose a practical nail shape — Coffin and stiletto nails give detailed characters more painting space, but short square and rounded nails are easier for everyday tasks. If you’re new to long extensions, an almond shape gives you a nice middle ground.
- Adjust the color contrast — Black and white artwork reads clearly on almost every skin tone, while blush, nude, lavender, gray, and bright pink can soften the overall effect. Choose a base shade that gives enough contrast for your reaper details to stay visible.
- Match the design to the occasion — A neon coffin manicure makes sense for a costume party, while the champagne-glitter skull set can work beautifully for dinner or a dressier October event. For work or school, one reaper accent nail is usually easier to wear.
- Be realistic about your skill level — Detailed portraits require a steady hand and several tiny brushes. Beginners can start with simple skull decals, dots, French tips, or one accent nail and still get the full grim reaper Halloween effect.
What You’ll Need
You don’t need a huge nail-art collection to recreate these designs. A few precise tools and high-contrast colors cover most of the techniques shown above.
Useful for reaper outlines, spiderwebs, bones, flames, and tiny facial details.
A highly opaque black makes silhouettes and French tips easier to define.
Ideal for tiny skull faces, bones, highlights, coffins, and character details.
Helpful for eyes, accent dots, drip ends, and other small rounded details.
A beginner-friendly shortcut for skulls, skeletons, bats, and gothic symbols.
Switching the finish can make the same spooky design feel completely different.
Pro Tips
Prep Before Painting
Lightly buff away surface shine with a 180- to 240-grit buffer, then wipe the nail with alcohol before applying base coat. Keeping polish off the skin and cuticle area also helps prevent early lifting.
Work in Thin Layers
Two thin color coats usually cure more evenly than one thick coat. Follow the cure time specified for your polish and lamp, especially when using highly pigmented black gel.
Flash-Cure Tiny Details
When a small skull eye, web line, or facial feature looks right, flash-cure it for about 10–15 seconds before continuing. This prevents the next brushstroke from dragging through finished details.
Seal the Free Edge
Run your top-coat brush lightly across the free edge before the final cure. That tiny step is especially useful on square and coffin nails, where tip wear tends to show first.
FAQ
Q: What colors work best for grim reaper Halloween nails?
A: Black, charcoal, white, and deep red create the clearest gothic look, but you don’t have to stay dark. Hot pink, lavender, nude, neon green, and silver glitter can make grim reaper nail art feel much more personal.
Q: Can I do grim reaper Halloween nails on short nails?
A: Absolutely. Keep the reaper on one accent nail and simplify the remaining fingers with dots, black French tips, glitter, or solid color. Designs #2 and #3 show how well spooky details can work on shorter lengths.
Q: How can beginners recreate detailed grim reaper nail art?
A: Start with decals or a simple skull-and-hood silhouette rather than a full shaded portrait. A dotting tool and fine liner brush are enough for many basic eyes, skull details, web lines, and outlines.
Q: What nail shape is best for detailed grim reaper designs?
A: Long coffin, square, and almond nails provide the most room for detailed figures. If you prefer short nails, use one simplified reaper accent and spread supporting elements such as bats, glitter, or French tips across the other fingers.
Recommended Product
Fine Detail Nail Art Liner Brush Set
★★★★☆ Highly rated on Amazon
Fine liner brushes make it much easier to control the tiny outlines, faces, bones, webs, and hood details used throughout grim reaper nail art.
As an Amazon Associate, we earn from qualifying purchases.
Final Thoughts
These grim reaper Halloween nails prove that spooky manicures can fit almost any style. You can keep things easy with one tiny accent, go glamorous with silver glitter, or use long coffin nails as a canvas for detailed gothic artwork.
Choose the look that works with your nail length and skill level, then borrow the colors or details you love most. There’s plenty of room to make the reaper theme your own.
Which of these nail looks are you trying first? Save this post to Pinterest so you can come back to it whenever you need fresh nail inspo!

Hi, I’m Jessica, the creator behind Unique Lash & Nails Katy.
I created this website for anyone who loves beautiful nails as much as I do. Here, I share trendy nail designs, seasonal manicure ideas, easy nail care tips, honest product recommendations, and step-by-step guides to help you create salon-worthy nails at home. Whether you’re looking for everyday inspiration or your next favorite nail trend, I hope you’ll find something you love.