17 Velvet Halloween Nails You’ll Want to Copy
If you love the rich, moody feel of velvet but still want your nails to say “Halloween,” you’re in the right place. These 17 designs mix deep jewel tones, spooky icons, and textures you can practically feel just by looking at them. Whether you’re after full-on clown chaos or a single glossy accent nail, there’s something here you’ll want to screenshot for your next salon visit.
✦ Our Top Picks at a Glance
Best Overall — Pink Mummy Blood-Drip Nails
Best for Beginners — Berry Pink Glossy Shimmer
Most Trendy — Midnight Blue Galaxy Glitter
Best for Special Occasions — Wine Velvet Damask Stiletto
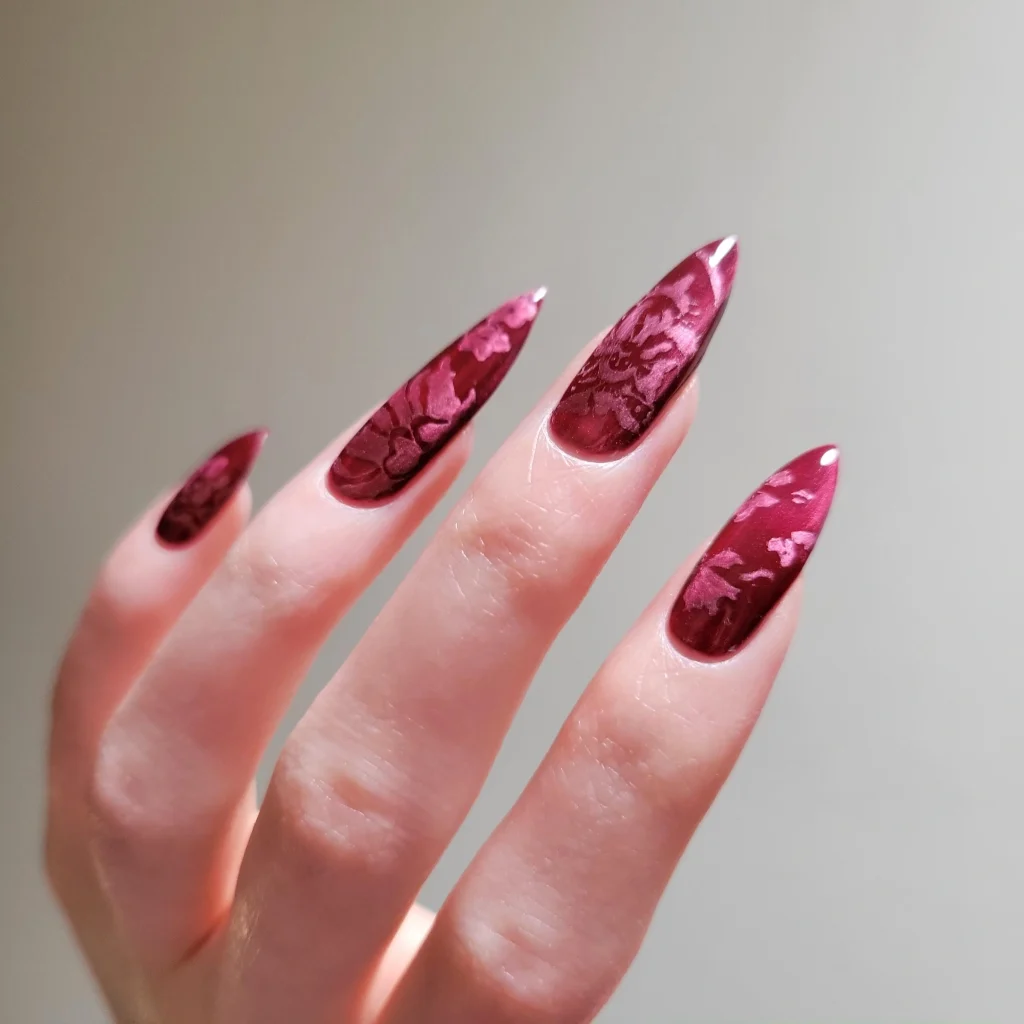


#1. Wine Velvet Damask Stiletto
Picture a deep wine base with a raised, jacquard-style floral pattern climbing across every nail like antique velvet wallpaper. The glossy topcoat catches the light so the blooms seem to shift between matte and shine depending on the angle.
Best For — date nights that call for old-world glamour
Pro Tip — Apply the stamped stamping plate design while your base coat is still slightly tacky, about 2 minutes after painting, so the pattern grips without smudging.
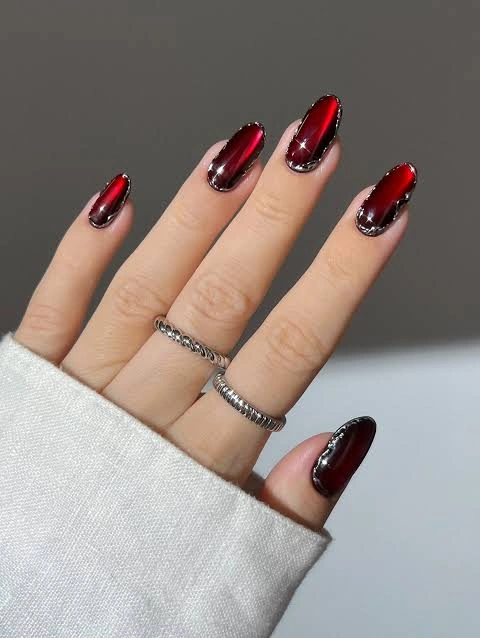
#2. Oxblood Jelly Chrome-Edge Almond
Unlike the softer looks on this list, this one goes bold with a translucent oxblood jelly polish rimmed in a thin metallic silver outline that traces each cuticle. It’s sleek, a little edgy, and pairs beautifully with the stacked silver rings shown here.
Best For — anyone who loves a glossy, jewel-toned finish
Pro Tip — Use a fine detail brush loaded with chrome polish and trace the cuticle line in one continuous stroke instead of dabbing, to keep the outline crisp.
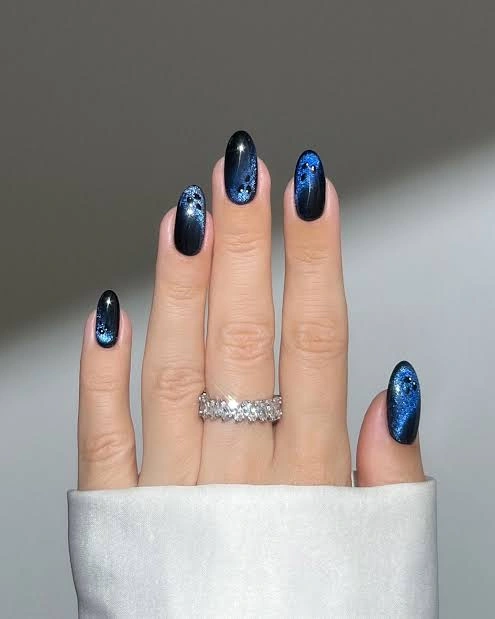
#3. Midnight Blue Galaxy Glitter
This one’s for anyone who loves a little drama in their everyday manicure. A near-black base fades into cobalt blue glitter clusters that genuinely look like a night sky caught mid-shimmer.
Best For — nights out where you want nails that sparkle
Pro Tip — Dab glitter gel polish with a makeup sponge instead of a brush, pressing straight down and lifting, to build density without streaking.
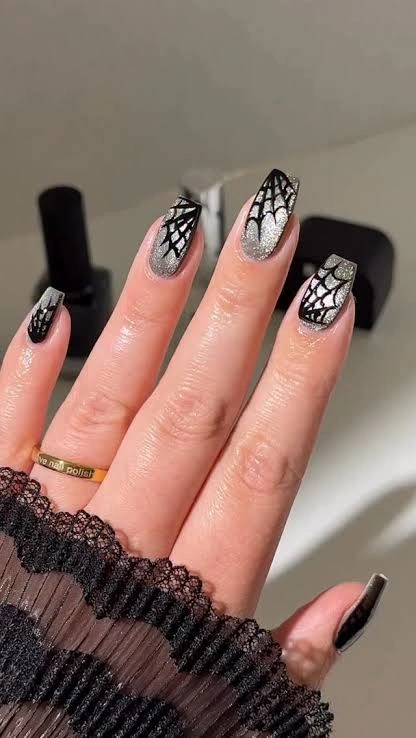
#4. Silver Glitter Spiderweb Coffin
Picture a shimmering silver glitter base layered with delicate black spiderweb lines hand-painted across select nails for just the right amount of spook. The long coffin shape gives the webs extra room to stretch across the nail.
Best For — fall parties that lean spooky-chic, not scary
Pro Tip — Thin your black gel polish with one drop of thinner before painting the web lines, so the brush glides thin enough for fine strands.
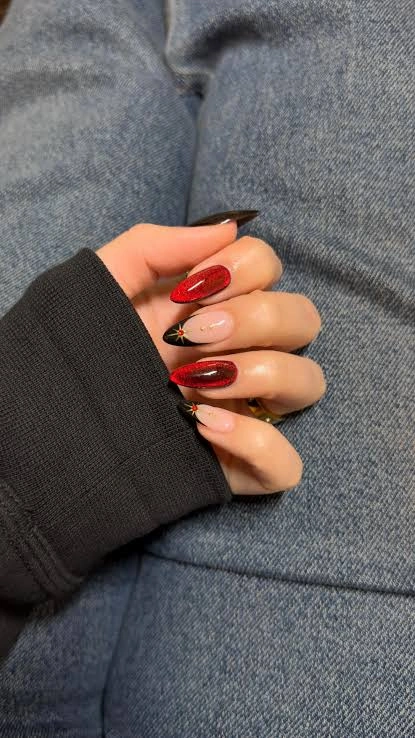
#5. Nude Black Ombre Starburst
Unlike the full-color looks nearby, this design keeps most nails neutral and lets one red glitter accent nail with a tiny gold starburst do all the talking. The rest fade from soft nude into deep black for quiet contrast.
Best For — minimalists who still want one statement nail
Pro Tip — Apply gold striping tape for the starburst lines before topcoat, pressing down with an orange stick for 5 seconds so the edges seal flat.
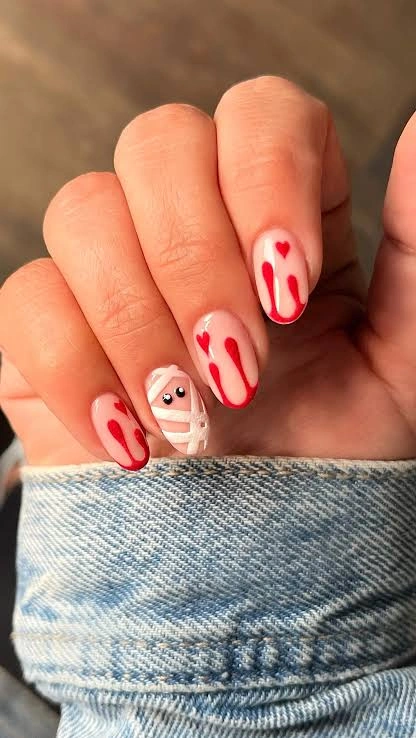
#6. Pink Mummy Blood-Drip Nails
Picture a soft pink base with glossy red heart-shaped drips running down each nail, paired with one nail wrapped in hand-painted mummy bandages complete with tiny googly eyes. It’s cute enough for daytime and still unmistakably Halloween.
Best For — trick-or-treating nights with a playful, cute edge
Pro Tip — Paint the mummy bandages as overlapping diagonal white stripes at roughly a 30° angle, leaving small gaps for the pink base to peek through before adding the eyes.
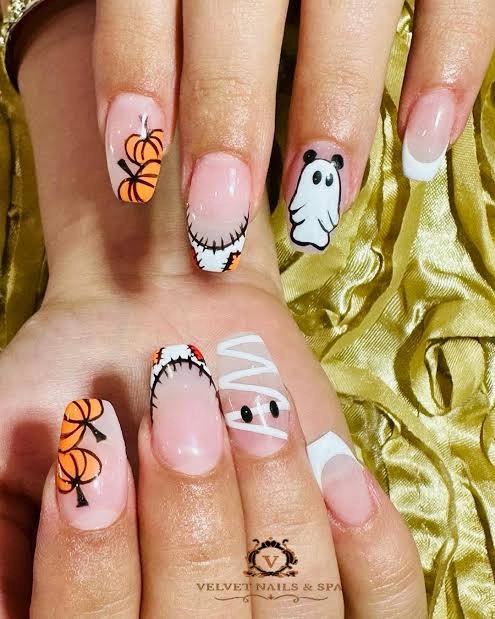
#7. French Tip Pumpkin Ghost
This one’s for the reader who can’t pick just one Halloween icon and wants them all on a single hand. A clean nude French base becomes the canvas for pumpkins, a round-eyed ghost, a stitched-mouth nail, and a mummy design, all in one set.
Best For — Halloween parties where every nail tells a story
Pro Tip — Freehand the pumpkin stems and stitches with a size 000 detail brush, cleaning the tip on a paper towel every two or three strokes to keep lines sharp.
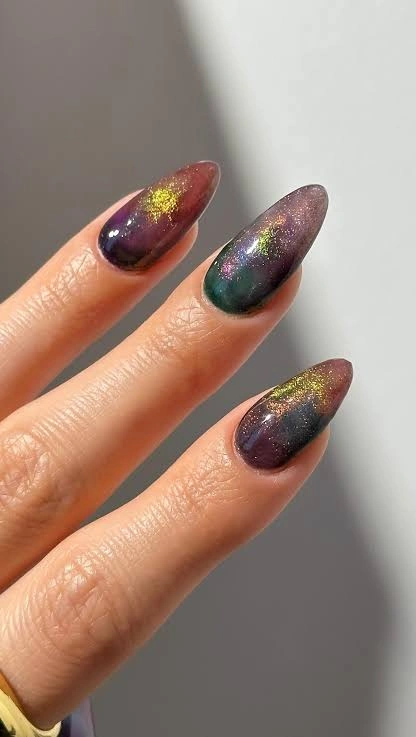
#8. Aurora Chrome Color-Shift Glitter
Picture a color-shifting chrome polish that swings from deep purple to forest green to burgundy depending on the light, with scattered gold glitter that looks like stardust caught in the finish. It’s one of those manicures that photographs differently every time.
Best For — anyone drawn to holographic, ever-changing finishes
Pro Tip — Apply chrome powder with a silicone applicator in small circular motions over tacky gel, then buff gently with a lint-free wipe for the smoothest shift.
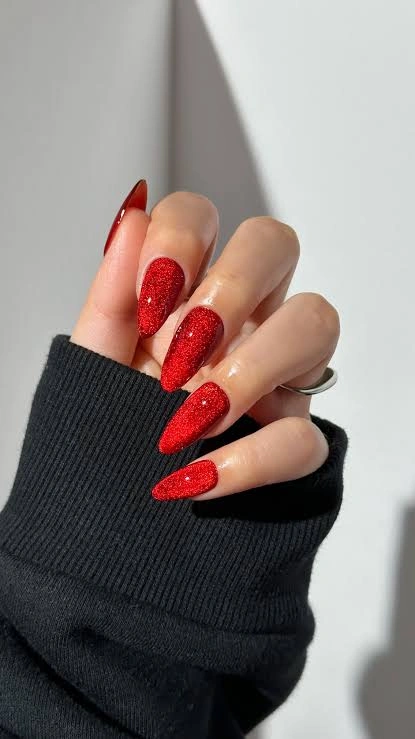
#9. Ruby Red Glitter Stiletto
Unlike the more subdued reds elsewhere on this list, this stiletto set goes all-in with dense, sparkling red glitter from cuticle to tip. The sharp point shape makes every catch of light feel a little more theatrical.
Best For — holiday parties that call for maximum sparkle
Pro Tip — Build glitter in three thin coats rather than one thick layer, letting each dry for 60 seconds, so the texture stays smooth instead of gritty.
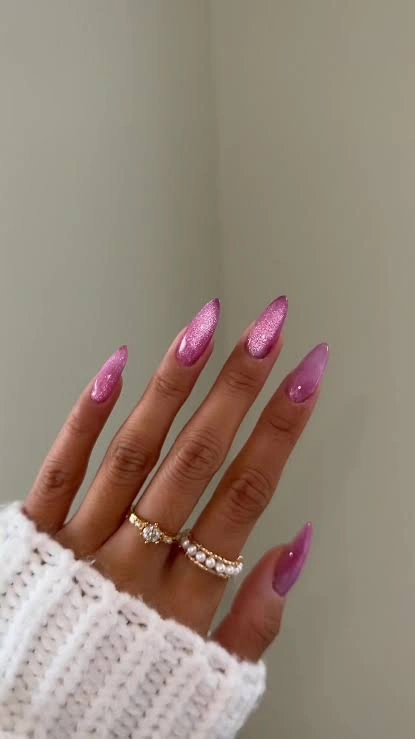
#10. Mauve Pink Shimmer Ombre
This one’s for the soft-glam lover who still wants a bit of edge. A mauve-pink shimmer fades toward a deeper plum near the tips, finished with a glossy, almost wet-look shine.
Best For — everyday fall manicures with a romantic feel
Pro Tip — Blend the two shimmer shades with a damp makeup sponge in a light dabbing motion, working from the tip inward so the gradient stays soft.
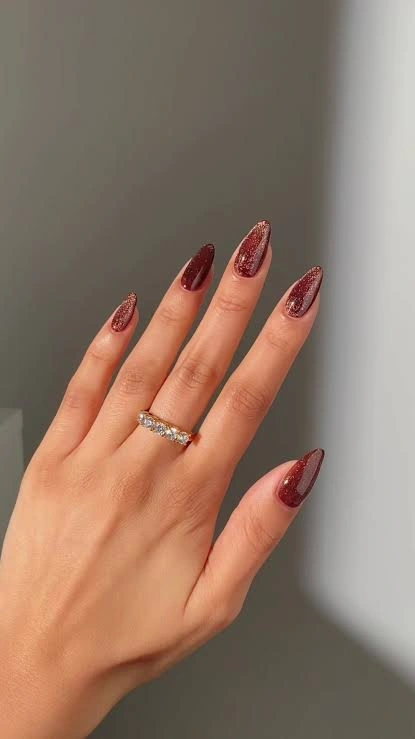
#11. Wine Burgundy Glitter Almond
Picture a rich burgundy glitter polish that reads almost black in shadow and glows garnet-red in direct light, kept simple with no extra nail art needed. The almond shape keeps the whole look polished and easy to wear anywhere.
Best For — anyone who wants glitter without the fuss
Pro Tip — Apply glitter polish in the direction of nail growth, from base to tip, so the particles lay flat instead of standing up and catching on fabric.
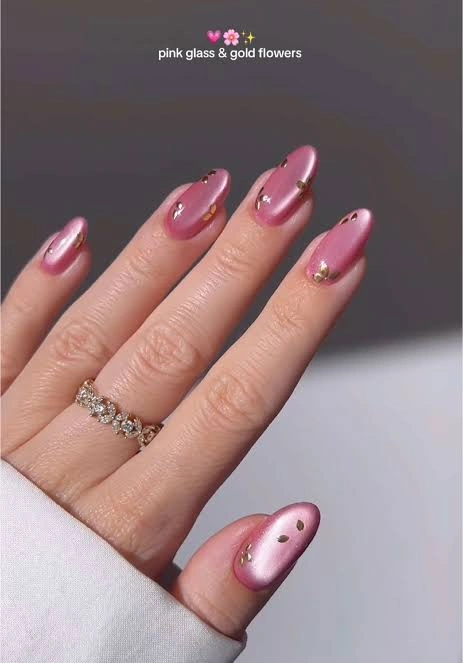
#12. Pink Glass Gold Flowers
Unlike the glitter-heavy looks nearby, this one leans into a smooth, glassy metallic pink finish accented with tiny gold foil flowers scattered near the cuticle. It’s soft, luminous, and surprisingly easy to recreate at home.
Best For — weddings and showers that call for soft glam
Pro Tip — Press gold foil flakes onto a dab of clear gel with the tip of an orange stick, then seal immediately with topcoat so they don’t shift.
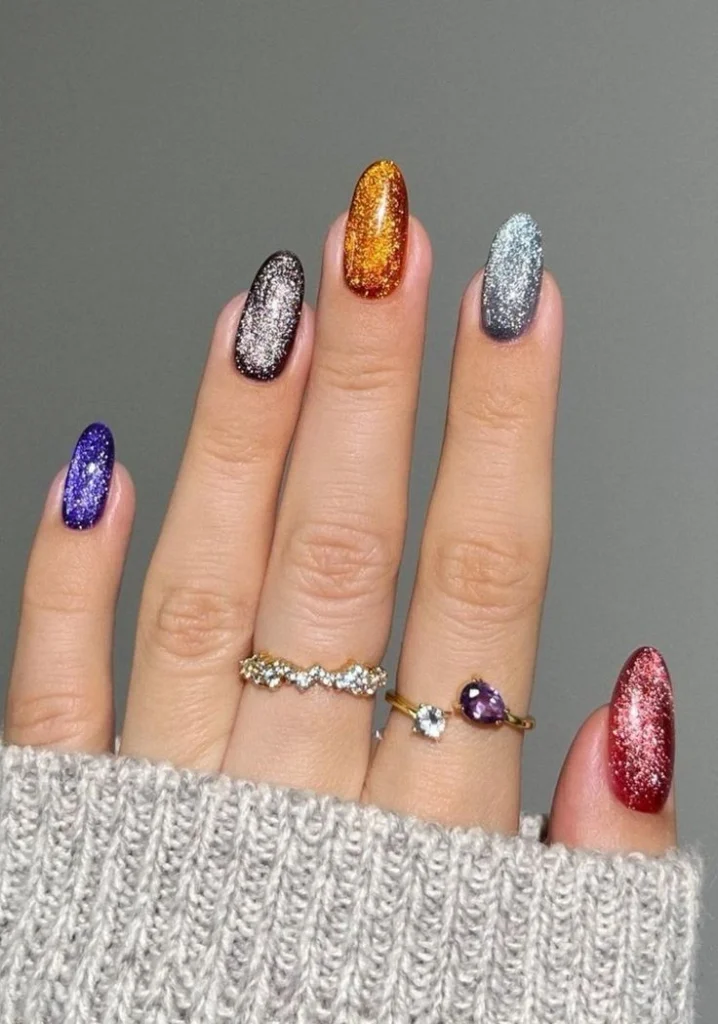
#13. Multicolor Glitter Mix Manicure
This one’s for the reader who can’t commit to a single shade. Every nail gets its own glitter color, from deep purple to fiery orange to icy silver, all under the same glossy topcoat so the mix still feels cohesive.
Best For — fans of maximalist, mix-and-match manicures
Pro Tip — Keep the same glitter size and finish across all five colors so the mismatched palette still reads as intentional instead of random.
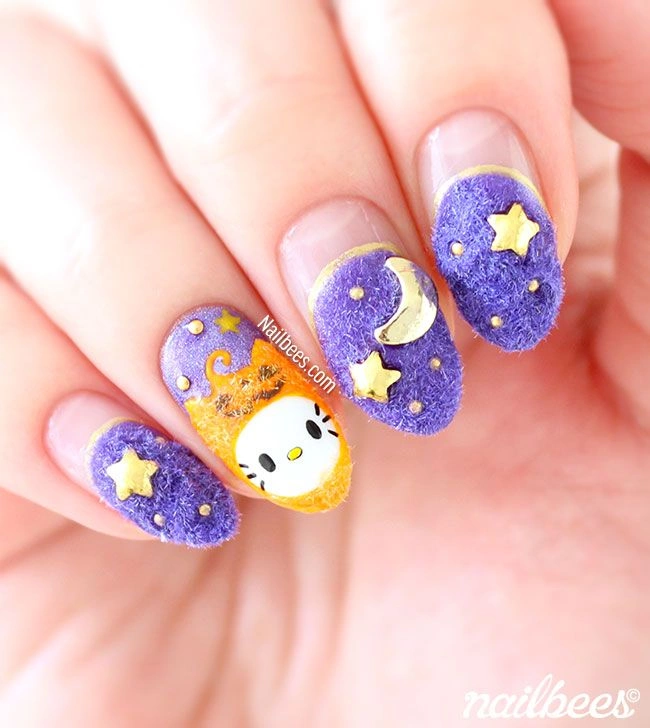
#14. Purple Fuzzy Hello Kitty
Picture a soft purple velvet-flocked texture you can actually feel, topped with gold star and moon charms and one nail featuring a hand-painted Hello Kitty peeking through the clouds. It’s the most literal “velvet nails” look on this whole list.
Best For — costume parties that reward a fun, tactile look
Pro Tip — Sprinkle flocking powder onto wet gel within 30 seconds of applying it, then press gently with a clean brush so the fibers stand up evenly.
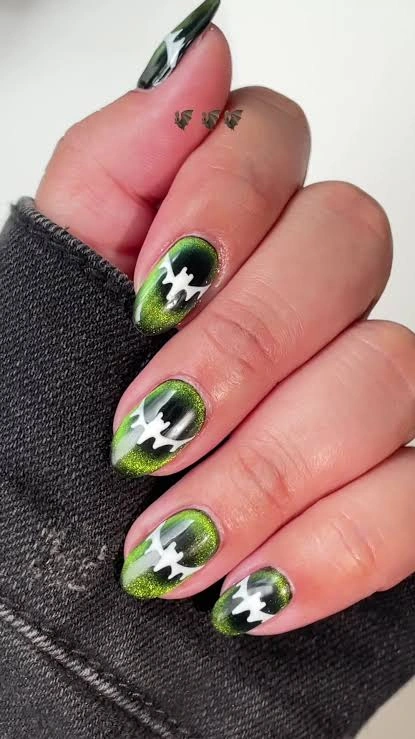
#15. Green Frankenstein Stitch Chrome
Unlike the pastel Halloween looks on this list, this design goes full monster with a shimmering green-to-black cat-eye base and bold white stitch marks that mimic Frankenstein’s scars. It’s campy in the best possible way.
Best For — anyone who wants a bold, campy Halloween look
Pro Tip — Drag a magnetic cat-eye tool over the wet chrome polish at a 45° angle for 5 seconds before curing, to pull the shimmer into that streaked effect.
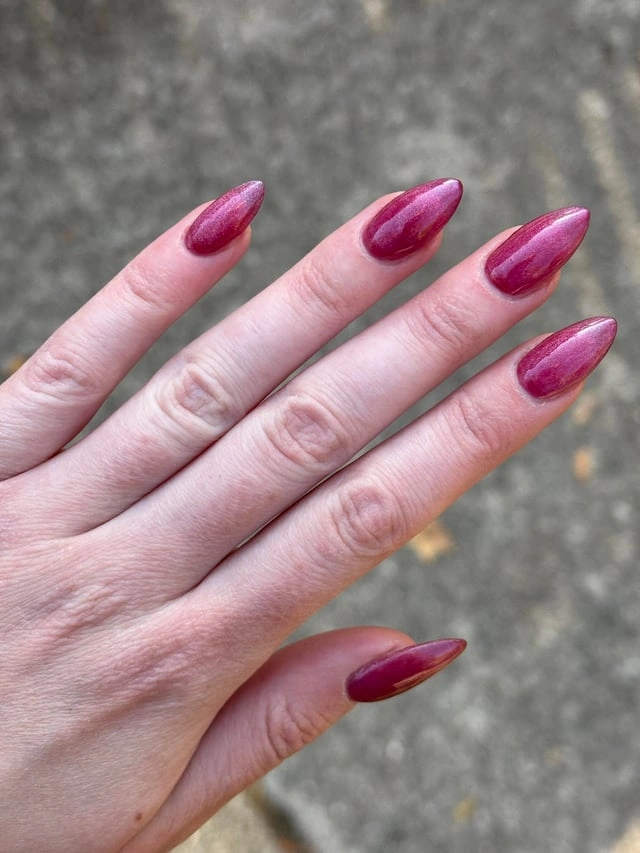
#16. Berry Pink Glossy Shimmer
This one’s for anyone who wants Halloween-adjacent color without any actual spooky art. A glossy berry-pink shimmer polish stands on its own, simple and wearable well past October.
Best For — days when you want low-maintenance color
Pro Tip — Apply two thin coats rather than one thick one, waiting a full 5 minutes between coats, so the shimmer particles stay evenly distributed instead of clumping.
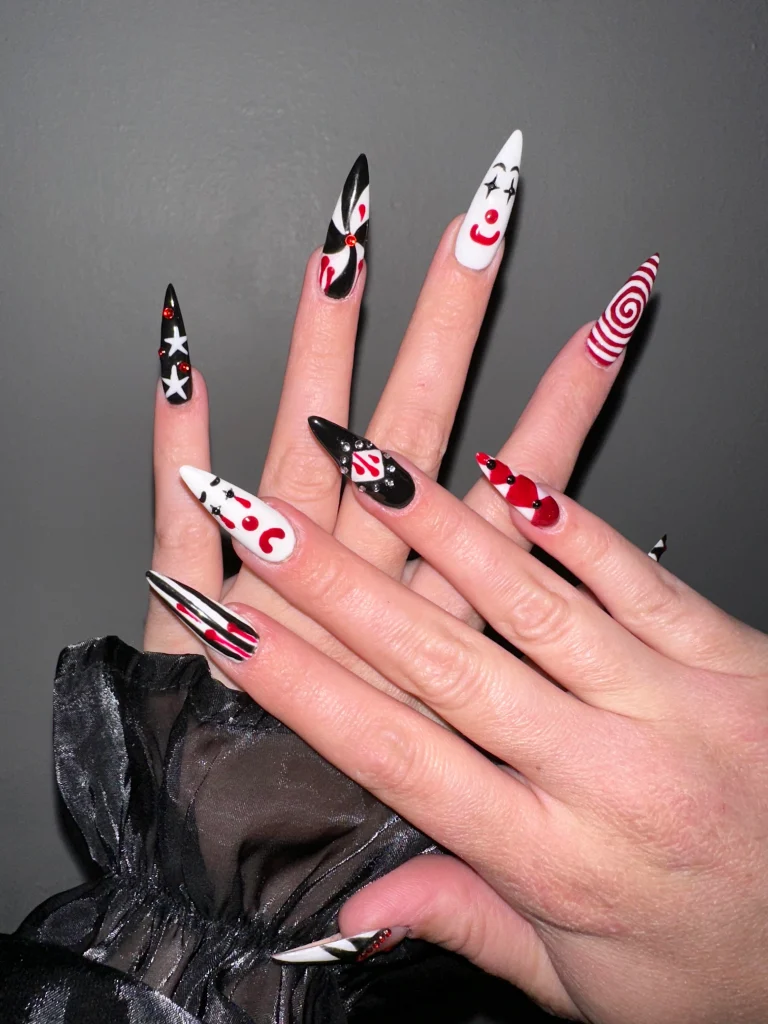
#17. Black White Circus Clown
Picture ten completely different mini designs on one hand: a grinning clown face, red-and-white swirls, hearts, stars, and rhinestone accents, all in a stark black-and-white palette with red for punch. It’s the most advanced design on this list, and it shows.
Best For — nail art lovers who want maximum detail
Pro Tip — Plan out all ten designs on paper first, assigning one motif per nail, so the black-and-white palette stays balanced instead of looking chaotic.
How to Choose the Right Nail Design
With 17 looks to pick from, narrowing it down comes down to a few practical factors. Here’s what to weigh before you book your appointment or pull out your polish.
- Nail shape — Stiletto and coffin shapes give designs like damask patterns and spiderwebs more surface area to stretch across. Shorter almond or round shapes work better for detailed scenes like the pumpkin-and-ghost French tips, since the smaller canvas keeps busy art from looking cluttered.
- Skin tone — Jewel tones like the wine, burgundy, and oxblood reds tend to flatter most undertones. If you want something that pops against warmer skin, the mauve-pink shimmer and pink glass looks read especially bright and fresh.
- Occasion — Save the full circus-clown or Frankenstein looks for costume parties and photos, and lean on the simpler glossy shimmers or single accent-nail designs for work or school, where a quieter Halloween nod fits better.
- Skill level — Ombre glitters, plain shimmers, and single accent nails are the easiest to DIY at home. Freehand scenes, stamped damask patterns, and the ten-design circus set are best left to a nail tech or attempted only once you’re comfortable with a detail brush.
What You’ll Need
A handful of core supplies will get you through almost every design on this list. Here’s what’s worth having on hand.
For that soft, textured velvet effect like the Hello Kitty design
For freehand work like the mummy bandages and clown faces
For color-shifting finishes like the aurora and Frankenstein looks
For repeatable patterns like the damask floral design
For delicate accents like the pink glass and gold flowers look
For streaked, shimmery finishes like the galaxy and green looks
Pro Tips for a Long-Lasting Manicure
Cure Every Layer Fully
Under-cured gel is the number one reason for early chipping. Cure each layer for the full 30 to 60 seconds your lamp calls for, even when a coat looks dry on the surface.
Cap the Free Edge
Every coat, including topcoat, should be swept across the very tip of the nail. This seals the edge and stops water and friction from lifting the polish from the corners first.
Wipe Away Tacky Residue
After your final cure, wipe each nail with a lint-free pad and a little rubbing alcohol. This removes the sticky top layer left by gel polish and keeps dust from settling into the finish.
Apply Cuticle Oil Daily
A drop of cuticle oil around the base of each nail every night keeps the surrounding skin flexible. Dry, cracked cuticles are one of the fastest ways to cause gel to lift early.
Frequently Asked Questions
Q: What makes a nail design “velvet” instead of just matte?
A: True velvet nails use a flocking powder pressed into wet gel, which creates raised fuzzy fibers you can actually feel. A matte topcoat only changes the shine, not the texture, so it looks flat rather than plush.
Q: How long do velvet Halloween nails typically last?
A: With gel polish and proper curing, most of these designs last two to three weeks before you’ll notice regrowth. Flocked or textured nails may need a protective topcoat refresh around the one-week mark to keep the fibers from flattening.
Q: Can I recreate these designs with press-on nails instead of gel?
A: Yes, and it’s often easier for beginners. Simpler looks like the berry pink shimmer or the wine glitter almond translate especially well to press-ons, since they don’t rely on freehand detail work.
Q: What’s the easiest velvet Halloween nail design for a beginner to try at home?
A: The berry pink glossy shimmer or the wine burgundy glitter almond are the most forgiving. Both rely on a single polish application with no freehand art, so there’s little room for mistakes.
Recommended Product
Velvet Flocking Powder Nail Art Kit
★★★★☆ Highly rated on Amazon
If you want to try the actual velvet-textured look from this list, a flocking powder kit is the one product that makes it possible at home.
As an Amazon Associate, we earn from qualifying purchases.
Final Thoughts
From jacquard-stamped stilettos to a full circus of mini designs on one hand, this list proves Halloween nails don’t have to mean orange and black. Pick whichever mood fits your plans, and don’t be afraid to mix elements from two or three looks into your own set.
Which of these nail looks are you trying first? Save this post to Pinterest so you can come back to it whenever you need fresh nail inspo!

Hi, I’m Jessica, the creator behind Unique Lash & Nails Katy.
I created this website for anyone who loves beautiful nails as much as I do. Here, I share trendy nail designs, seasonal manicure ideas, easy nail care tips, honest product recommendations, and step-by-step guides to help you create salon-worthy nails at home. Whether you’re looking for everyday inspiration or your next favorite nail trend, I hope you’ll find something you love.