17 Coffin Halloween Nails for a Spooky-Chic Manicure
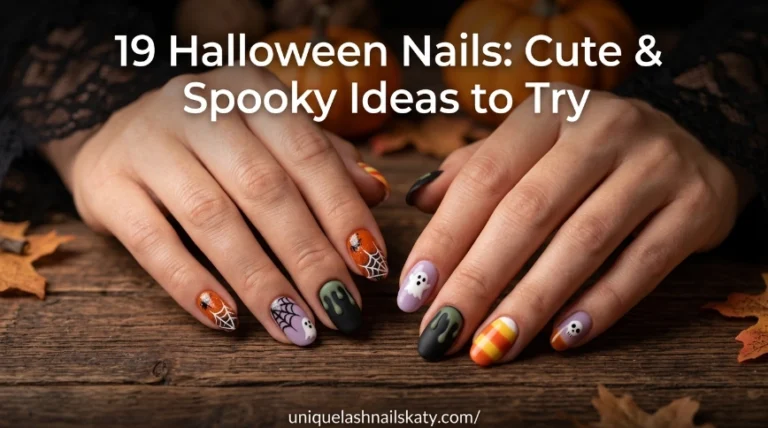
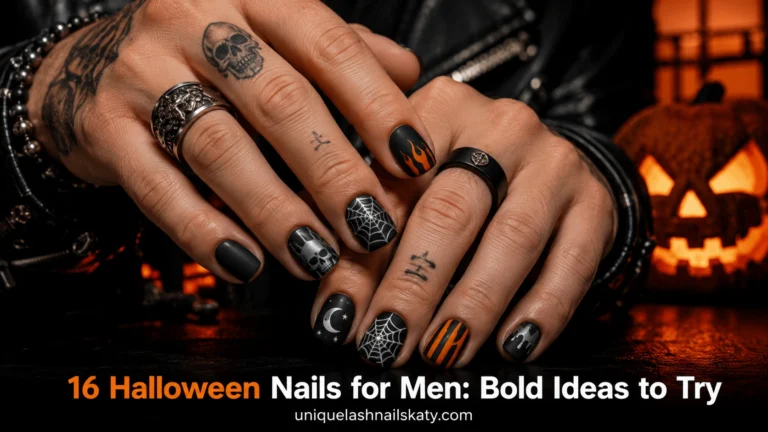
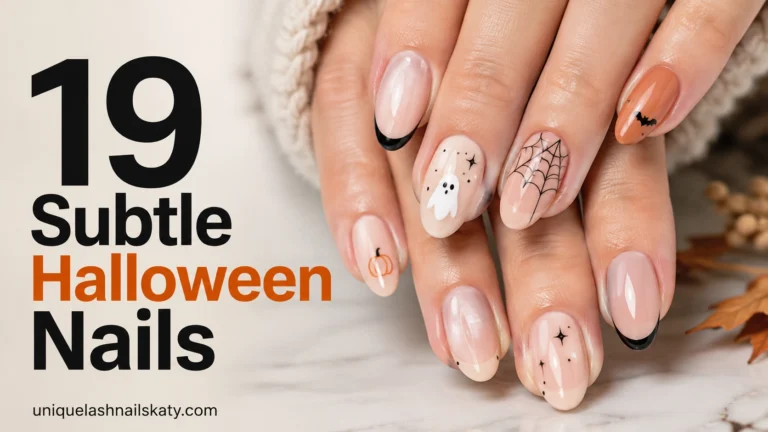
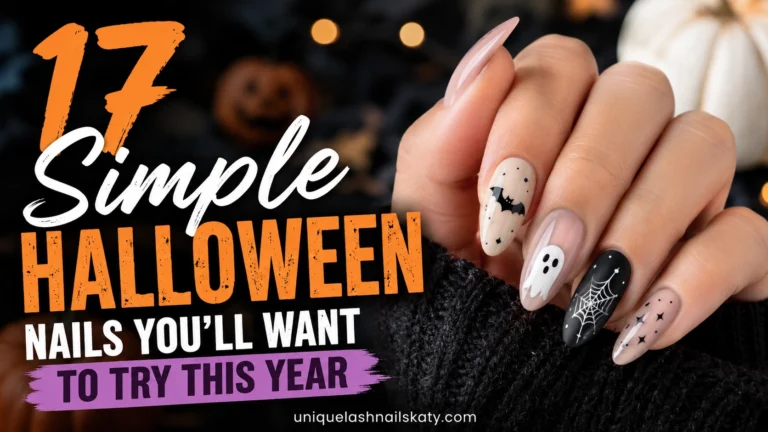
If you want your Halloween manicure to feel dramatic, stylish, and a little mysterious, coffin nails are the perfect canvas. Their long, tapered shape gives spooky artwork plenty of room to shine.
From black spiderwebs and ghostly details to bloody drips, orange flames, glitter, and gothic line art, these coffin Halloween nails offer an idea for every kind of October mood.
Whether you’re booking a salon appointment or recreating your favorite look at home, you’ll find plenty of inspiration below.
✦ Our Top Picks at a Glance
Best Overall — Black Coffin Nails with White Cross Details
Best for Beginners — Black Coffin Nails with Gothic White Line Art
Most Trendy — Orange and Black Snake Halloween Coffin Nails
Best for Special Occasions — Silver and Red Gothic Coffin Nails
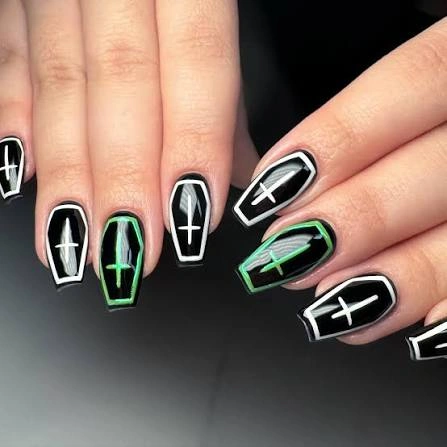
#1. Black Coffin Nails with White Cross Details
Glossy black coffin nails become instantly haunting with crisp white cross details and thin silver edging. The stark contrast makes this manicure feel gothic and polished rather than overly complicated.
Best For — gothic lovers wanting clean Halloween drama
Pro Tip — Use a fine liner brush for the crosses and let the black base cure completely before adding white details.
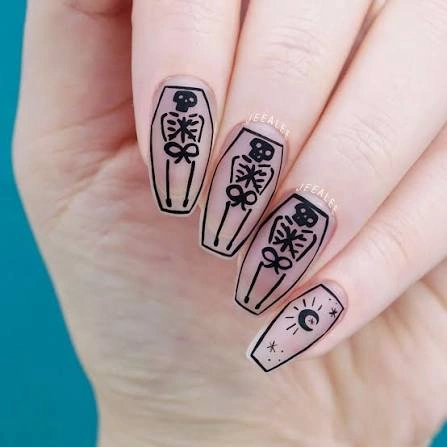
#2. Nude Coffin Nails with Black Skeleton Artwork
A soft nude-pink base keeps these coffin nails surprisingly delicate while black skeleton illustrations bring in the spooky factor. Tiny bows and floral-style details add a quirky twist to the macabre artwork.
Best For — soft-goth fans who prefer detailed artwork
Pro Tip — Keep the nude base sheer so the black illustrations remain the clear focal point.
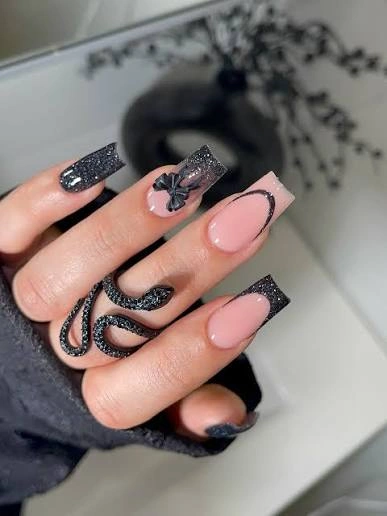
#3. Black and Pink Glitter Spiderweb Coffin Nails
Pink, black, and glitter come together in a playful Halloween combination that feels glamorous as well as spooky. Curved spiderweb artwork and sparkling black accents make the long coffin shape look especially dramatic.
Best For — glam girls who want spooky sparkle
Pro Tip — Apply glitter in thin layers and seal the textured accents with a generous glossy top coat.
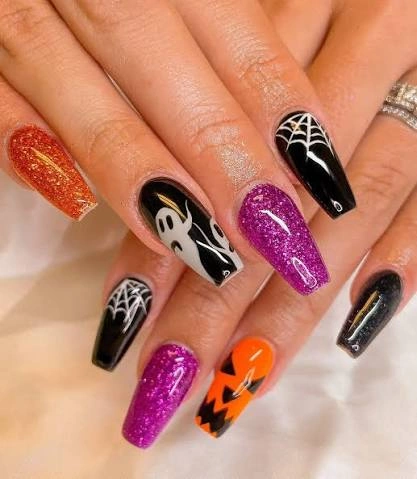
#4. Black Coffin Nails with Orange Glitter and Ghost Art
Bright orange glitter instantly warms up the glossy black base, while tiny ghosts, spiderwebs, and playful Halloween details create a festive finish. This look has enough color to stand out beautifully against dark October outfits.
Best For — classic Halloween fans wanting colorful accents
Pro Tip — Put orange glitter on only two or three nails so the black base remains visually dominant.
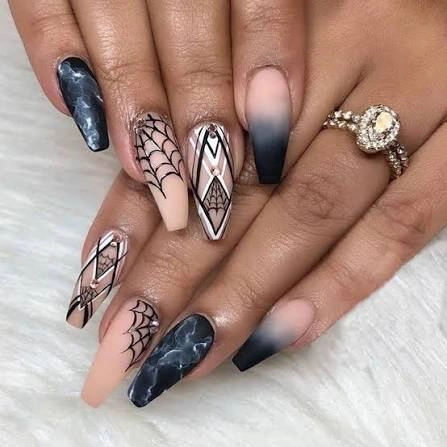
#5. Black and Smoky Nude Spiderweb Coffin Nails
Smoky gray, nude, and black shades create a moody base for intricate spiderweb artwork. The mix of marble-like texture and delicate web lines gives these coffin nails a mysterious, almost enchanted appearance.
Best For — elegant goth style with an October twist
Pro Tip — Draw the main web spokes first, then connect them with curved lines for cleaner symmetry.
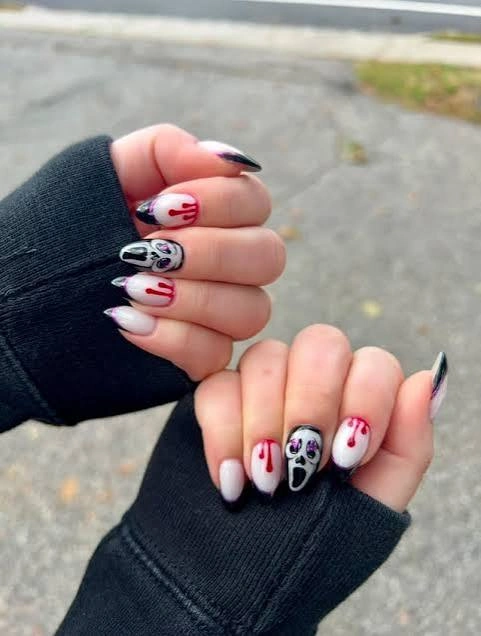
#6. White Coffin Nails with Red Blood Drips and Horror Accents
Long coffin nails get a chilling makeover with milky white bases, sharp red drips, metallic accents, and a creepy coffin-inspired feature nail. The bright red details make the design look especially striking from a distance.
Best For — horror lovers making a bold statement
Pro Tip — Make blood drips different lengths so they look organic instead of evenly repeated.
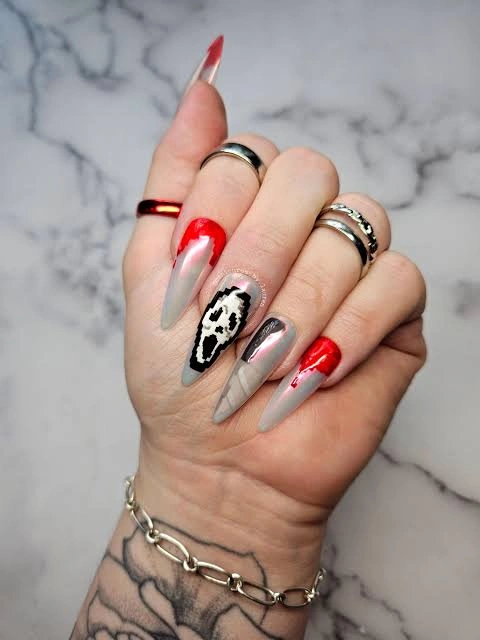
#7. Silver and Red Gothic Coffin Nails
Reflective silver and glossy red transform these long coffin nails into a glamorous gothic statement. A dramatic coffin illustration adds the unmistakable Halloween element without covering every nail in complicated art.
Best For — parties, costumes, and dramatic evening looks
Pro Tip — Use chrome or metallic powder over a smooth cured surface for the cleanest reflective finish.
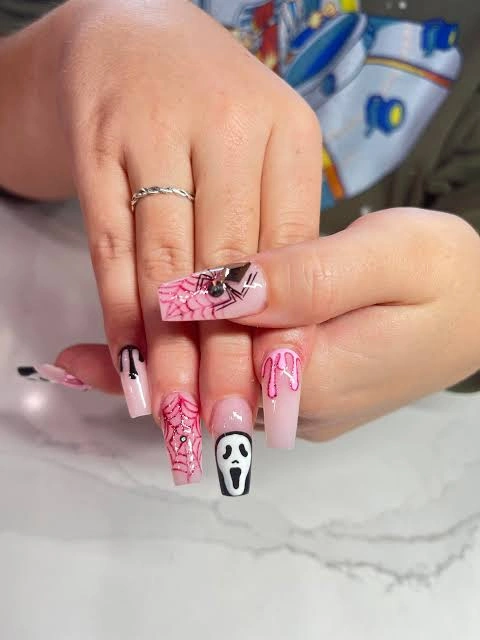
#8. Pink Spiderweb and Ghost Coffin Nails
Soft pink coffin nails become spooky with black spiderwebs, tiny red drips, and an instantly recognizable ghost face. The feminine base keeps the manicure playful rather than overwhelmingly dark.
Best For — pink lovers who enjoy cute spooky details
Pro Tip — Use a translucent pink base to make the black artwork pop while keeping the manicure soft.
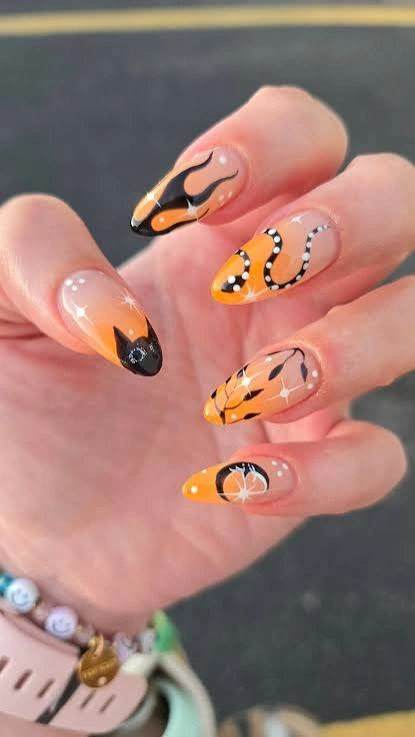
#9. Orange and Black Snake Halloween Coffin Nails
Orange French-style tips, black flame details, snakes, stars, and glossy highlights create a fiery Halloween manicure. The warm orange palette feels festive while the serpentine artwork adds an unexpected edgy touch.
Best For — trend lovers wanting a unique October manicure
Pro Tip — Paint the orange tips first and add black outlines only after the orange layer is fully cured.
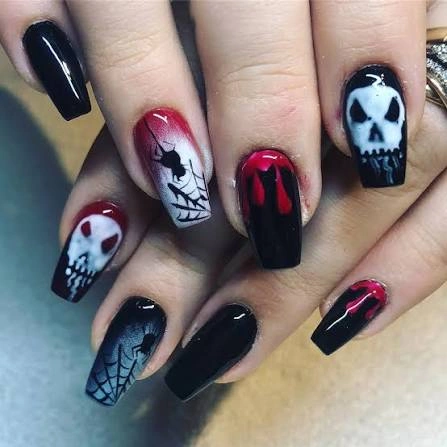
#10. Black Skull and Red Drip Coffin Nails
Glossy black coffin nails are paired with white skull artwork, delicate spiderwebs, and glossy red drips for a classic horror-inspired manicure. The mostly black palette makes the red accents look even more dramatic.
Best For — classic horror fans wanting bold contrast
Pro Tip — Use a dotting tool for skull eyes and teeth so the small white details stay crisp.
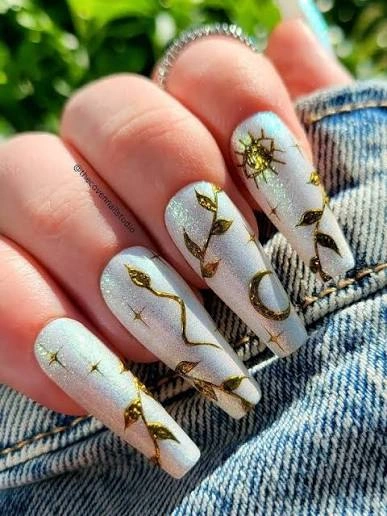
#11. White Coffin Nails with Gold Botanical Halloween Art
Milky white coffin nails provide a bright, elegant backdrop for delicate gold leaves, stems, and tiny seasonal details. This is a softer interpretation of Halloween that feels sophisticated enough to wear beyond October.
Best For — elegant minimalists wanting seasonal detail
Pro Tip — Apply gold foil sparingly and seal its edges carefully so the delicate pieces don’t lift.
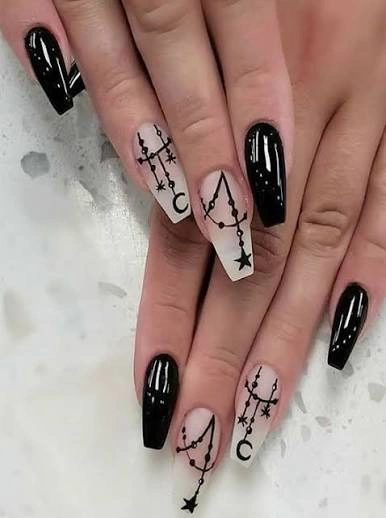
#12. Black and White Gothic Star Coffin Nails
Glossy black coffin nails alternate with pale accent nails decorated in gothic chains, stars, moons, and delicate line work. The combination feels witchy and mysterious without relying on bright Halloween colors.
Best For — witchy style fans who love monochrome nails
Pro Tip — Sketch your chains and stars with a very thin brush before filling in any thicker sections.
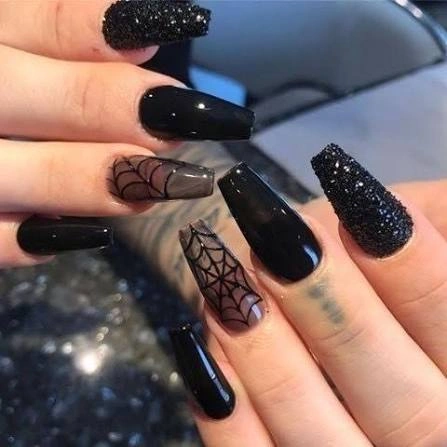
#13. Black Coffin Nails with Gothic White Line Art
High-shine black coffin nails are balanced with pale accent nails covered in delicate gothic line drawings. Web-like curves, stars, and hanging ornaments create a refined spooky look with plenty of visual breathing room.
Best For — beginners wanting elegant gothic details
Pro Tip — Keep the white line art thin and use the same repeating motifs on both hands for balance.
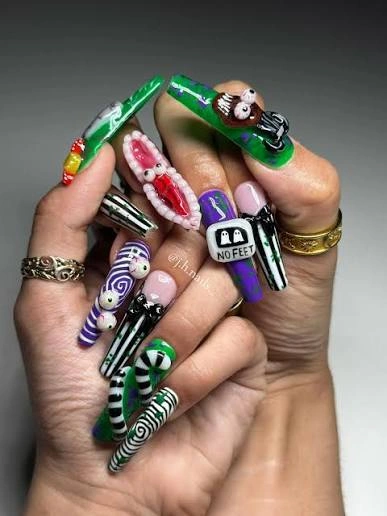
#14. Textured Black Coffin Nails with Spiderweb Accents
Ultra-glossy black nails meet textured glitter accents and translucent spiderweb artwork for a manicure packed with dimension. The contrast between smooth and rough finishes makes this design especially eye-catching.
Best For — texture lovers craving dark statement nails
Pro Tip — Cure textured glitter accents thoroughly before applying top coat around their edges.
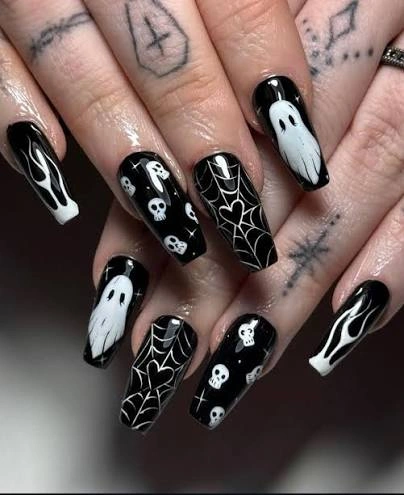
#15. Black Coffin Nails with Neon Halloween Details
Electric green accents instantly bring energy to a black coffin manicure, especially when paired with graphic white details and sharp geometric lines. The neon contrast gives this spooky style a modern, almost futuristic feel.
Best For — bold personalities who love unexpected color
Pro Tip — Paint a white underlayer beneath neon green polish to make the fluorescent color look brighter.
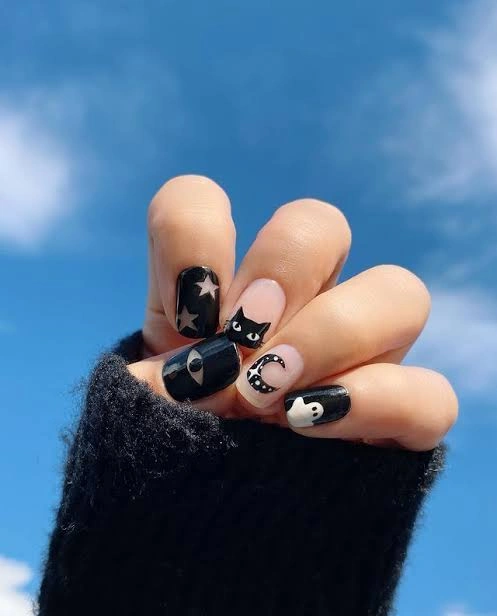
#16. Black and Pink Ghost Coffin Nails
Pink coffin nails decorated with spiderwebs, drips, ghostly faces, and black accents create a fun alternative to traditional orange Halloween manicures. The contrast is youthful, playful, and still unmistakably spooky.
Best For — playful Halloween fans who love pink
Pro Tip — Use pink as the main background and reserve black for outlines so the set doesn’t become visually heavy.
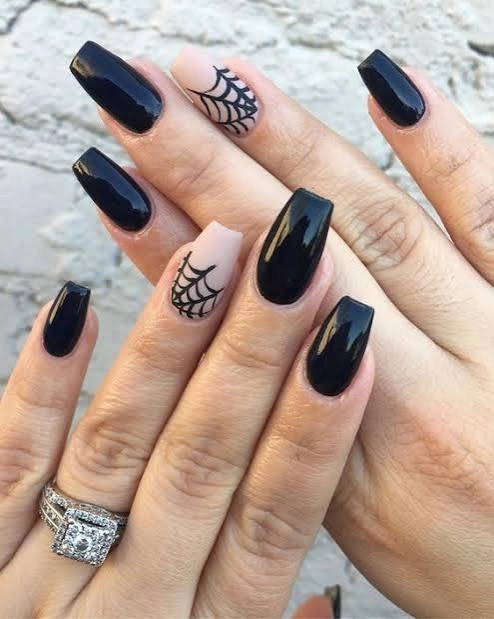
#17. Glossy Black Coffin Nails with Spiderweb Texture
Deep glossy black coffin nails make a dramatic foundation for raised glitter textures and delicate spiderweb accents. The mostly monochrome palette gives the manicure a sophisticated gothic finish that works especially well at night.
Best For — dark manicure lovers wanting subtle Halloween texture
Pro Tip — Keep the spiderweb lines slightly raised while leaving the main black nails ultra-glossy for contrast.
How to Choose the Right Nail Design
The best coffin Halloween nails aren’t necessarily the most complicated ones. Start with your nail length, preferred shape, outfit, and how much detail you’re comfortable maintaining.
- Nail shape — Coffin nails already provide a long, structured canvas, making them excellent for spiderwebs, skulls, ghosts, dripping designs, and detailed gothic artwork. If your natural nails are shorter, extensions can give you more room for intricate details.
- Skin tone — Nude, pink, black, white, orange, and red can all work beautifully across different undertones. If you want a softer contrast, choose a nude or blush base; for maximum drama, black with white or red details creates a stronger visual effect.
- Occasion — A Halloween party is the perfect excuse for blood drips, skulls, neon accents, and dramatic artwork. For dinner, work, or everyday October wear, try black-and-white line art, subtle spiderwebs, or a simple ghost accent instead.
- Skill level — Simple French tips, dots, stickers, and drip shapes are easier for beginners. Fine spiderwebs, skull faces, tiny gothic symbols, and raised textures usually take more patience or professional nail-art experience.
If you love ghost details, you can also explore these ghost Halloween nails for more spooky inspiration.
For a dressier black manicure, these black nail designs can also give you ideas for keeping dark nails elegant.
What You’ll Need
You don’t need a huge collection of nail-art supplies to recreate these coffin Halloween nails. A few dependable tools will handle most of the designs above.
Useful for spiderwebs, gothic lines, drips, and tiny artwork.
Creates the dramatic base used throughout many Halloween looks.
Essential for ghosts, skulls, crosses, webs, and contrast details.
Helps create eyes, skull details, rounded drips, and small accents.
A simple shortcut for ghosts, webs, skulls, bats, and seasonal motifs.
Seals detailed artwork and gives glossy black nails their glass-like finish.
Pro Tips for a Long-Lasting Manicure
Prep the Nail Surface
Clean and dry your nails before applying base coat. Removing excess oil helps your manicure adhere more evenly and gives detailed Halloween artwork a smoother foundation.
Build Artwork in Thin Layers
Thin layers give you much better control over tiny skulls, webs, drips, and line art. With gel products, cure each layer according to the product directions before adding the next detail.
Seal the Free Edge
Run a small amount of top coat across the free edge of each coffin nail. This is especially helpful when your manicure includes glitter, French tips, or artwork close to the tip.
Protect Detailed Designs
Avoid picking at raised decorations, decals, or textured glitter if an edge begins to lift. Keeping the surface protected helps preserve tiny Halloween details for longer.
If you want to keep your manicure looking polished after Halloween, consider choosing neutral black, nude, white, or metallic details that can transition naturally into fall. You can also browse these October nail ideas for more seasonal inspiration.
Frequently Asked Questions
Q: What are the best coffin Halloween nails for beginners?
A: Start with a solid black or nude coffin base and add simple details such as white crosses, dots, French tips, small ghosts, or easy spiderweb accents. Stickers are another helpful shortcut if detailed freehand art feels difficult.
Q: What colors look best for coffin Halloween nails?
A: Black and white create the classic gothic look, while orange adds traditional Halloween warmth. Red, pink, silver, nude, and neon green can completely change the mood while keeping the manicure seasonal.
Q: Are coffin nails good for detailed Halloween nail art?
A: Yes. The long, tapered shape provides plenty of space for spiderwebs, ghosts, skulls, dripping effects, gothic symbols, and other detailed artwork. Longer extensions offer even more room for intricate designs.
Q: How can I make my coffin Halloween nails last longer?
A: Start with clean, dry nails, apply thin coats, cure gel products properly according to their directions, and seal the free edge with top coat. Avoid using your nails as tools and don’t pick at lifted artwork.
Recommended Product
Fine Detail Nail Art Brush Set
★★★★☆ Highly rated on Amazon
A fine detail brush set makes it easier to create the thin spiderwebs, gothic lines, drips, and tiny Halloween artwork featured throughout these coffin nail ideas.
As an Amazon Associate, we earn from qualifying purchases.
Final Thoughts
These coffin Halloween nails prove that spooky doesn’t have to mean predictable. Whether you prefer glossy black, delicate gothic line art, bloody red drips, bright orange, playful pink, or textured spiderwebs, there’s a look here that can match your October style.
Choose the design that fits your nail length, outfit, and comfort level, then make it your own with your favorite Halloween colors and details.
Which of these nail looks are you trying first? Save this post to Pinterest so you can come back to it whenever you need fresh nail inspo!

Hi, I’m Jessica, the creator behind Unique Lash & Nails Katy.
I created this website for anyone who loves beautiful nails as much as I do. Here, I share trendy nail designs, seasonal manicure ideas, easy nail care tips, honest product recommendations, and step-by-step guides to help you create salon-worthy nails at home. Whether you’re looking for everyday inspiration or your next favorite nail trend, I hope you’ll find something you love.