16 Halloween Nails for Men: Bold Ideas to Try
Halloween nail art isn’t just about orange polish and cute pumpkins. If you want something darker, edgier, or more understated, these halloween nails for men offer plenty of inspiration.
From black-and-white skulls to dripping blood, creepy characters, flames, spiders, and graphic patterns, these looks prove that Halloween nail art can be seriously bold.
Whether you have short natural nails or prefer long statement tips, there’s a design here worth saving.
✦ Our Top Picks at a Glance
Best Overall — Black & Red Spooky Stiletto Nails
Best for Beginners — Black & White Checkered Halloween Nails
Most Trendy — Neon Halloween Character Nails
Best for Special Occasions — Silver Horror Face Nails
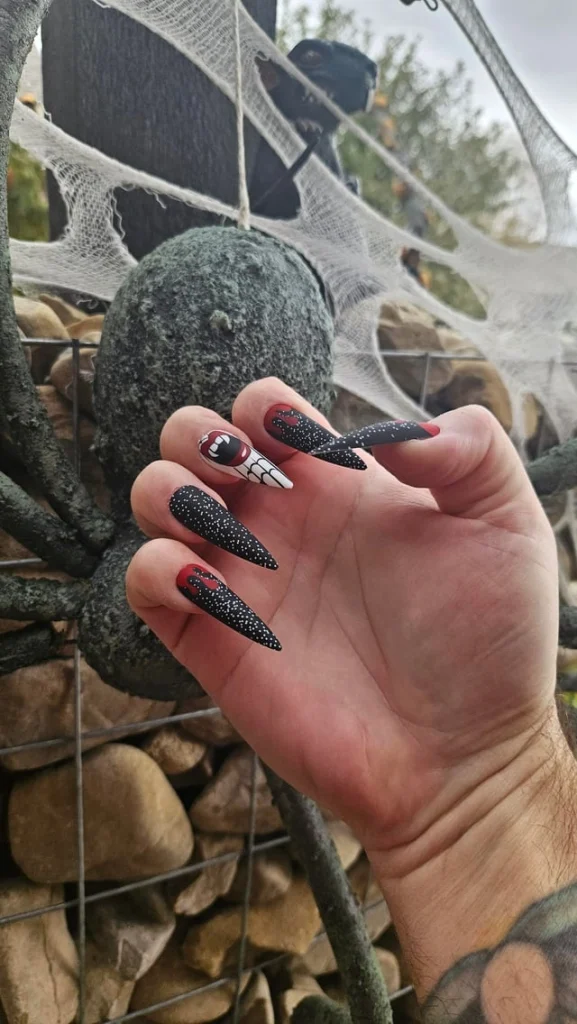
#1. Black & Red Spooky Stiletto Nails
Long black stiletto nails get a dramatic Halloween makeover with tiny white speckles, red accents, spooky character details, and a creepy spiderweb-inspired pattern. The contrast feels dark and theatrical without relying on a single predictable Halloween symbol.
Best For — bold personalities who love dramatic Halloween style
Pro Tip — Use a fine liner brush for the tiny white details and cure each layer before adding red artwork.
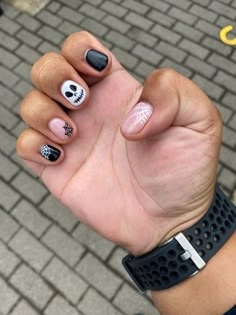
#2. Black & White Checkered Halloween Nails
Short nails look surprisingly edgy with a simple mix of black polish, white checkers, tiny faces, and flame-like accents. The compact artwork works especially well when you want Halloween energy without long extensions.
Best For — short nails and clean graphic Halloween looks
Pro Tip — Use striping tape as a guide when painting the checkerboard squares so the tiny pattern stays crisp.
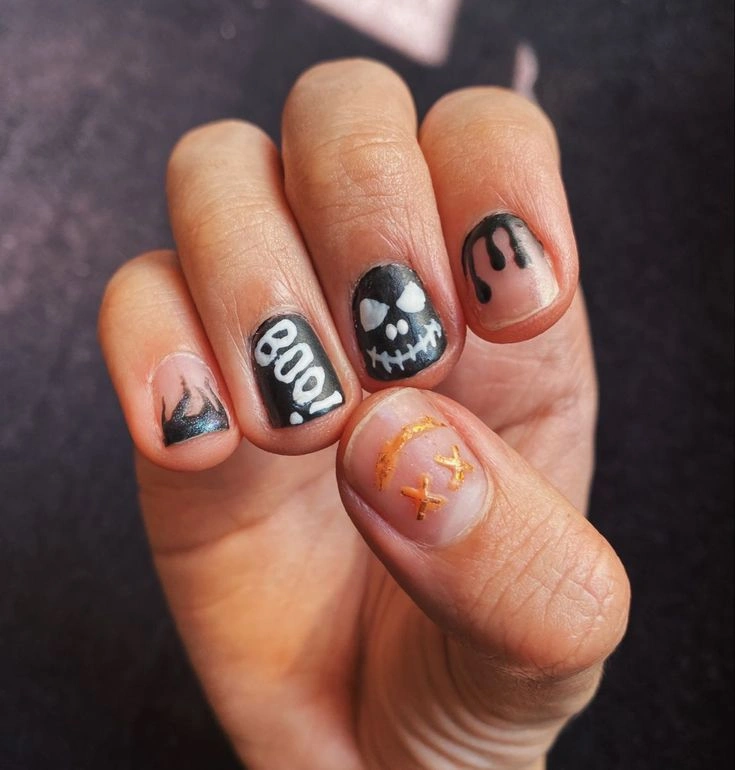
#3. Skull, Flame & Drip Halloween Nails
This manicure combines several Halloween staples into one compact set, including skull faces, black flames, white details, and small gold accents. The mismatched approach gives each nail its own personality while the black base keeps everything connected.
Best For — maximalists who want multiple spooky symbols
Pro Tip — Paint the largest skull or flame accent first, then repeat one small detail across the remaining nails.
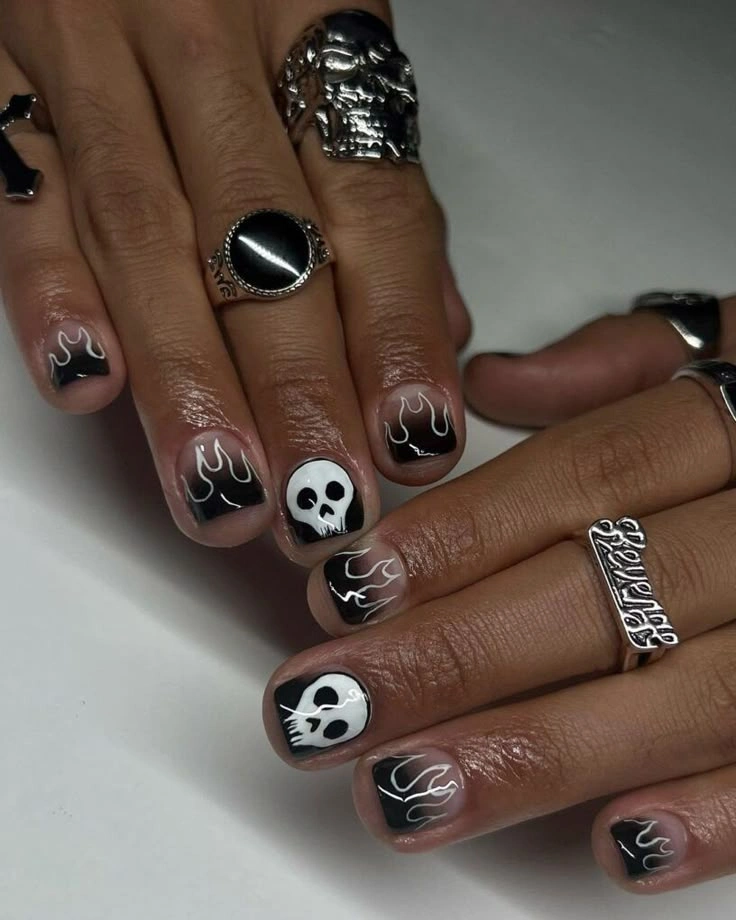
#4. Black Flame Skull Nails
Glossy black nails are framed with thin white flames, while a single white skull becomes the unmistakable focal point. The design is dark, minimal, and graphic enough to work beyond Halloween night.
Best For — minimalists who still want serious edge
Pro Tip — Keep the flame outlines thin and slightly uneven to create a hand-drawn tattoo effect.
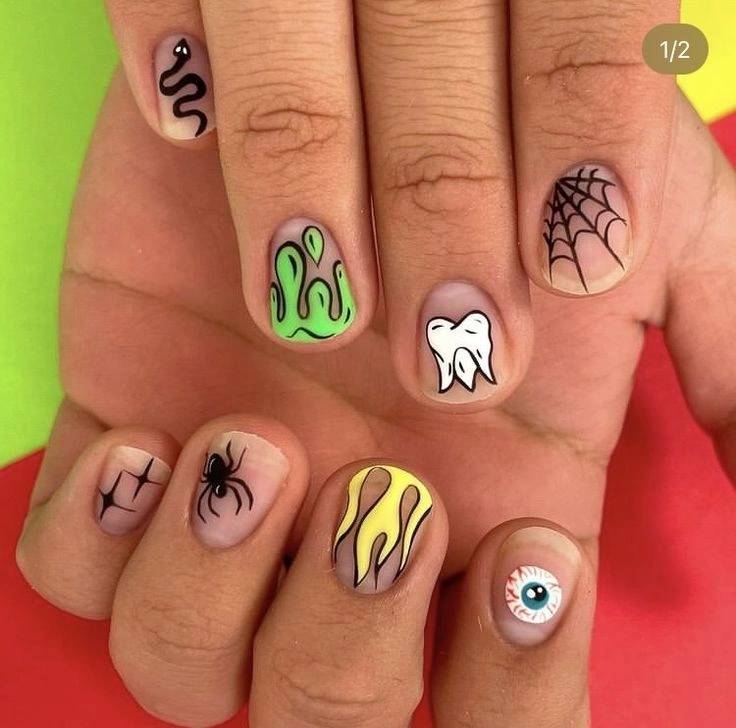
#5. Neon Green Spooky Character Nails
Bright lime green instantly changes the mood of these short Halloween nails, especially beside black outlines, a spiderweb, a tiny eye, and other creepy motifs. The result feels playful and graphic rather than traditionally gothic.
Best For — colorful Halloween fans with short nails
Pro Tip — Paint a white base underneath neon green polish to make the fluorescent shade appear brighter.
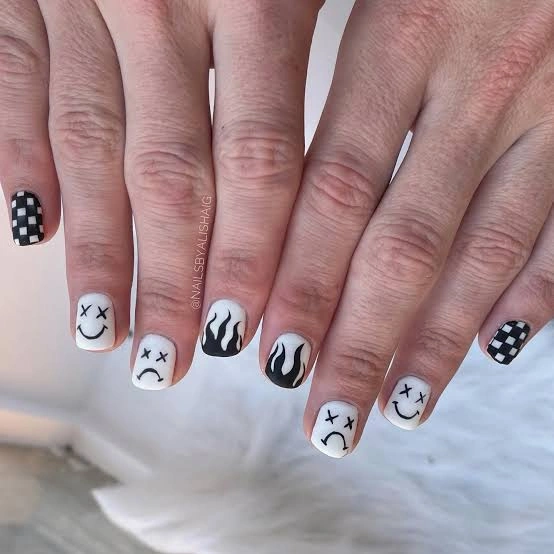
#6. White Flame Ghost Nails
Soft pink and nude bases make room for thin black flames, ghostly white artwork, and small red accents. It’s a lighter interpretation of Halloween that still has enough contrast to stand out.
Best For — subtle spooky looks with unexpected color
Pro Tip — Let the nude base cure fully before painting black flames so the fine outlines stay sharp.
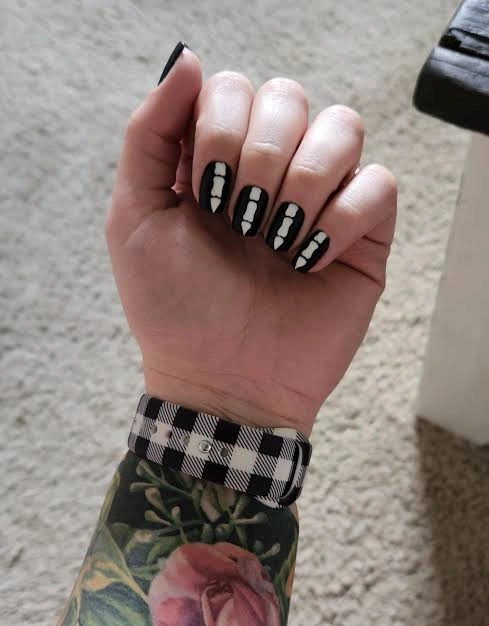
#7. Skeleton Bone Black Nails
Matte or glossy black nails become the perfect background for stark white bone shapes running down the center. The repeated skeleton detail looks especially striking on short square nails and keeps the design unmistakably Halloween.
Best For — skeleton lovers who prefer monochrome nails
Pro Tip — Draw the center bone line first, then add smaller horizontal sections while the design is still wet.
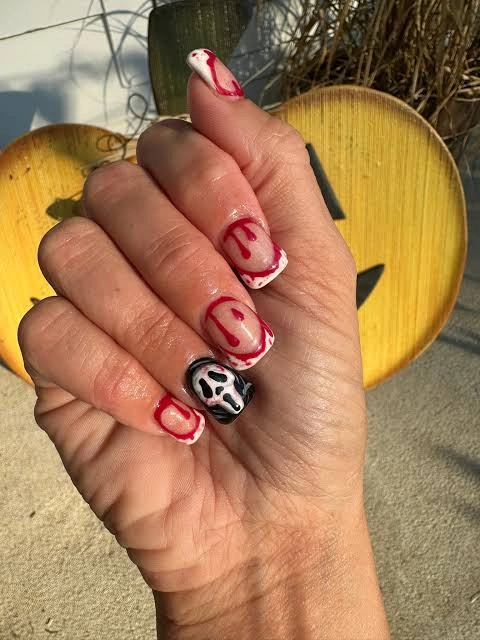
#8. Red Blood Drip Ghost Nails
Sheer nails get a creepy upgrade with red dripping accents and a single black-and-white ghost or skull detail. The transparent base keeps the manicure wearable while the red artwork delivers the Halloween drama.
Best For — horror fans wanting a wearable statement
Pro Tip — Place small red dots at the ends of each drip before pulling the polish upward with a liner brush.
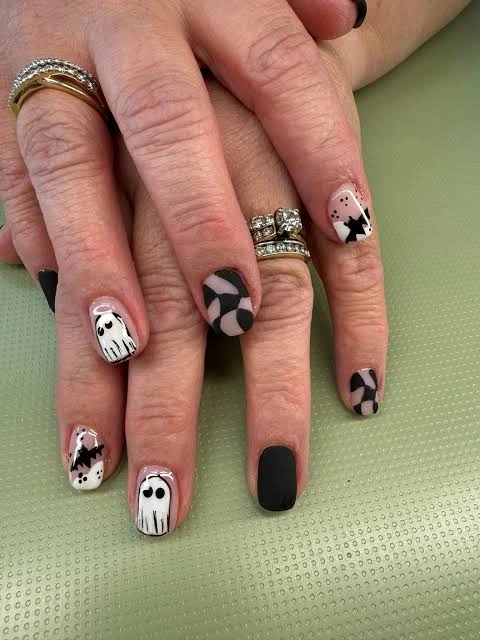
#9. Ghost & Checkerboard Halloween Nails
White ghost faces, black-and-white checkerboard squares, tiny bows, and illustrated details create a fun mismatched manicure. The short rounded shape keeps the artwork approachable and easy to pair with casual Halloween outfits.
Best For — casual Halloween outfits and playful nail art
Pro Tip — Alternate busy artwork with solid black nails to give the eyes a visual resting point.
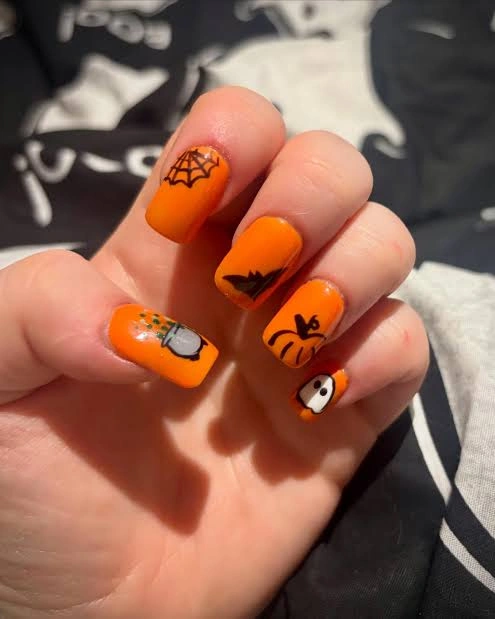
#10. Orange Pumpkin Spider Halloween Nails
Bright orange nails bring a traditional Halloween palette to life with black spiders, spiderwebs, bats, and tiny ghost details. The saturated color makes these nails especially eye-catching against darker Halloween clothing.
Best For — classic Halloween fans who love orange
Pro Tip — Add a small black spiderweb near one sidewall rather than centering every motif for a more natural look.
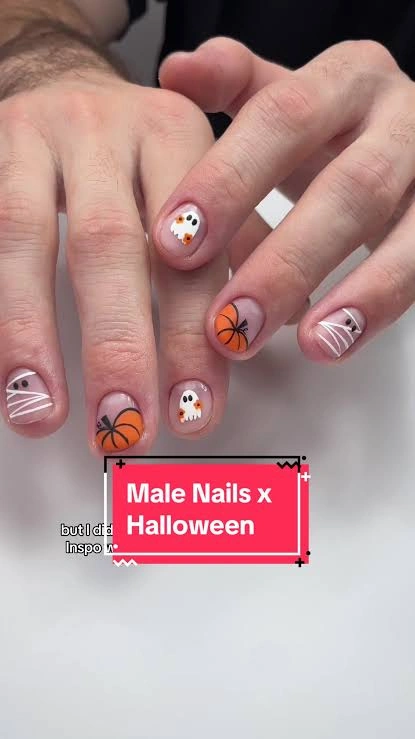
#11. Black Spiderweb Halloween Nails
Simple glossy black nails are broken up with crisp white spiderwebs and a tiny spider accent. This is one of the easiest ways to get a dark Halloween manicure without covering every nail in complicated artwork.
Best For — beginners wanting an unmistakably spooky manicure
Pro Tip — Draw three or four straight web spokes first, then connect them using small curved lines.
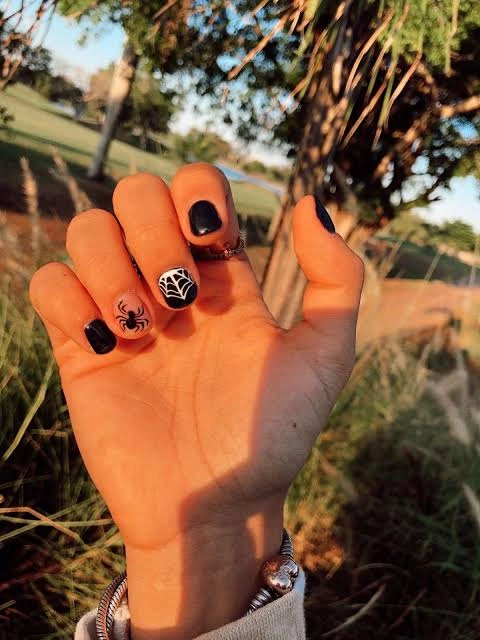
#12. Creepy Eye & Clown Halloween Nails
Pinkish nude nails become a creepy canvas for dripping shapes, wide eyes, red details, and eerie character-inspired artwork. The unusual color combination makes this manicure feel more horror-themed than traditional Halloween-cute.
Best For — horror lovers who prefer unusual artwork
Pro Tip — Use a small dotting tool for eyes, then sharpen the outer shape with a fine detail brush.
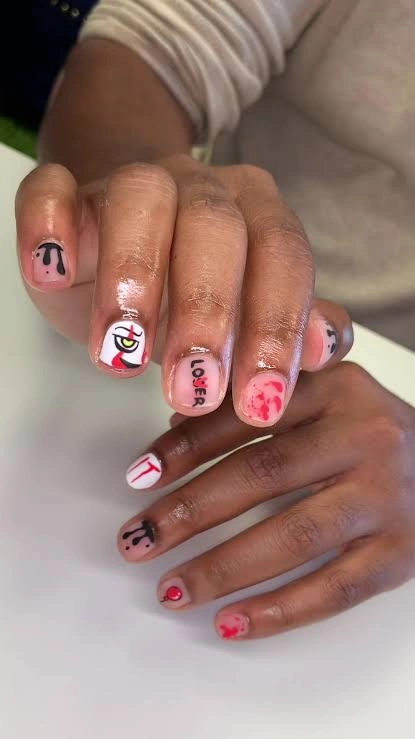
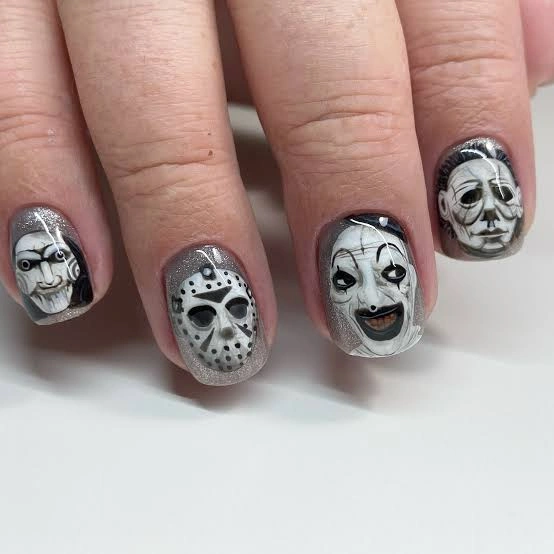
#13. Silver Horror Face Nails
Metallic silver backgrounds turn detailed horror faces into miniature pieces of art, with black shading, expressive eyes, masks, and eerie mouths. These are far more intricate than a typical Halloween manicure and create a dramatic close-up effect.
Best For — special events and serious horror enthusiasts
Pro Tip — Build detailed faces from the largest shapes to the smallest highlights instead of trying to paint every feature at once.
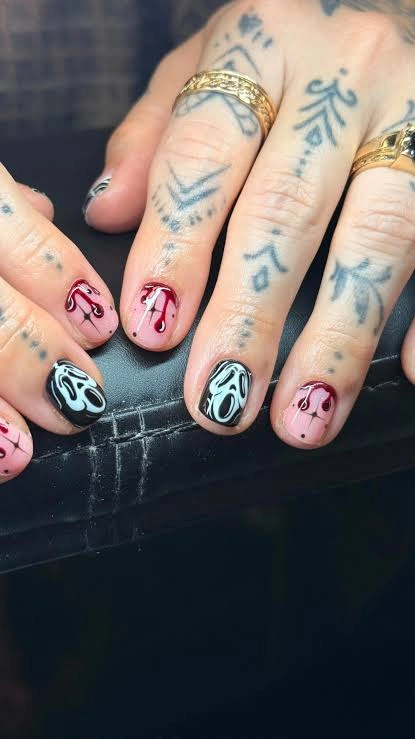
#14. Pink Ghost Blood Drip Nails
Soft pink nails get a darker edge with glossy red drips, black-and-white ghost artwork, and small graphic accents. The unexpected pink background makes the creepy details pop while keeping the manicure modern.
Best For — modern Halloween looks with pink accents
Pro Tip — Keep the red drips glossy while using a satin or matte finish on one accent nail for contrast.
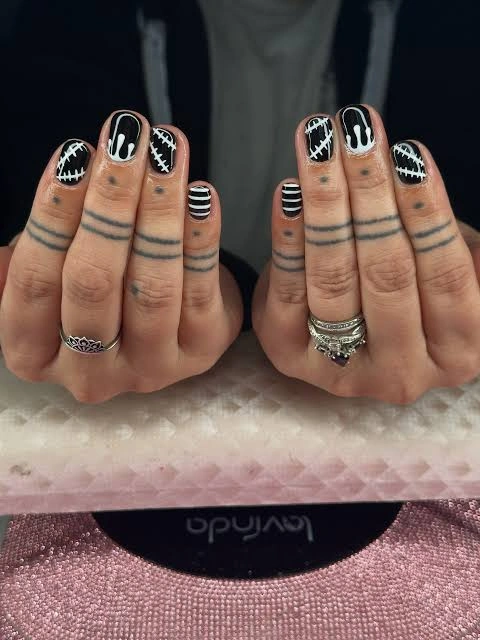
#15. Black & White Stitched Monster Nails
Black-and-white nails feature stitched monster mouths, skeletal marks, and striped accents that resemble creepy costume makeup. The repeated white stitching creates a strong visual rhythm across both hands.
Best For — monochrome fans who want graphic horror details
Pro Tip — Make the stitch marks slightly diagonal instead of perfectly horizontal for a more organic sewn effect.
#16. Matte Black Skull & Flame Nails
Deep black nails combine white skeleton faces, stitched patterns, and flame-like artwork for a bold finish that feels almost tattoo-inspired. The restrained black-and-white palette makes the design masculine, versatile, and easy to style with Halloween outfits.
Best For — edgy styles and understated Halloween outfits
Pro Tip — Try a matte top coat over the black background while leaving the white artwork glossy for a subtle dimensional finish.
How to Choose the Right Nail Design
The best Halloween manicure depends on more than the design itself. Think about your nail shape, skin tone, occasion, and how much detail you’re comfortable wearing.
- Nail shape — Long almond and stiletto nails give detailed flames, skulls, and spiderwebs plenty of room. Short square and rounded nails are better suited to checkerboards, tiny ghosts, stripes, and compact graphic designs.
- Skin tone — Black, white, nude, and transparent bases are easy to adapt to different undertones. Orange, red, lime green, silver, and pink accents can then provide the contrast you want.
- Occasion — For a Halloween party or costume event, go bigger with blood drips, horror faces, neon characters, or dramatic stiletto tips. For everyday wear, black flames, skeleton lines, or one small ghost accent can feel much easier to style.
- Skill level — Beginners can start with checkerboards, dots, flames, and simple spiderwebs. Detailed faces and character art are better choices for a nail artist or a confident freehand painter.
If you’re drawn to darker styles, you can also find more inspiration in these ghost Halloween nail ideas and explore polished seasonal looks beyond the classic Halloween palette.
What You’ll Need
You don’t need a professional salon setup to recreate many of these halloween nails for men. A small collection of reliable nail-art tools will cover most of the details shown above.
Useful for flames, spiderwebs, outlines, stitches, and tiny faces.
Creates the dark foundation for most of these Halloween designs.
Essential for skulls, ghosts, bones, eyes, flames, and contrast details.
Makes small eyes, dots, drip ends, and rounded details easier to control.
A simple shortcut for ghosts, spiders, webs, and other tiny motifs.
Seals detailed artwork and gives finished nails a smooth shine.
Pro Tips for a Long-Lasting Manicure
Prep the Nail Surface
Remove surface oils and lightly buff the natural nail before applying base coat. Clean preparation gives polish and gel a much better surface to grip.
Build Tiny Details Slowly
Skulls, eyes, stitches, and webs look cleaner when they’re created with several thin strokes. Don’t try to make complicated artwork in one heavy layer.
Cap the Free Edge
Brush a small amount of top coat across the nail tip after covering the main surface. This helps protect the edges of dark polish and detailed French-style designs.
Give Artwork Enough Cure Time
When you’re working with gel, cure each layer according to the polish manufacturer’s instructions. Proper curing helps prevent detailed artwork from smearing underneath the final top coat.
For more seasonal inspiration, you can also browse these October nail ideas when you want something autumn-inspired rather than completely spooky.
Frequently Asked Questions
Q: What are the best halloween nails for men with short nails?
A: Short nails work especially well with black flames, skeleton bones, checkerboards, spiders, ghosts, and small graphic details. Keeping the artwork compact prevents the manicure from looking crowded.
Q: What colors work best for men’s Halloween nail designs?
A: Black and white are the easiest combination for a bold, masculine look, while red adds a horror-inspired accent. Orange, neon green, silver, and nude can make the same spooky motifs feel more modern.
Q: Can men wear Halloween nail art without using bright colors?
A: Absolutely. Black, white, gray, silver, and nude are enough to create skulls, ghosts, spiderwebs, flames, stitches, and horror faces. A monochrome manicure can look especially sharp with casual or all-black outfits.
Q: How do you make halloween nails for men last longer?
A: Start with clean, dry nails, apply thin layers, cure gel products correctly, and seal the free edge with top coat. Avoid picking at raised artwork because lifted details can pull away the surrounding finish.
Recommended Product
Halloween Nail Art Detail Brush Set
★★★★☆ Highly rated on Amazon
A fine nail-art brush set makes small Halloween details such as flames, webs, stitches, and skull features easier to paint precisely.
As an Amazon Associate, we earn from qualifying purchases.
Final Thoughts
Halloween nails can be bold without being complicated, and these designs show just how many directions you can take the theme. Choose black-and-white graphics for a clean finish, or go all out with blood drips, neon characters, flames, ghosts, and horror artwork.
The key is choosing a design that fits your nail length, personal style, and Halloween plans. Start with one standout accent if you’re new to nail art, then build up the details as your confidence grows.
Which of these nail looks are you trying first? Save this post to Pinterest so you can come back to it whenever you need fresh nail inspo!

Hi, I’m Jessica, the creator behind Unique Lash & Nails Katy.
I created this website for anyone who loves beautiful nails as much as I do. Here, I share trendy nail designs, seasonal manicure ideas, easy nail care tips, honest product recommendations, and step-by-step guides to help you create salon-worthy nails at home. Whether you’re looking for everyday inspiration or your next favorite nail trend, I hope you’ll find something you love.