
17 Polka Dot Back to School Nails You’ll Love
That first-day-of-school energy deserves nails that match it, and polka dots are the easiest way to get there. They’re playful without trying too hard, and they work on literally any nail shape or length you’ve got.
Below you’ll find 17 real polka dot looks worth screenshotting for your next appointment. Grab your favorite one, save it to Pinterest, and let’s get your hands ready for the new semester.
✦ Our Top Picks at a Glance
Best Overall — Black & White Polka Dot French Tips
Best for Beginners — Nude Mini Polka Dot Nails
Most Trendy — Rainbow Confetti Polka Dot Nails
Best for Special Occasions — White Polka Dot Floral French Nails
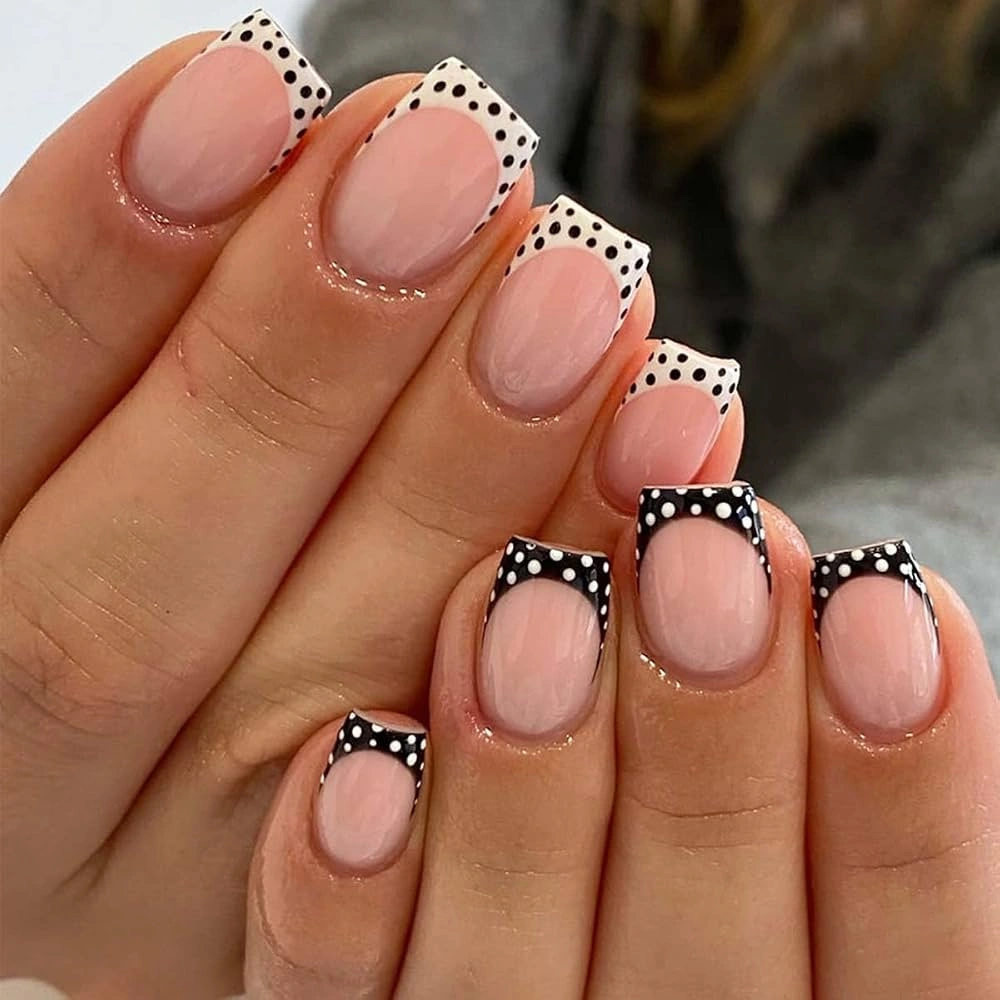
#1. Black & White Polka Dot French Tips
Picture a classic French manicure, then swap half the tips for tiny black dots on white and white dots on black. It’s a fun twist that still reads polished enough for the classroom or the office.
Best For — students who want polished but playful nails
Pro Tip — Use a fine-tip nail dotting tool set instead of a toothpick — you’ll get rounder, more even dots on your first try.
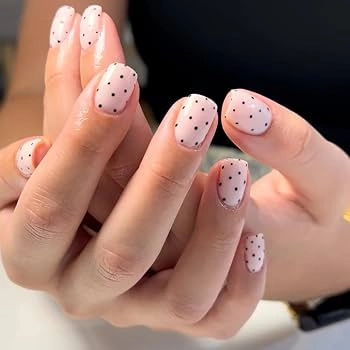
#2. Nude Mini Polka Dot Nails
A soft nude base gets scattered with tiny black micro-dots, giving you texture without any real commitment. It reads clean from across the room but rewards a closer look.
Best For — beginners and anyone in a conservative dress code
Pro Tip — Keep the dots randomly spaced instead of in neat rows. Uneven placement actually looks more natural and forgiving of small mistakes.
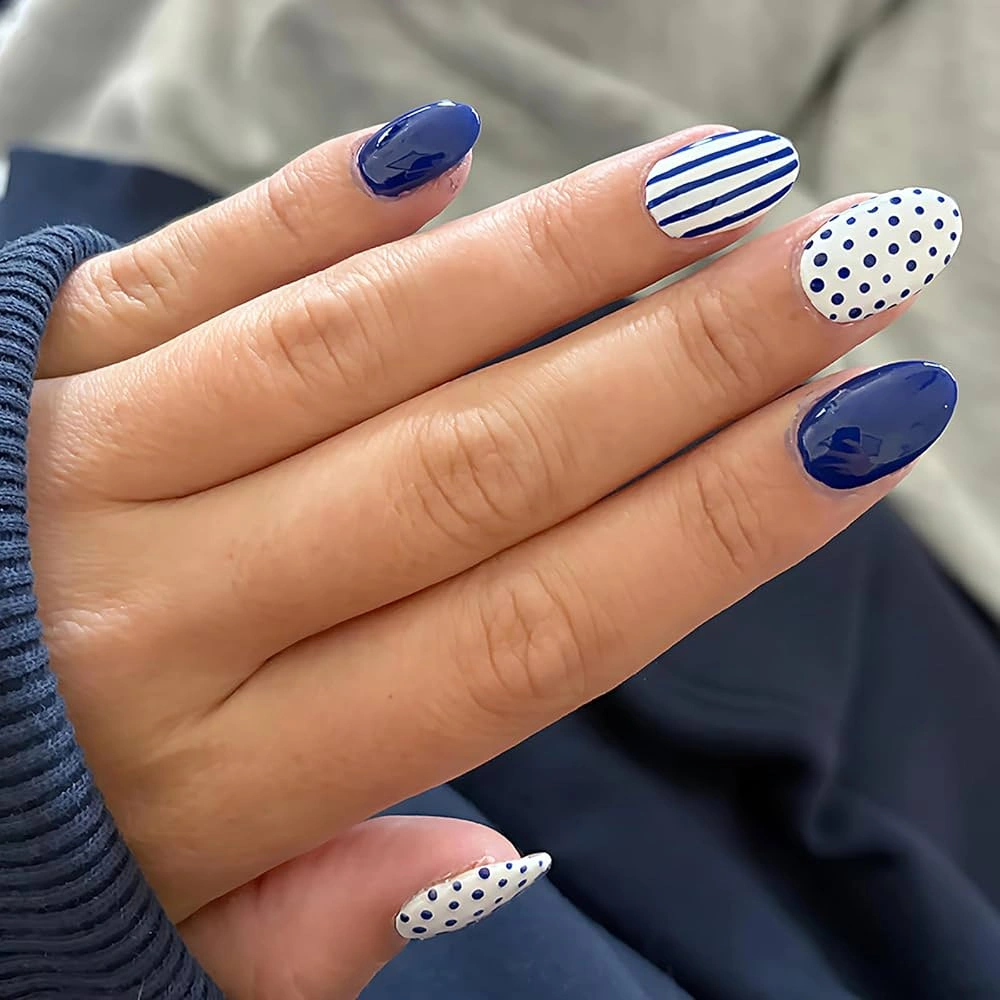
#3. Navy Polka Dot & Stripe Accent Nails
Solid navy nails get paired with one striped accent finger and one polka dot accent finger, giving you a mix-and-match set that still feels cohesive. It’s preppy in the best possible way.
Best For — anyone who wants a coordinated but not matchy set
Pro Tip — Lay down thin strips of striping tape for nails before painting to get perfectly straight lines every time.
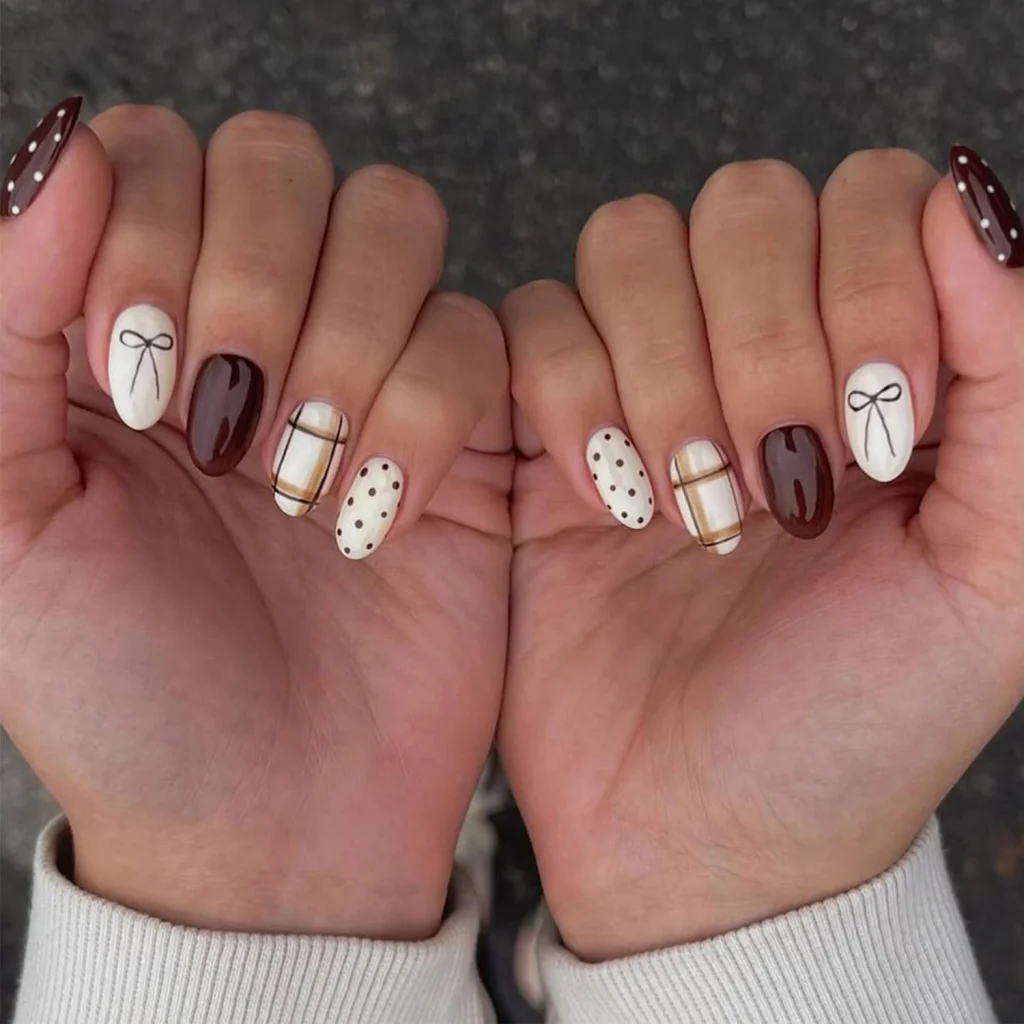
#4. Cocoa Brown Polka Dot Bow Nails
Rich chocolate browns and soft creams share space with delicate hand-drawn bows, plaid lines, and small dots. It’s giving cozy academia in the best possible way.
Best For — fall semester starts and coffee-shop study sessions
Pro Tip — Draw the bow outline first in a thin line, then fill in just the knot. It keeps the design looking hand-drawn instead of stiff.
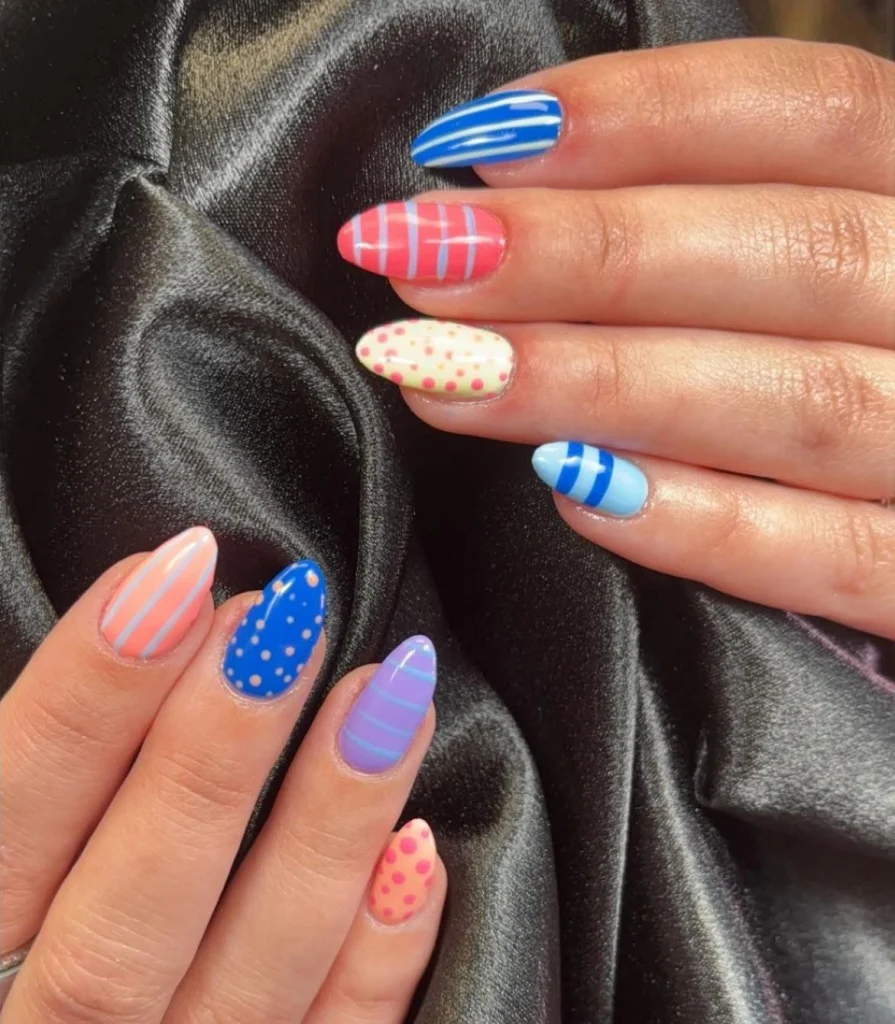
#5. Pastel Rainbow Polka Dot & Stripe Nails
Every nail gets its own pastel shade, then a mix of dots and stripes in a slightly deeper tone of the same color. The result feels custom-made without looking chaotic.
Best For — anyone who loves color but wants it to stay harmonious
Pro Tip — Stick to one accent tone per base color. Matching families keep a busy design from feeling overwhelming.
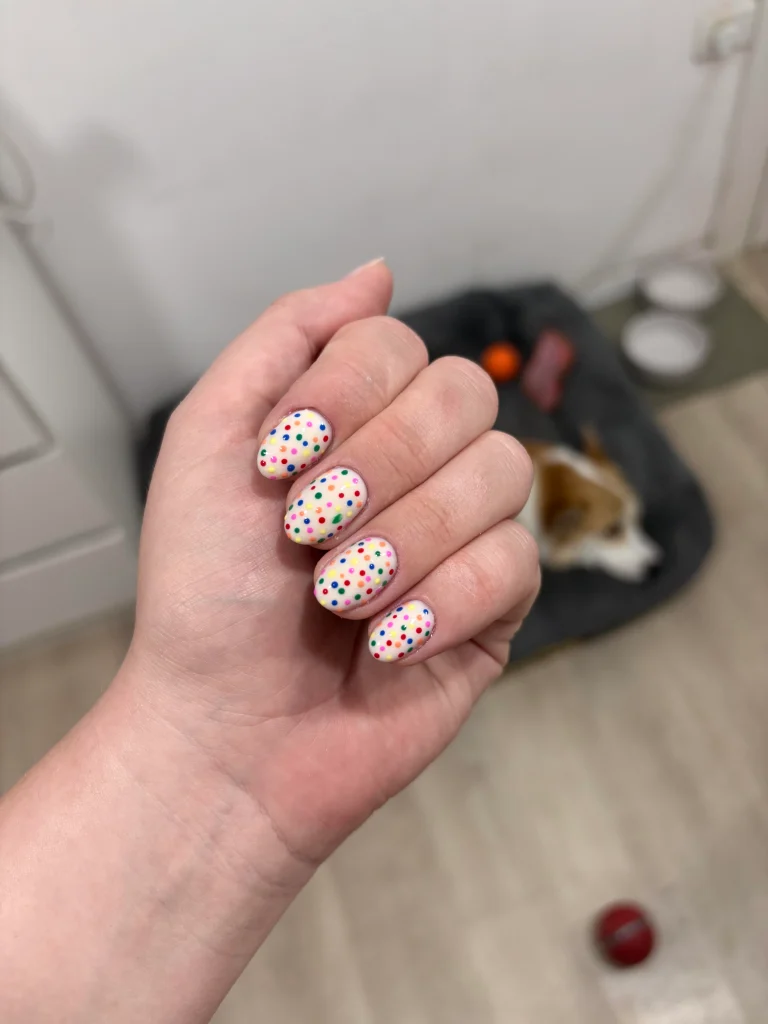
#6. Rainbow Confetti Polka Dot Nails
Think birthday cake in nail form: a warm off-white base scattered with tiny dots in every primary and pastel color you can think of. It’s genuinely one of the happiest manicures out there.
Best For — first-day-of-school photos and birthday week
Pro Tip — Use a nail art dotting tool with several tip sizes so your confetti dots vary in scale, not just color.
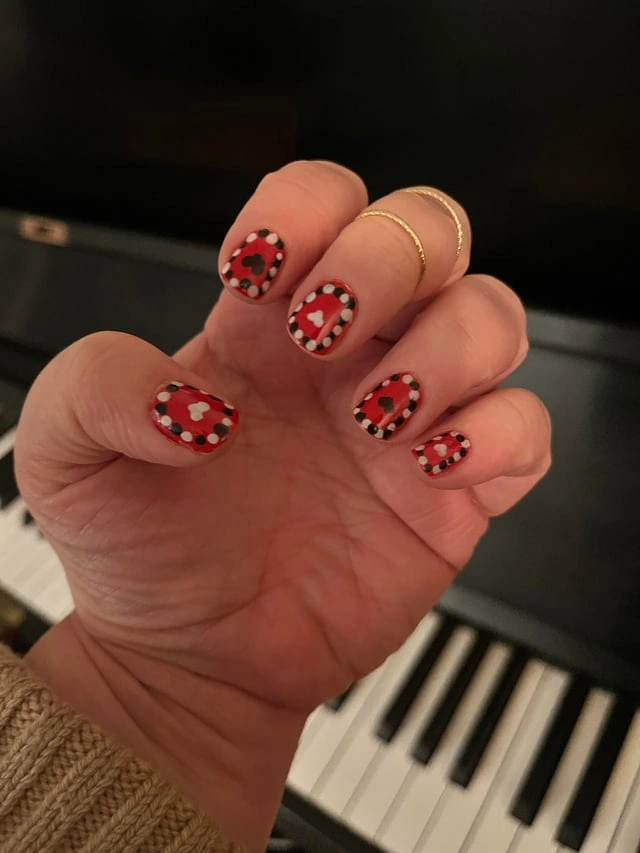
#7. Red Polka Dot Heart Nails
A bold red base is framed by a border of black and white dots, with a tiny heart tucked into the center of each nail. It’s bold, a little retro, and impossible to ignore.
Best For — bold personalities who don’t shy away from color
Pro Tip — Paint the border dots first, then add the heart last so it stays crisp and doesn’t smudge into the pattern around it.
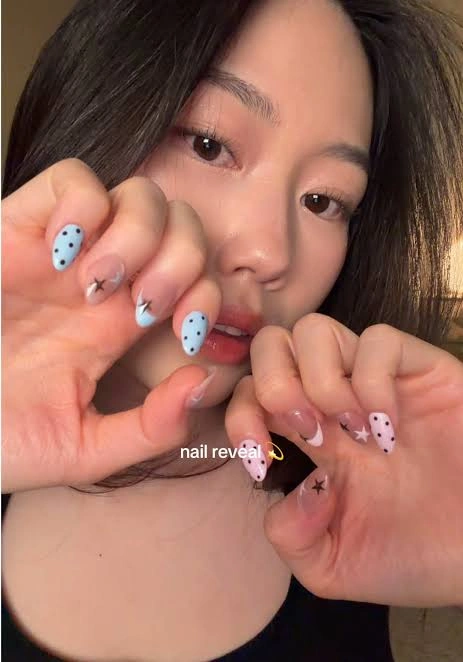
#8. Baby Blue Polka Dot Star & Moon Nails
Soft baby blue and blush pink nails split the difference between dots and tiny celestial charms. Stars and crescent moons peek out between the dots for a dreamy, late-night-study vibe.
Best For — dreamy, soft-girl aesthetics
Pro Tip — Save the star and moon charms for just one or two accent nails so the polka dots stay the main focus.
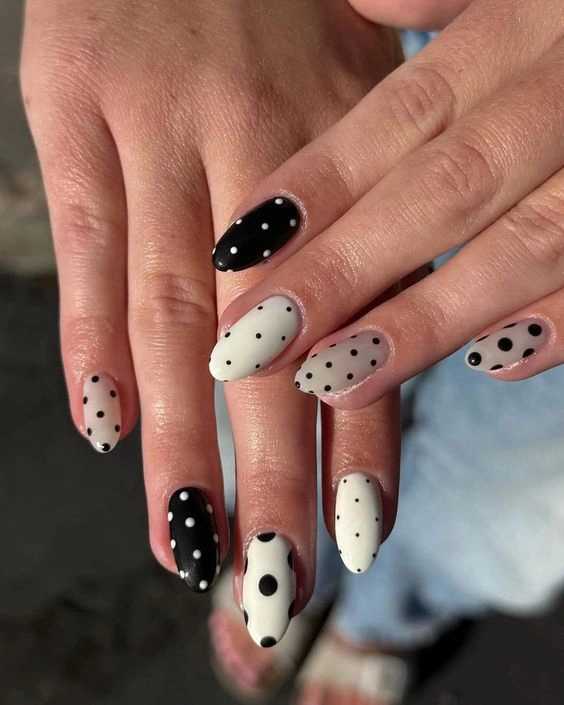
#9. Mismatched Black & White Polka Dot Nails
Every nail flips the script: black base with white dots, white base with black dots, and sizes that range from pinhead-small to bold and oversized. It’s graphic, high-contrast, and endlessly Instagrammable.
Best For — minimalists who still want a statement look
Pro Tip — Seal the whole set with a quick-dry top coat so the crisp black-and-white contrast doesn’t get muddied by smudging.
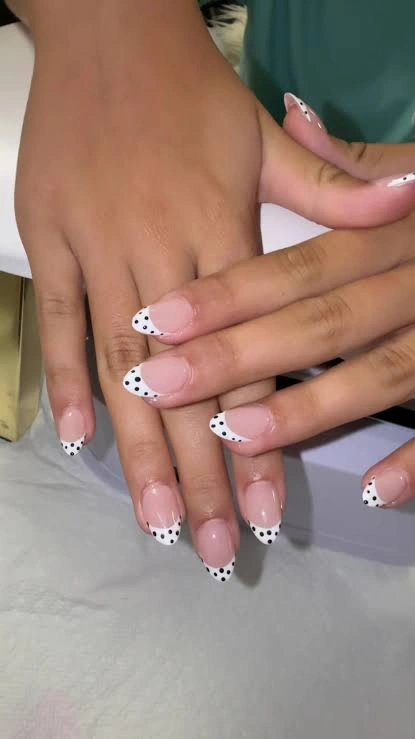
#10. Classic Polka Dot French Tip Nails
A traditional French tip in white gets a light dusting of tiny black dots across the entire tip line. It’s subtle enough for orientation week and dressy enough for picture day.
Best For — anyone who loves French tips but wants a little more
Pro Tip — Let your white tip fully dry before adding dots. Wet polish will drag and blur the edges of every dot you place.
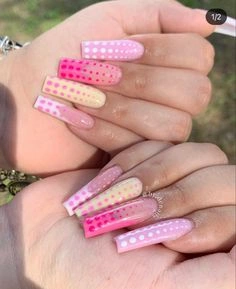
#11. Pink Ombre Polka Dot Coffin Nails
Long coffin nails fade from soft pink to golden peach, with rows of white polka dots layered on top like sprinkles on a sunset. It’s a statement length with a genuinely sweet design.
Best For — long nail lovers who want maximum visual impact
Pro Tip — Blend your ombre with a makeup sponge before adding any dots — trying to blend around existing polka dots is much harder.
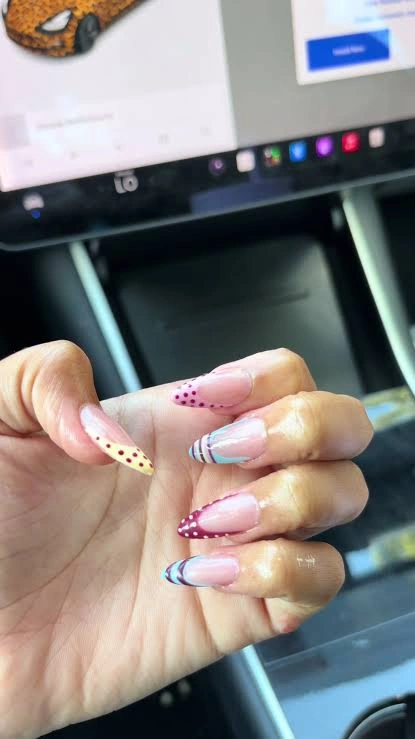
#12. Pastel Polka Dot Stripe French Nails
Sheer pink nails get a colorful striped french tip in teal and berry, plus a scattering of tiny dots on the accent finger. It’s a fun, low-commitment way to try color without going full opaque.
Best For — sheer-nail fans who want a colorful twist
Pro Tip — Precut nail art striping tape makes the colorful tip lines so much easier than freehanding them with a brush.
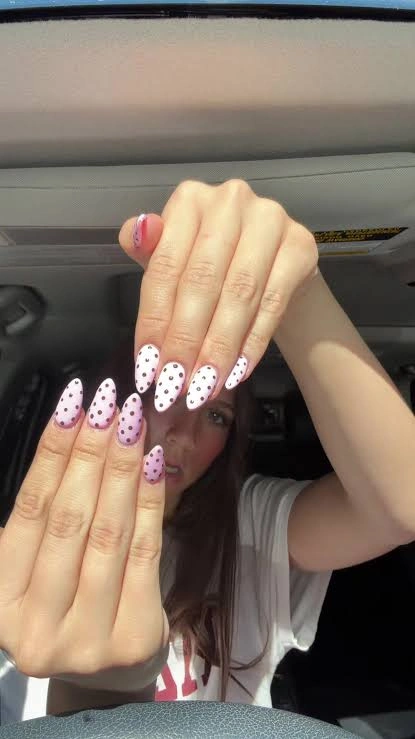
#13. Lilac Polka Dot Almond Nails
A soft lilac base is covered edge to edge in black polka dots, all placed at almost the same size for a uniform, almost fabric-like texture. On an almond shape, it looks especially elegant.
Best For — anyone wanting an elegant all-over pattern
Pro Tip — Mark out a loose grid with your dotting tool first so the dots stay evenly spaced across the whole nail.
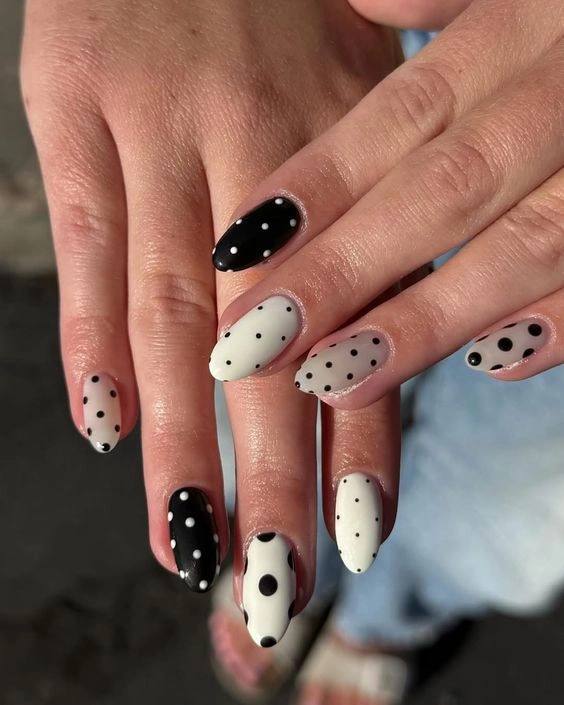
#14. Two-Tone Polka Dot Swirl Nails
Black and white swap places nail to nail, with dot sizes ranging from tiny to oversized in a loose, almost swirling arrangement. No two fingers match, and that’s exactly the point.
Best For — creative types who like an asymmetrical set
Pro Tip — Vary your dot sizes on purpose across the hand instead of nail by nail — it reads more intentional and less random.
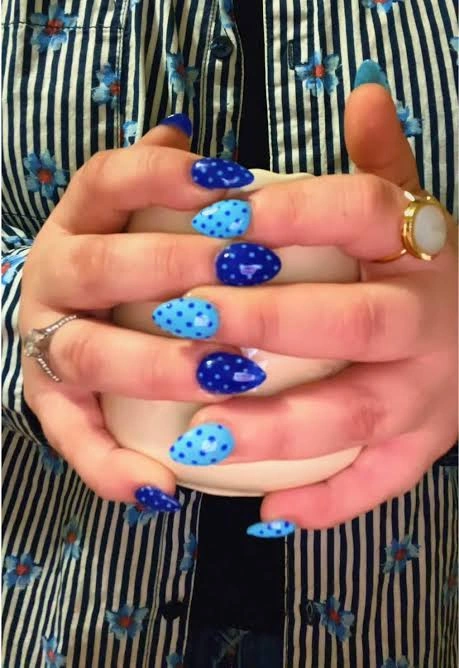
#15. Cobalt Blue Ombre Polka Dot Nails
Deep cobalt and lighter sky blue nails alternate across the hand, each one dotted in the opposite shade for built-in contrast. It’s a rich, saturated look that photographs beautifully.
Best For — deep color lovers heading into fall
Pro Tip — Alternate your two blues nail by nail rather than mixing them on the same nail — it keeps the pattern easy to read.
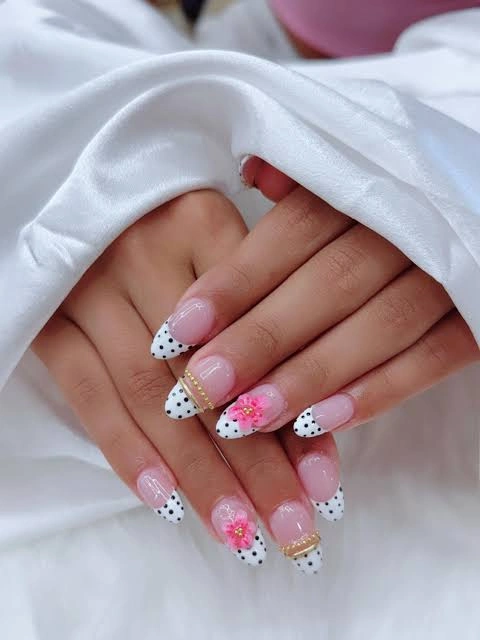
#16. White Polka Dot Floral French Nails
A sheer nude base meets a crisp white polka dot french tip, then gets finished with a delicate pink flower and a thin gold line across one or two accent nails. It’s the most special-occasion look on this list.
Best For — graduation, orientation day, or picture day
Pro Tip — Add the gold line and nail art rhinestones last, pressing them into a not-quite-dry top coat so they stay put.
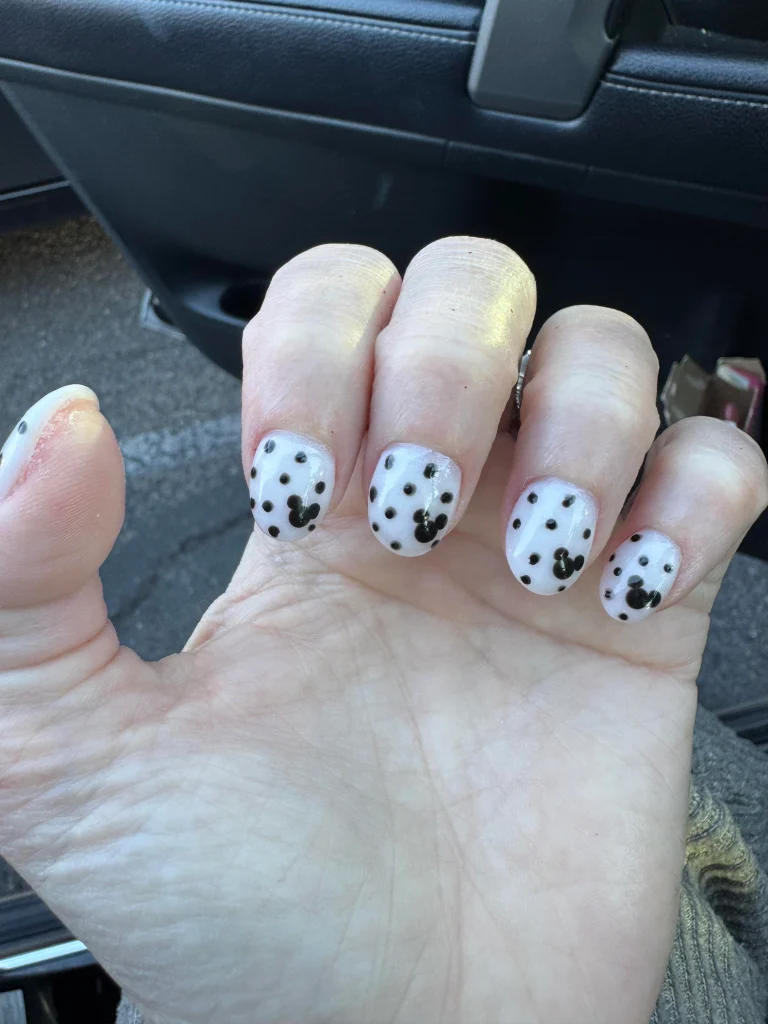
#17. White Polka Dot Mouse-Ears Nails
A soft white base is covered in classic black polka dots, with a couple of nails featuring a playful mouse-ear silhouette tucked between the dots. It’s a nostalgic, theme-park-ready twist on the classic dot pattern.
Best For — theme park trips and playful, nostalgic sets
Pro Tip — Paint the mouse-ear silhouette first, let it dry fully, then fill in the surrounding dots so the shape doesn’t blur.
How to Choose the Right Nail Design
With 17 options in front of you, picking just one can feel harder than the actual manicure. Here’s what to think through before you book your appointment.
- Nail Shape — Almond and coffin shapes carry bigger, bolder dots well, since there’s more surface area to work with. Square and round shapes look great with smaller, more evenly spaced dots.
- Skin Tone — Warm skin tones tend to glow next to cocoa browns, reds, and warm pastels. Cooler skin tones often pop more against navy, cobalt, and lilac bases.
- Occasion — Save the rhinestones, gold lines, and florals for picture day or graduation. Everyday classes call for something simpler, like nude mini dots or a classic French dot tip.
- Skill Level — If this is your first time doing your own nail art, start with randomly placed mini dots. Save the ombre, swirl, and multi-color confetti looks for once you’ve got a steadier hand.
What You’ll Need
Most of these looks come together with a small, reusable kit. Here’s what to have on hand before you start.
Gives you clean, round dots in multiple sizes without freehanding.
Handles thin lines, bows, and tiny details like hearts or stars.
Keeps stripes and French tip lines straight without a steady hand.
Locks in your design and keeps small details from smudging.
Adds a little sparkle to any accent nail or special-occasion set.
Keeps skin around the nail soft so polish edges look cleaner.
Pro Tips for a Long-Lasting Manicure
Always Start With a Base Coat
A base coat protects your natural nail from staining and gives the polish something to grip. Skipping it is the number one reason polka dot designs peel early.
Let Each Layer Dry Fully
Dots and stripes need a fully dry surface to sit on cleanly. Rushing between layers is what causes smudged edges and bleeding colors.
Seal the Tips
Swipe your top coat over the free edge of each nail, not just the top. This one habit alone can add days to how long your manicure lasts.
Moisturize Daily
Dry cuticles cause polish to lift faster at the edges. A few seconds of cuticle oil each night keeps your polka dots looking fresh longer.
Frequently Asked Questions
Q: How do you make even polka dots without a dotting tool?
A: A bobby pin head or the rounded end of a hairpin works in a pinch. Dip it in polish and press straight down without dragging for the roundest result.
Q: What nail shape works best for polka dot back to school nails?
A: Almond and short coffin shapes give dots the most room to shine, but the pattern genuinely works on every shape. Round and square nails just call for slightly smaller, closer-together dots.
Q: How long do polka dot nails typically last?
A: With gel polish and a good top coat, most of these designs hold up for two to three weeks. Regular polish versions usually last five to seven days before chipping starts.
Q: Can you do polka dot nails at home without a salon visit?
A: Absolutely — a dotting tool, a steady surface, and a little patience are really all you need. Start with the nude mini dot design if it’s your first attempt.
Recommended Product
Nail Art Dotting Tool Set
★★★★☆ Highly rated on Amazon
This is the one tool nearly every look on this list relies on — it takes the guesswork out of getting round, evenly sized dots on your very first try.
As an Amazon Associate, we earn from qualifying purchases.
Final Thoughts
Polka dots might be one of the simplest nail art patterns out there, but these 17 looks prove just how much range they actually have. Whether you want something office-appropriate or a full rainbow confetti moment, there’s a version here that fits your first week back.
If you love a coordinated set, check out these blue back to school nails or these pink back to school nails for more inspiration. Long nail fans might also love these almond back to school nails, and if chipping is your biggest worry, this guide on how to moisturize your nails properly is worth a read before your appointment.
Which of these nail looks are you trying first? Save this post to Pinterest so you can come back to it whenever you need fresh nail inspo!

Hi, I’m Jessica, the creator behind Unique Lash & Nails Katy.
I created this website for anyone who loves beautiful nails as much as I do. Here, I share trendy nail designs, seasonal manicure ideas, easy nail care tips, honest product recommendations, and step-by-step guides to help you create salon-worthy nails at home. Whether you’re looking for everyday inspiration or your next favorite nail trend, I hope you’ll find something you love.







One Comment